My plan
My plan is a specialized modul for creating your own plans. It is closely related to Marketing plan. Before creating My plan it is necessary to create a marketing plan. That can be added only by Admin. It is explained in next chapter Marketing plan. To access My plan click on icon in menu and modul will open.
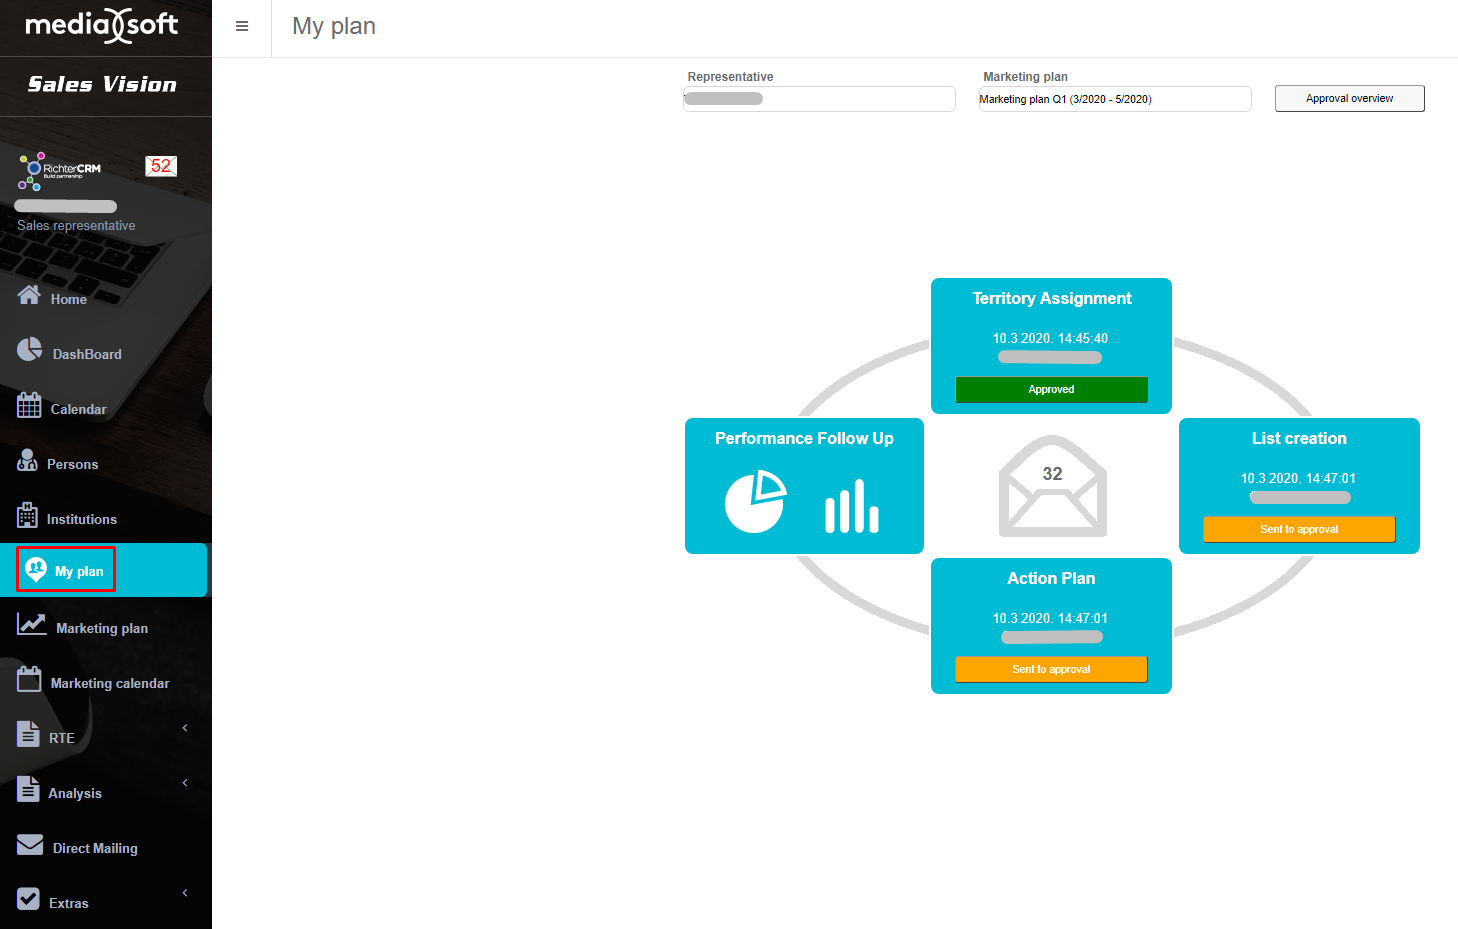
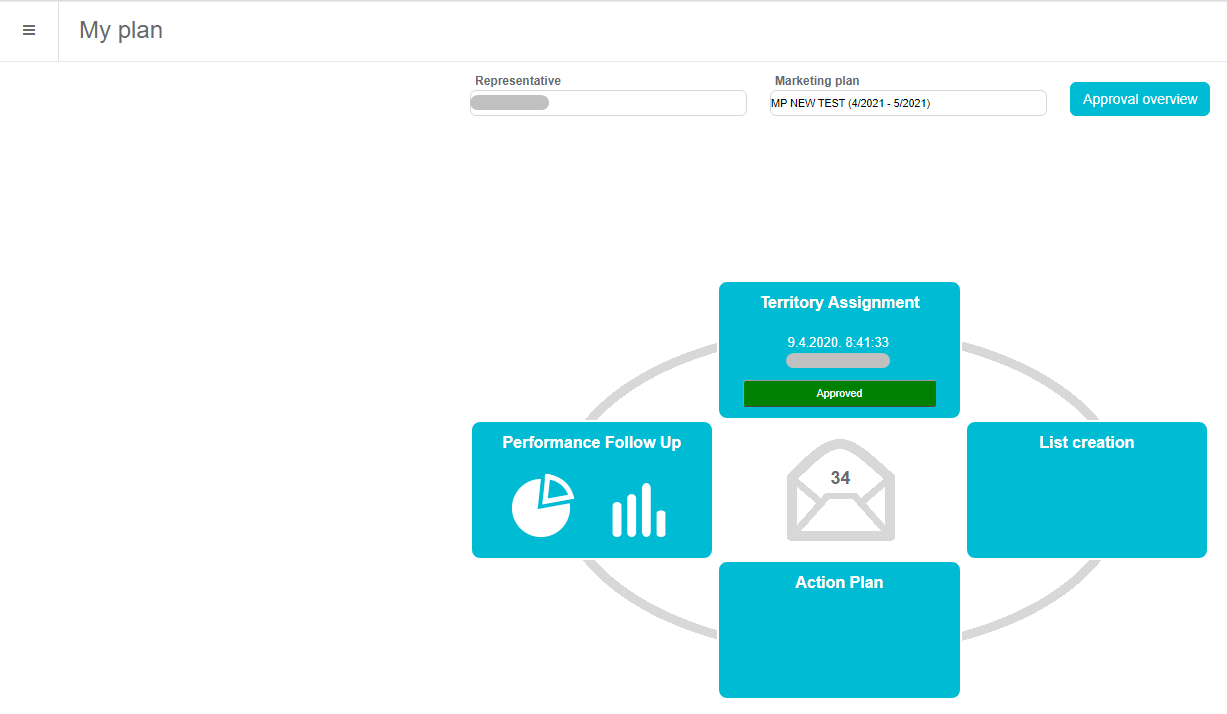
On top of screen we need to choose Representative (it is automatically set for logged user) and Marketing plan for which we want to create My plan. Below that we can see four parts (squares) which will be explained in next chapters (steps 1, 2, 3, 4 on screen above).
Territory assignment
First time we are creating plan it is necessary to set percentages for every brick we need to visit. When we are done with assigning to brick, it is necessary to send this data to approval. That can be done by clicking Send to approval button on top right part of the screen. New window will open where we can send some text to explain what is done in assingning.
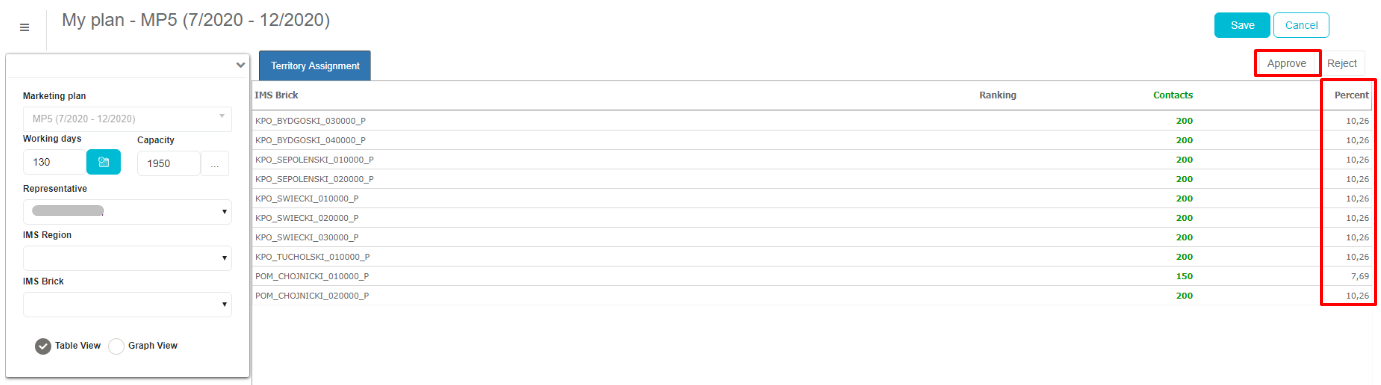
Also, we do not need to send data to approval immediately if it is still not fully done. But, before closing modul it is necessary to save data so it will not be lost. That can be done by clicking Save button above Send to approval (top right part of the screen). Except Save, there is a Cancel which is used to abort if some data is wrong or we missed something.
Admin can approve this by going to My plan module and choosing person and marketing plan. Automatically he/she will see status Send to approval and by opening Territory assignment can Accept or Reject data. After accepting status will change and Sales representative can continue with creating My plan. If data is rejected Sales representative needs to assign different data.
List creation
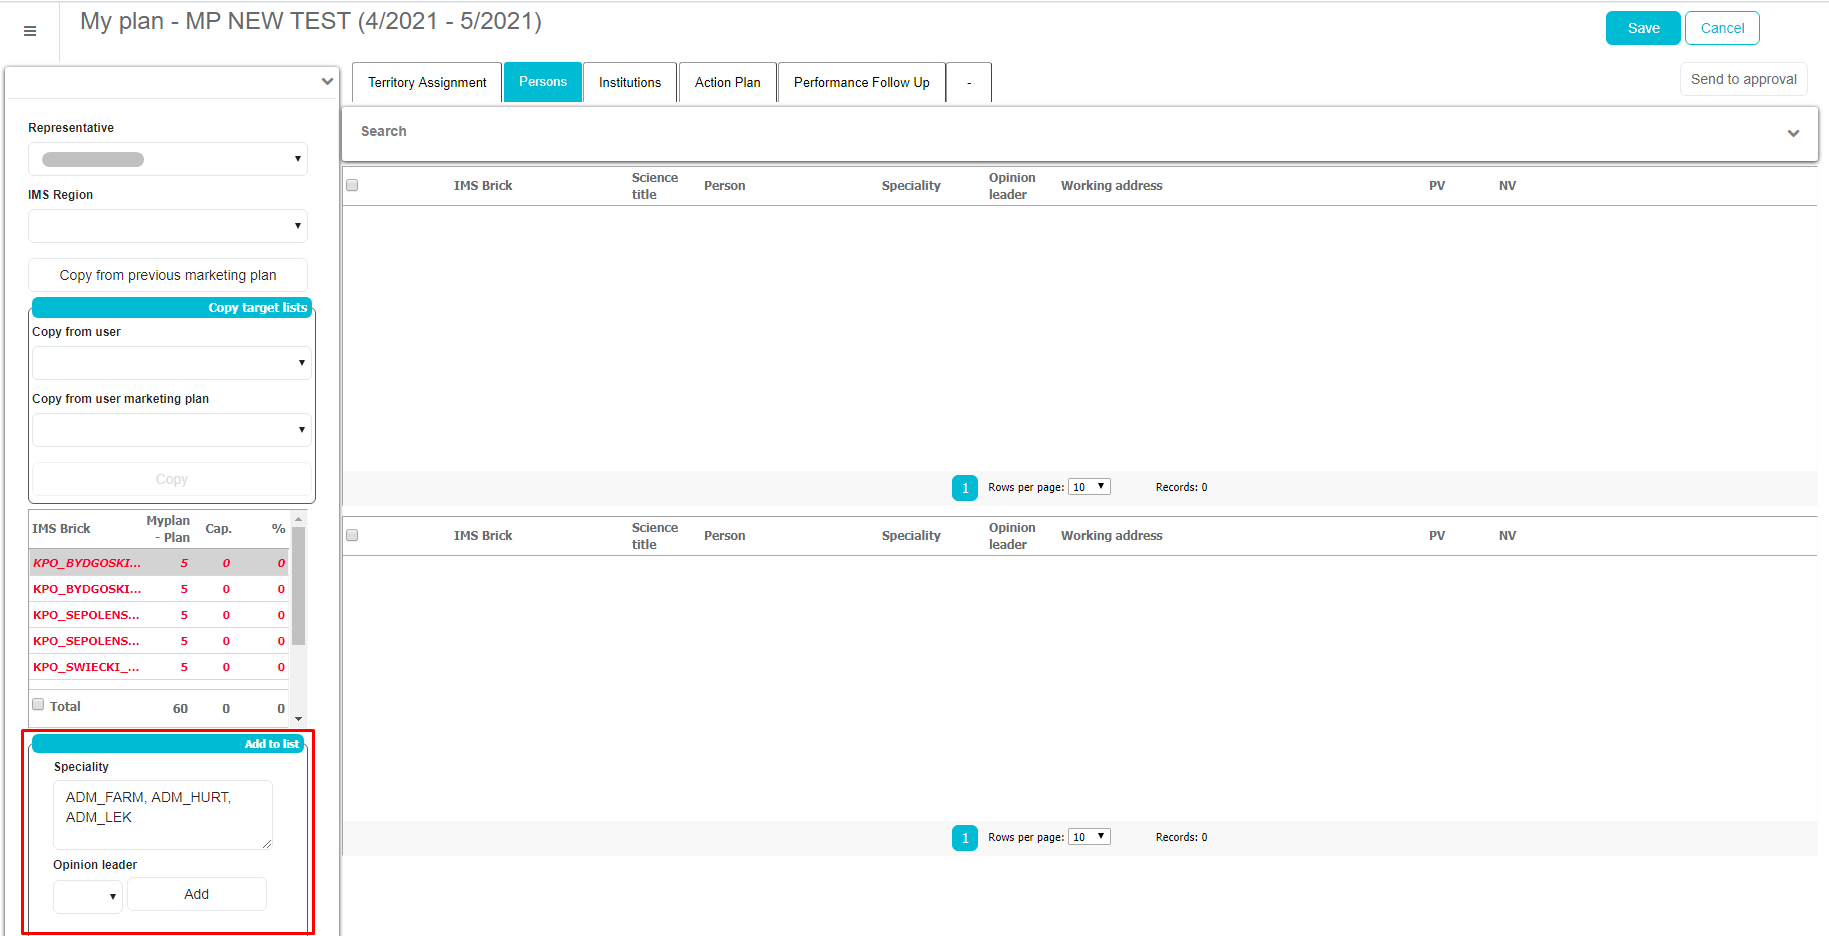
In List creation we have to define visits to Persons and Institutions. Both of them are actually the same with one difference, choosing persons or institution. To set data for persons click on tab at top of screen. On the left side of screen we have filters to narrow data for entering. Persons can be added by clicking Add button as shown on picture below. We can add specific person by clicking on checkbox next to IMS brick of that person or add whole Speciality. In list (top side of the persons) of persons we can see informations like Classification, Working address, PV (number of visits for previous marketing plan), NV (number planned visit for this plan), etc.
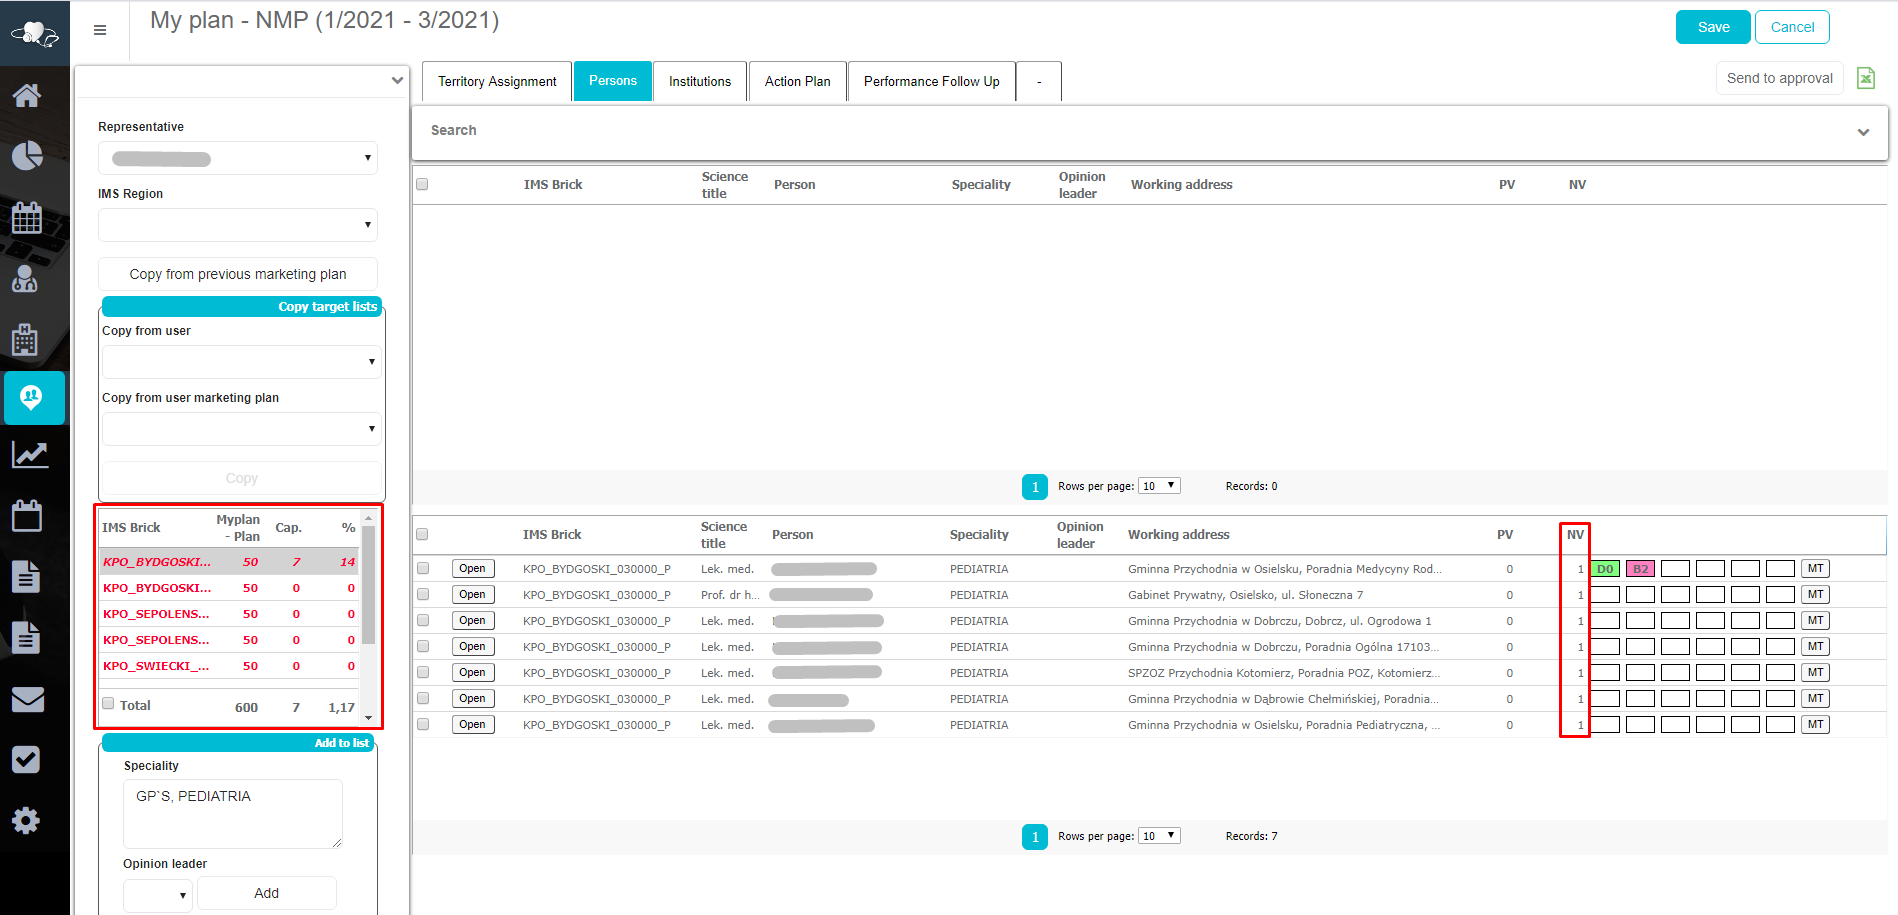
After we added persons they will automatically transfer to bot side of persons list. There we can enter visit plans for every person individually (NV) and it will calculate total values for IMS brick (left side of the screen). After we finished with creating list it is necessary to Save it. If we click Send to approval it will send not only Persons data, but also Institution and Action plan data. Be careful with that because there is no back to editing unless Admin reject changes so we can edit it again.
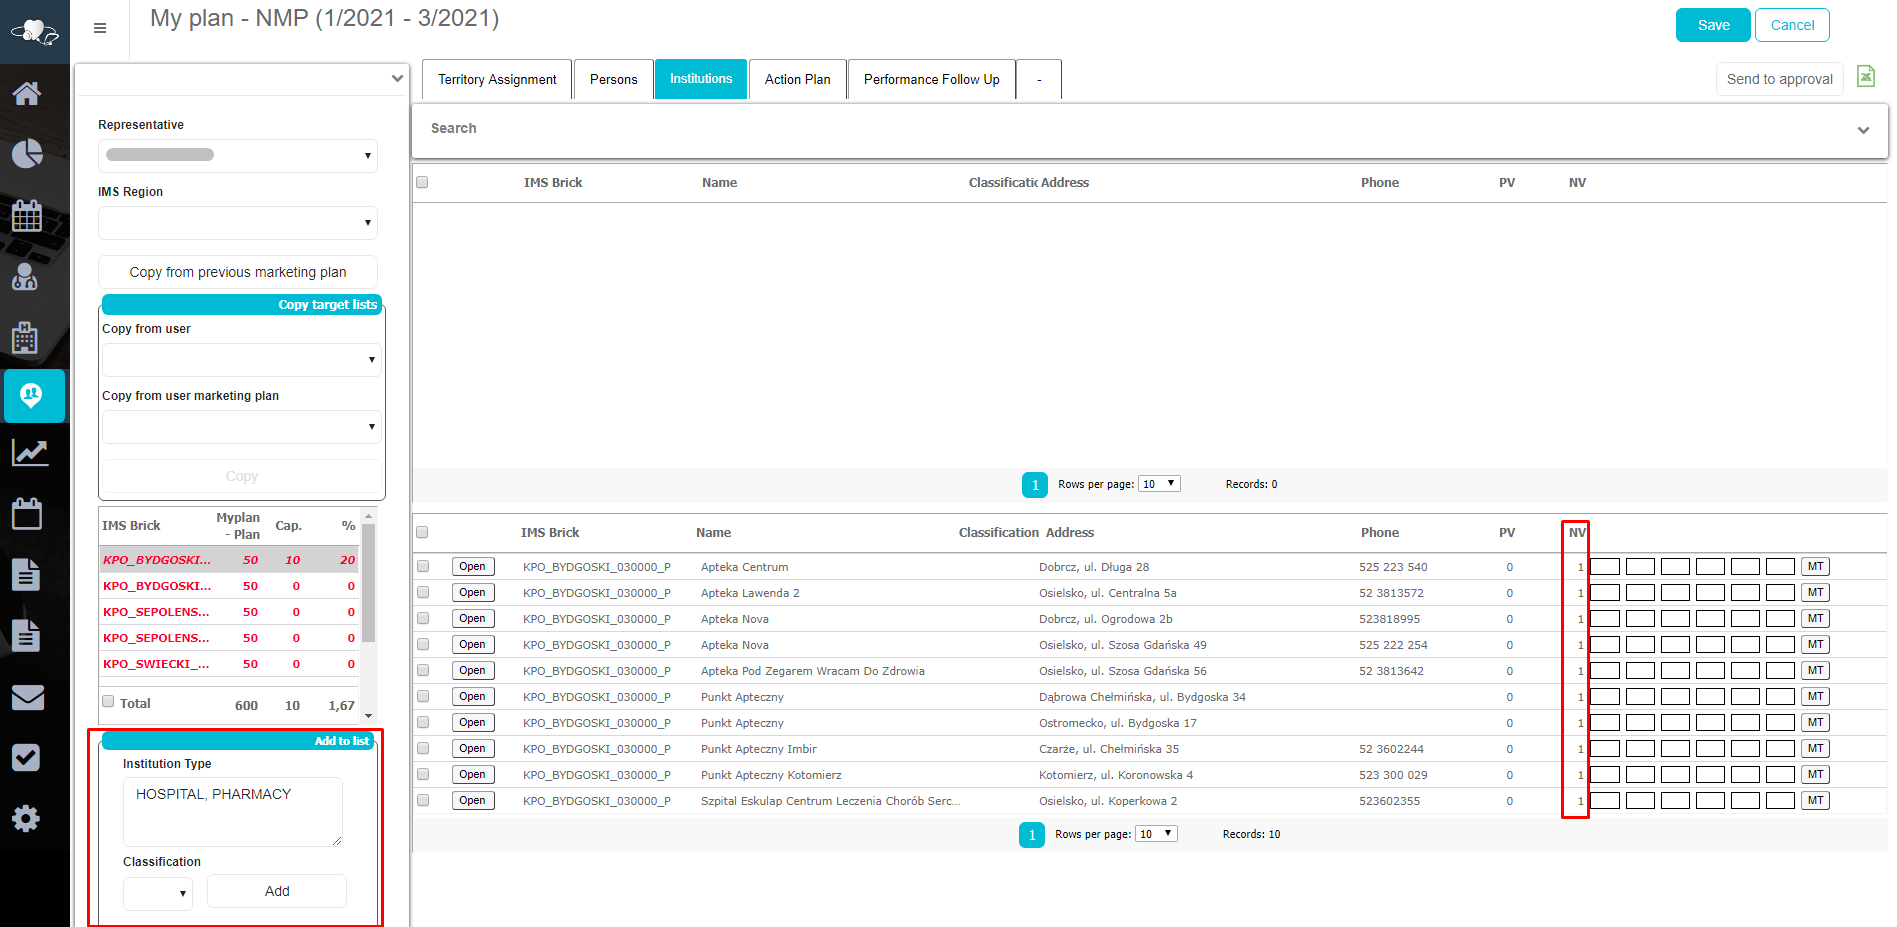
Next step is to set data for Institutions. It is the same as in Persons. By choosing Institutions or whole Institution type we can Add them. Also, there is visit plans for every Institution individually (NV). After we finished with creating list it is necessary to Save. If we click Send to approval it will send not only Institutions data, but also Persons and Action plan data. Be careful with that because there is no back to editing unless Admin reject changes so we can edit it again.
Action plan
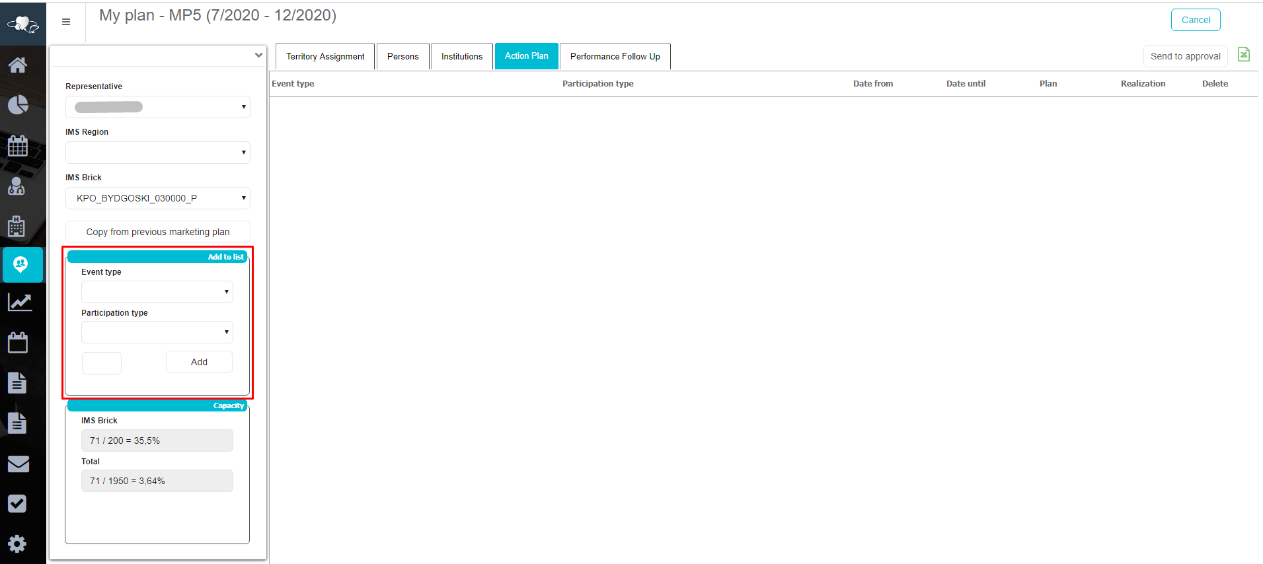
In Action plan we can define events. On the left side of the screen we have filters (Event type and Participation type) to narrow data for entering. Events can be added by clicking Add button as shown on picture below. In list (top side of the screen) we can see informations like Event type, Participation type, Date from, Date until, Plan, Realization and Delete.
After we have entered information about events, we need to send data to approval. Admin can approve this by going to My plan module and it will automatically see status Send to approval and clicking Action plan button it can be approved. After accepting, status will change, or if it is rejected Sales representative can again assing the data.
Performance follow up
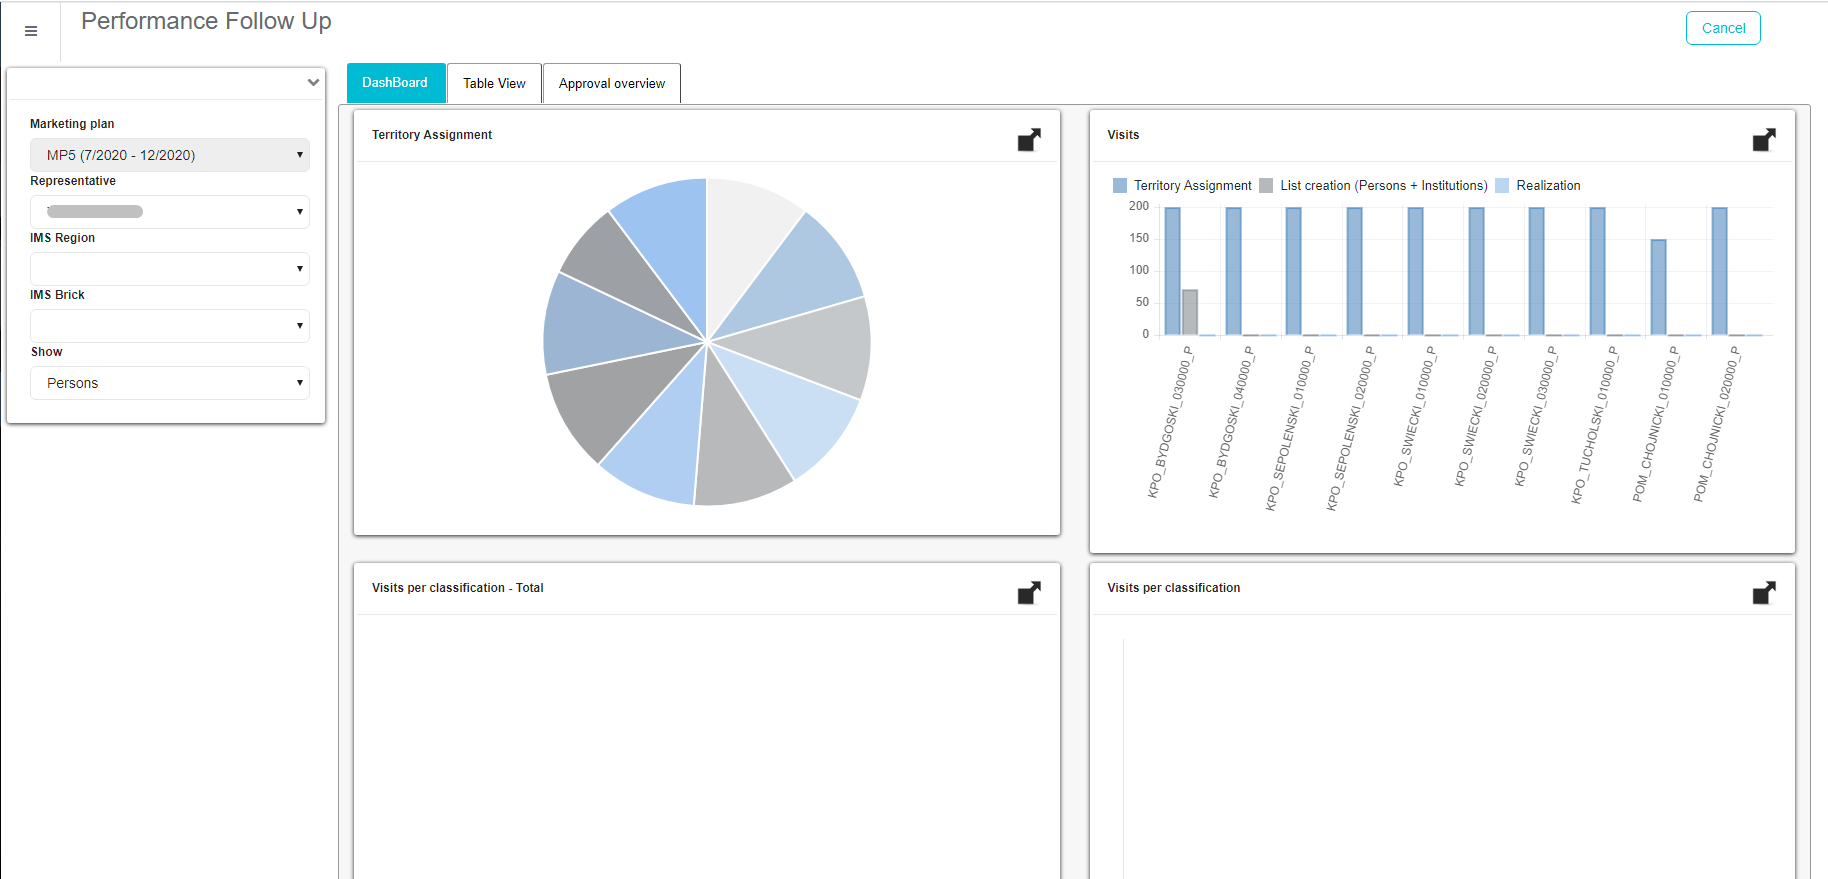
Performance follow up is last part of My plan. It is used to preview dashboards with different data and to see progress of our my plan process. After entering performance, we can see three tabs at the top of screen. We are using first and second tab to preview data as graphs and tables. The third one is used for controlling our progress. First tab is actually very similar to Dashboard modul where we can see different graphs filled with data which we created earlier in Territory assignment and List creation. On the left side we can see few filters to specify data for preview.
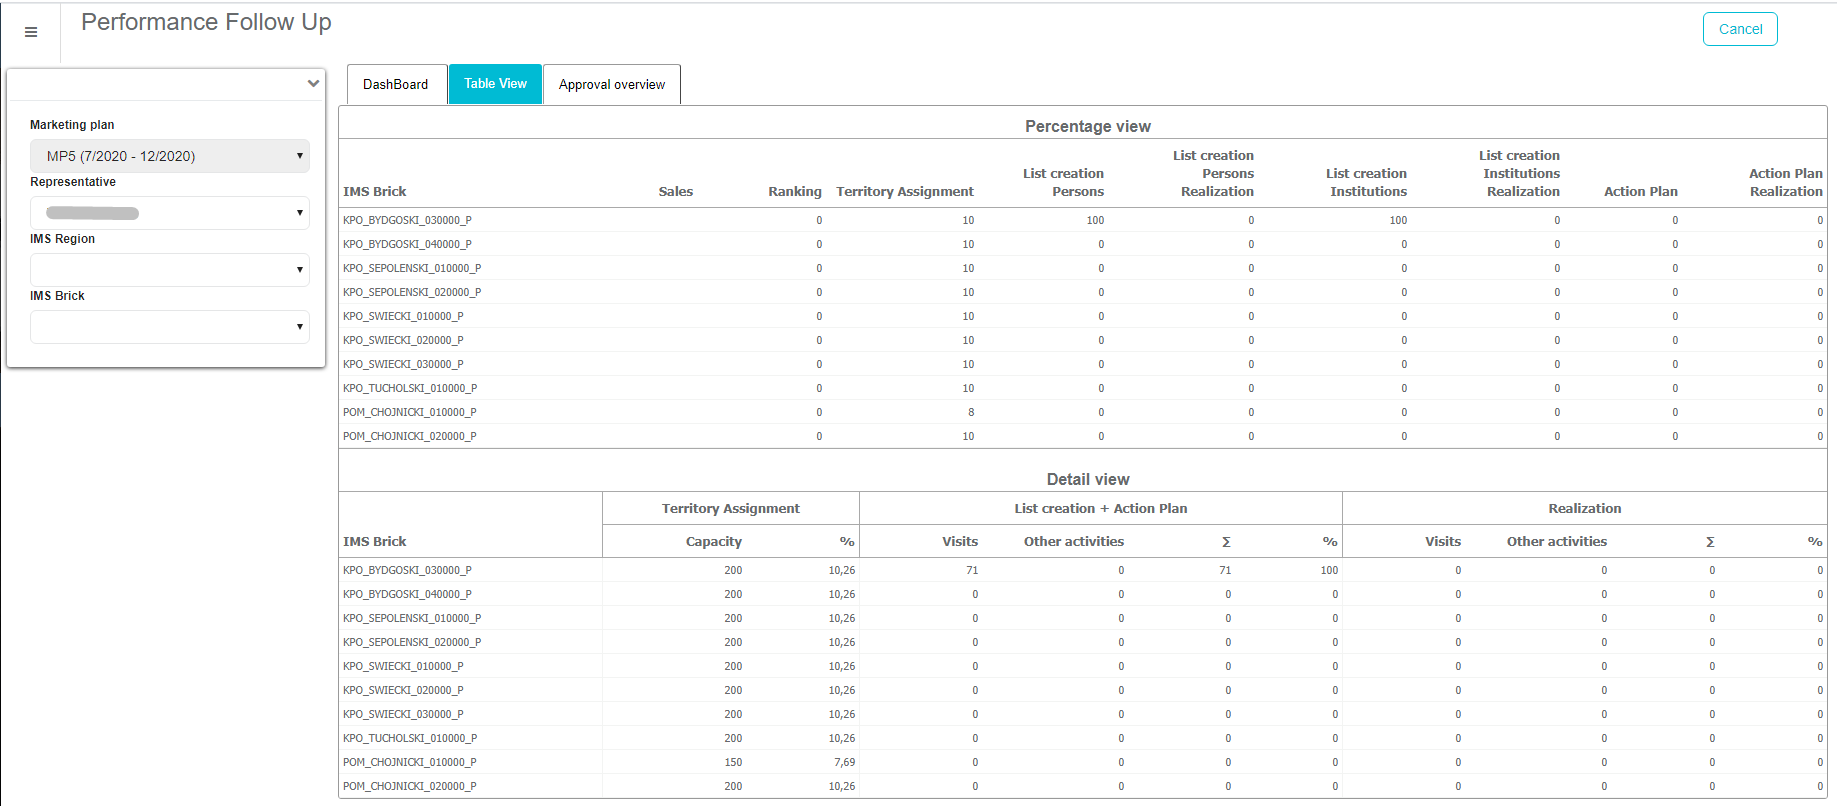
Second tab is a table view of selected data. We can see a lot of data for specific IMS brick with sales, visit, plan, etc. To see specific data we can use filter on the left side.
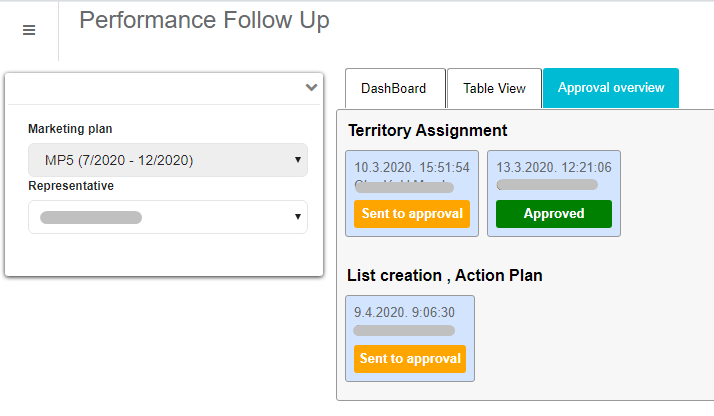
In the last tab we can see overview of approval process from start. Every status from send to approval, approved and rejected as well as who created or modified with time can be seen.
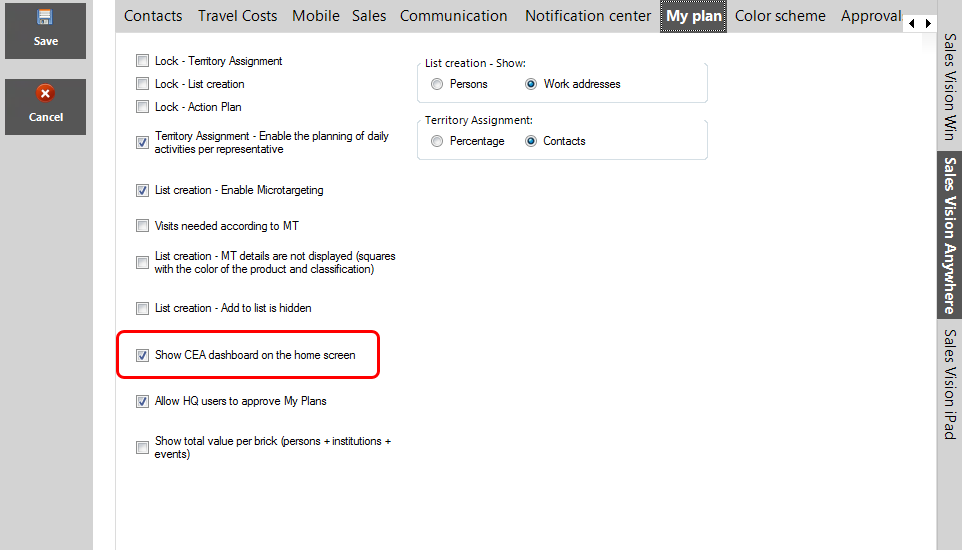
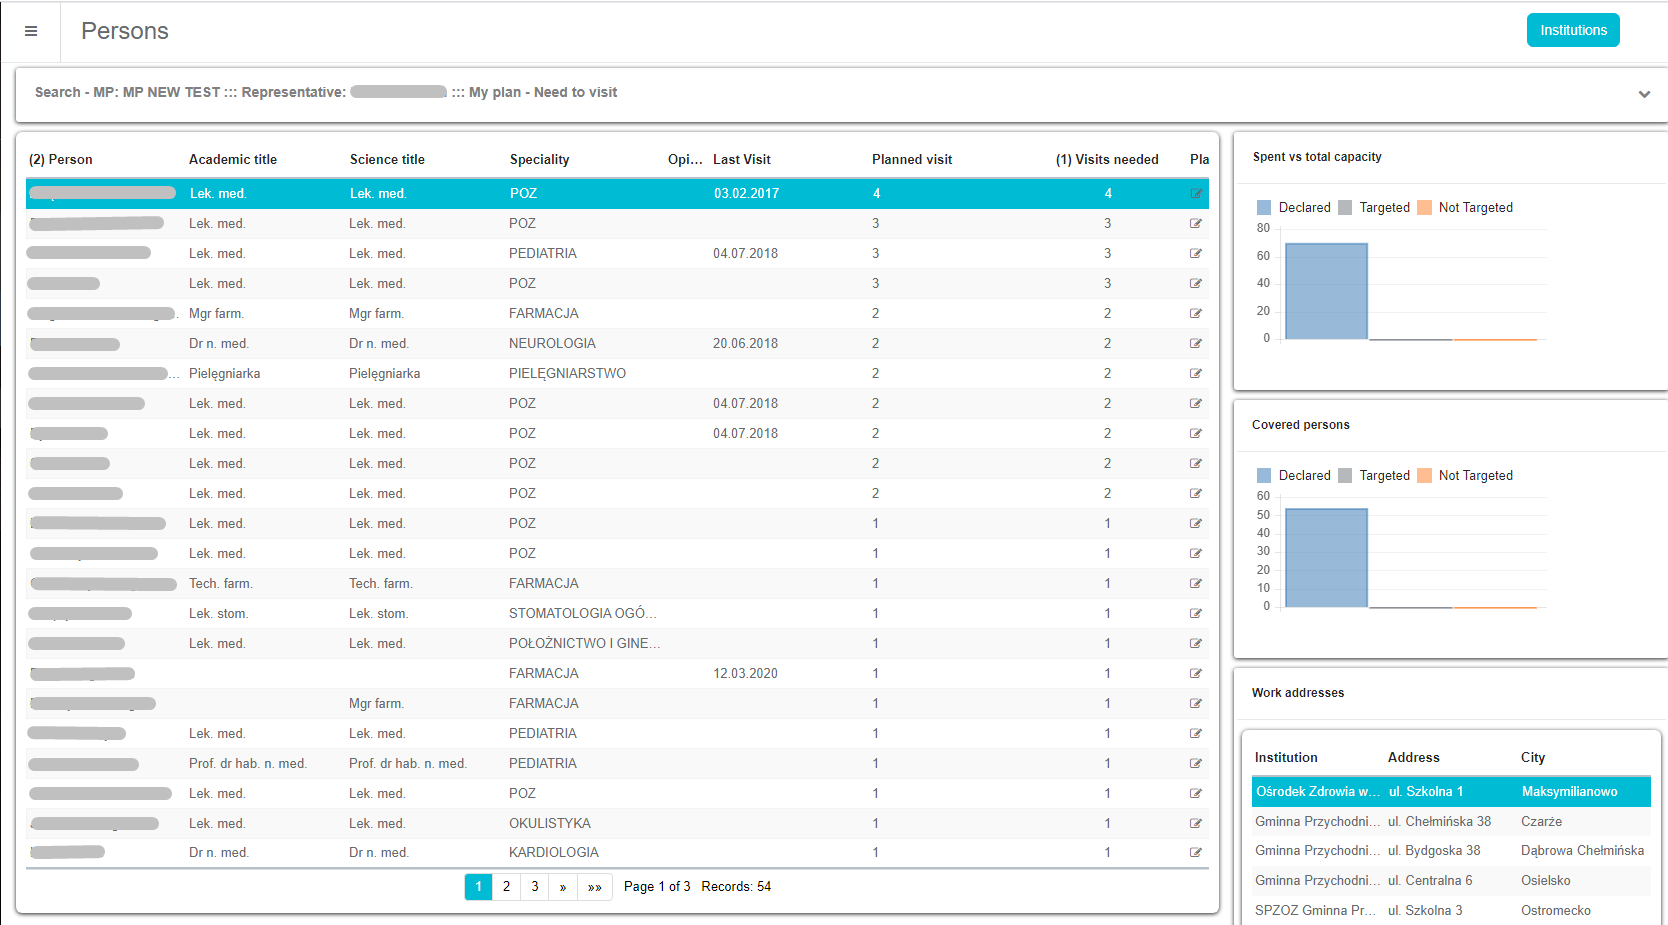
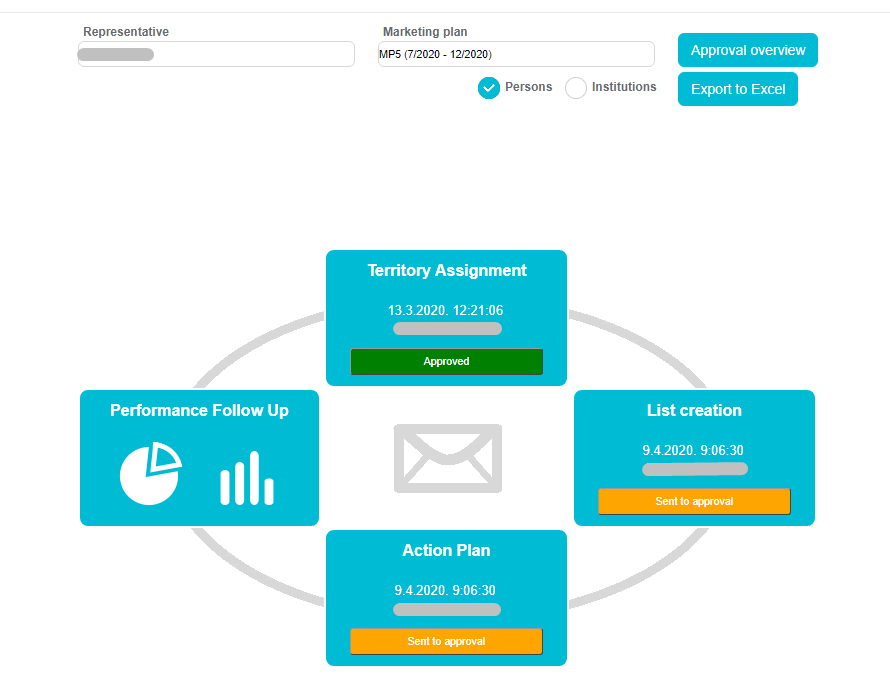
Besides My plan modul, we can see part of it in Home screen. This can be done by enabling option in SVAdmin application by Admin. Option is called Show CEA dashboard on the home screen. If Admin set it we will see screen as shown below. On the top of that screen is a filter to declare data you want to see. Marketing plan and Sales representative is a mandatory fields. Below that there are two parts. Left one is preview of filtered data and the right one is reserved for showing dashboards. Also, you have two separated views to see persons and institutions. This is accessible by clicking on Persons/Institution button.