Marketing plan by selection
a. Introduction
Marketing plan by selection is a module used to create promotion plan for representatives. It is a similar to normal marketing plan with difference of directly choosing persons and institutions. Advantages of this kind of plan is in detailed selection of only some persons or institutions which should be visited instead of whole speciality or type with all desired data. Adding persons and institutions can be done by Admin and also Sales representatives. Admin is mostly managing and controling representative's work and is creating marketing plan for them so he/she add persons which representative should visit. Then, representative is specifing in details that plan. Comparing to normal marketing plan this is a lot more detailed. For example, some specialities have few thousand persons, or some type of institutions have a hundreds of institutions so it is not possible to visit them all.

Adding persons and institutions
Persons
Marketing plan by selection is created by Admin but Sales representatives are choosing persons and institutions. To do that, enter Marketing plan module.
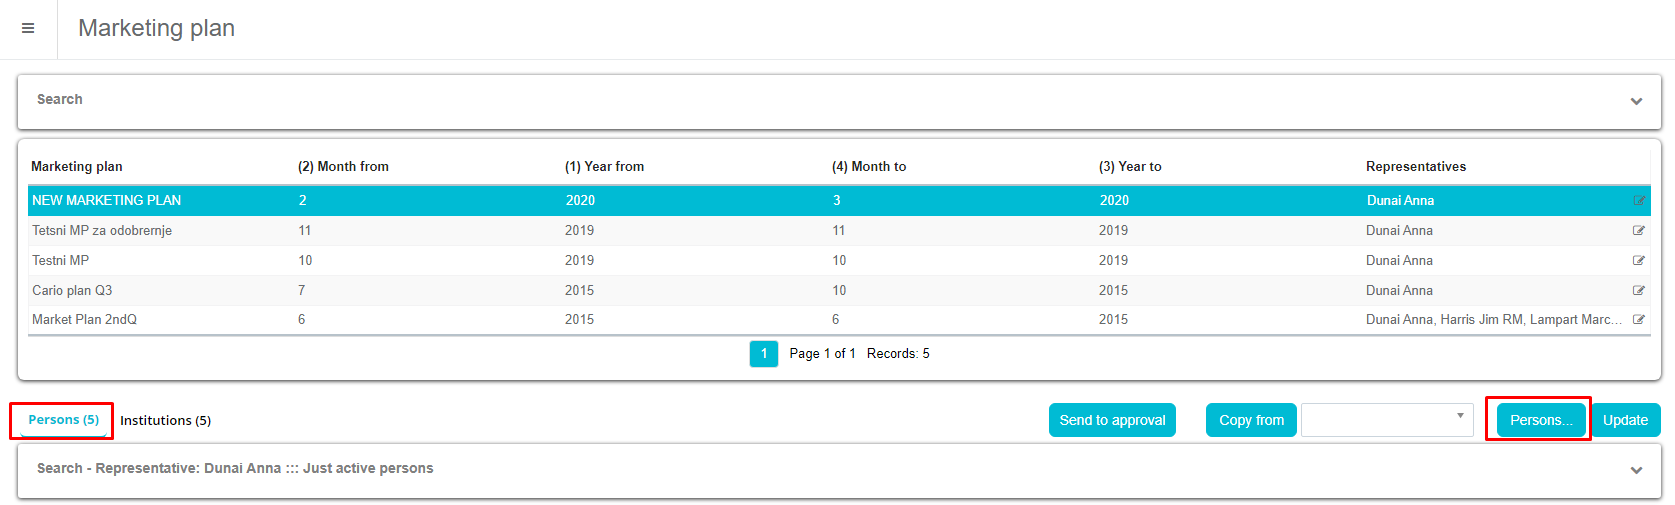
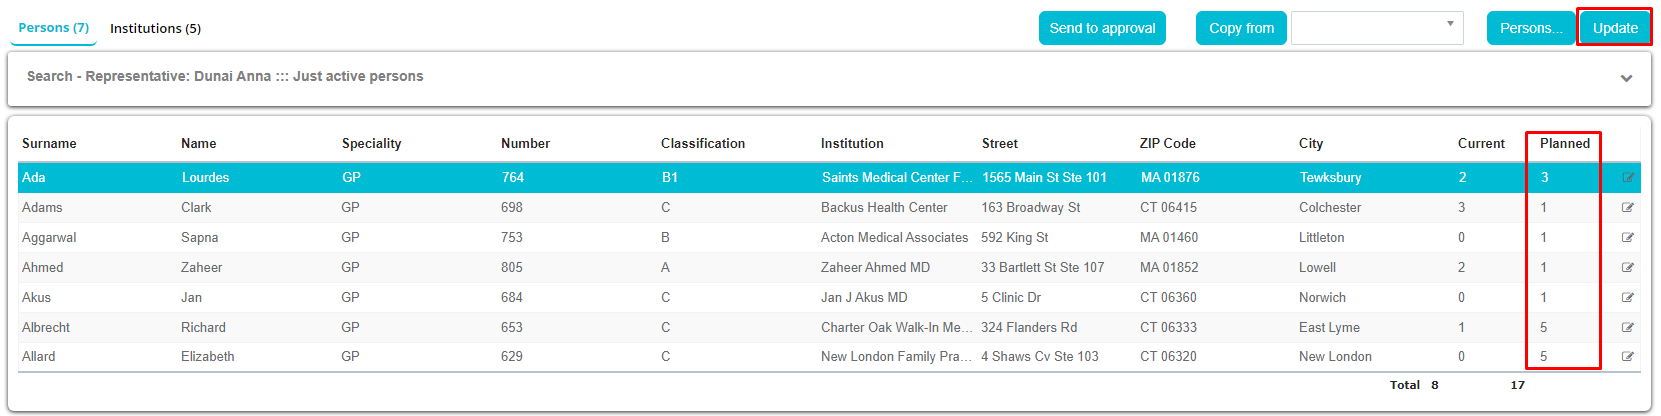
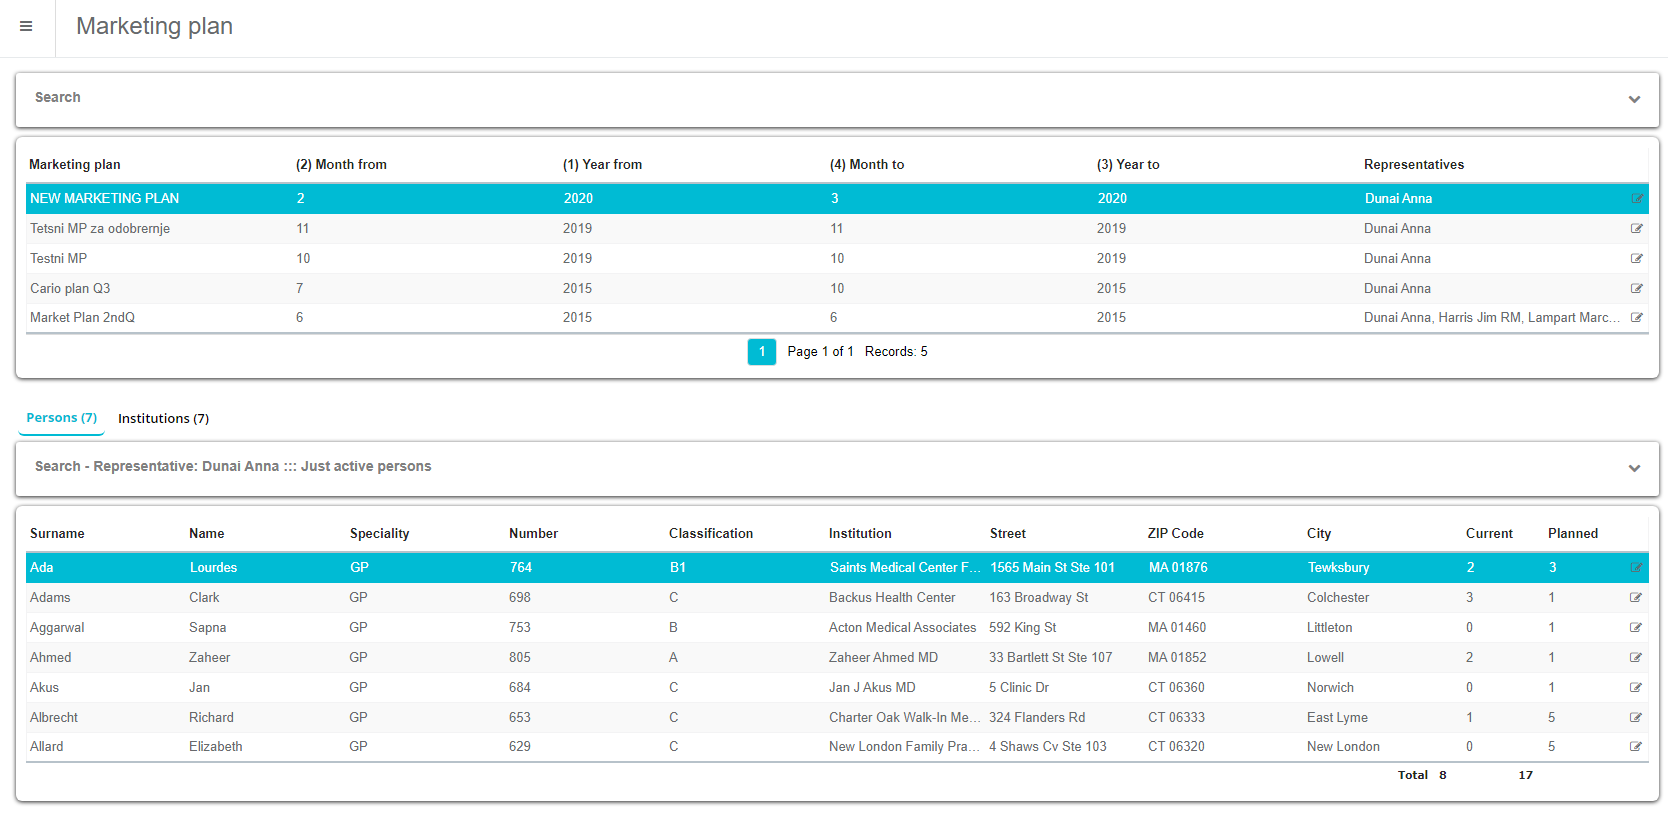
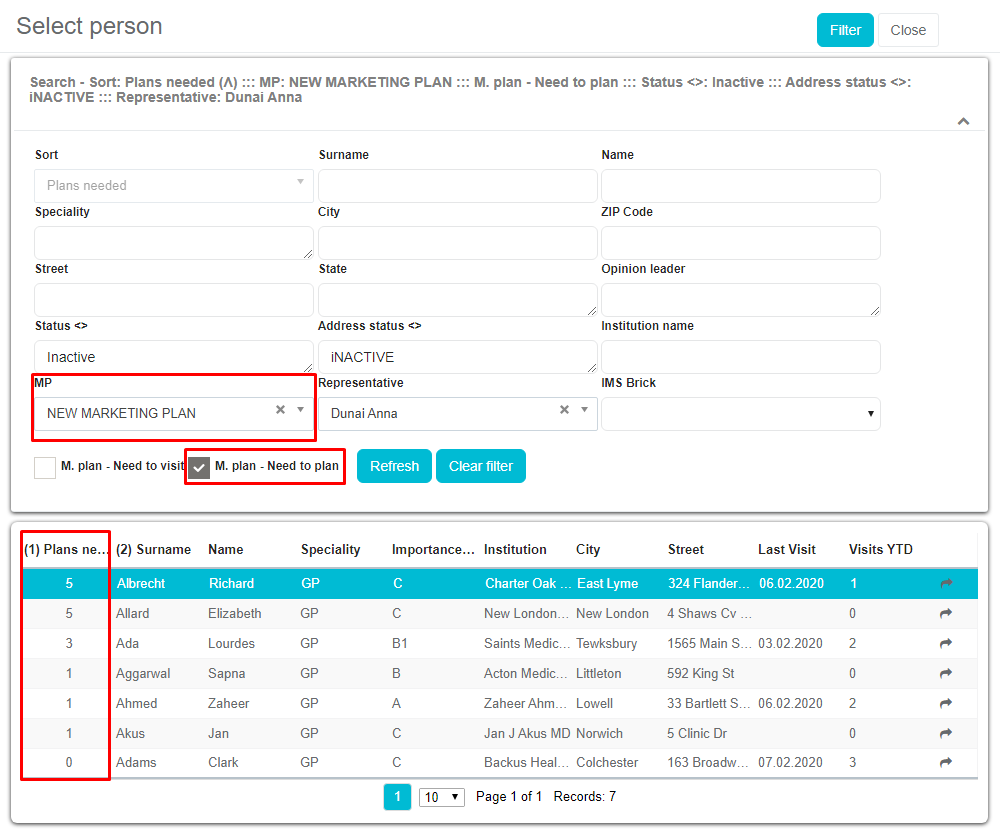
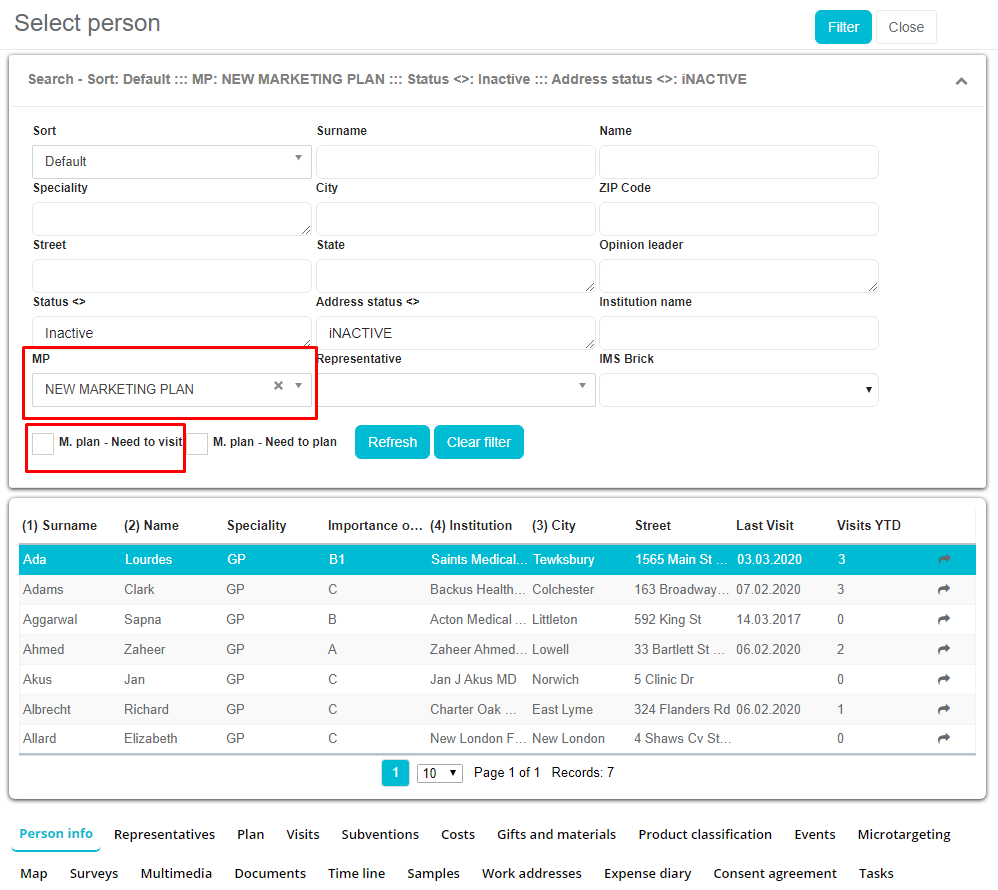
To create list of persons click on Persons button od right side of window. When window opens, use Quick filter to get persons which you want. After filtering, next step is to select persons. That can be done by clicking Checkboxes on right side of window and persons will appear on bottom side as Selected. To confirm selection click on Confirm button od top of window. Except adding persons one by one, we can add all persons in list by clicking Select all. Also, by clicking Deselect all we can remove all persons in current selection.
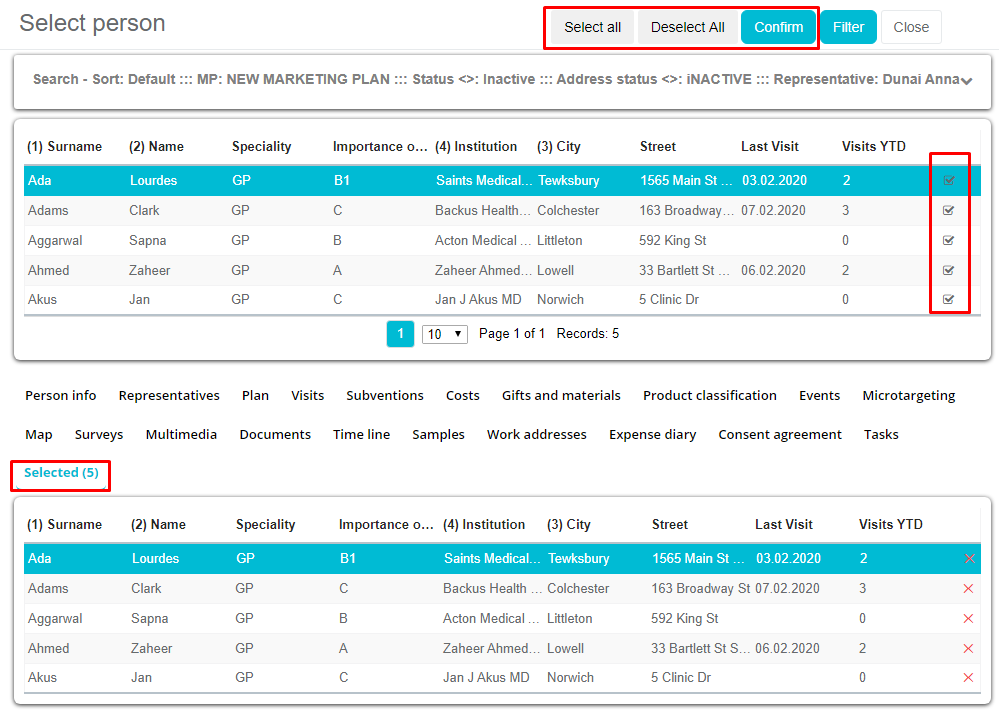
After adding persons to marketing plan, we need to set Planned visit for them. That can be done by clicking on Planned field and entering desired number of visit. Default Planned value is automatic set from created Marketing plan. Red color of number means that this value is changed. After setting all planned value, click on Update button to save them. Also, we can edit informations about person by clicking on Edit button on right side of window.
Institutions
Except persons, we can add institution to Marketing plan. To do that, use tab Institution on main window of Marketing plan module. Creating list of institutions is the same as for persons. Click on Add button on right side of window.
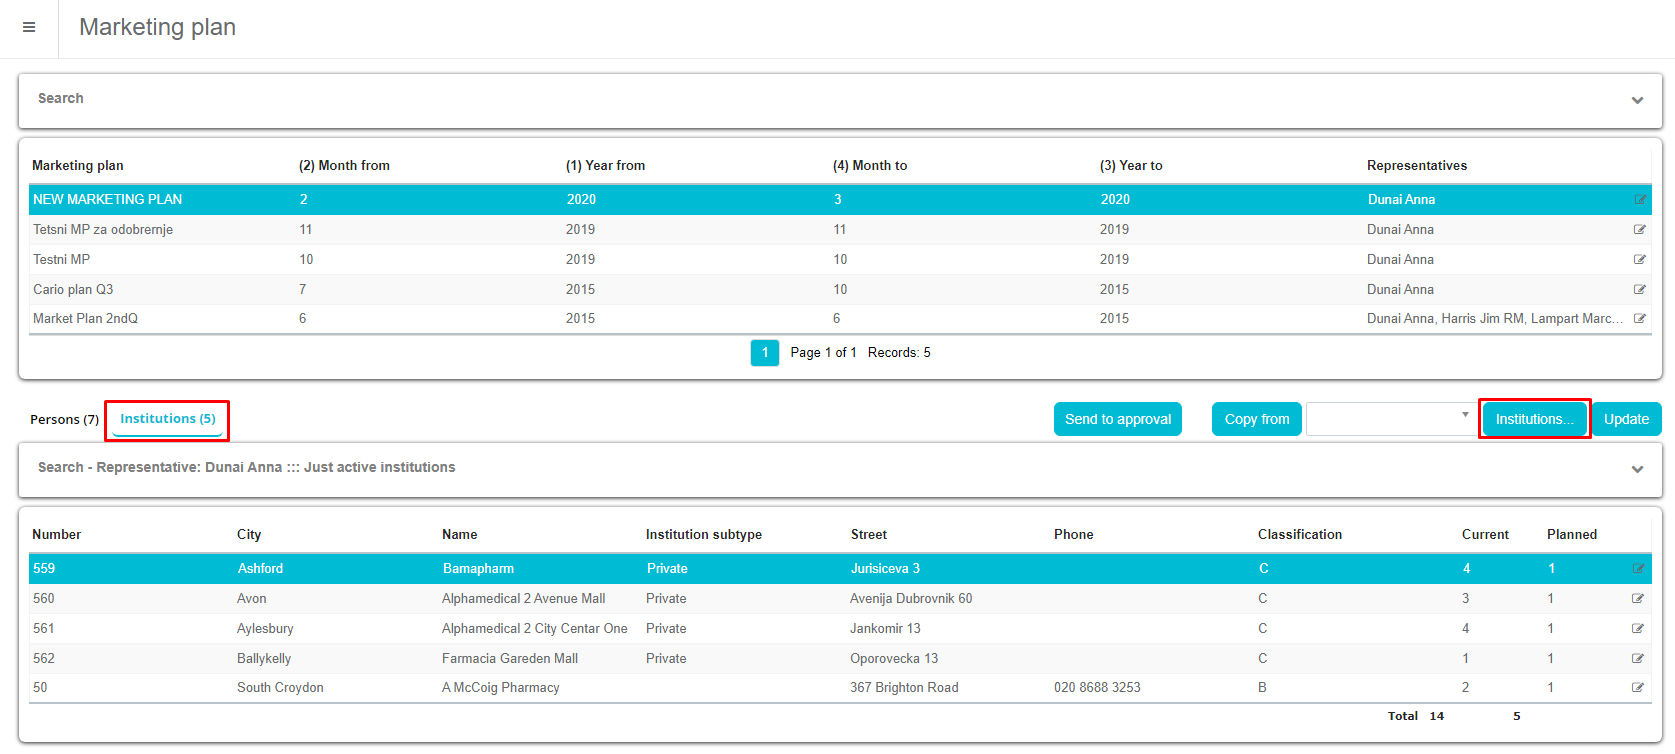
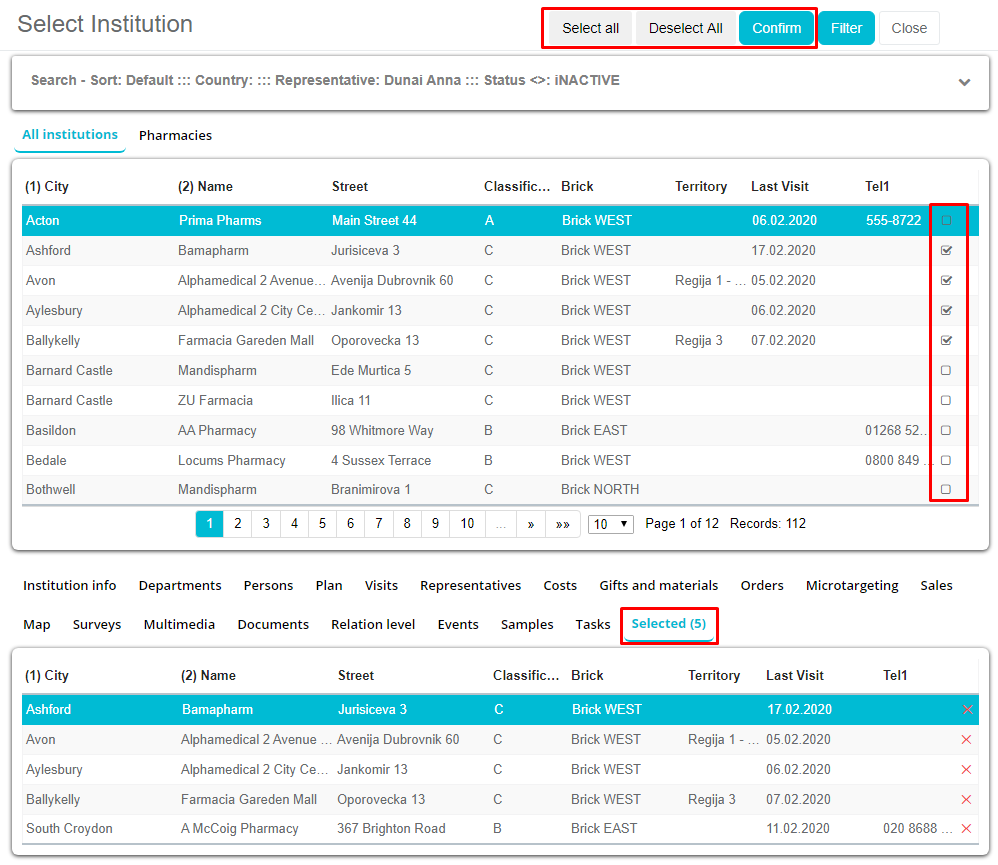
Use Quick filter to get institution that you want. After filtering, next step is to select institutions. That can be done by clicking Checkboxes on right side of window and institutions will appear on bottom side as Selected. To confirm selection click on Confirm button od top of window. Except adding institutions one by one, we can add all of them by clicking Select all. Also, by clicking Deselect all we can remove all institutions in current selection.
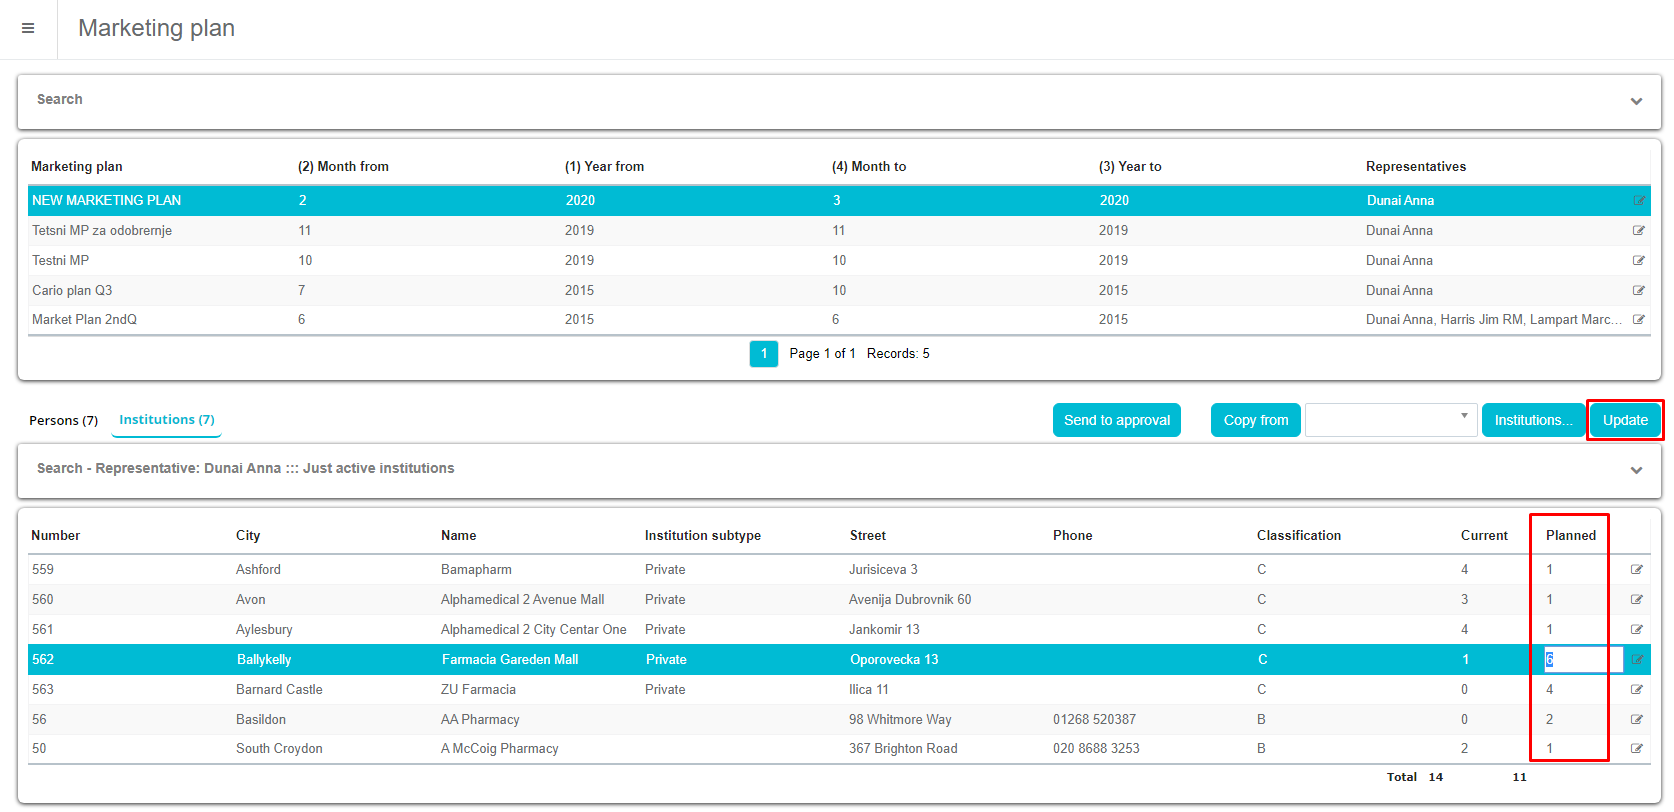
After adding institutions to marketing plan, we need to set planned visit for them. That can be done by clicking on Planned field and entering desired number of visit. Default Planned value is automatic set from created Marketing plan. Red color of number means that this value is changed. After setting all planned value, click on Update button to save them. Also, we can edit informations about institution by clicking on Edit button on right side of window.
Marketing plan approval
User can, after adding persons and institutions to Marketing plan, send the list to approval by using Send to approval button.

When window opens, you can enter additional info and then send to approval.

Admin or RM can approve plan by clicking Approve or Reject.
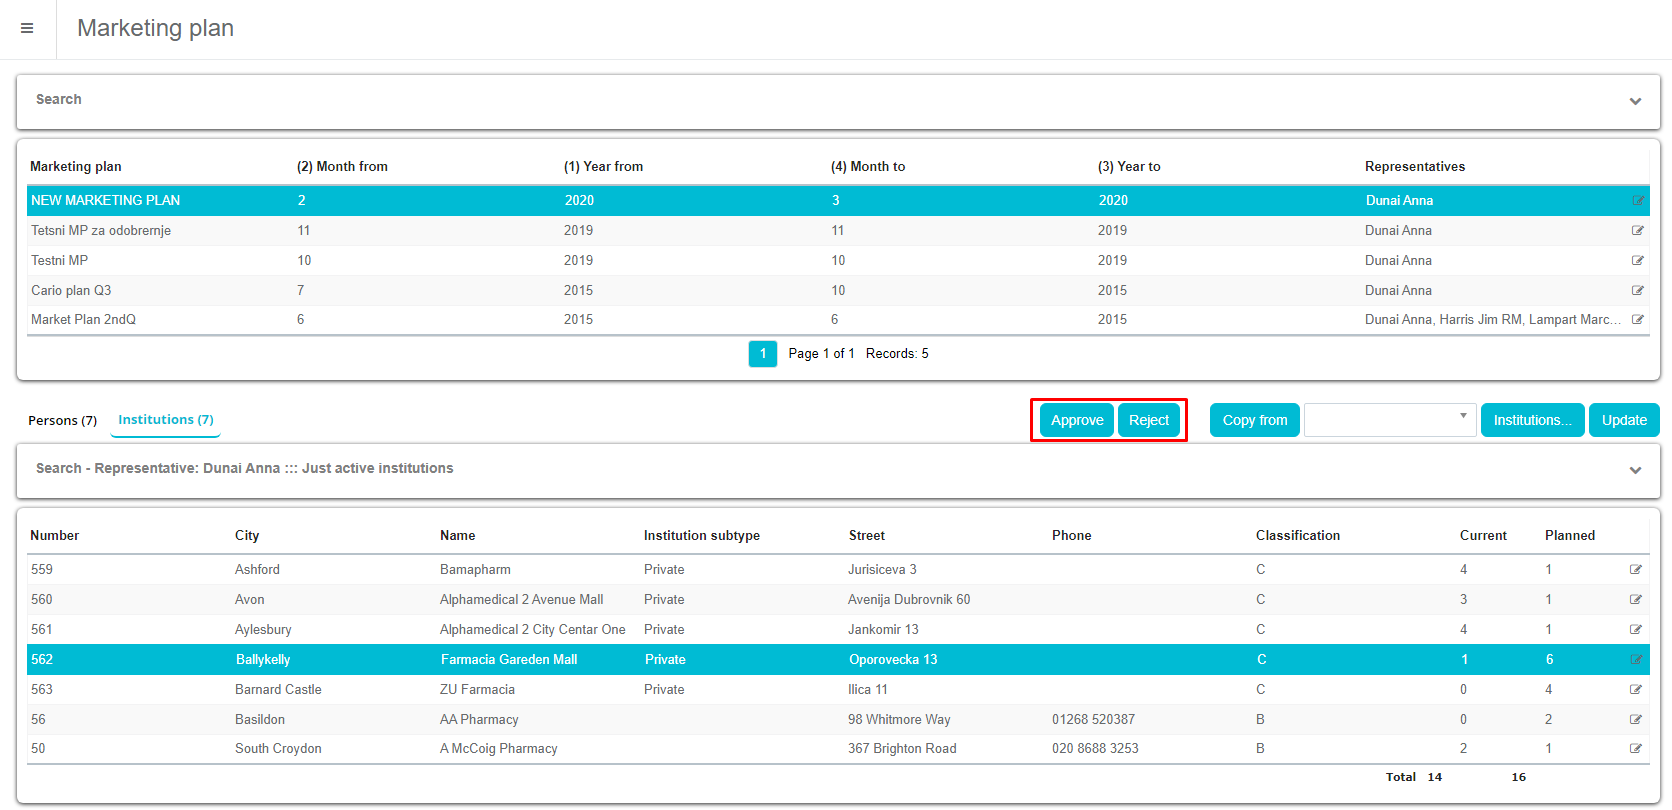
If Marketing plan is approved, user does not have possibility to add or delete persons and institutions to MP (as shown on picture below, buttons are not available).
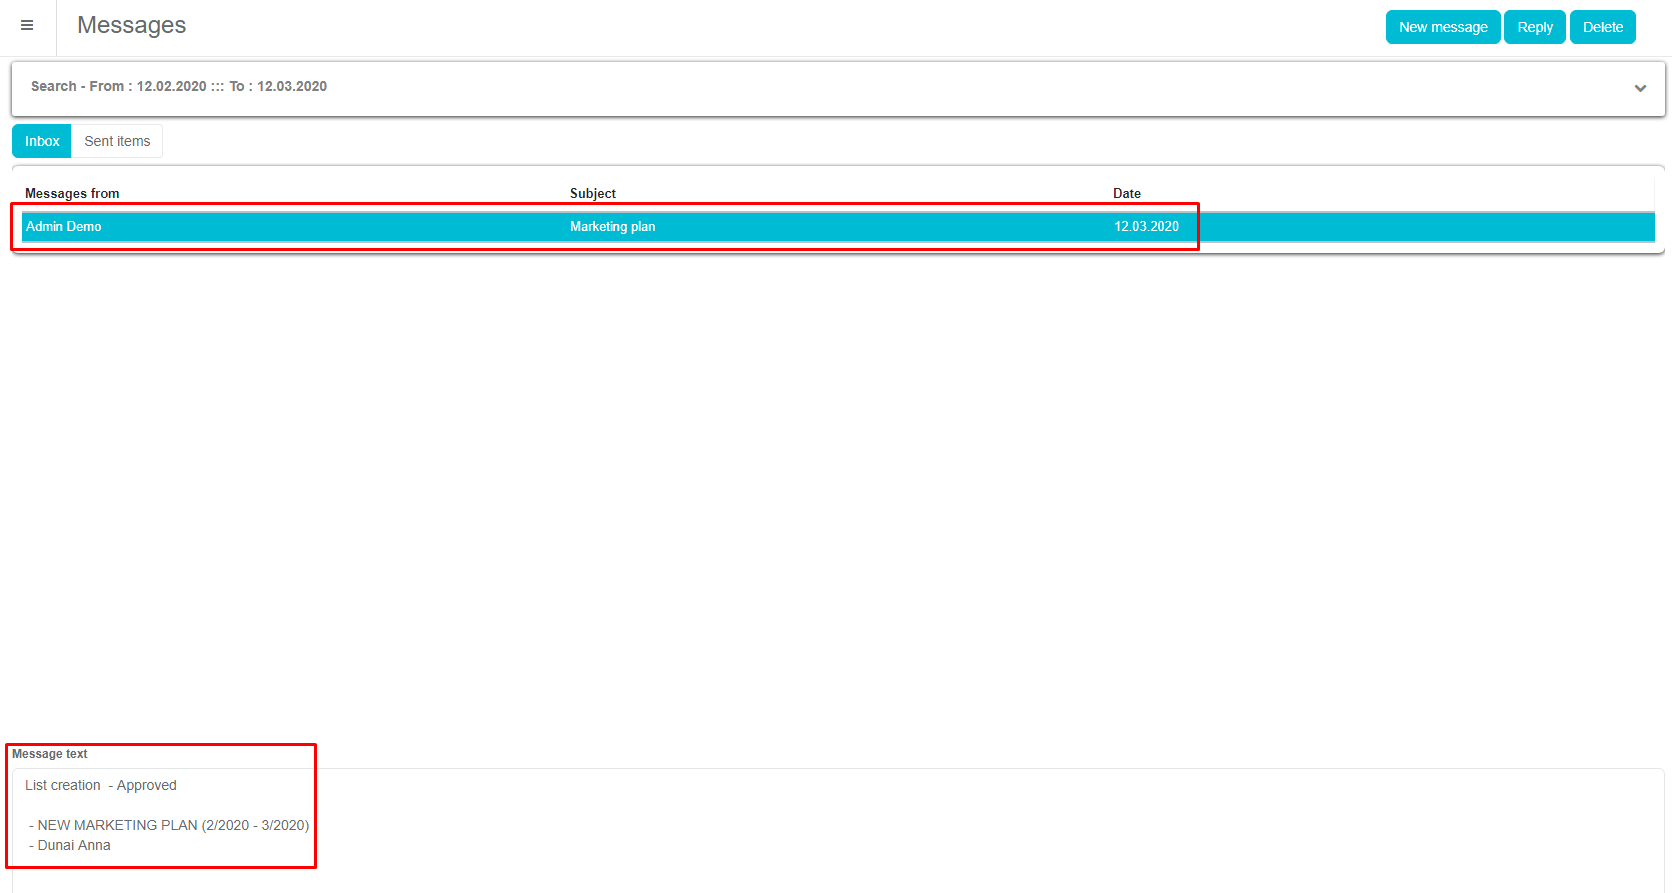
If plan has been rejected, Sales representative can alter the list and send it to approval once again. Sales representative will receive a message if plan has been approved or rejected.
Plans
Normal plans
Adding plan by earlier created Marketing plan is almost the same as normal plan. After entering Calendar module choose Person plan or Institution plan.
Window with list of persons/institutions will appear. To see persons/institutions from Marketing plan, in Quick filter choose that plan. Option M. plan – Need to plan is used to see for which persons we need to make a plan and number of total required plans. For example, if we set Planned visits in Marketing plan as value “three” and we already created two plans for that person, person will appear in list with column Planned visit and entered number “one” which means we still need to make one plan. When we make one more plan, next time person will not be visible.
After selecting person/institution for plan, normal window for entering plan will appear.
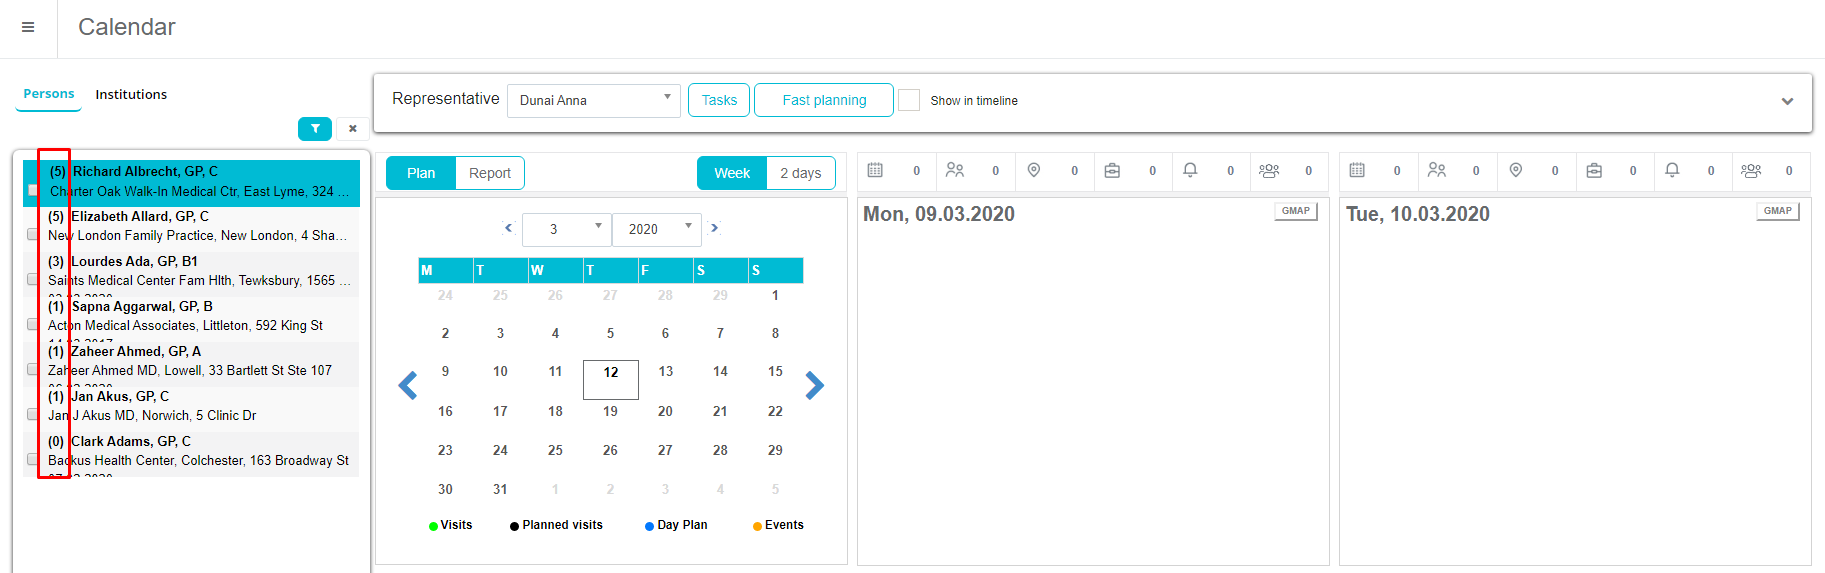
Fast planning
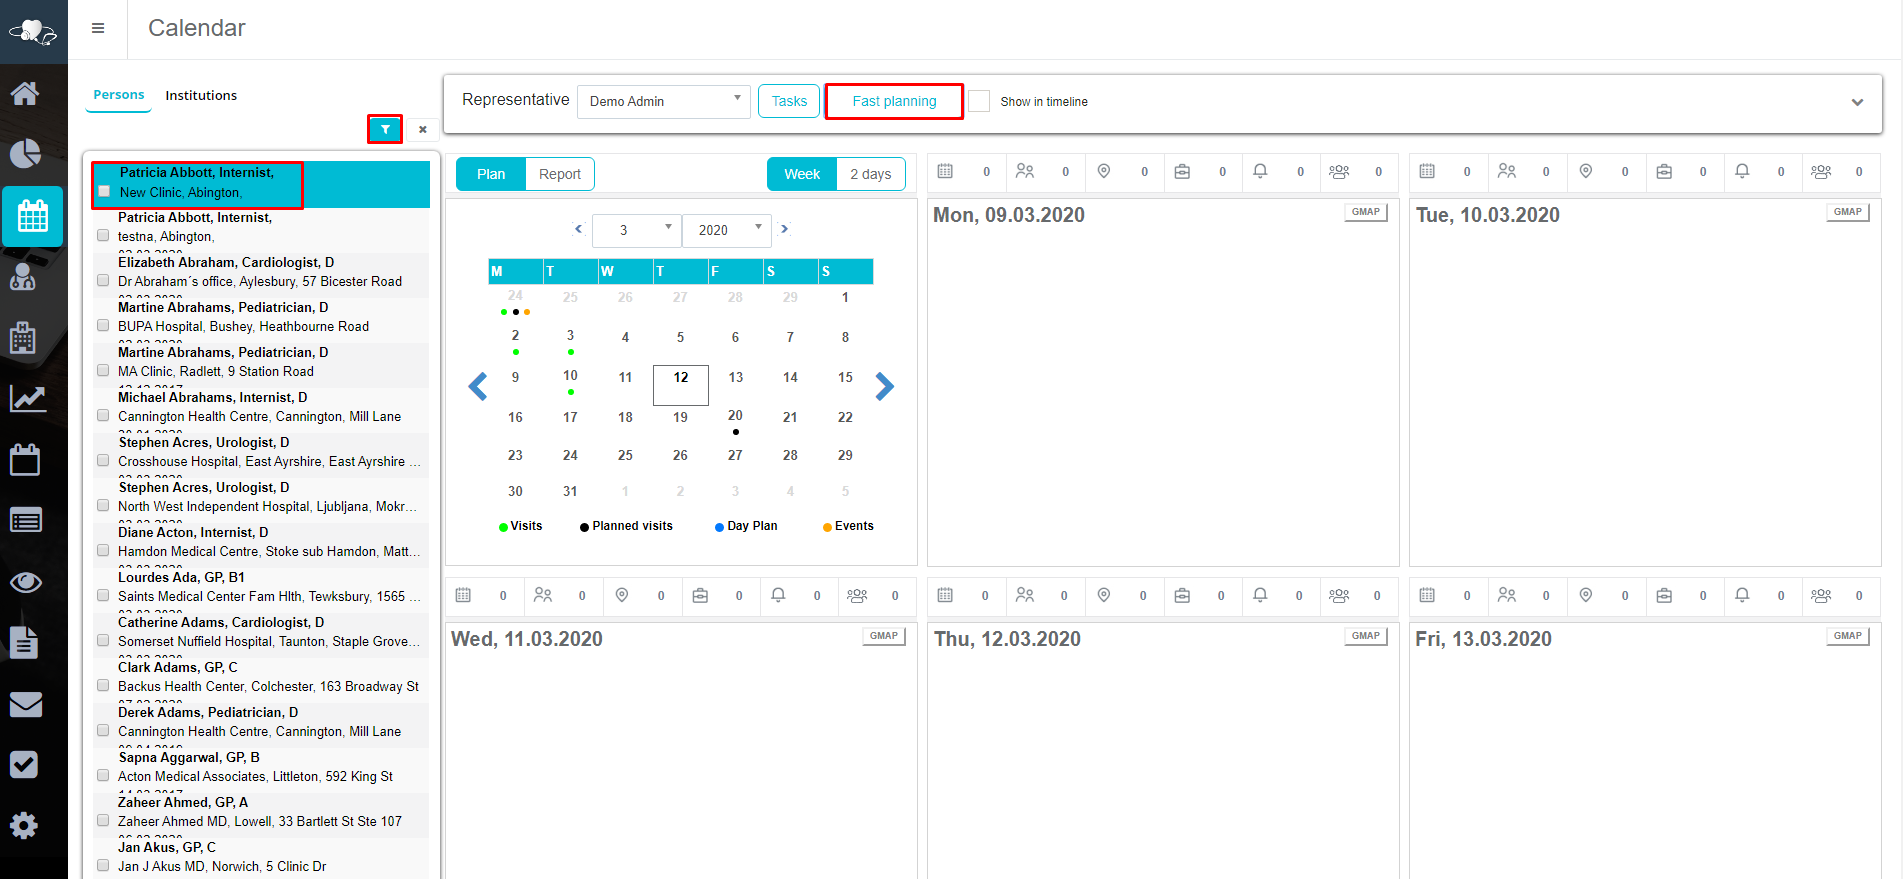
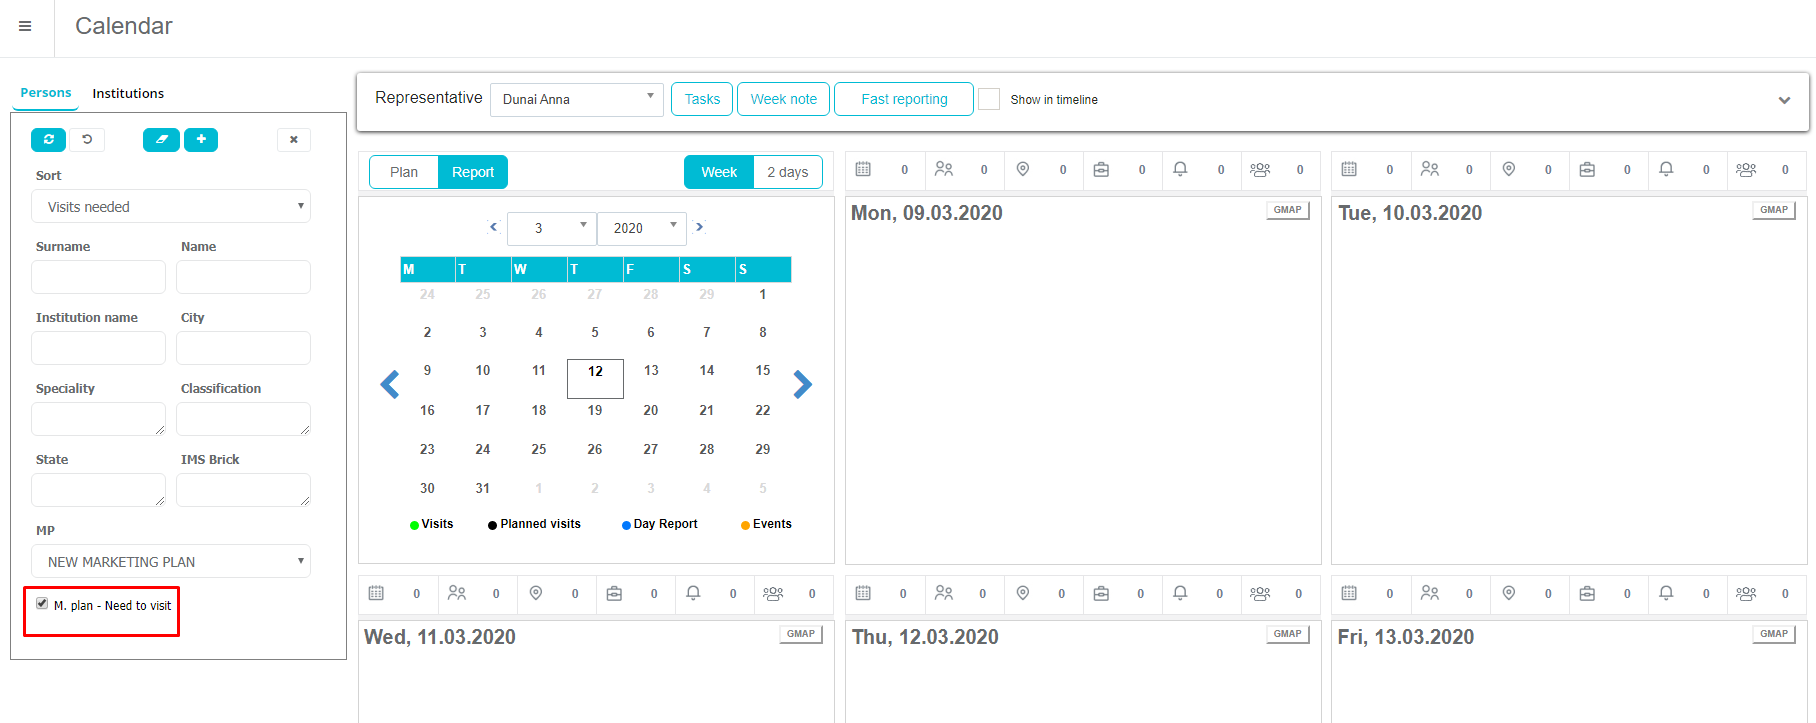
Marketing plan by selection is also available in Fast planning. To see persons that needs to be planned, option M. plan – Need to Plan under Filter tab must be enable.
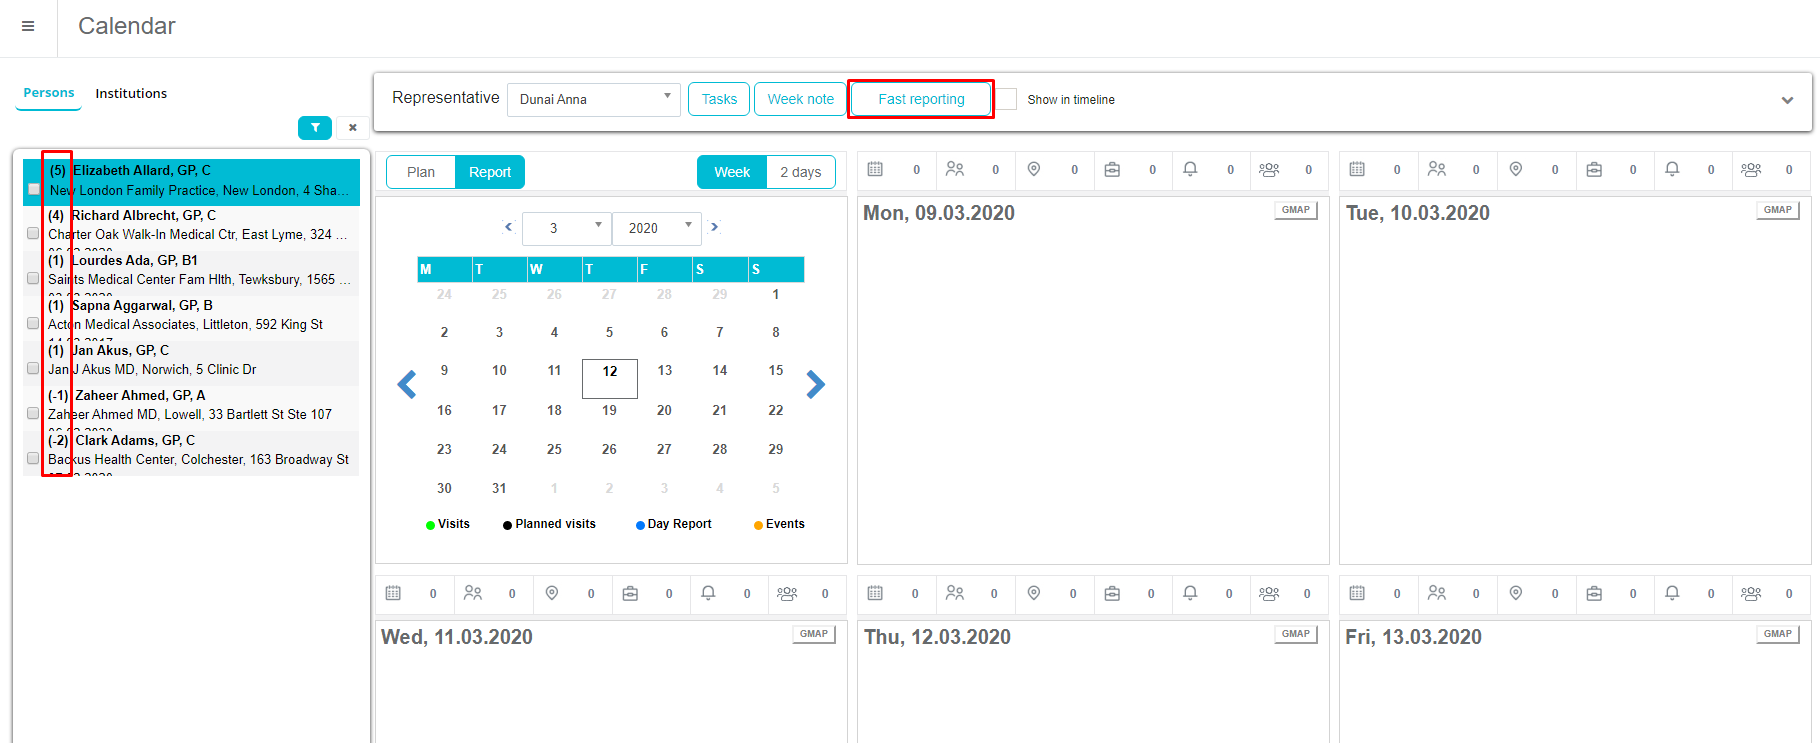
After enabling option, we can see number of needed plans to complete Planned visits set in Marketing plan. That number is shown on left part of person's/institution's name.
Visits
Normal visits
Adding visit by earlier created Marketing plan is almost the same as normal visit. After entering Calendar module choose Person visit or Institution visit.
Window with list of persons/institutions will appear. To see persons/institutions from Marketing plan, in Quick filter choose that plan. Option M. plan – Need to visit is used to see difference between already created visits and planned visit in marketing plan. For example, if we set Planned visits in Marketing plan as value three and we already created two visits for that person, person will appear in list and when we make one more visits, next time person will not be visible.
After selecting person/institution for visit, normal window for entering visit will appear.
Fast reporting
Marketing plan by selection is also available in Fast reporting. To see persons that needs to be visited, option M. plan – Need to visit under Filter tab must be enable.
After enabling option, we can see number of needed visits to complete Planned visits set in Marketing plan. That number is shown on left part of person's/institution's name.
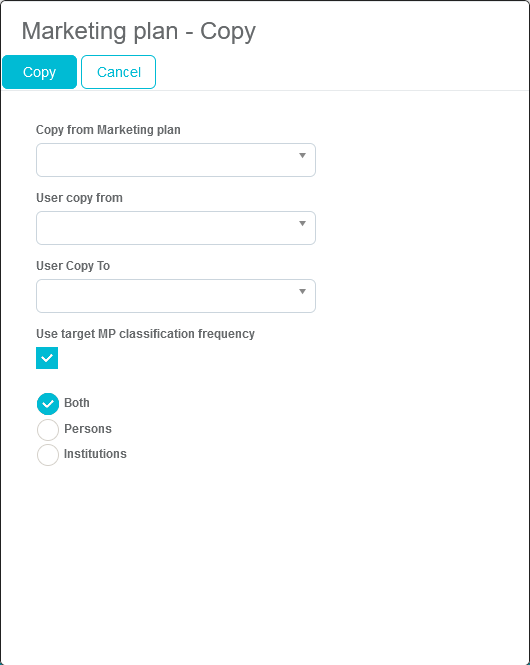
Copy selected users
Copying selected persons and institutions from one user to another. Copy conditions: • Copying is available from one user to another, also from – to same user. • Copying is available inside the same marketing plan as well as from one marketing plan to another • In case of 2 different marketing plans – only matching specialties or institutions types will be copied into the destination marketing plan.
If in MP1 exists specialty1, specialty2 and specialty3 and in MP2 specialty1 , specialty3 Then, only specialty1, specialty3 clients will be copied. Same logic will be implemented for the institution types.
If option “Marketing plan by selection - Enable adding persons that are not same specialty as in MP” is enabled, then all specialties will be transferred to the MP2 from MP1.