Calendar
Calendar module is specialized for planning and monitoring of all activities. Planning visits, reporting on the visits, tracking an events, supervisions and other activities are very simple to track and take much less time. In addition, the creation of reports in this module greatly facilitates the work of representatives in the field.
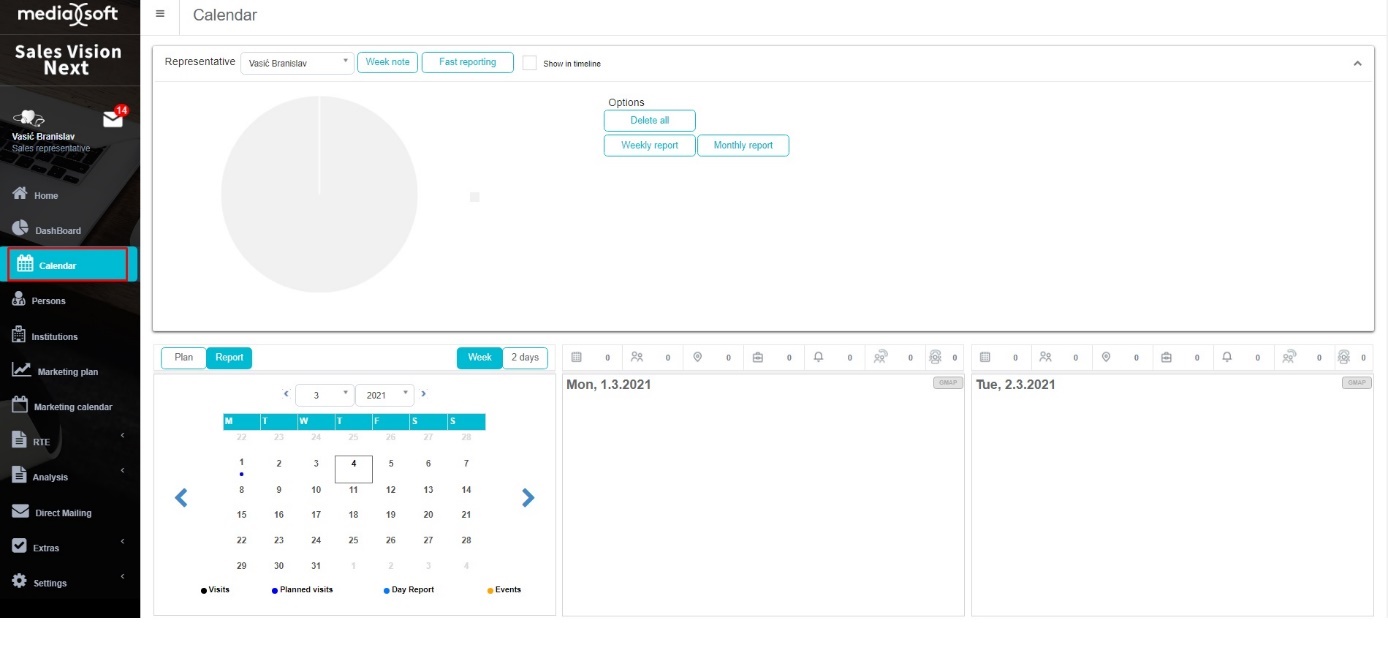
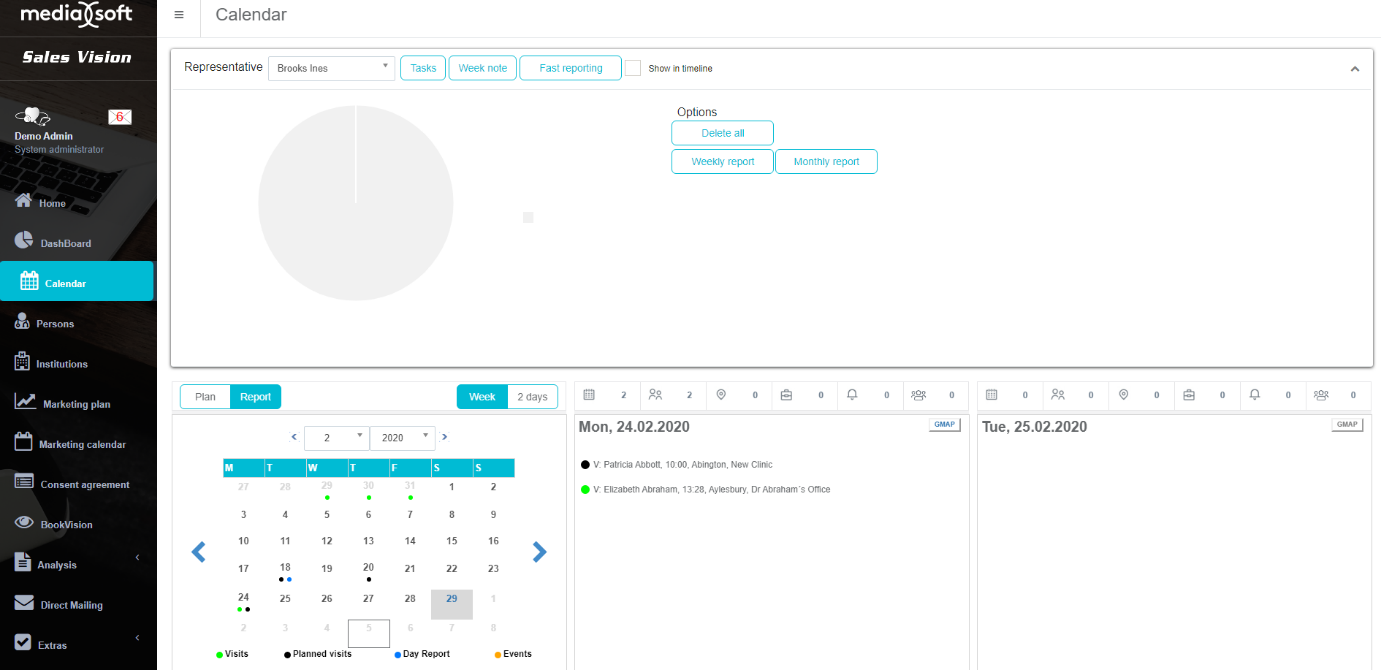
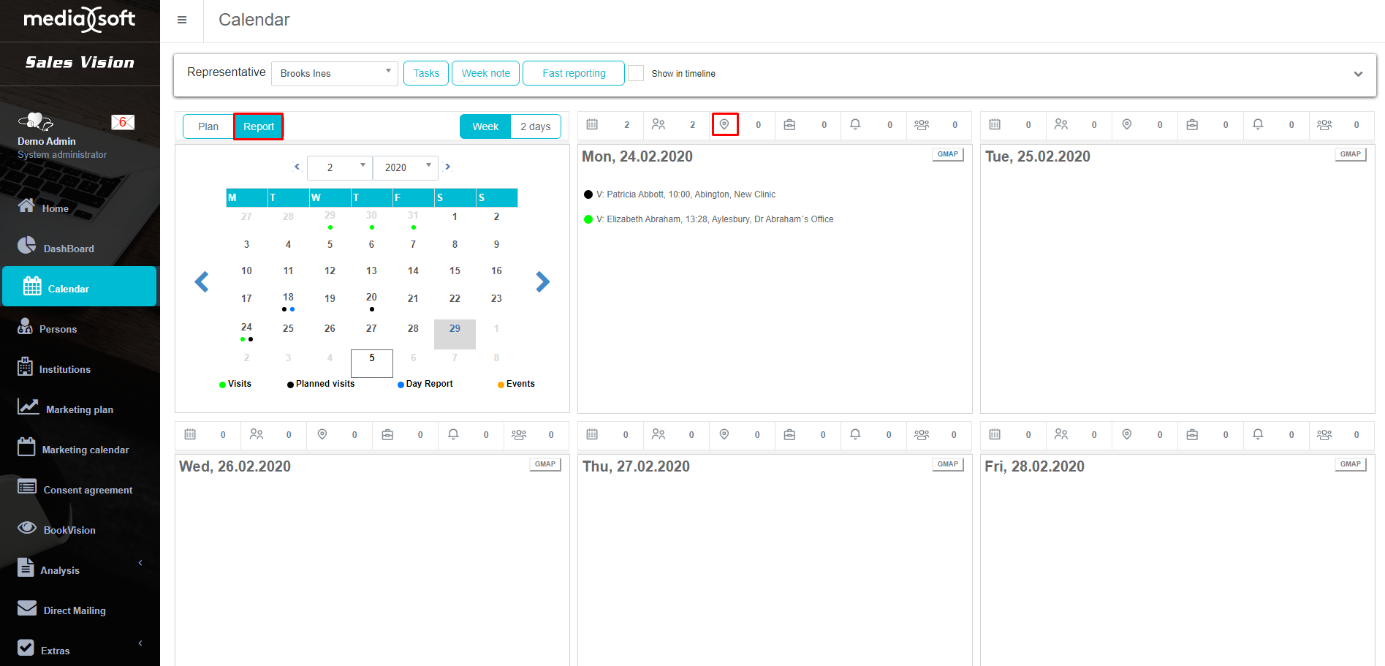
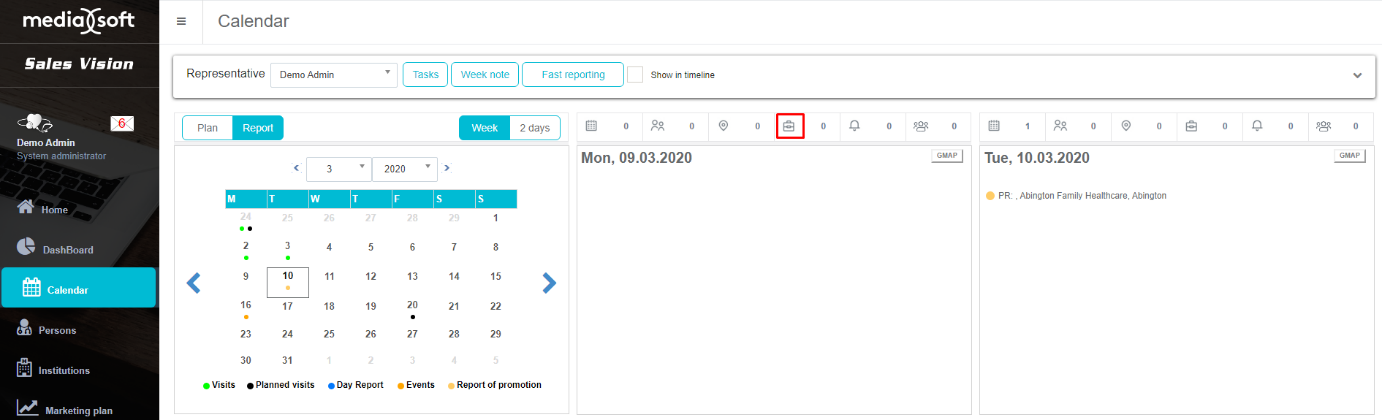
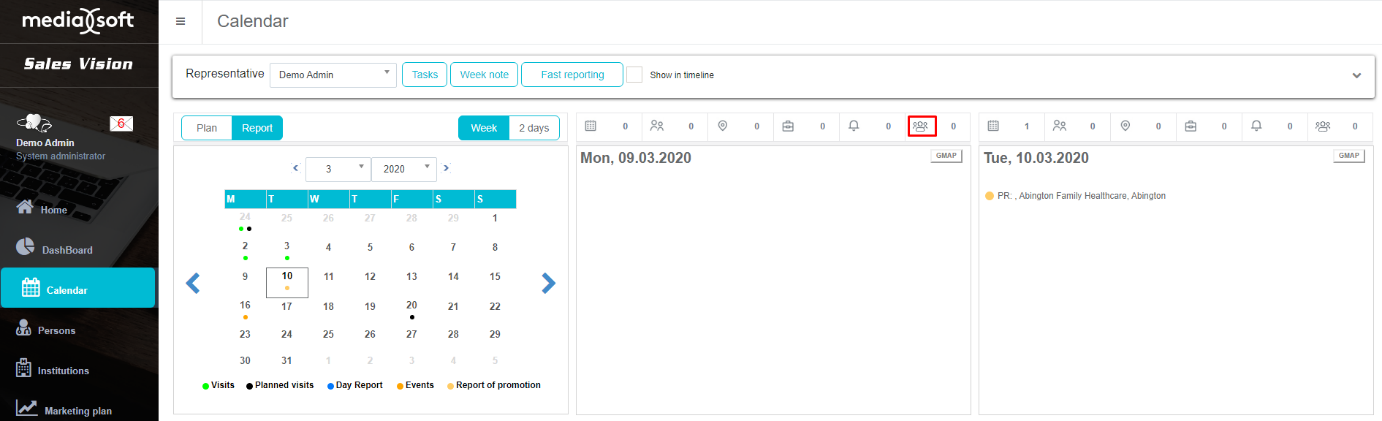
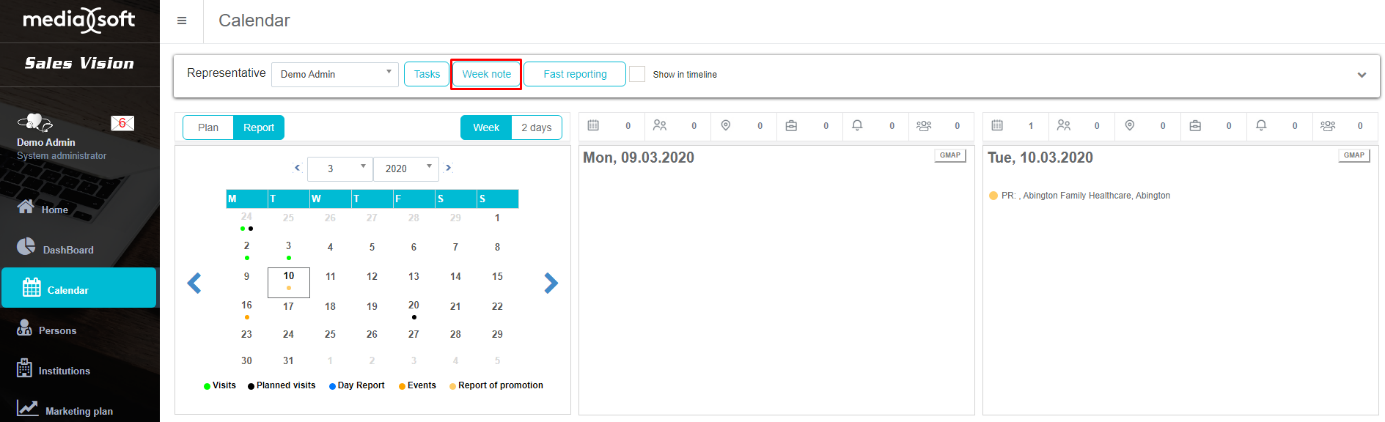
On the top part of the screen you can see Sales representative name, buttons for Tasks, Week note and Fast reporting (this part is minimized by default but it can be expanded by clicking on ^ button in right side of the screen). Below that are buttons for Plan/Report and Calendar. The Dat part is used for changing view between days/months/years and Plan/Report. Next to the Plan and Report tabs we can see buttons for changing view in two day or whole week. Whole bottom part of the screen is showing days for current week. This is a main part and we are using it for adding, editing, deleting and viewing plans and visits.
Plan

Day plan
In order to enter new day plan, Plan needs to be selected.
Then click on the calendar button (first button) in day for which you want to add a day plan.
In Day plan view you can enter Route, Info and Activities. Date will be automatically set for today but it can be changed. In bottom part of this window you can see Daily activities where you can select planned activity from activity list. Sum of all activities must be 100% (if percentages are not 100%, you will get warning message). When you have entered all the data press Save button and new Day plan will be shown in calendar.
If you would like to edit Day plan, the procedure is the same, you just need to open the window for entering day plan. Also, when window is opened you can delete day plan by pressing Delete button.
Person plan
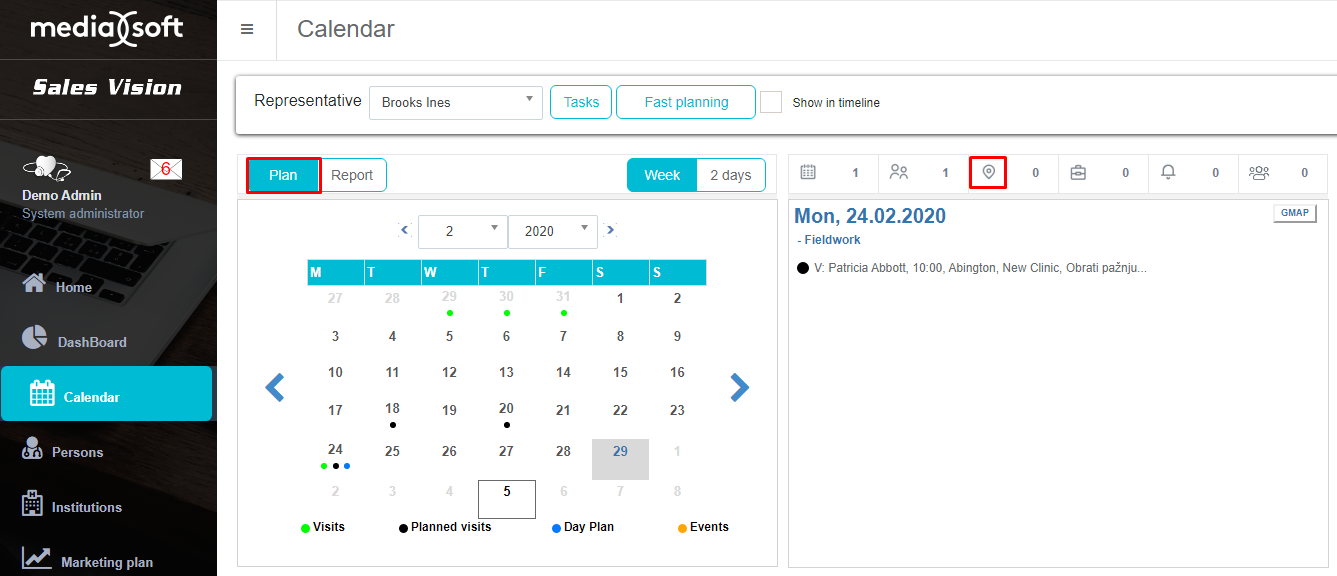
Select a day for which you wish to create a plan and press on the Persons button (second button).
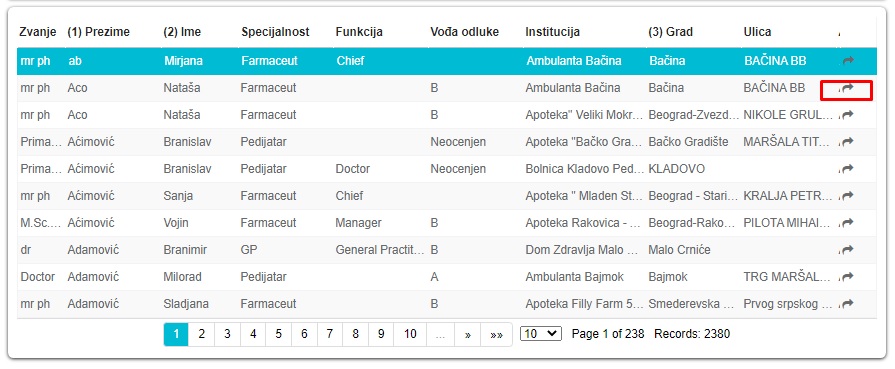
Then a new window will appear with a list of all persons in the database. To choose the person you wish to enter in the plan select it and press on the choose button.
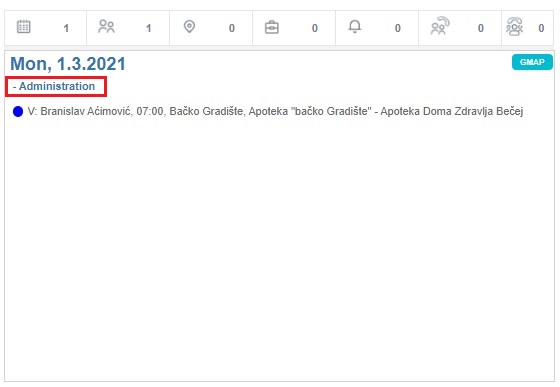
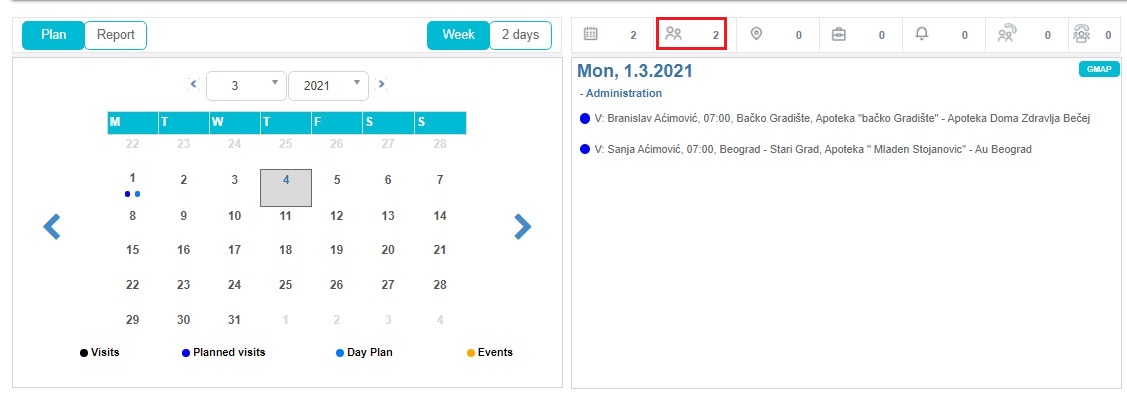
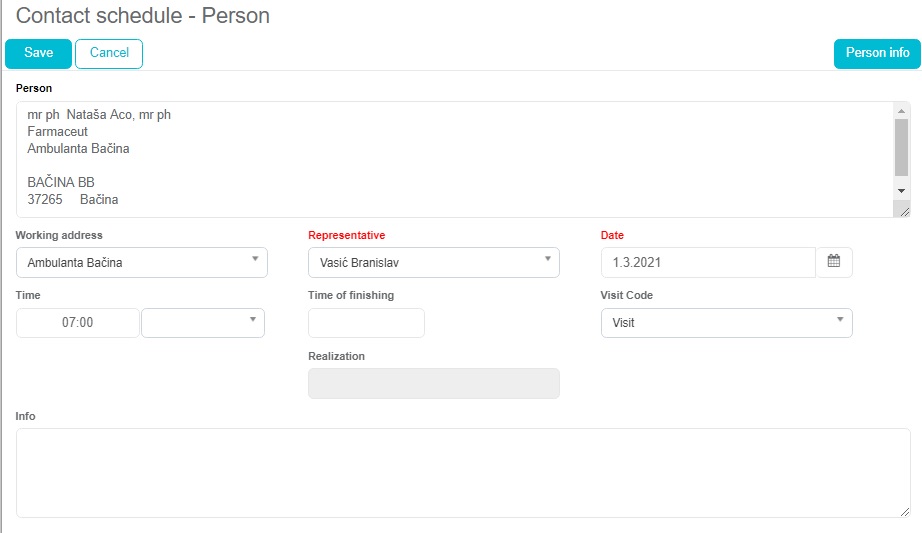
New form will open where you can enter data such as Date (by default it is set for today but it can be changed), Time, Visit code and Info. After entering all data, press Save button to save that plan. A new plan has been added to the calendar. If you click Cancel, data will not be saved. You can not add a Person plan for a day in the past. If you select a day in the past and try to add a new plan you will get an info message.
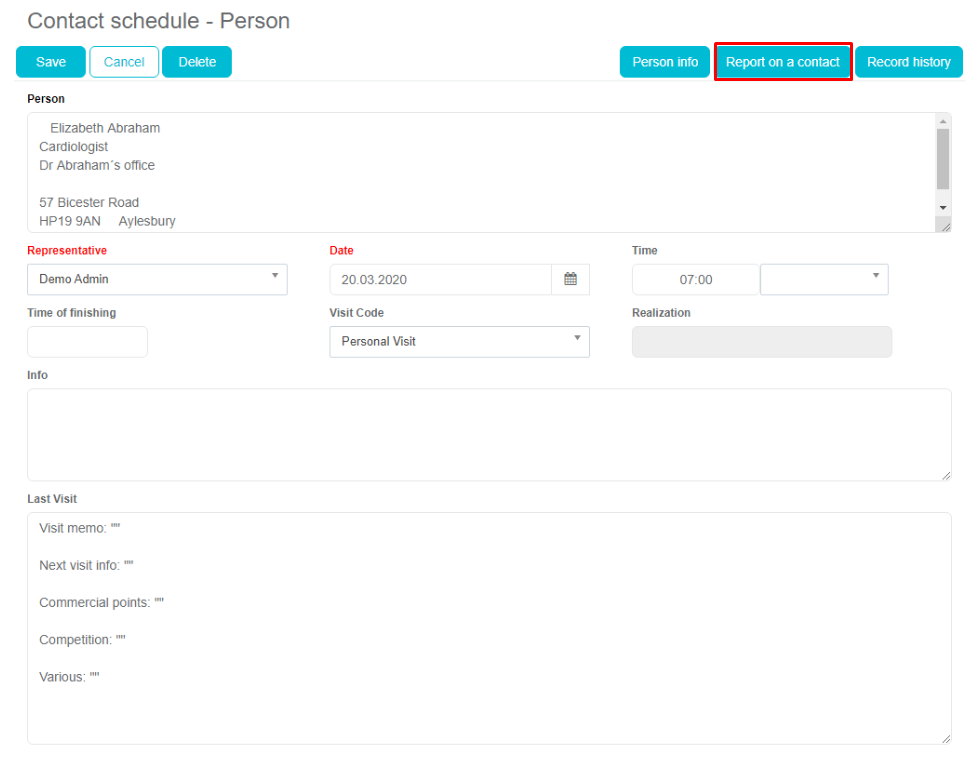
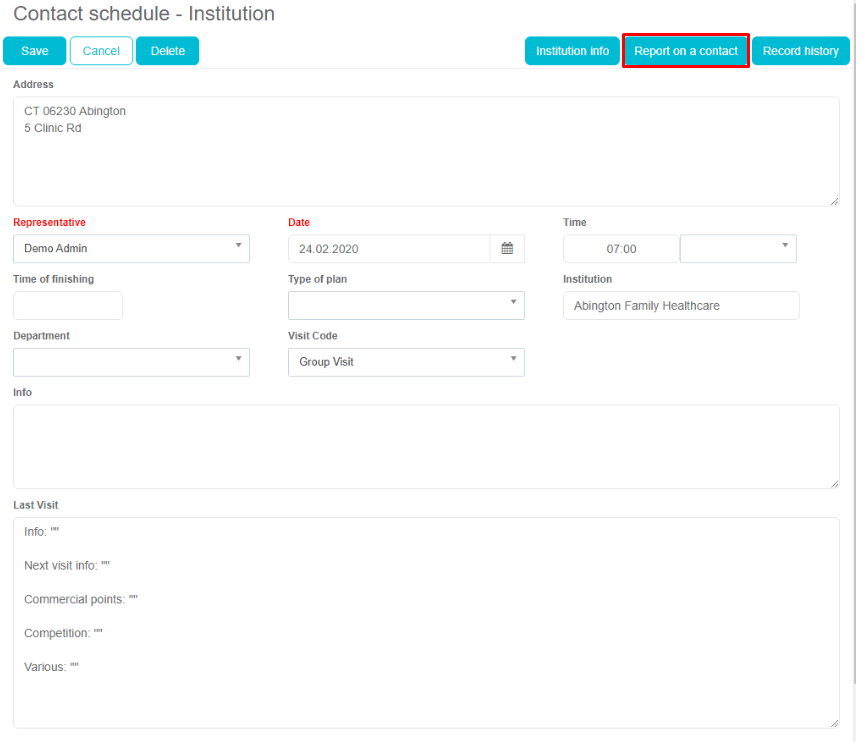
You can also make a report from plan by pressing on Report on a contact and a window for adding new report will be opened (adding a visit will be described in the following chapter). By pressing on the Person info button next to the Report on a contact button info for this person will be opened.
Institution plan
Select a day for which you wish to create a plan and press on the Institution button (third button).
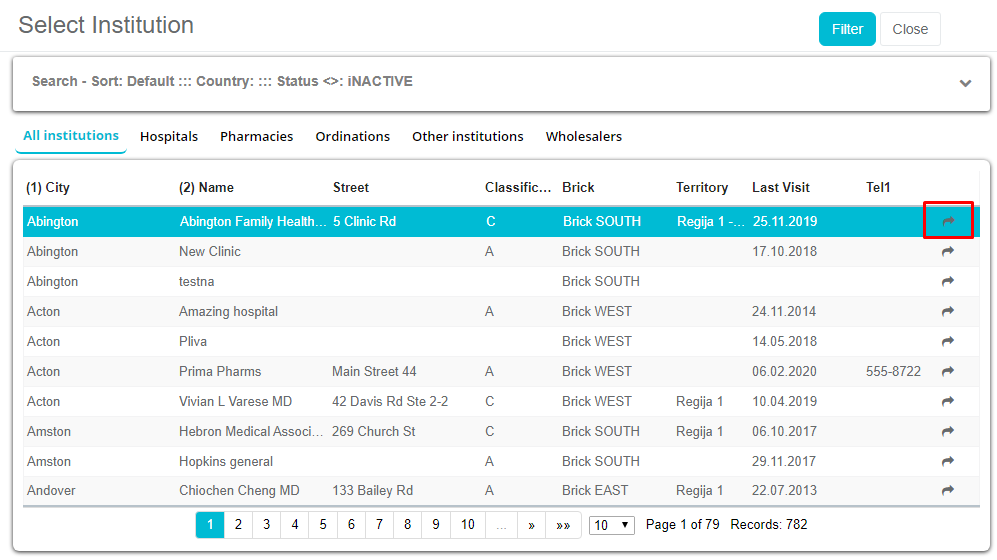
Then a new window will appear with a list of all institution in the database. To choose the institution you wish to enter in the plan select it and press on the Choose button.
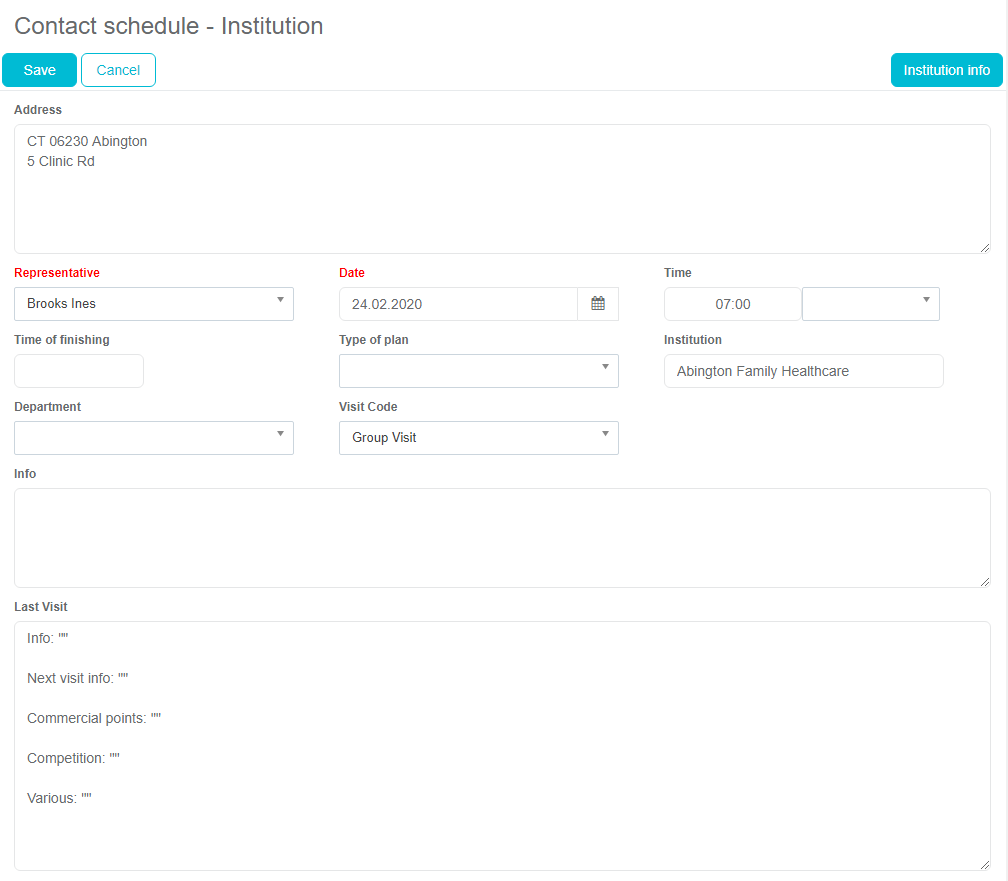
New form will open where you can enter data such as Date (by default it is set for today but it can be changed), Time, Visit code and Info. After entering data, press Save button to save plan. New plan has been added to the calendar. If you click Cancel, data will not be saved. You can not add a Institution plan for a day in the past. If you select a day in the past and try to add it, you will get an info message.
You can also make a report from plan by pressing on Report on a contact and a window for adding new report will be opened (adding a visit will be described in the following chapter). By pressing on the Institution info button next to the Report on a contact button info for this person will be opened.
Visit
Day report
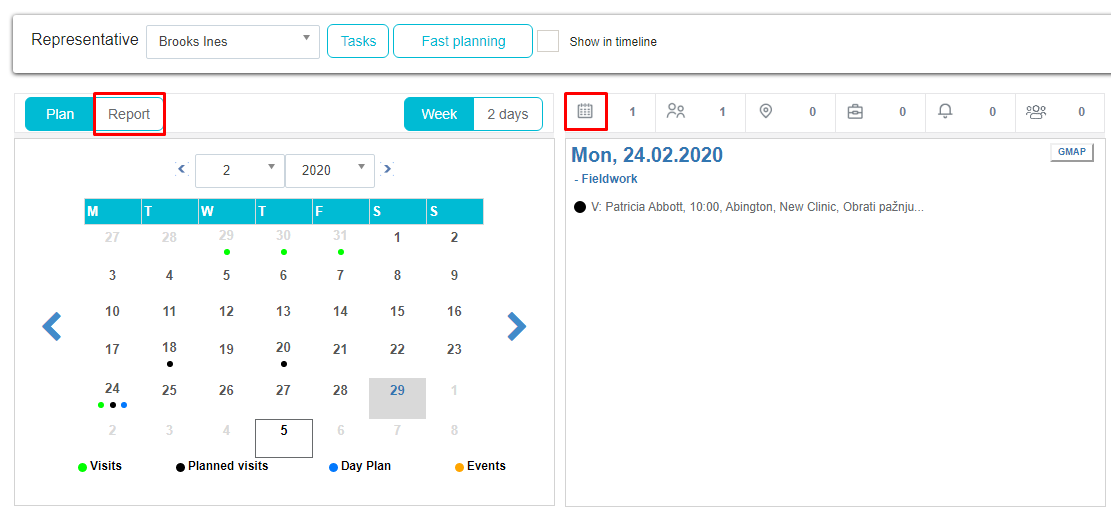
In order to enter a new day report, Report needs to be selected.
Then click on the calendar button (first button) in day for which you want to add a day report.
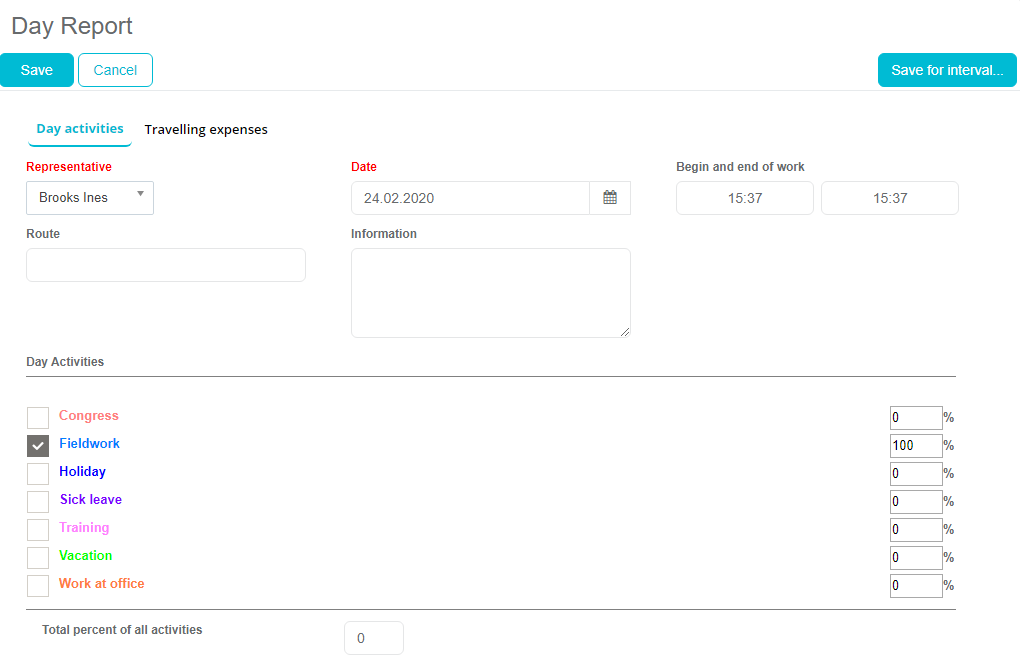
In Day report view you can enter Route, Info and Activities. Date will be automatically set for today but it can be changed. In bottom part of this window you can see Daily activities where you can select finished activity from activity list. Sum of all activities must be 100% (if percentages are not 100%, you will get warning message). When you have entered all the data press Save button and new Day report will be shown in calendar.
Person visit
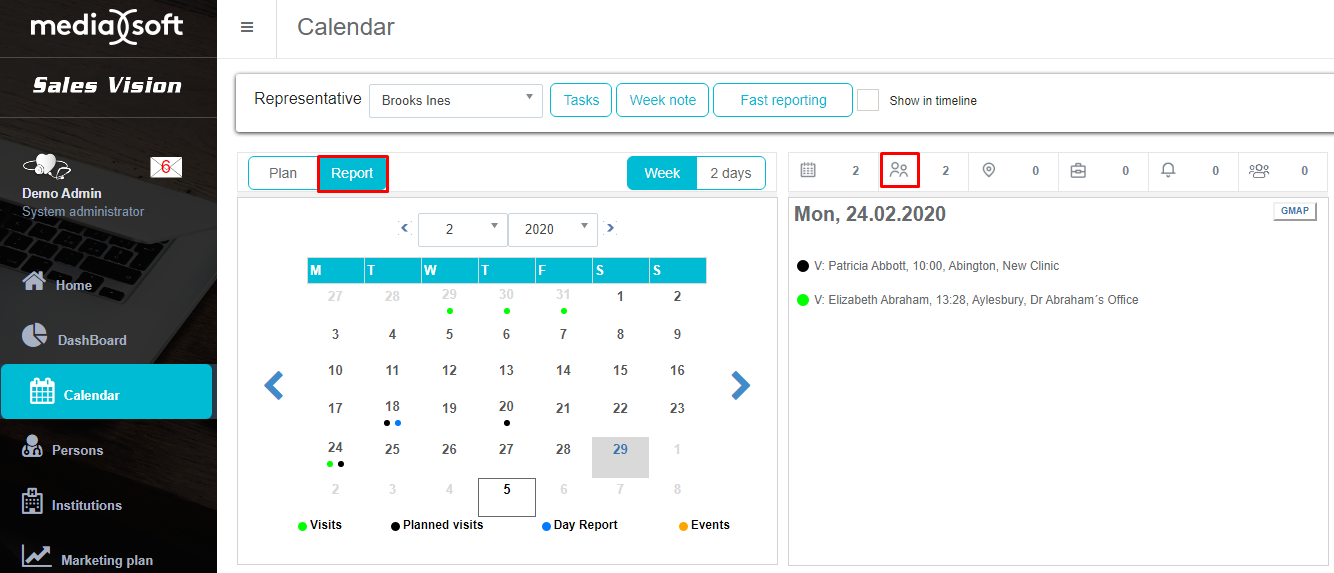
Select a day for which you wish to create a visit and press on the Persons button (second button).
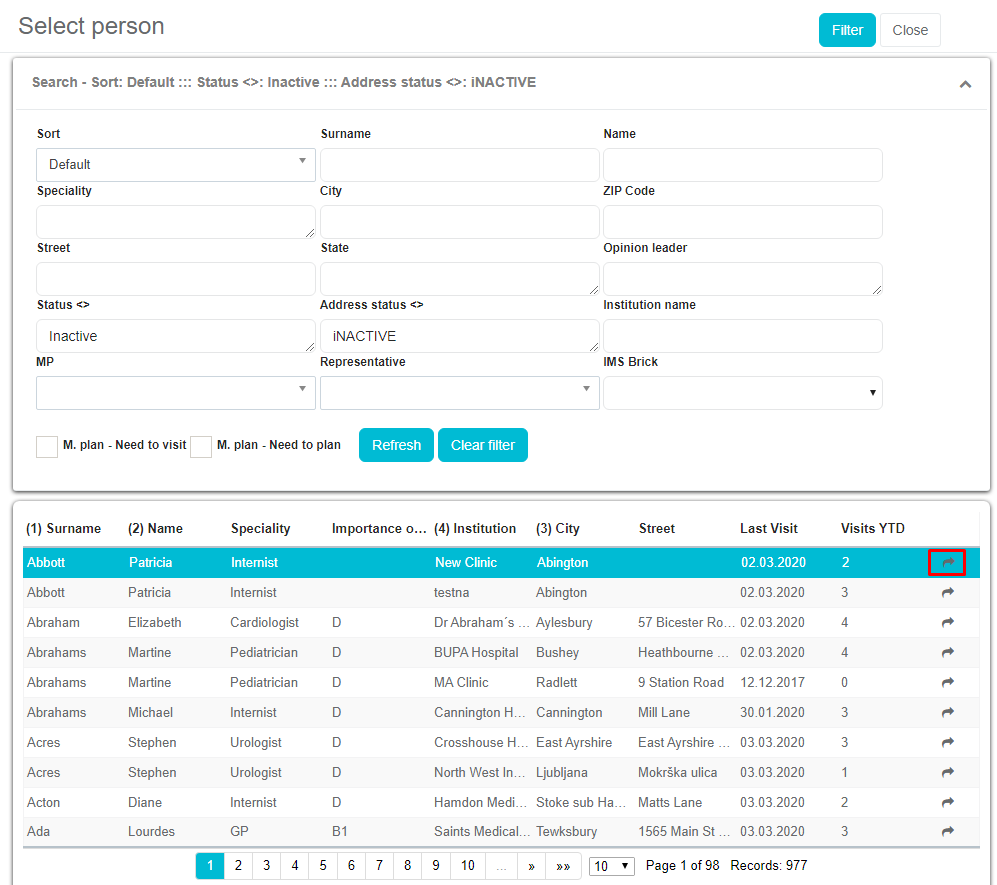
Window which opens contains a list of all the people who are in your database and for which you can create a report. A person can easily be found by using simple search at top side of screen, the same as in module Persons. In addition to simple search, you can use a more powerful search filter in the top right. You can also see how many results are found on bottom side of the screen. To view persons, use pages, button previous and next. After finding the desired person, click on Choose button in order to add a new visit.
Double visit
When double visit option is set up to Double visit type (576 This type of visit is double visit), then when user select himself as covisit inside visit plan, creator of the visit plan must see that this visit plan will be accompanied by covisit user. Info will appear only for the person or institution plan and on both calendars (creators and covisitors).
Blinking visit
New option must be created to be able to present digital marketing material (e-detailing) directly without pre-filing mandatory data to reporting the visit, and saving the visit automatically. New option will work only in case when visit is reported as, or from presentation.
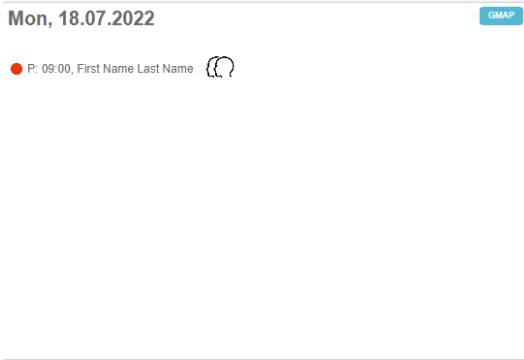
Users will be able to start the presentation from the plan, directly as visit or from the Storypad module. When presentation is started, user won’t receive any notification about missing data and visit will be automatically saved. Visit will blink in the Calendar and user will have possibility to fill out all missing data later.
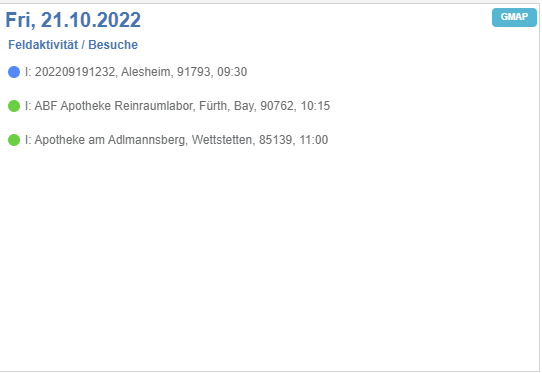
Visit will blink in case that data is not filled (as a warning) and day in the Calendar will be marked with red color as indication that for that day data is not reported fully. The text of the visit will be Italic. Day report will be created automatically if it doesn't exist. SR will be able to show CLM presentation even though the Day Report was not reported, because the CRM will save Day report type defined in the option 9.
Visit will be also saved automatically without any need to fill out mandatory fields (products, etc.) and visit type will be one from option 5 or 12. Day report type: from option 9 – Working day Visit type: from options 5 - Initial type of visit or 12 - Initial Type of Group Visit Day report can be edited after the presentation to be able to include any other type of the activity for the day (like office work, etc.) These visits won't have any limitations (number of days for entry) since visit must be edited. Until all data is reported, visit will be colored in red in both cases (when realized from plan and directly without plan). In case that visit was realized from plan, color (green by default) of plan won’t be changed. The visit will change to green in "Plan" to visualize which customer was visited even though the visit report was not completed fully, but in "Report" the visit will be still in red, because the visit report was not completed.
If the visit was not part of the Plan, the visit will not be showed in the "Plan tab" of the Sales Rep, but it will be showed in the "Report" tab highlighted with the defined color by the Local Admin (usually black in the case of Germany, or blue in the case of Russia) when the visit report was completed. If the visit report was not fully completed, it will be showed in red, same as visit reports not fully completed from the Plan.
At the beginning of synchronization process (iPad only since web doesn’t have synchronization, works online), warning messages will be implemented if there are visits that are not reported fully (blinking visits).
“There are visits that are not fully reported! Please fill out the data because these visits won’t be shown in the statistics.” The visit date will be disabled for editing so the user can't "cheat".
Visit info
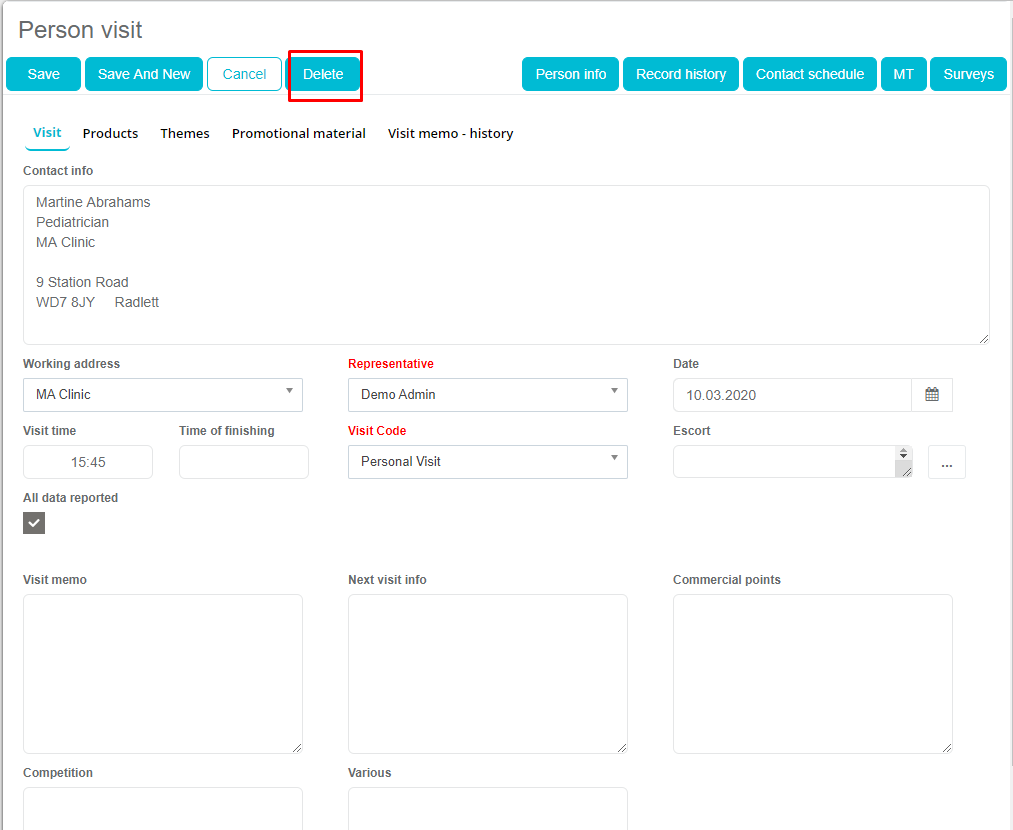
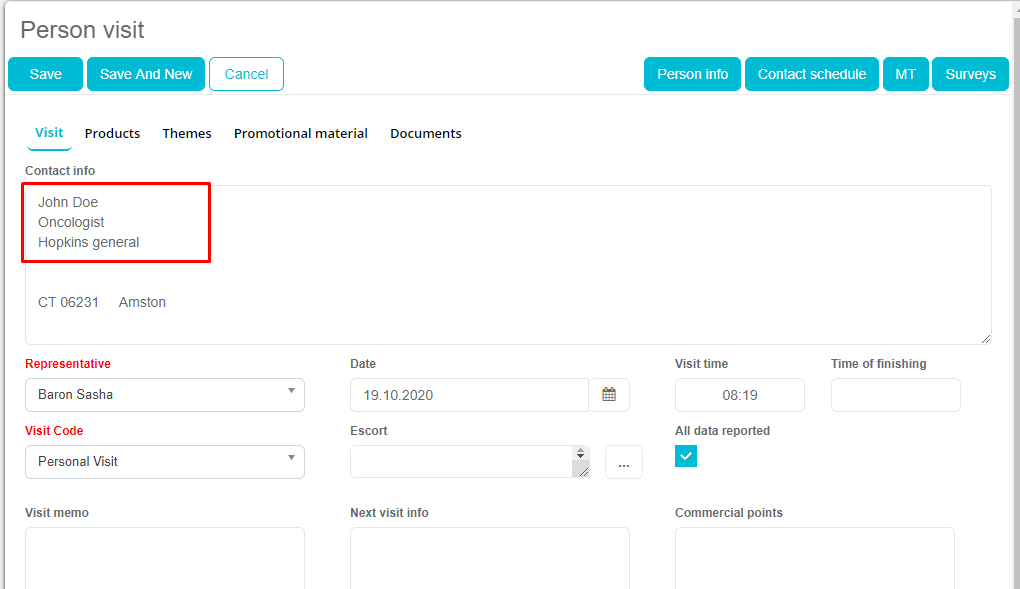
Here you can enter data like Person, Visit code, Date (by default it is set for today but you can change it), Time, Info and similar. On top left side there is Save and new which is used for making fast visit. When you click this option, it will automatically save current visit and open a new clear window.

When you are making visit to person there is a more options which are not in plans. They can be found on top right side. By pressing on a Person info button, info for this person will be opened. Another one is Contact schedule which is making a plan from this report (adding a plan was described in previous chapter). Third one is MT which is used to enter microtargeting for that person. Next one is Surveys where you can enter new survey for that person. Last one is Tasks, where you can see the tasks for the person you are creating visit for. Additionaly, except all options on top right side, we can see four tabs at top of window. Visit tab is shown by default and it is main part.
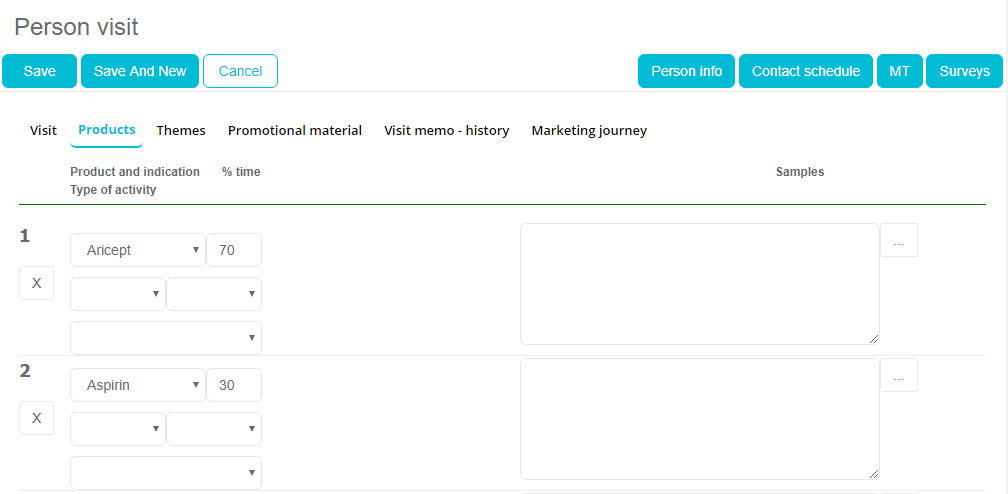
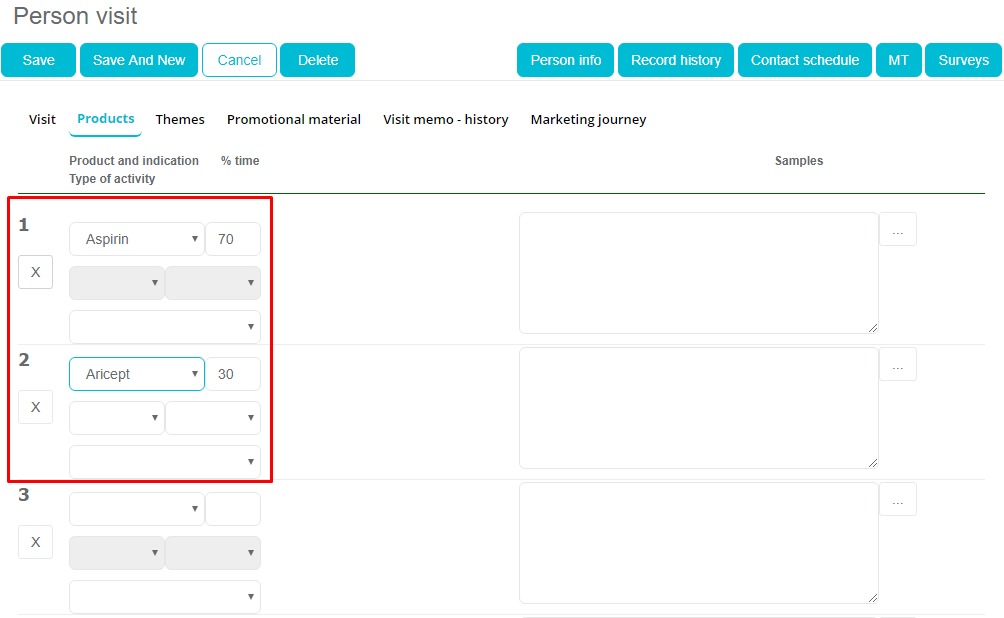
Products
Second tab is Products where you can select products. Mark products, materials and samples that you have talked about during the visit. Choose one or more products from the drop down list. When product is selected, percentage will be shown. This percentage represents the % of total visit time in which you have spoken about some product. Values are set by default but you can change them manually by pressing on value and entering a new one. When all data is entered press Save button. If you do not select products total sum of 100% and you try to save entry, you will get info message.
In addition to every product that you have presented, info about gifts given to the person can be entered. Gifts must be entered in Sales Vision by the administrator for a related product before you can list it in the visits. Simply click on the “…” button under Gifts and it will open a list of gifts. Then you just need to choose gifts. Additionaly, info about materials that were given to the person can be entered. Materials must be entered by the administrator for a related product. Simply click on the “…” button under Materials and list of materials will be opened. Then you just need to choose the same. In addition to every product that you have presented, info about samples that were given to the doctor can be entered. The same as for Gifts and Materials, administrator must enter sample and you just need to select them. Also, we can enter additional info related to the product for the person you are visiting writing in field below products.
Gifts, Publications and materials
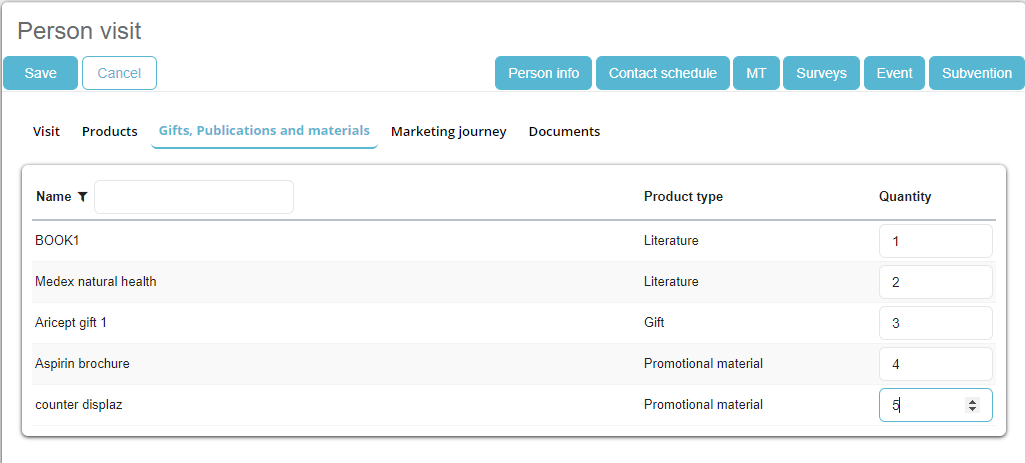
There is a new tab named Gifts, Publications nad materials that shows the name of the product that has been used during the visit. It also contains the Product type column that can have following types: Literature, gift and Promotional material.
Institution visit
Select a day for which you wish to create a visit and press on the Institution button (third button).
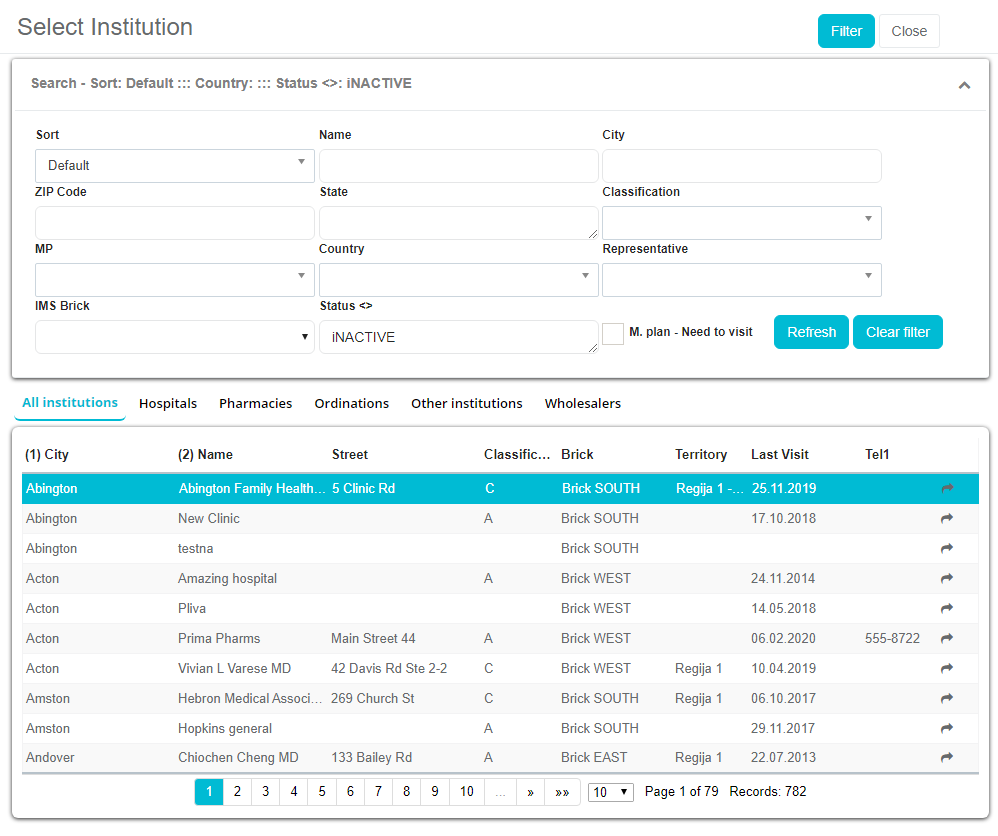
Window which opens contains a list of all the institution that are in your database and for which you can create a report. An institution can easily be found by using simple search at top side of screen, the same as in Institution module. In addition to simple search, you can use a more powerful search filter in the top right. You can also see how many results are found on bottom side of the screen. To view institutions use pages, button previous and next.
After finding the desired institution, click on Choose button in order to add a new visit.
Here you can enter data such as Institution, Visit code, Date (by default it is set for today but you can change it), Time, Info and similar. On top left side there is Save and new which is used for making fast visit. When you click this option, it will automatically save current visit and open a new clear window.
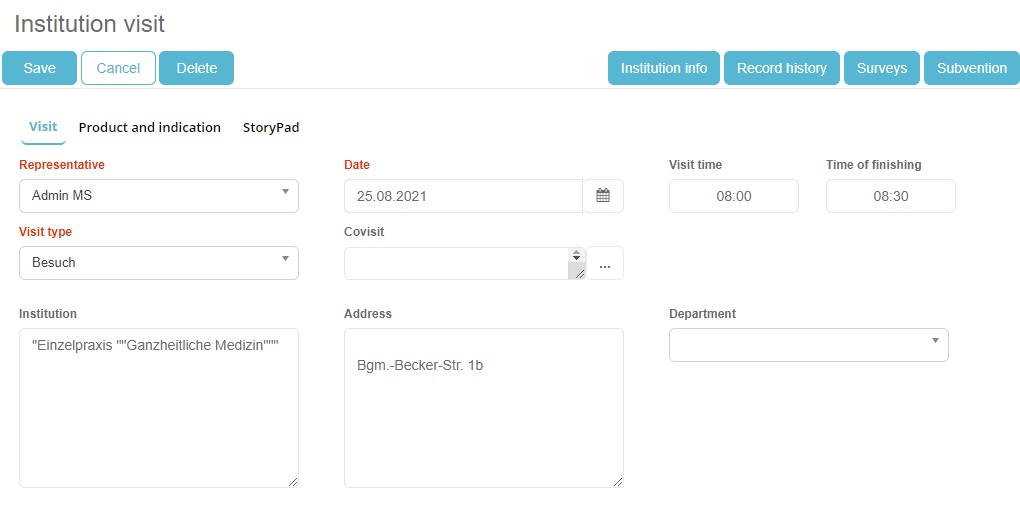
When you are making visit to institution there are more options which are not in plans. They can be found on top right side. By pressing on a Institution info button, info for that institution will be opened. Another one is Contact schedule which is making a plan from this report (adding a plan was described in previous chapter). Third one is MT which is used to enter microtargeting for that institution. Next one is Surveys where you can enter new survey for that institution. This options will be described later in Institution module. Last one module is Tasks, where you can see tasks for institution you are creating visit for.
Additionaly, except all options on top right side, we can see four tabs at top of window. Visit tab is shown by default and it is main part.
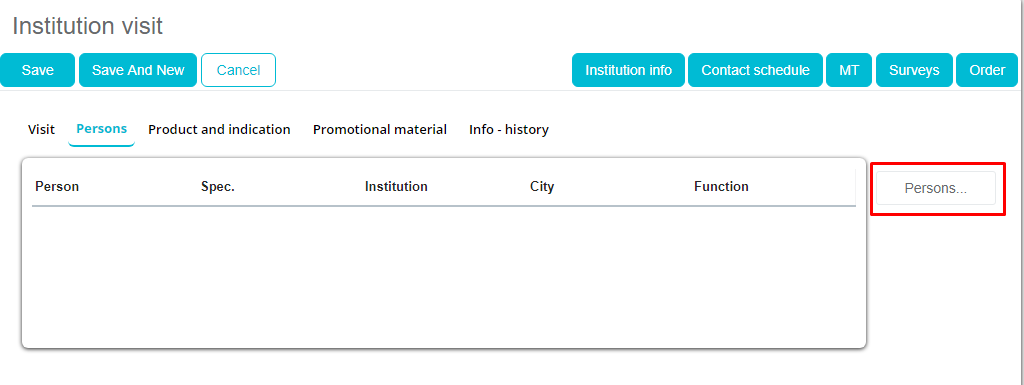
Person
Second tab is Persons where we can add persons that are in institution that we are making visit for. To add them, click on Add person button and new window will open with the list of all the persons who works in that institution.
Select the person and it will appear in the Selection box. After selecting wanted persons click Confirm to confirm the selection. Filter is also available the same as in Person module.
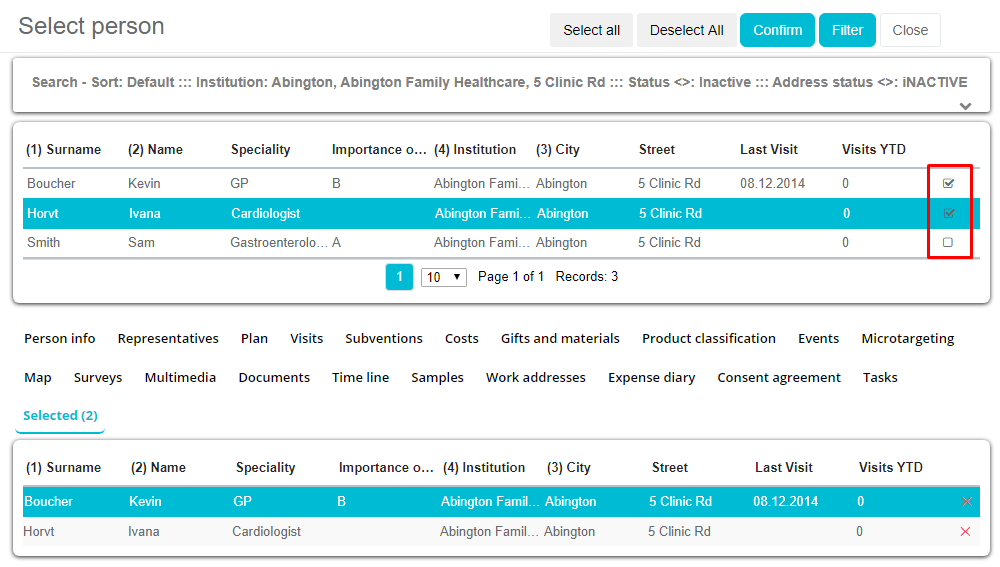
Persons are added to the list with informations about them.
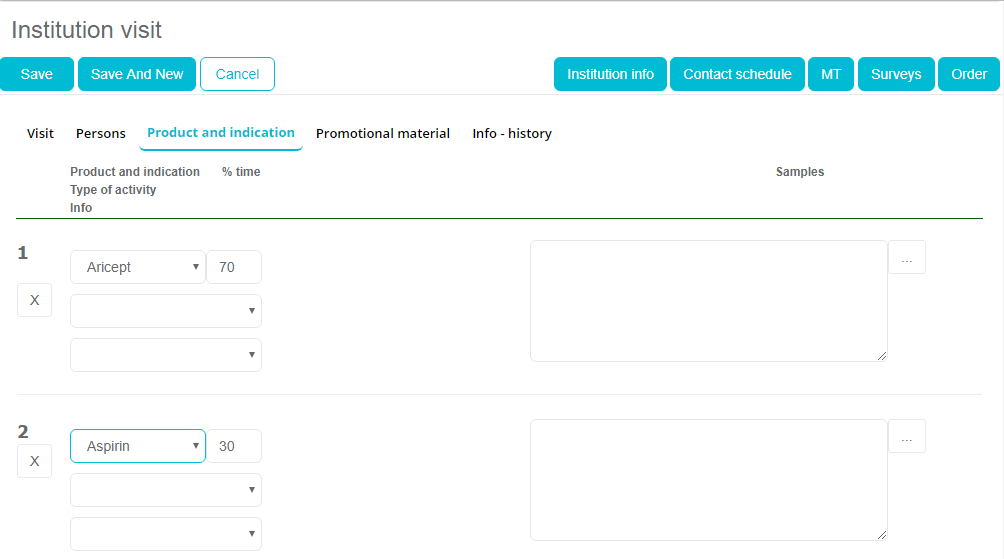
Products and indications
Third tab is Product and Indication where you can select products, materials and gifts and enter informations about them. Choose one or more products from the drop down list. When product is selected, percentage will be shown. This percentage represents the % of total visit time in which you have spoken about some product. Values are set by default but you can change them manually by pressing on value and entering a new one. When all data is entered press Save button. If you do not select products total sum of 100% and you try to save entry, you will get info message.
After entering all data, press Save button to save that visit for this institution. A new visit has been added to the calendar view. If you click Back, data will not be saved. You can not add a visit for an institution for future. If you select any day in future and try to add a new visit you will get an info message.
Gifts, Publications and materials

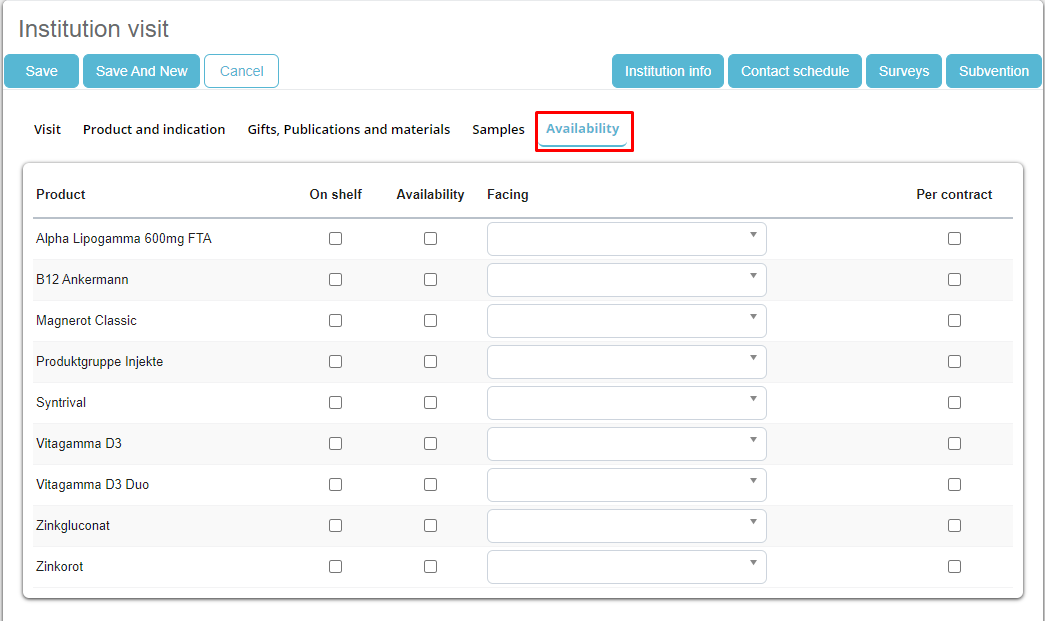
Availability
Refers to the changes depending on the stock. It is a new tab available on the Institutions visit.
Editing and deleting plans and visits
If you want to edit plan or visit you need to press on existing record, change desired data and press the Save button. Window for editing is the same as for adding. To delete plans or reports click on existing data and in opened window press on Delete button on top left side. Be careful with deleting because you can not return back.
Fast planning and reporting
Along with standard procedure for adding new plans and visits to persons and institutions while using calendar module, you can create visits and plans using Fast planning and Fast reporting option. For adding plans you have to be on plan tab on calendar and for visits you have to use visits tab. The same as for standard plans and visits. But then click on Fast planning/reporting button and list of persons in your database will appear.
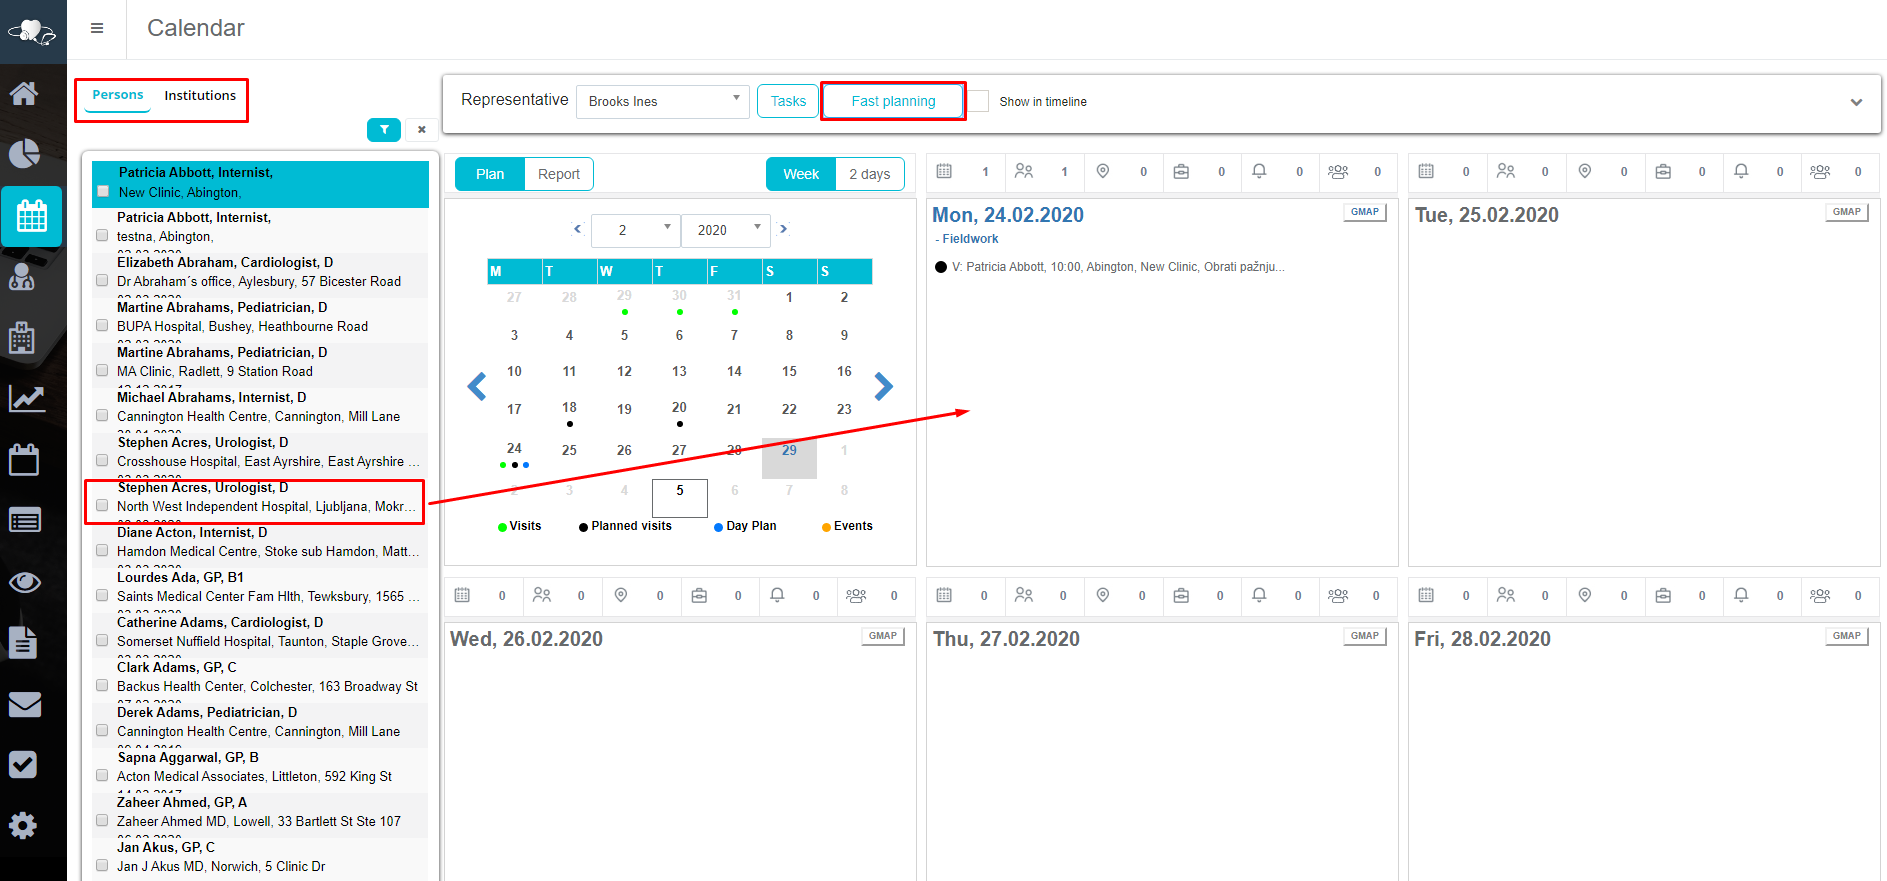
Select a person you wish to add plan/visit for and simply drag it while holding the right click to the day of the week you want and plan/visit will automaticaly create. Same process is when adding institution plan/visit, but use button institution on top side of fast planning/reporting window.
Other activities and options
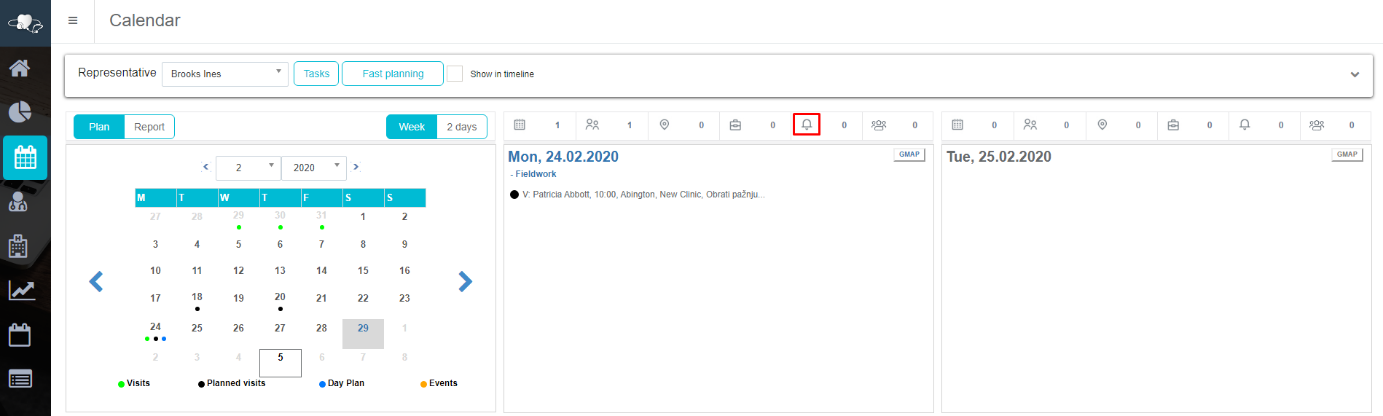
Event
In the Calendar module you can add a new Event. Select a date in your calendar and click on bell button, as shown on the picture, and a new window will open.
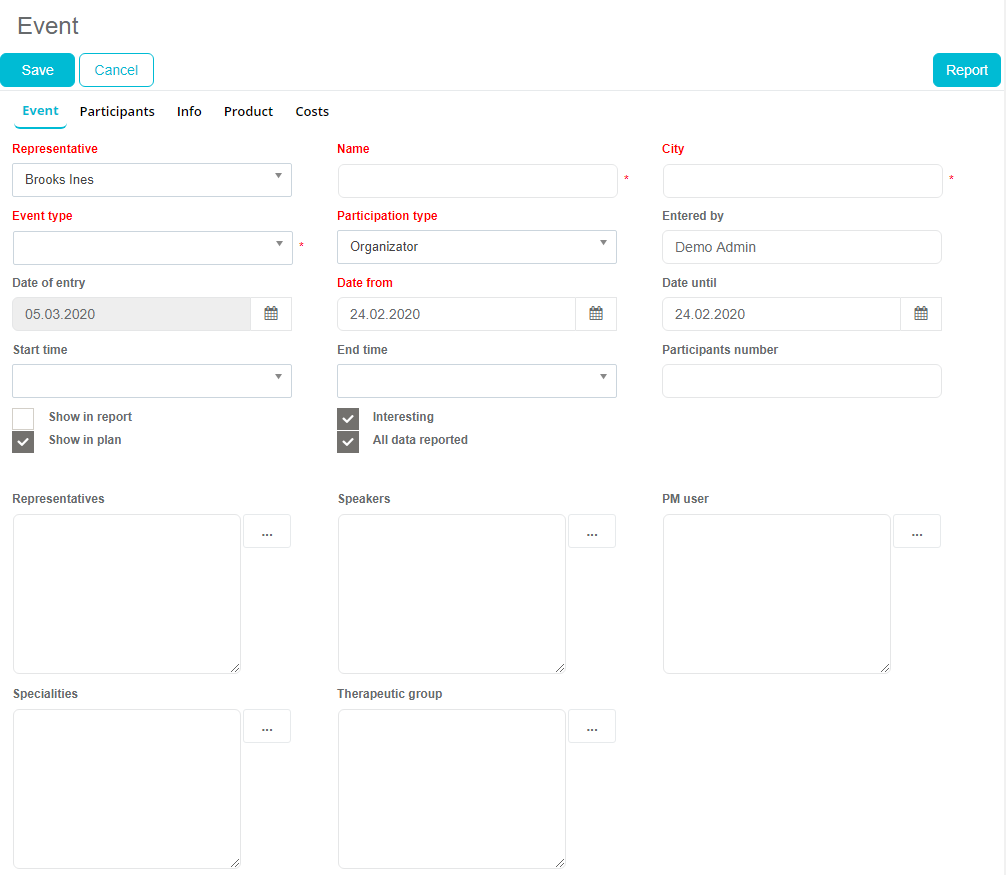
In event view enter all basic data for the event you wish to add. Fields Name, City, Event type, Participation type and Date from are mandatory, when others are optional, like Speciality. For event you can choose to be visible in plan, report or both for the entered date. You can also add representatives that are going to the event by clicking “…” next to Representatives field, and also you can define Specialties on the same way.
Participants
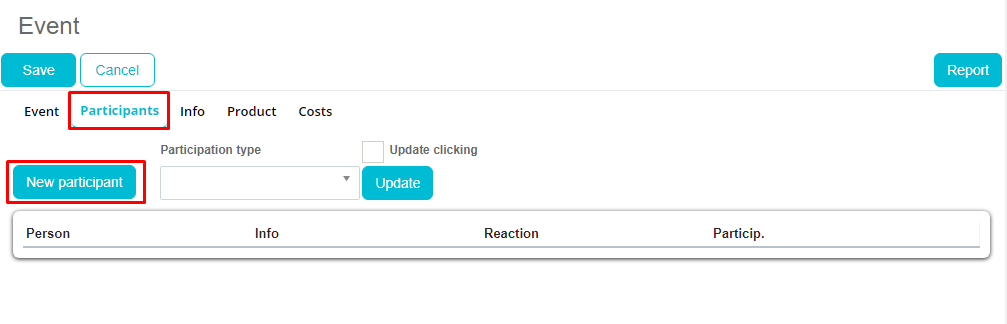
To add a persons that will be present, press on Participants button in the top part of the window and than click on New participant.
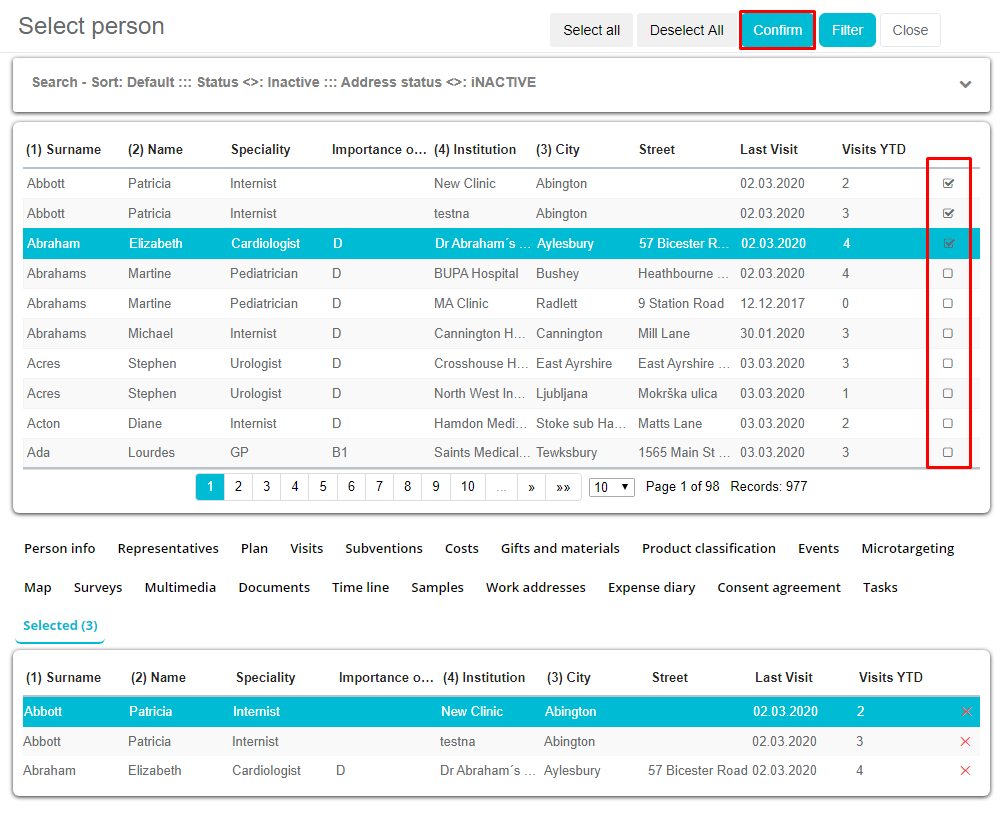
New window will open, with a list of persons. You can use the filter option for more sophisticated search. Select the person and it will appear in the Selection box. After selecting wanted persons click Confirm to confirm the selection.
Persons are added to the list with informations about them.
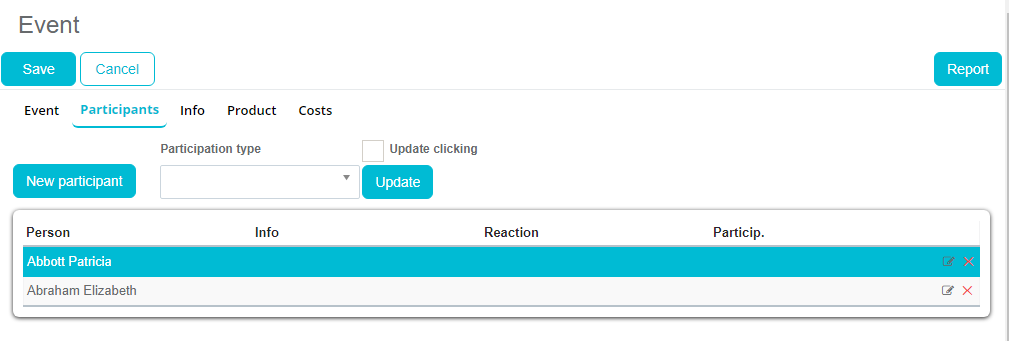
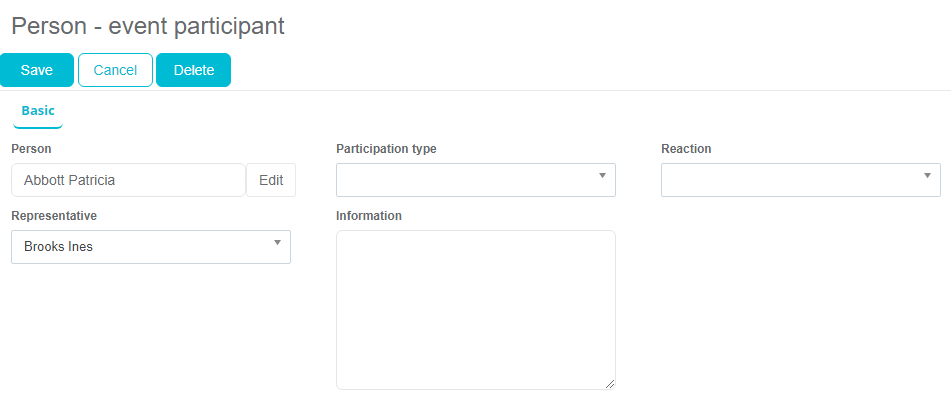
List of participants will appear. If you click on the participant you can update data, like person’s reaction, satisfaction or enter additional information.
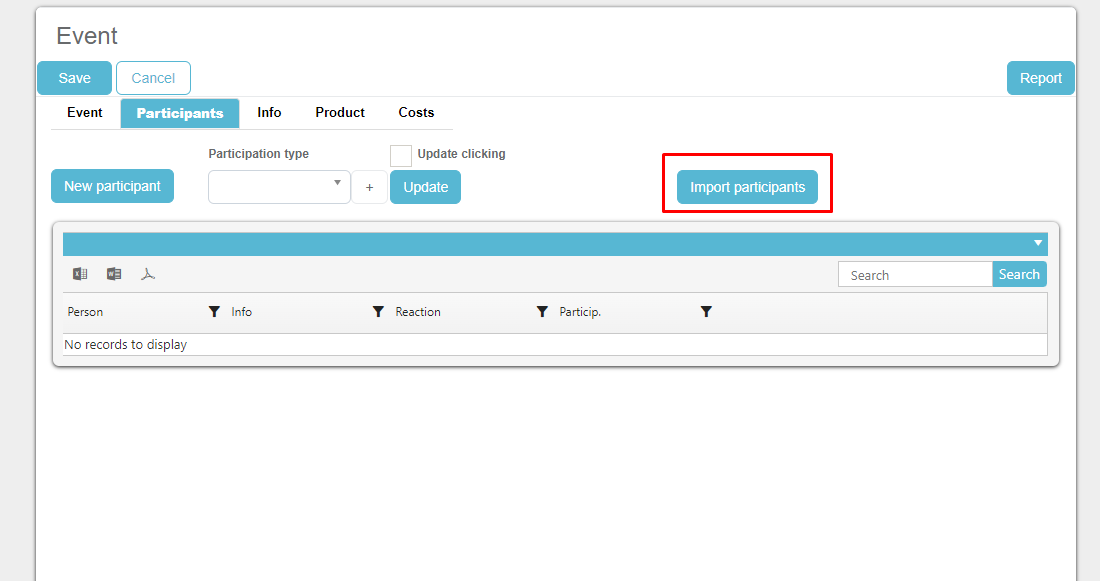
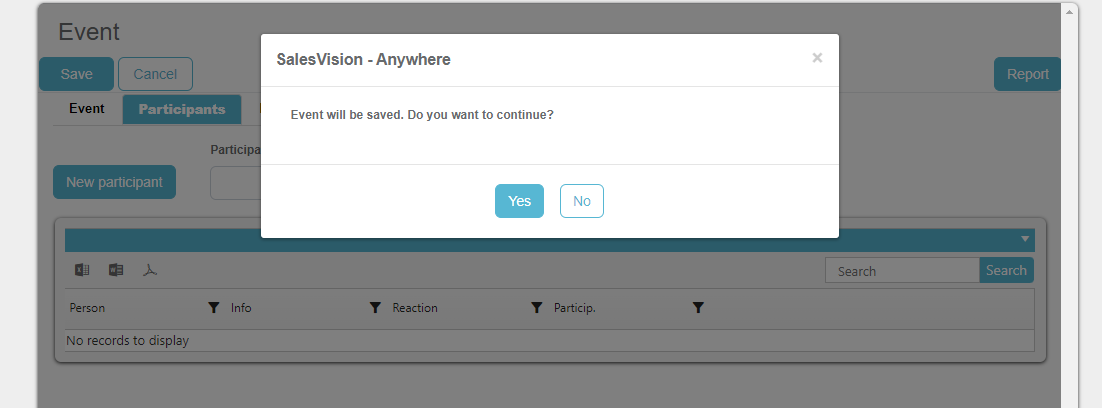
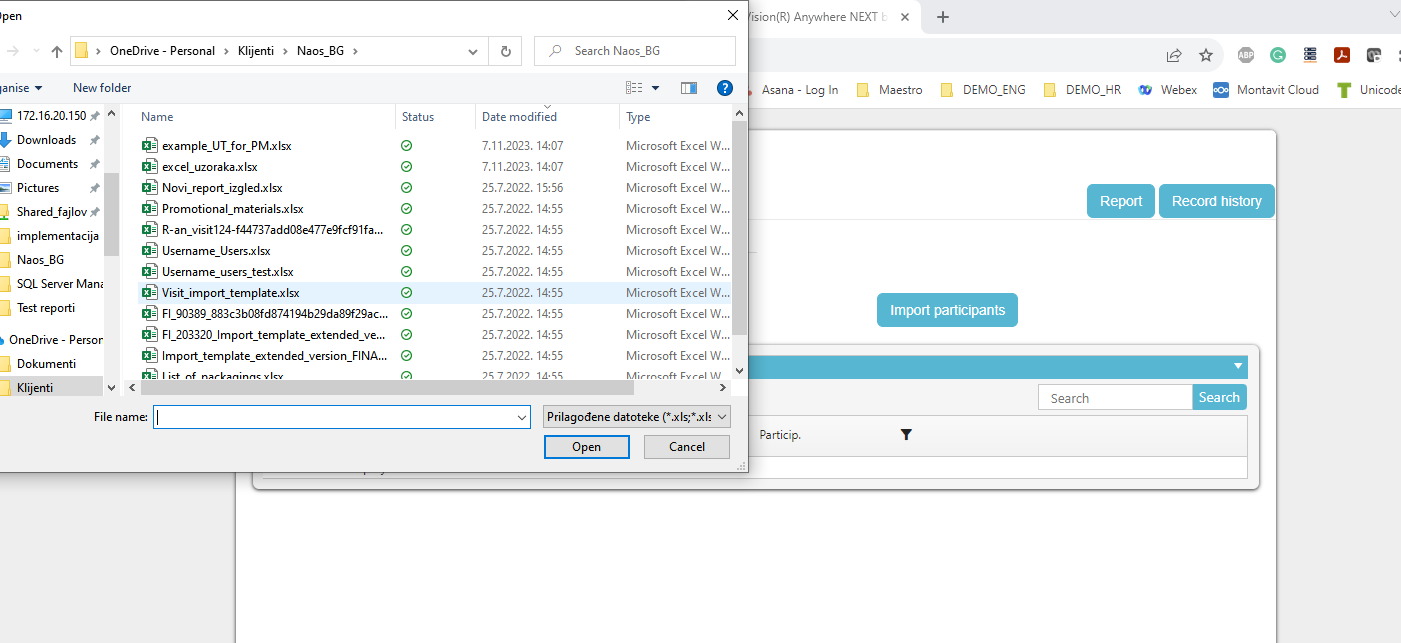
Import participants
We have added a possibility, when creating an event, that button IMPORT PARTICIPANTS is initially visible. To be more precise, we have added a popup message that this event will be saved.

Info
Under tab Info you can enter comments and description for an event.

Product
Tab products are use to define which products are presented at the event, were there any gifts, publications or materials.
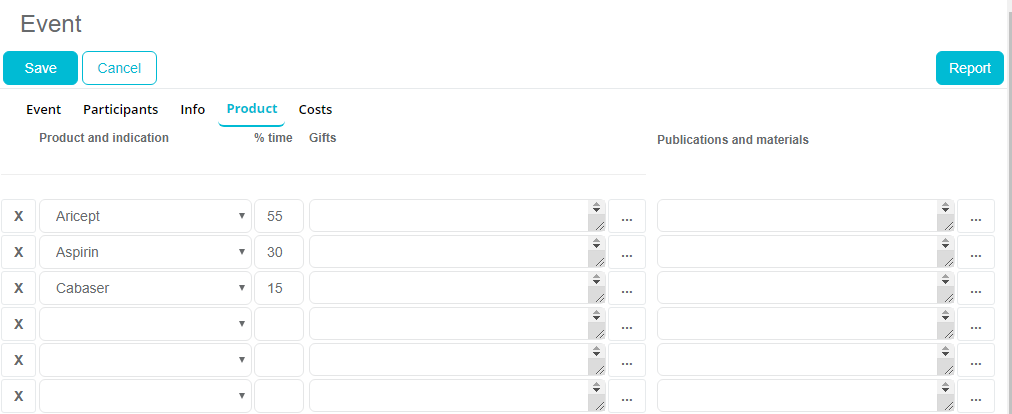
After entering all data, press Save button and event will be visible in the calendar.
Once, you have created Event, in our newest feature of SV Anywhere you can also add Documents on the Event (picture bellow).
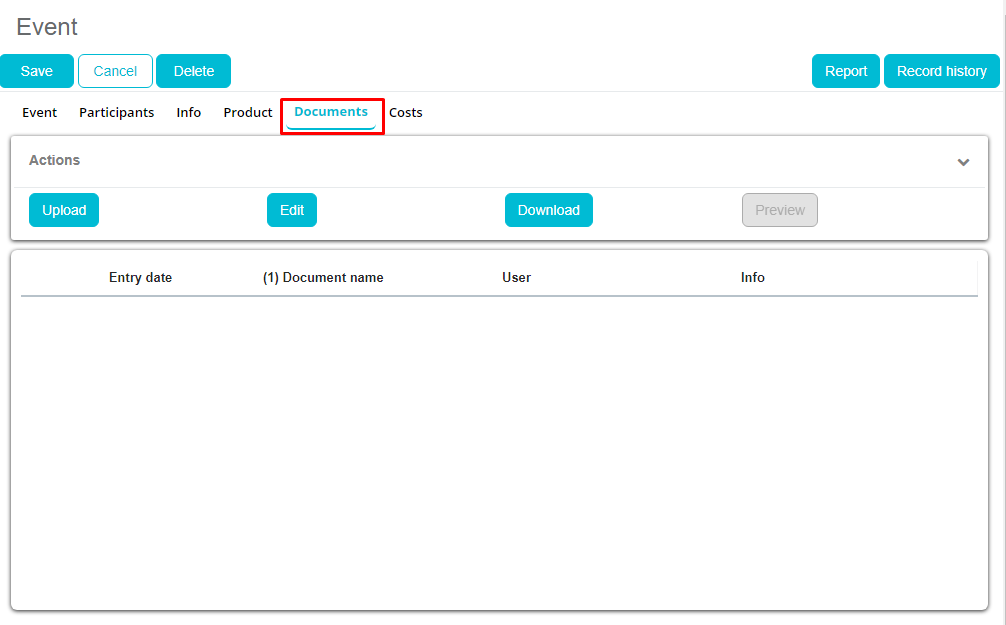
Here you can see action buttons like Upload, Edit, Download and Preview. Upload button is used to choose file from your computer, any type of file. Edit is used for editing files that you have uploaded. Download button is used to download files and Preview button is used to see what type of file is uploaded.
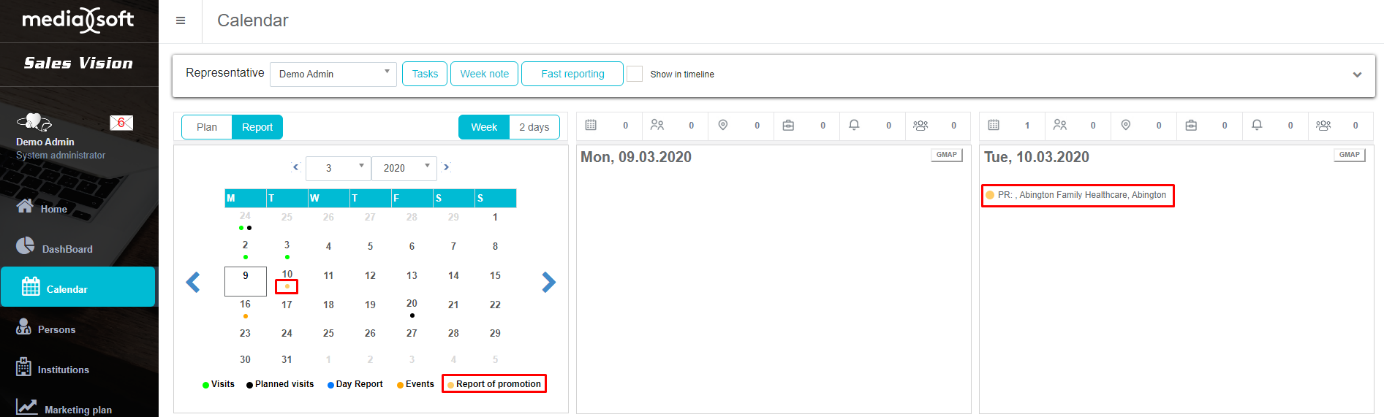
Report of product promotion
This is an option that is avaliable only if option 629 is activated in SV AnyAdmin. In this module you can while adding new Event, add Report of product promotion. This module is used for detailed description of promotion of product while visiting persons/institutions. When you open Event you can se button in the right top corner Report of product promotion. When you click on it, new window will be open.
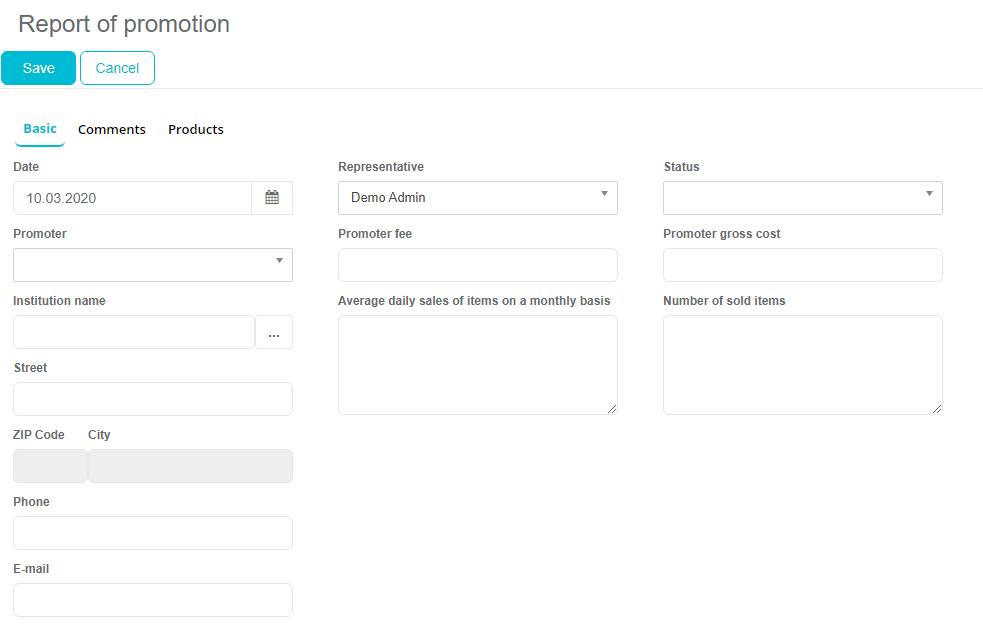
When you click on tab Basic, you will see basic details about report, like date, promoter,promoter fee, promoter gross cost, number of sold product ect.
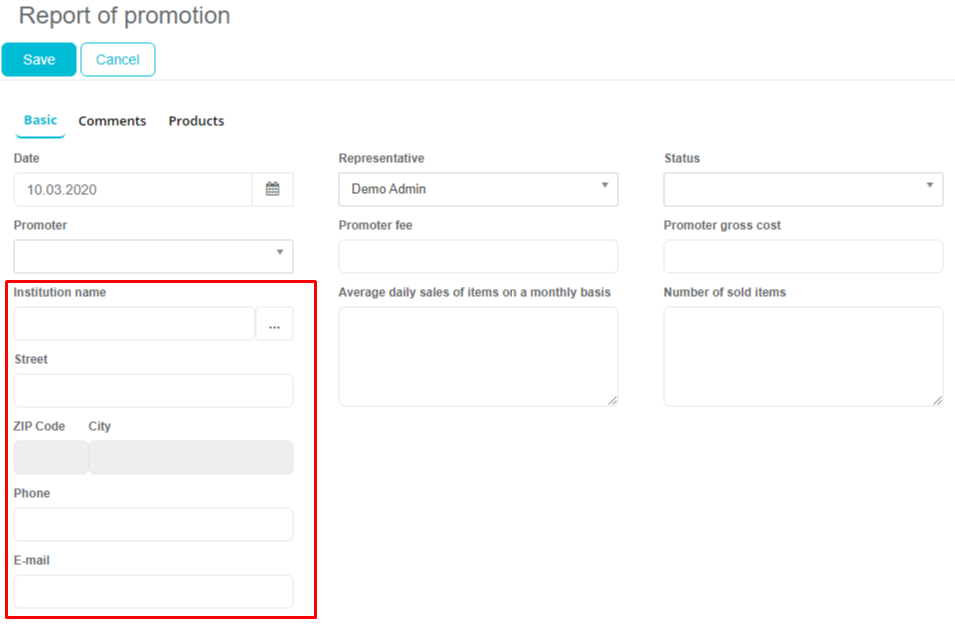
One thing that needs to be highlighted is if you want to change Institution name, Street, Phone, E-mail, this change will be applyed on that institution under module Institutions.
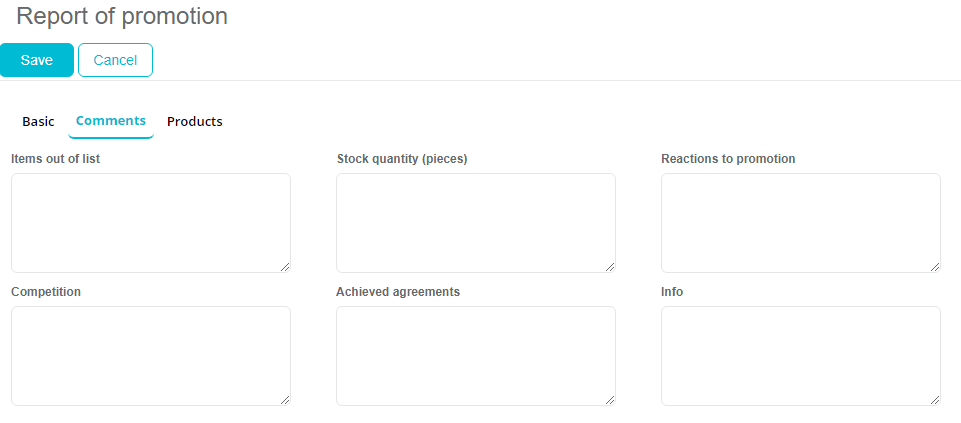
When you click on tab Comments you will see fields filled with comments about products out of list, stock quantity, reactions to promotions ect.
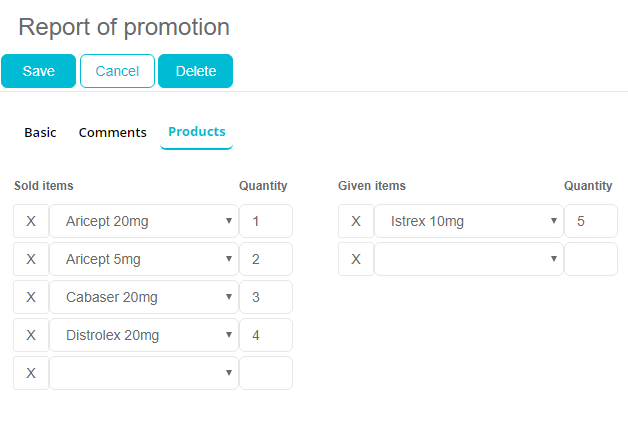
Last tab is Products where you can see all the products and their quantities which were sold/given in this Event.
Other activities
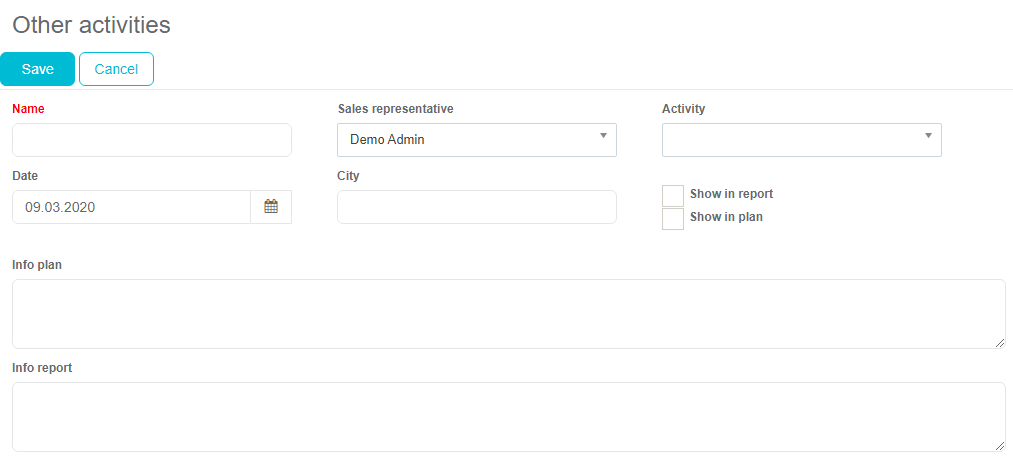
To add another activity that could not be defined as visit or event, press New other activity button (fourth button). A new window will open, after you fill in all the data, press Save button to save this new activity.
Field Name is mandatory and others are optional. Activity is very simple data where you can easily enter information and save it.
Supervision
You can enter new supervision by pressing on last button in calendar. This will open new form for entering Supervision. Another possibility is to add supervision via Marketing calendar module that wil be explained later.
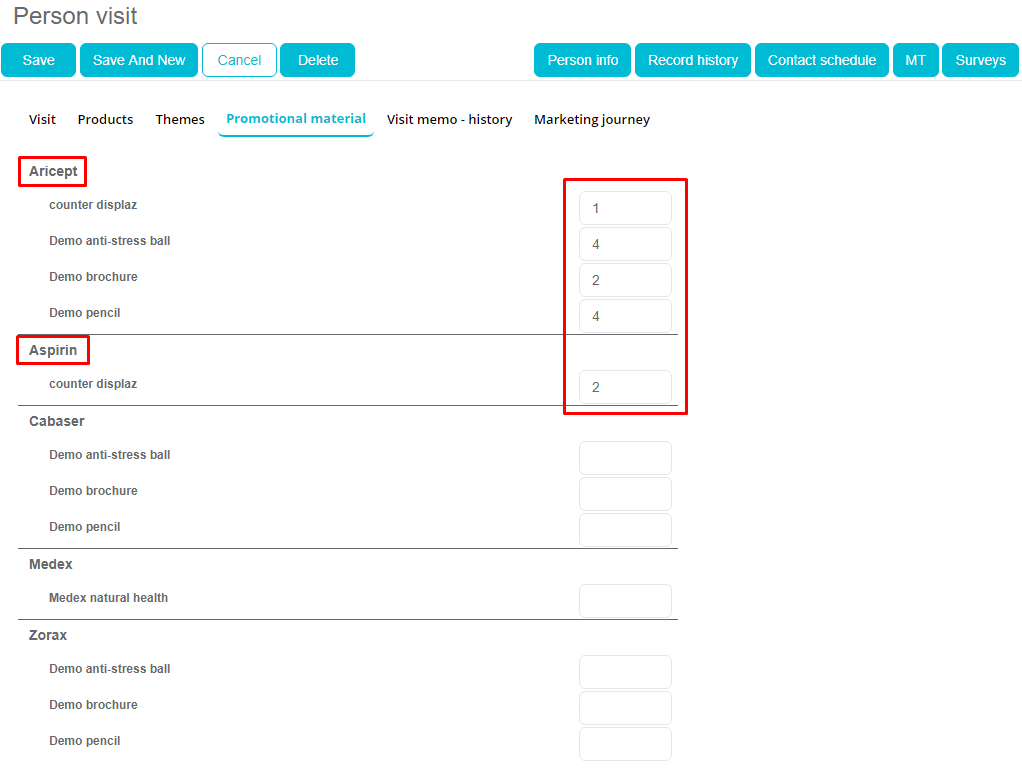
Promotional materials
Promotional materials can be added using new tab that has been added when visiting a person and an institution where user can add number of promoted materials. By adding quantity to text box of materials (maximum number can be defined Administrator), automatically tab of promoted products will be filled with products (except for the products defined in Admin as general products).
If deleting product, all promoted materials linked to deleted product, will also be deleted.
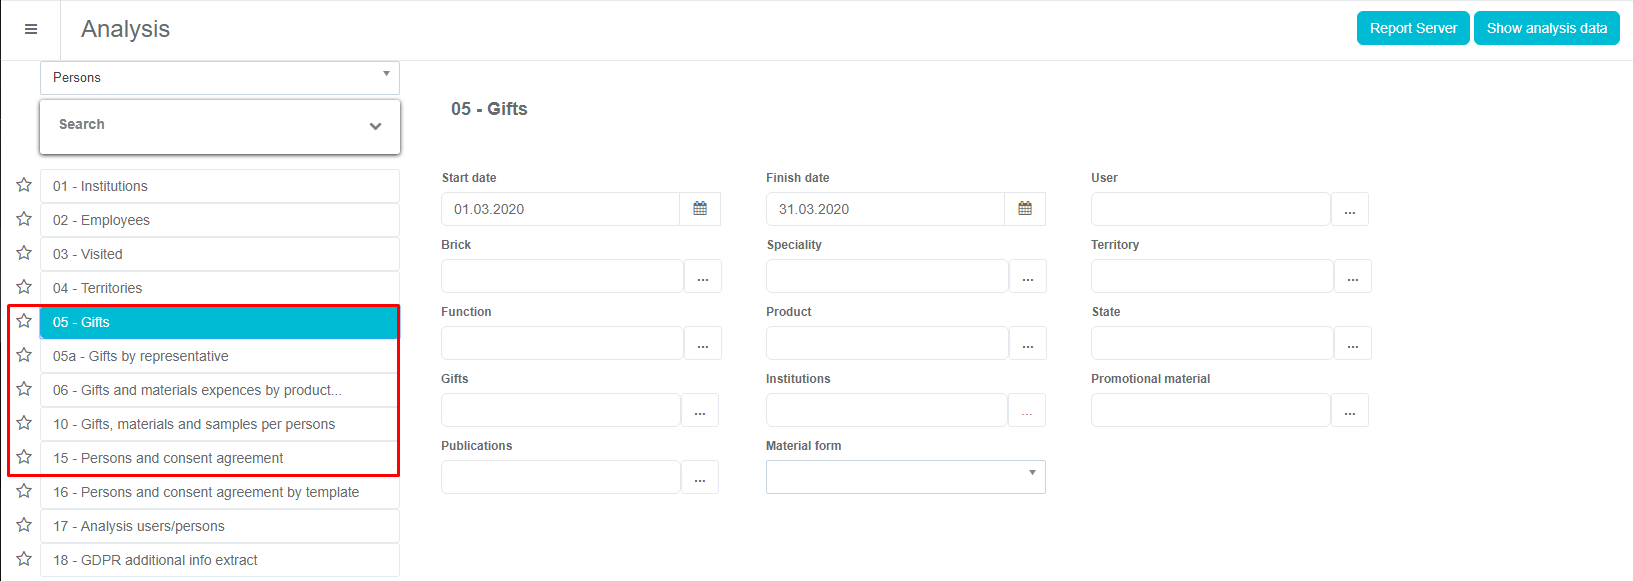
Additionally, analysis regarding gifts and promo materials have been changed to work in accordance with new funcionality.
Week note
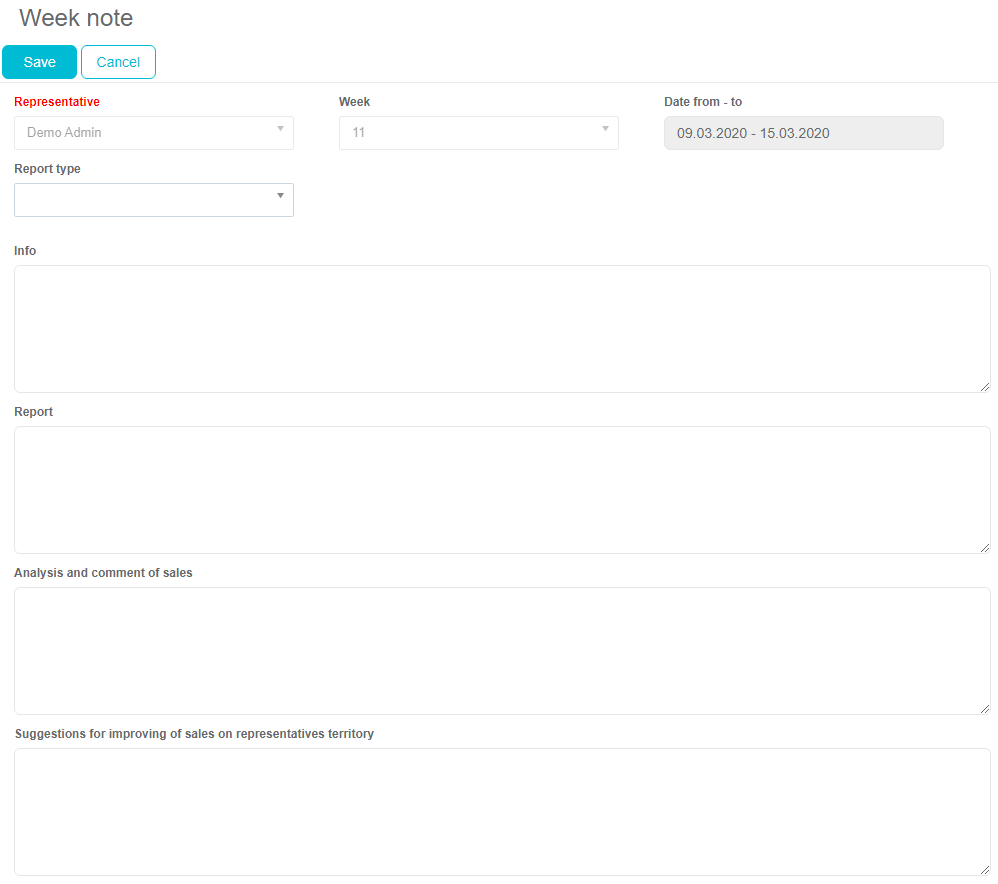
A Week note is a module where representatives can write different week notes and info. To access it, press Week note button on calendar next to Fast reporting.
Week note is very simple data where you can easily enter information about week tasks and „to do“ things and save it.
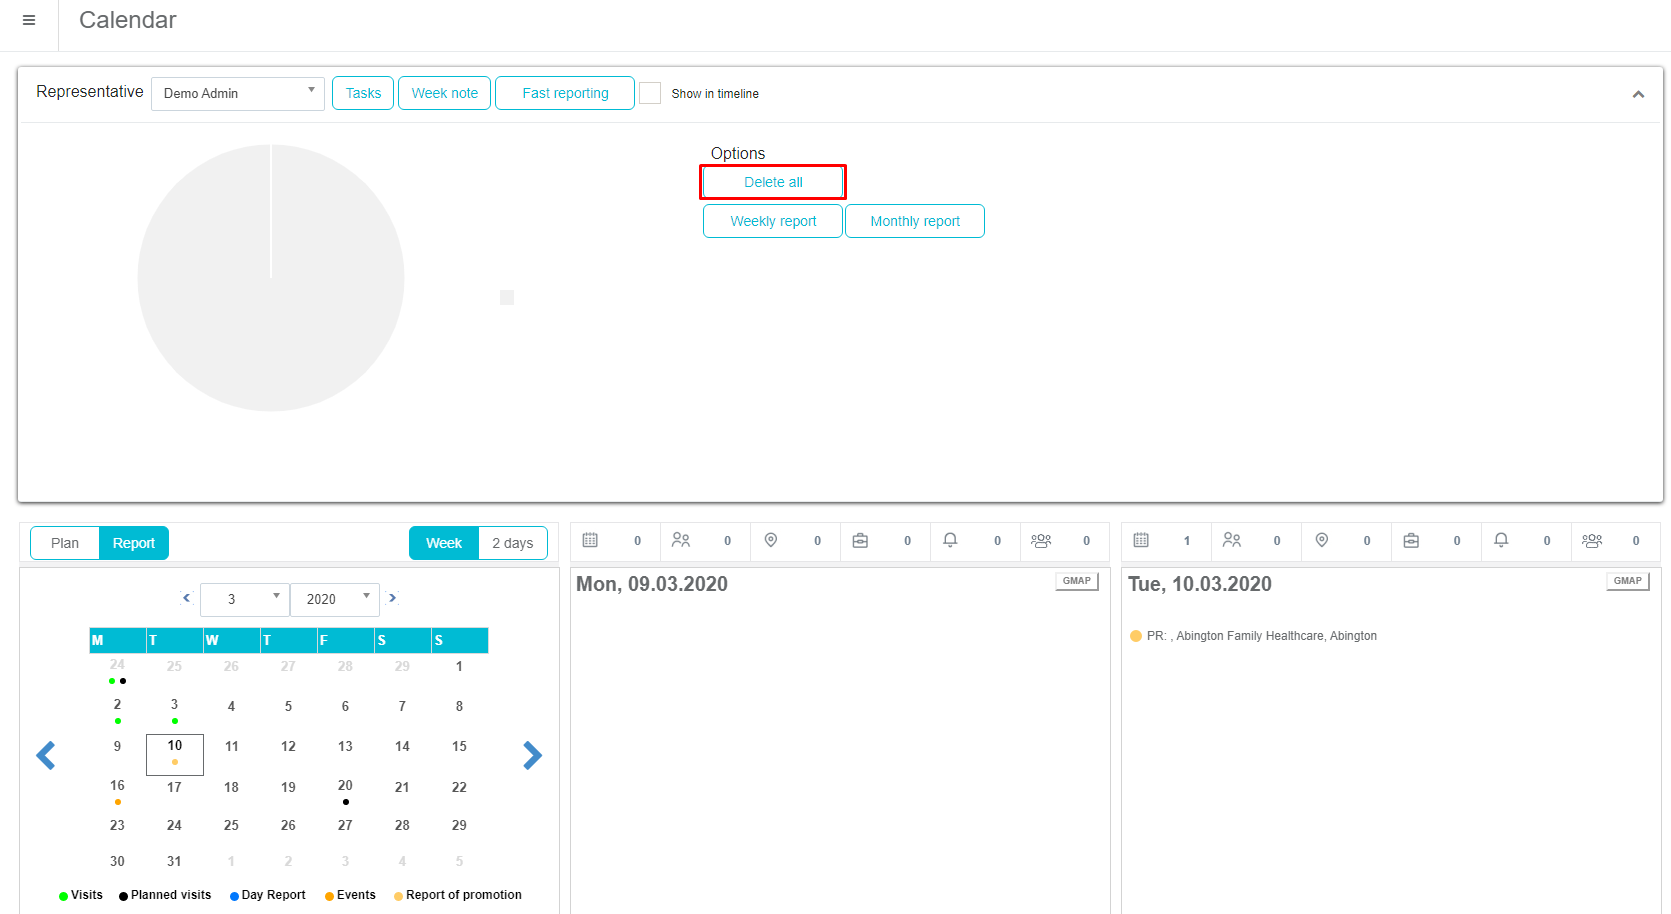
Delete all
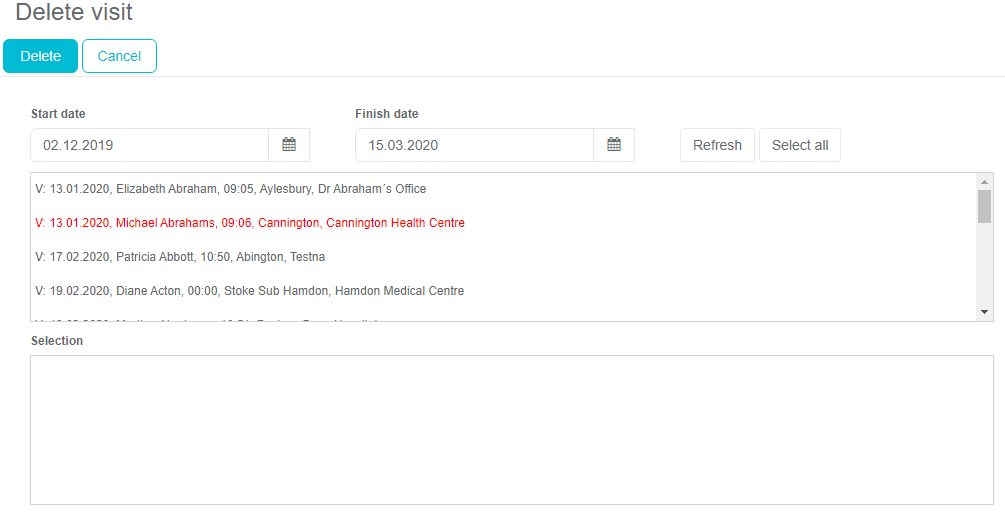
In the Calendar there are also a lot of other options like a possibility to Delete all visit plans in some period. You have to click Delete all, and then a new window will appear.
Here you need to define the period in which you want to delete all plan by using Start and Finish date fields. Once you have defined it, click Delete button to delete all plans.
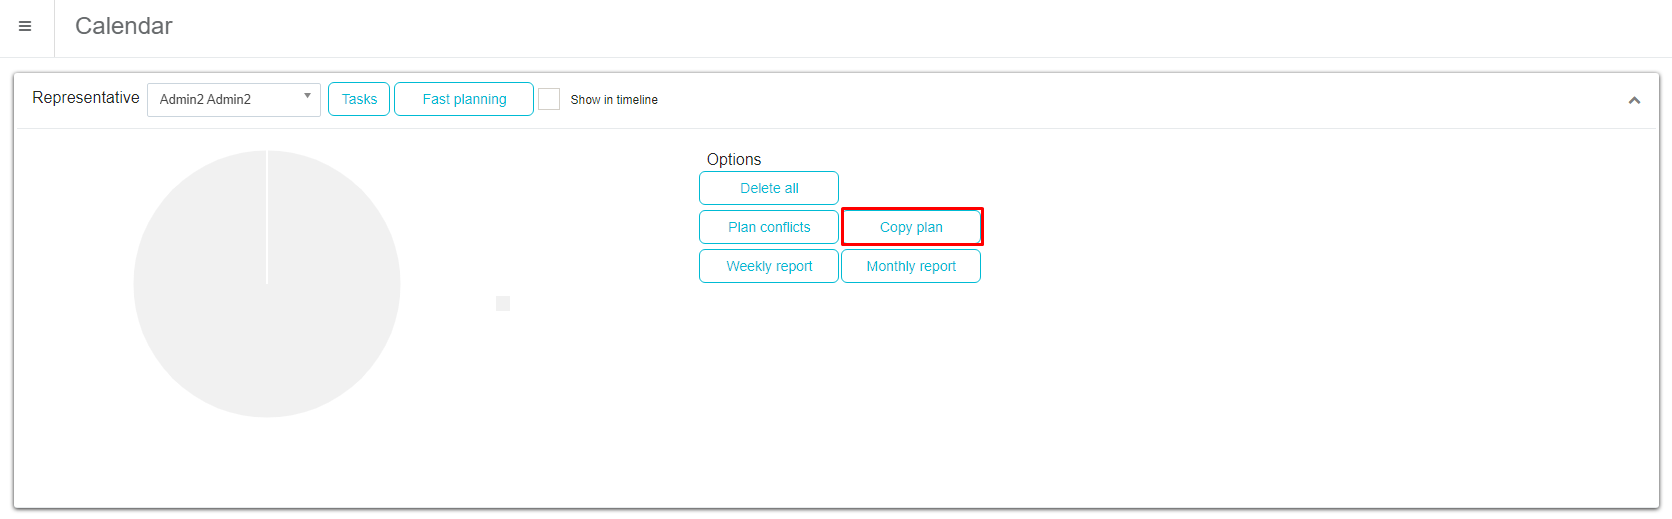
Copy plan
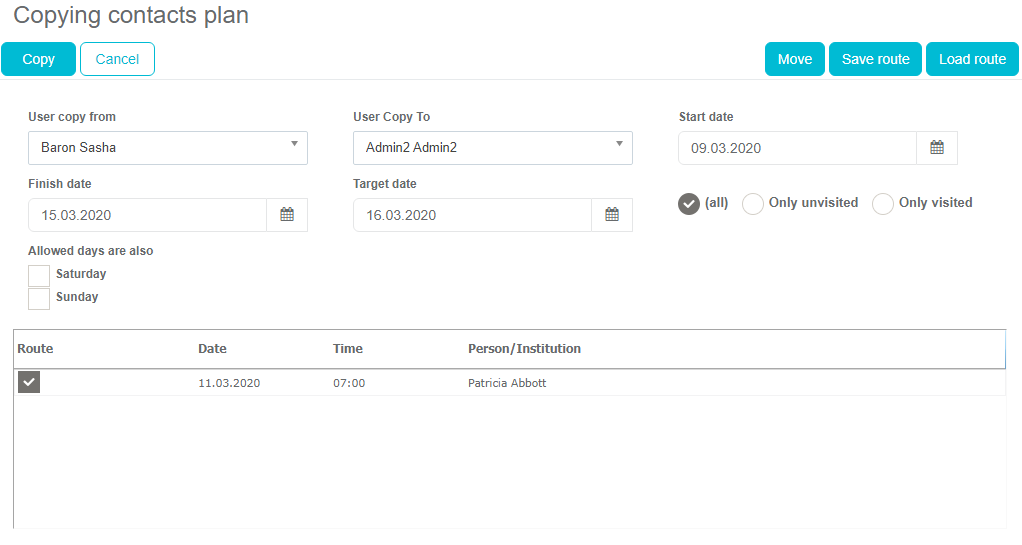
There is also an option to Copy plan. With this option you can very easily copy plans from some period to one desired date, and you don’t have to enter it manually.
You can enter different criteria for copying: Start date and Finish date. You can also copy the entire plan (all), Only unvisited or Only visited. For the desired date you can also Save route or Load route from another day.
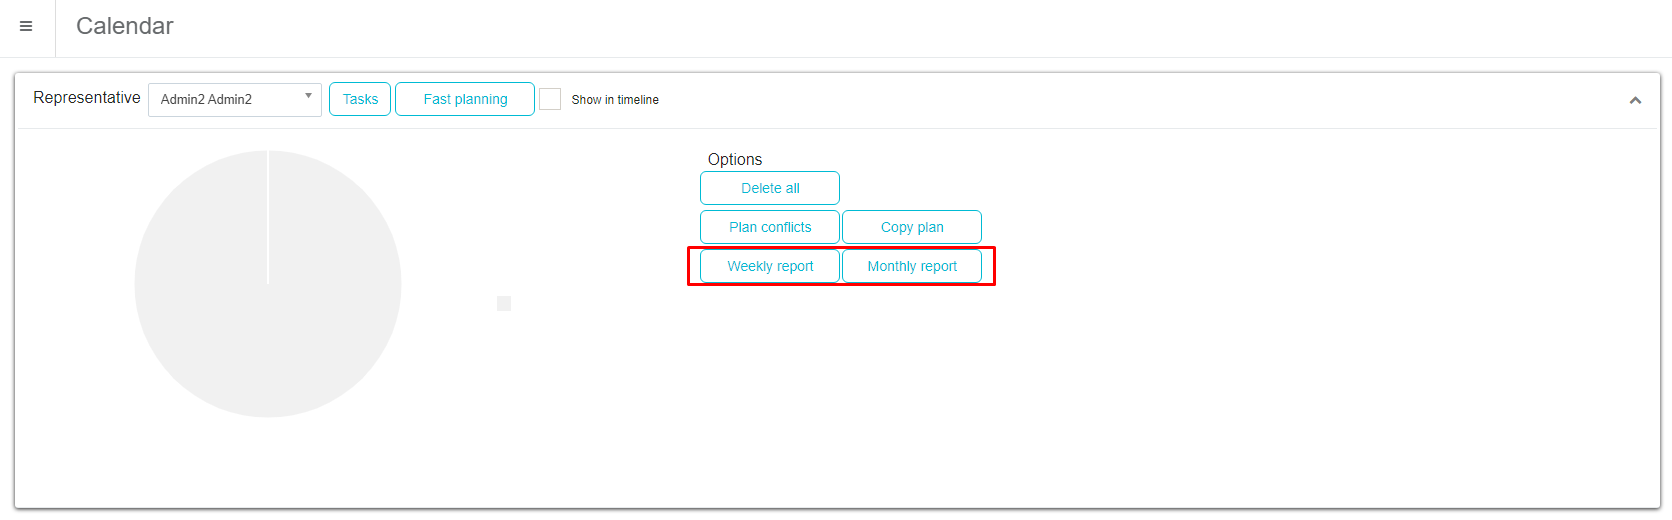
Weekly and monthly reports
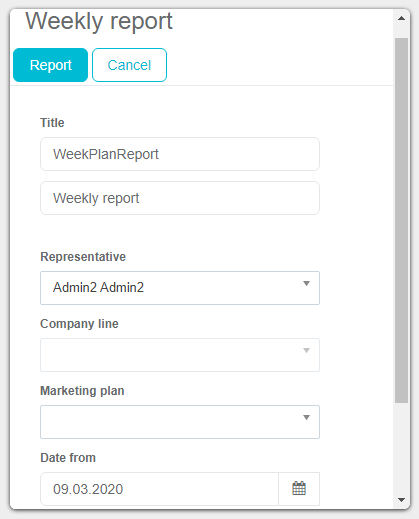
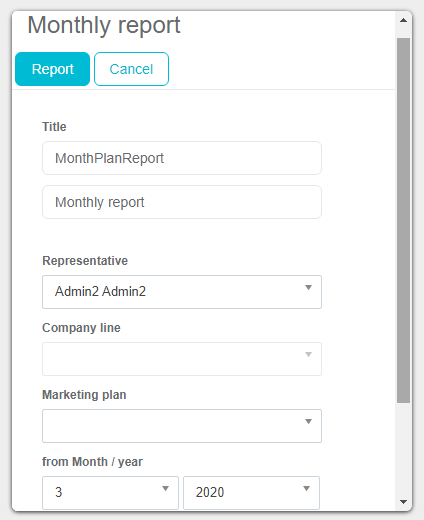
A set of several very practical reports can be found in the calendar module. From the menu, on the right side you can choose Weekly report or Monthly report just by clicking on desired buttons. A new window for each report will be opened. For every report it is possible to expand or narrow down the group of data you wish to examine.
After setting the wanted criteria, you have to click on the Report button. The same as with all other reports in Sales Vision Anywhere, you can export these reports.
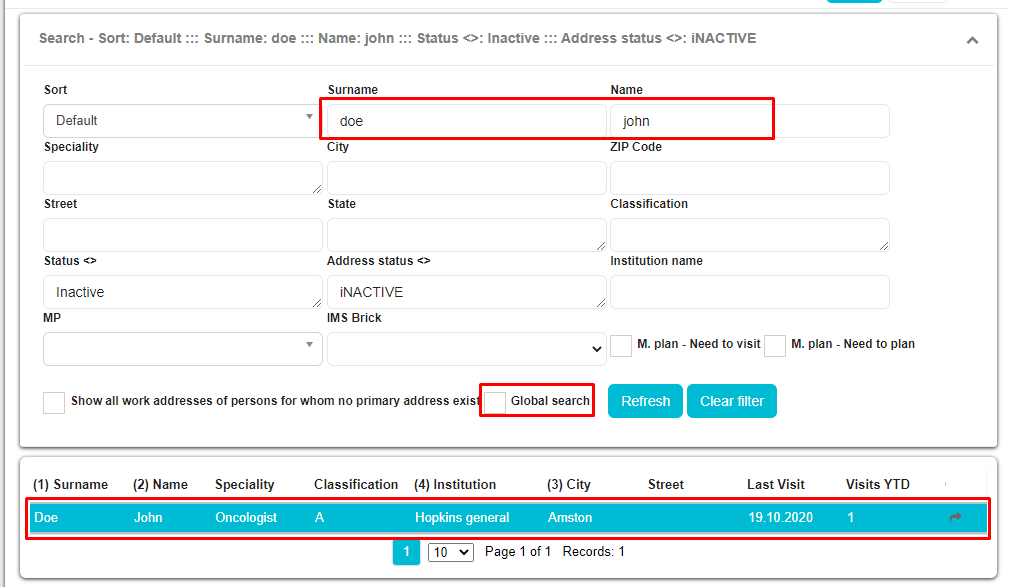
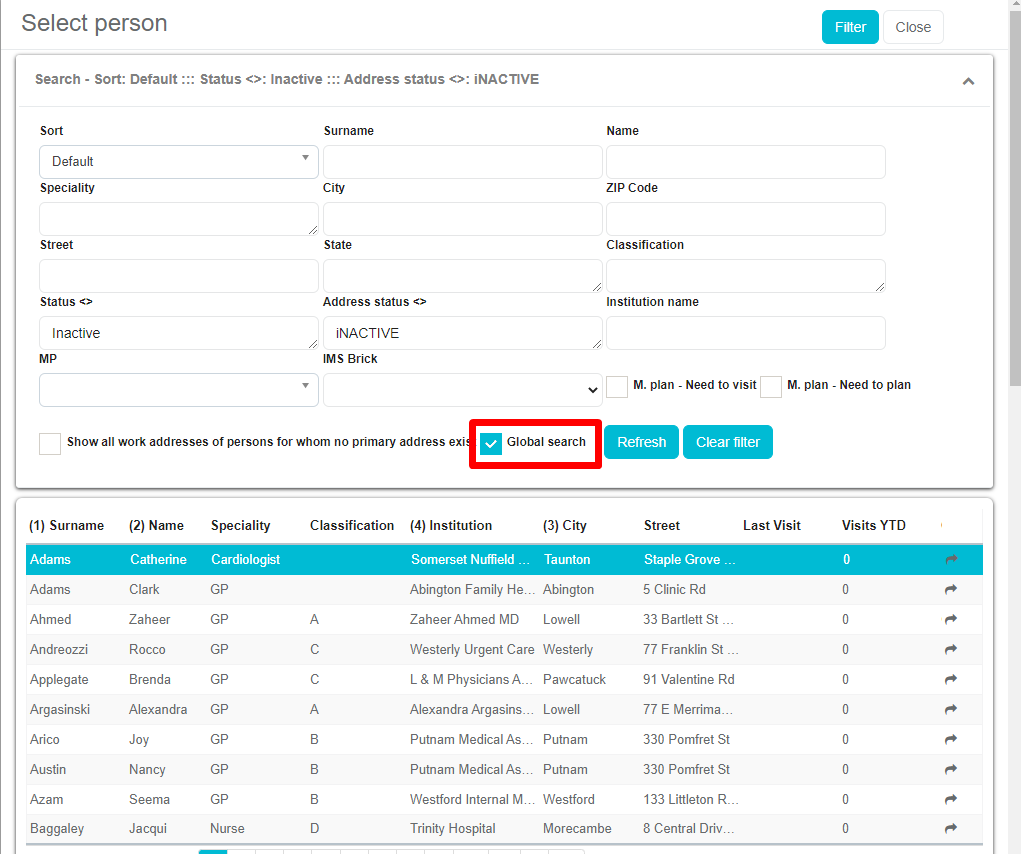
Global search – person visit
If you want to create a visit on a person which is not on your territory and database. If global search is active than is possible. On a person list window under filter menu is a visible checkbox “Global search”.
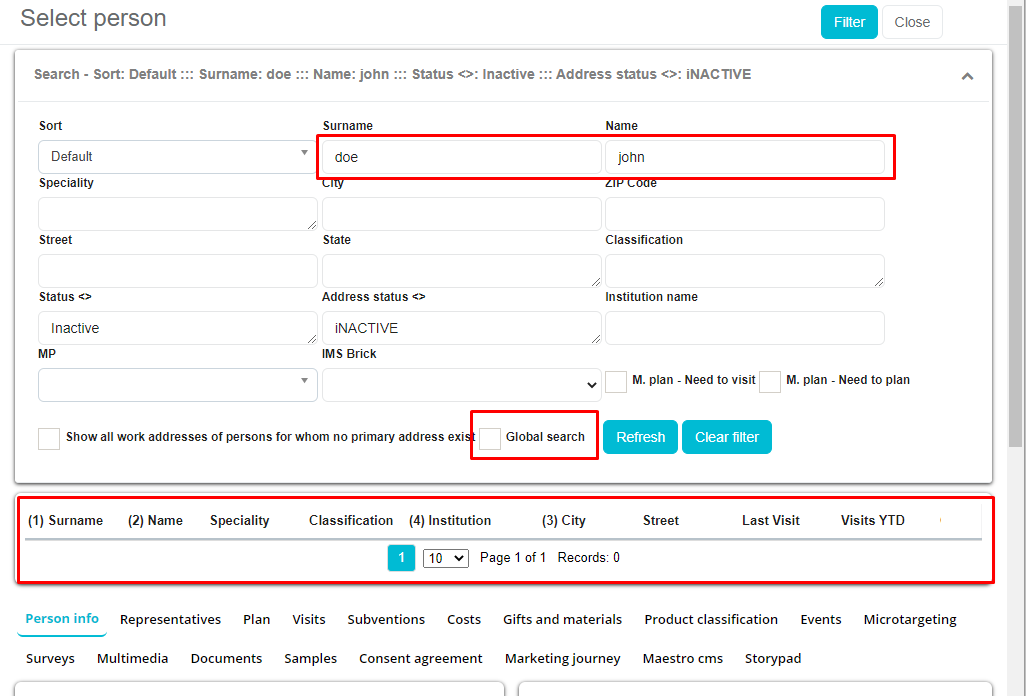
When global search checkbox is checked, when you do search you can find all persons including the ones that are not on your territory.
As you can see on the following figure person is not found when “Global search” is not active.
After we checked “Global search” we found persons:
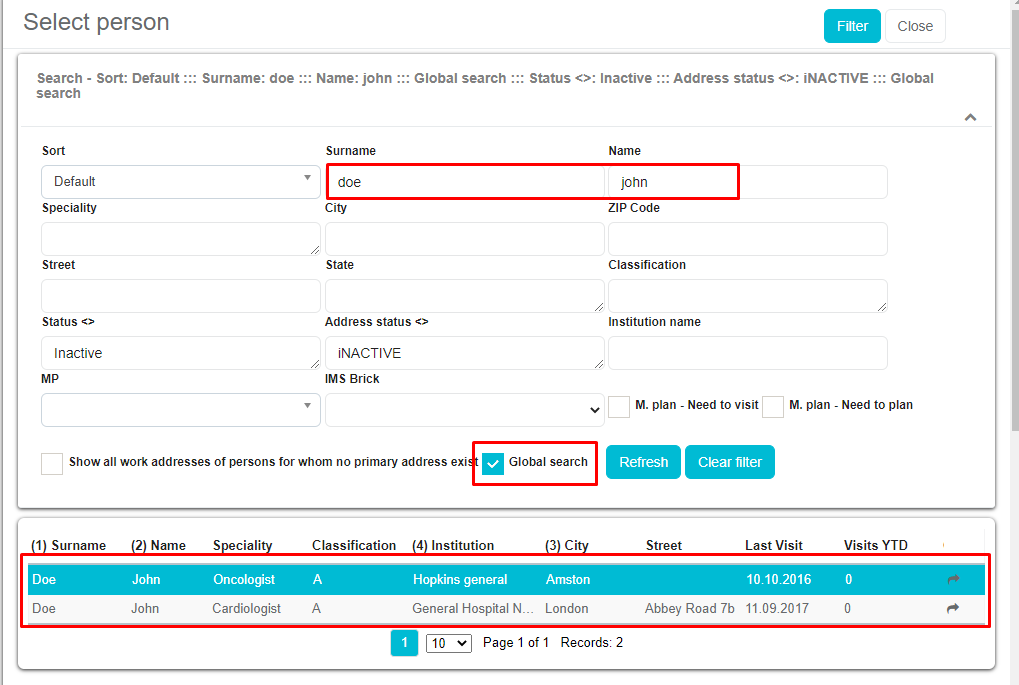
We select person and create visit:
After we “Save” person visit for person found through “Global search” this person is added to our territory and from now on is available to be found without global search.