BookVision / Storypad
BookVision Closed Loop Marketing is the native/offline Presenter tool for every medical rep on the field. Click on the BookVision button to enter BookVision module. In Anywhere version you can add new presentations, define different conditions to target persons in your database, define time period in which a certain presentation is valid, upload the content, preview the presentation etc.
The menu itself consists of two different submenu: Presentations and Global files. Presentations submenu is used for uploading the presentations and basic settings of each presentations. Global files submenu is in case you want to use video materials and attach them to more than one presentation. This functionality is convenient if you want to store space on the server.
Presentations
The screen of Presentations submenu consists of several parts of the screen which will be described one by one.
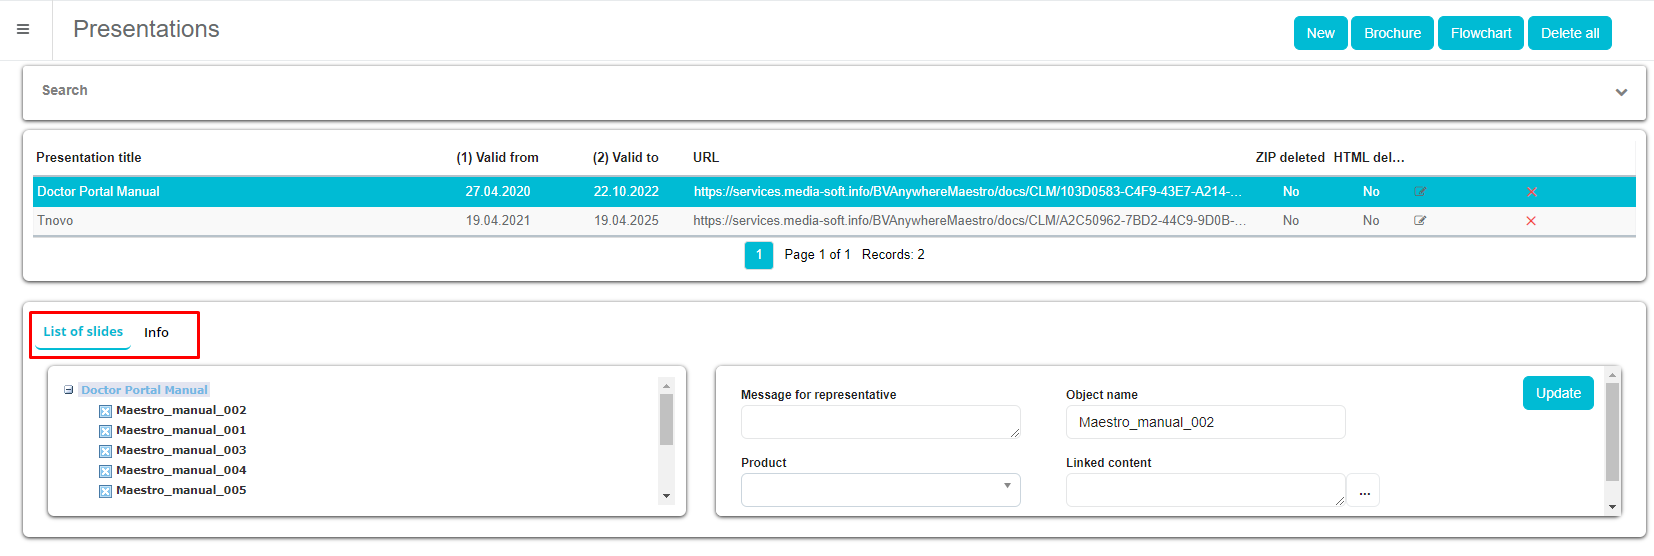
List of presentations
For all presentations that exist, you can see name, validation dates, URL and if presentation contains zip/html files.

In the bottom part of list exists navigation panel which shows number of pages, number of records (presentations), and current page. Buttons Prev and Next are used to navigate between pages.
You can select each of these presentations by clicking on it. Bottom part of screen contains of two tabs: List of slides contained in selected presentation and Info tab containing details of the selected presentation.
To edit existing presentation, select presentation from the list and then click on Edit tab.

To delete existing presentation click on Edit tab and after form for editing is opened click on Delete button.
And after the message appears, click on the button OK. You will be able to delete a presentation only is it had not been shown to anyone. If you do not want for this presentation to be visible to users anymore, set the field Valid to some date in the past.

Filters
To narrow down your search use filters. To filter list of presentation, click on the arrow at the end of the Search row and enter filtering criteria in the filters on the above the list of presentations.

After entering the filtering criteria, click the button Refresh. You can filter the list of presentations by: Presentation title, Valid from, Valid to, User, Speciality, Classification and Category.

Uploading new presentation
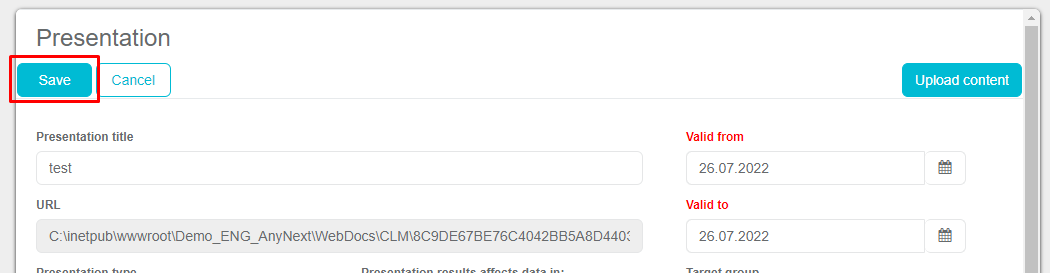
To upload a new presentation click on the New button located in the upper right corner of the screen.

A new window will open as the one shown on the picture below.
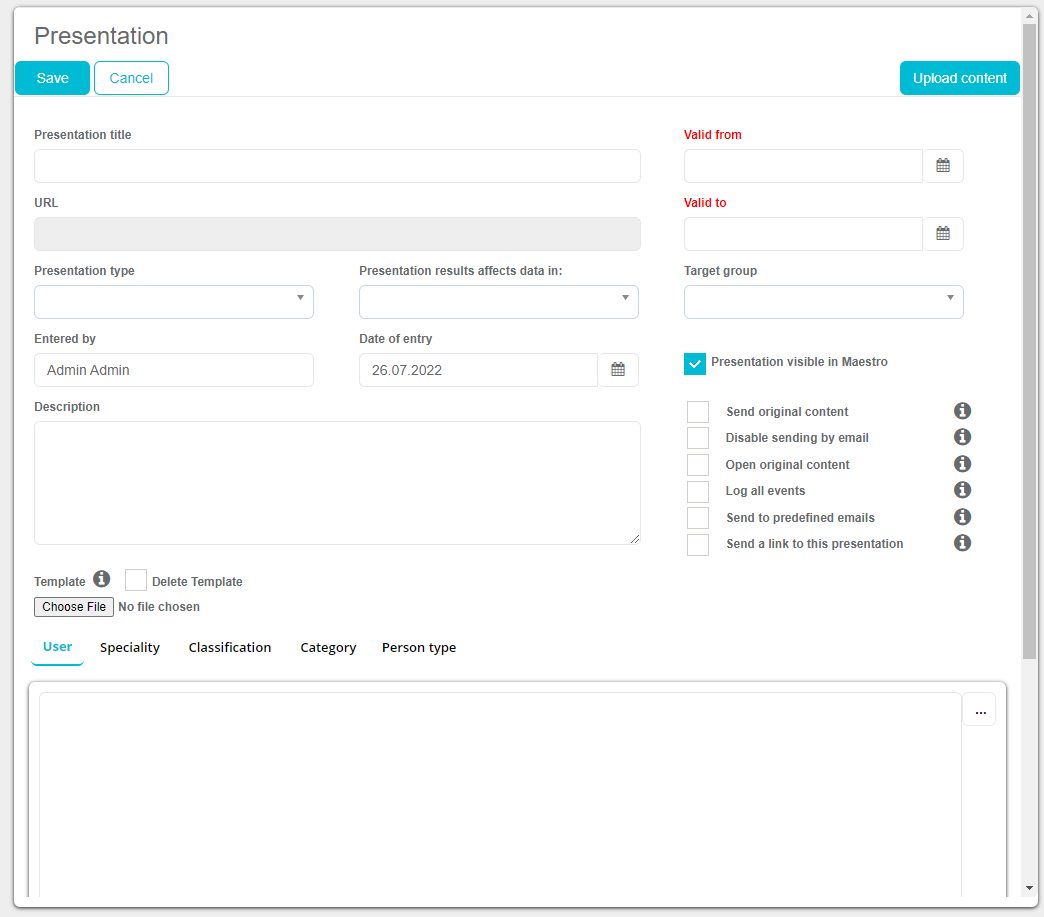
Description of fields located on the window one by one: Presentation title: the name of the CLM presentation that will be shown to users URL: populated automatically according to the location of the CLM presentation on the server Valid from and Valid until: activity of CLM presentation. It means that the presentations will not be available for the users outside of this time interval. Only active CLM presentations are shown to users. Presentation type: additional codelist irrelevant for the basic functionality of the presentations Presentation results affect data in: additional codelist irrelevant for the basic functionality of the presentations Target group: additional codelist irrelevant for the basic functionality of the presentations Entered by: populated automatically by name of the user who had uploaded the presentation to the database Date of entry: populated automatically by date when this presentation had been initially uploaded to the database Description: internal description of the presentation, available on the Sales Vision Next iPad application for users.
Description of checkboxes: Presentation visible in Maestro: this presentation will be visible in the Doctor Portal for doctors/persons to view it. If this checkbox is not selected, presentation will be visible only on iPad application. Send original content: if this option is selected, in the e-mail only links to the original documents will be sent. Otherwise, it will send the generated PDF documents. Disable sending by email: if this option is enabled, sending a presentation to e-mail from the mobile device will be disabled. Open original content: if this option is enabled, on the mobile device the original documents (PDF, DOC, etc.) from the related presentation can be opened. Otherwise, only the generated content from related presentations can be opened (which could be of lower quality than the original document). Log all events: enable logging of every event. Send to predefined emails: additionally emails are sent to predefined addresses. Send a link to this presentation: a link to this presentation will be send. By clicking on the link, it can be viewed in an Internet browser.
Description of additional tabs: For each selection, click on the button with "..." at the end of the row to get the list of values such as users, specialities etc. to select from or use the checkboxes to select the values you want to use. User: in tab User you select users will be assigned to the selected presentation. Only selected users will be able to download the selected presentation on the iPad device and make the presentation.

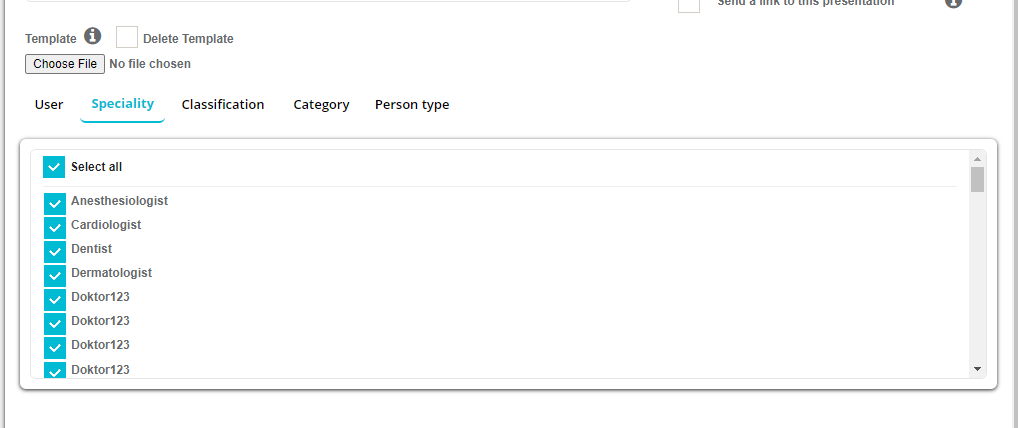
Speciality: in the tab Speciality, you choose person speciality to which the user will be able to present a selected presentation. If presentation is not joined to some speciality, it means it will not be visible to persons those unjoined speciality to be presented.
Classification: in the tab Classification you select person classification. Selected presentations will be presented to person who have just selected the classification.

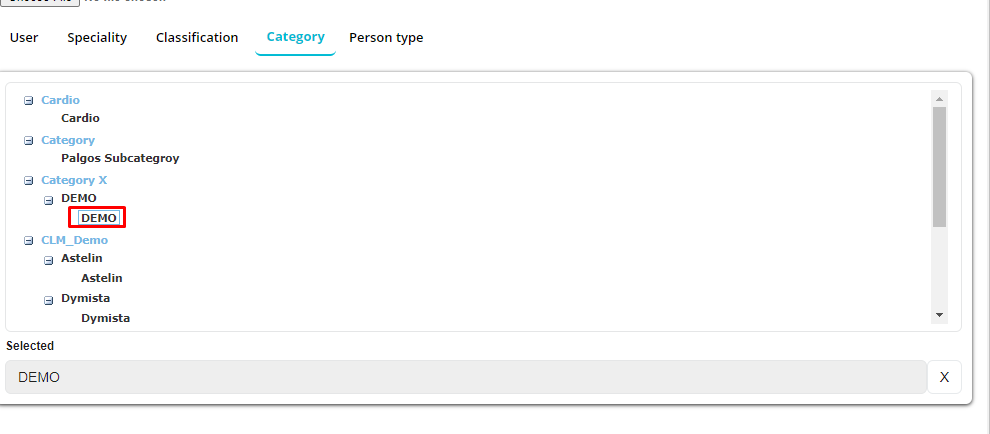
Category: in the tab Category choose a category which will belong to the selected presentation. In Sales Vision on the iPad device, the presentation will be visible in the selected category. The list of values shown under Categories can be defined by your System Administrator as codelists in Anywhere Admin application.
Person type: in the tab Person type, you choose person type which will be able to present a selected presentation.

Upload content Button called Upload content is used to upload the physical presentation to Sales Vision application. It is located in the upper right corner of the new presentation window. By clicking on it, a new screen will open, similar to the one shown in the picture below.
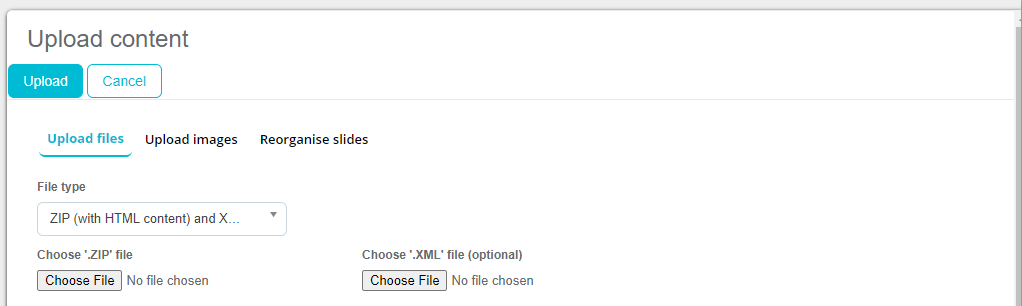
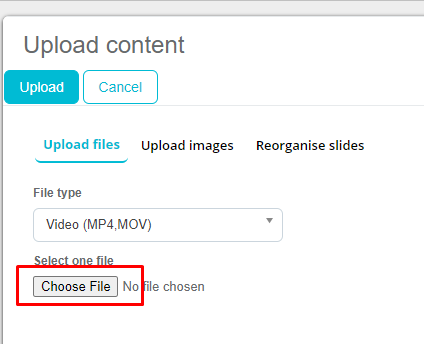
There are three types of file types that can be uploaded to BookVision module. You can select them under dropdown field File type. These are: ZIP (HTML and XML) PDF and Video
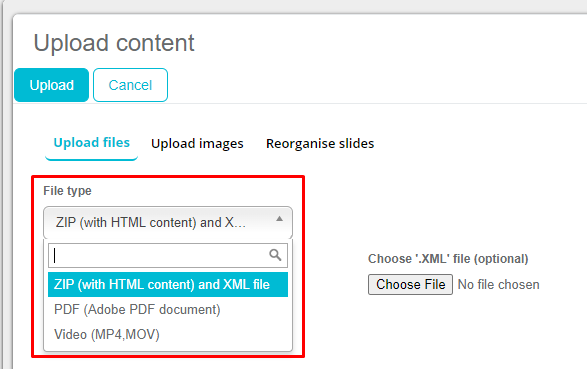
Note: if you are using HTML content type, then XML file uploading is optional. ZIP file of HTML is enough. More on the HTML technical part of the presentation will be described in a separate chapter. After selecting the File type, click on Choose Files button and select the file you wish to upload to Sales Vision and click on Upload to save the file you have chosen under Choose file button, regardless on the file type.
For PDF documents that contain more than one page, each page will be converted to .png file. Here you are able to reorganize order of pages if needed by using Reorganize slides if needed. To reorganize pages, select the page you want to move, and use arrows to up and down to more the slide. You can remove the slide by using Remove from list button.

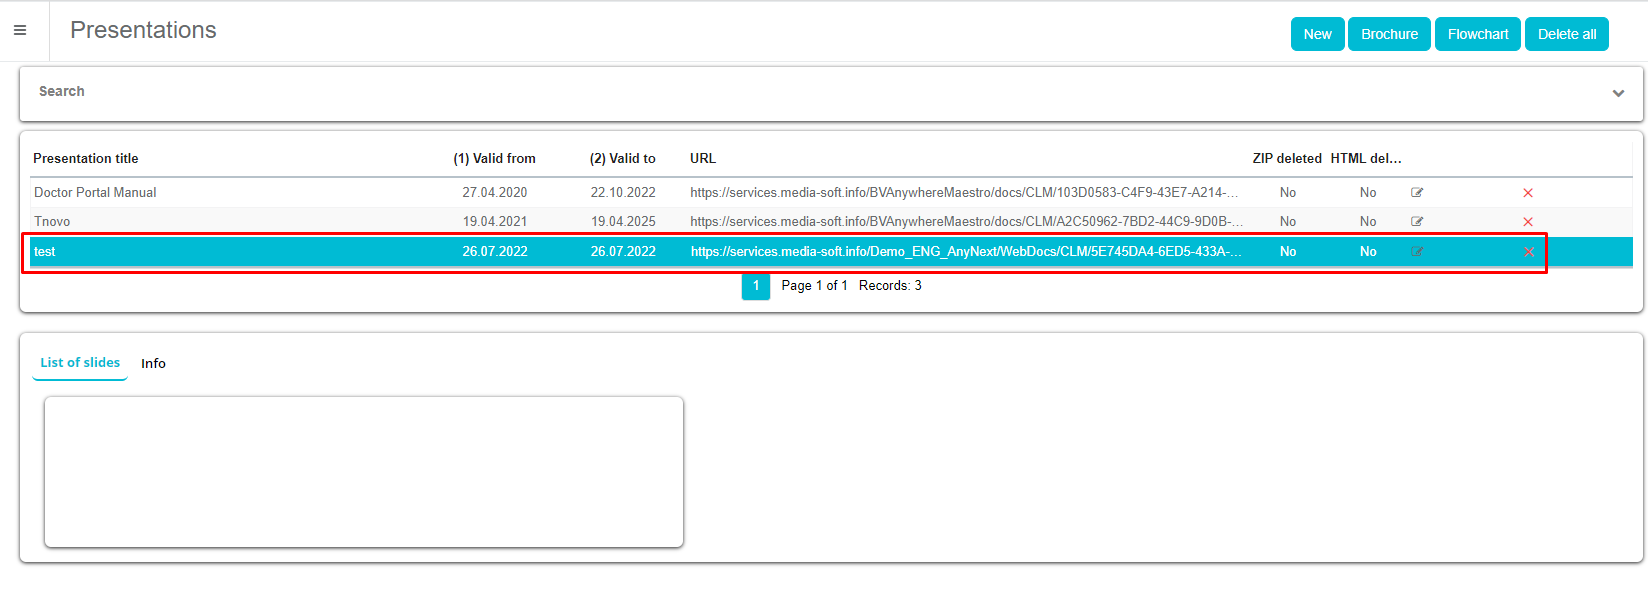
Once you are done with uploading the content and setting all settings of the presentation, click on Save button on the new presentation window.
Your presentation will be successfully saved to the database if you have correctly prepared the files for upload. In case when an error message appears, please check the presentation you are trying to upload and make sure it had been done correctly. The presentation will appear on the list of presentations as shown on the picture below.
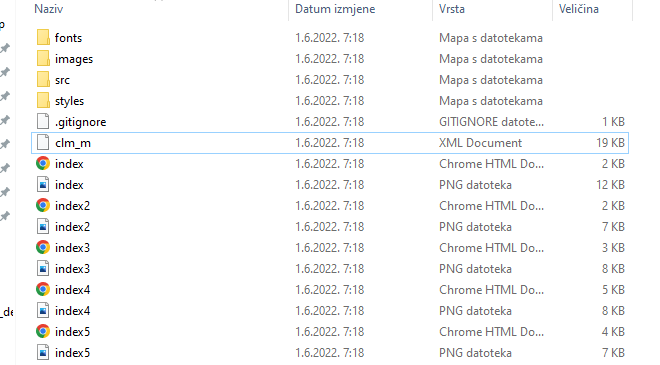
Example of well defined structure of unzipped HTML folder for CLM
In the lower part of the screen, you can arrange order of slides, rename them and delete the ones that are not important using tab List of slides. To rename the slide, click on the slide you want to rename. On your right new fields will appear. To rename the slide, enter new name under Object name and Update. You can also connect a product from the drop down list to each slide. To sort the order of slide, use drag and drop option. Click on the name of the slide you wish to move and pull it to the wanted position.

On the second tab called Info you can see more details about selected presentation.
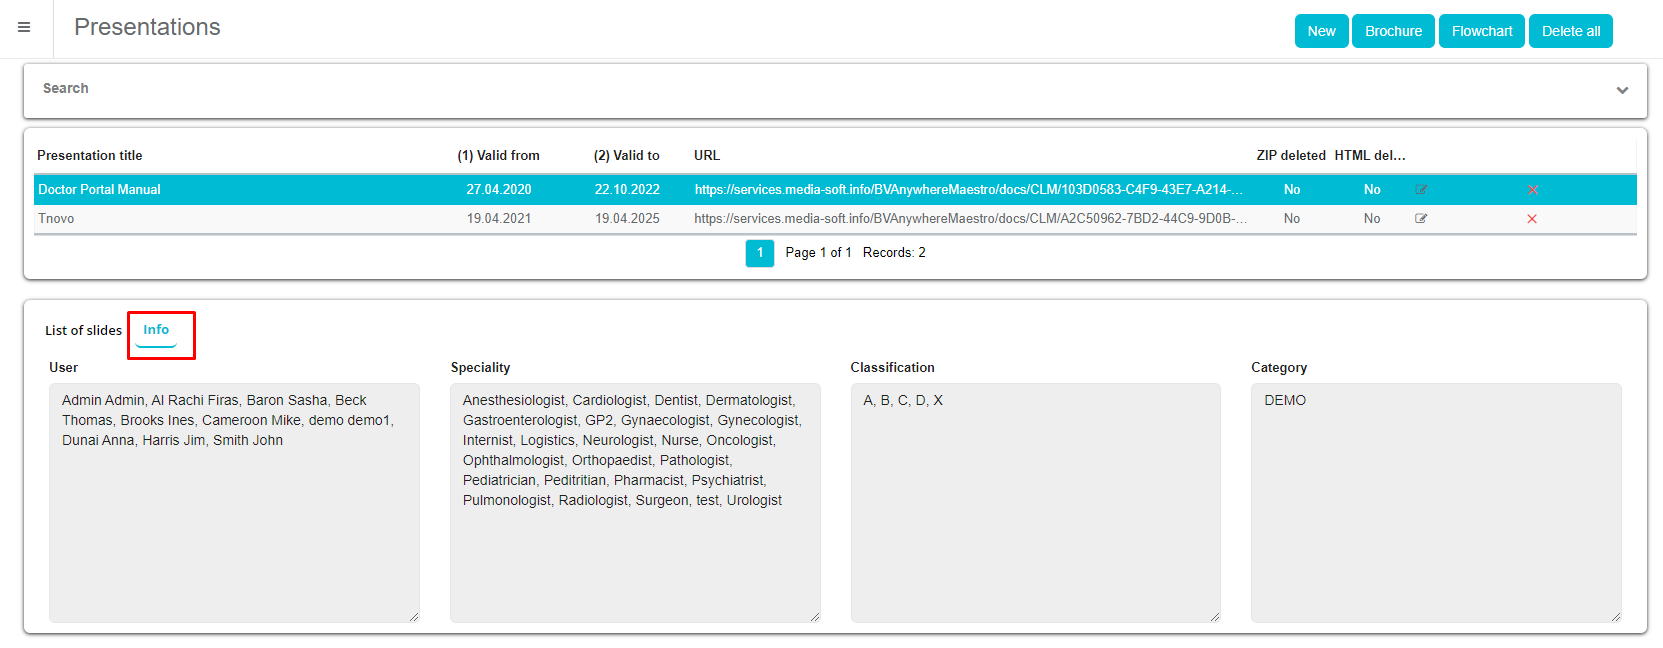
In User it is possible to see assigned users who will be able to download selected presentation. Speciality shows to which speciality selected presentation will be presented. Classification shows to which speciality selected presentation will be presented. In Category it is possible to see to which category selected presentation belongs to.
Brochure
To display content of existing presentation, select to presentation in the list and then click to Brochure button located in the upper right corner.

By using Pervious and Next slide you can switch among slides.
Flowchart
After you have uploaded the CLM presentation, the connections and sequence of individual slides in the presentation had been created automatically according to definition from HTML file. But you can still change them or preview them by clicking on the Flowchart tab.

To change a connection between the two slides, click on one slide and then drag the line to the slide that you want to link with first selected slide. If you want to add a new connection, use Add connection button in the upper right corner of the Flowchart and join slides. Drag a line form one slide to other the join them.
To delete the existing relationship between the two slides, click on the line that connects the two slides. After the line turns green at the end, use the Delete button on your keyboard to delete the slides.
Delete all
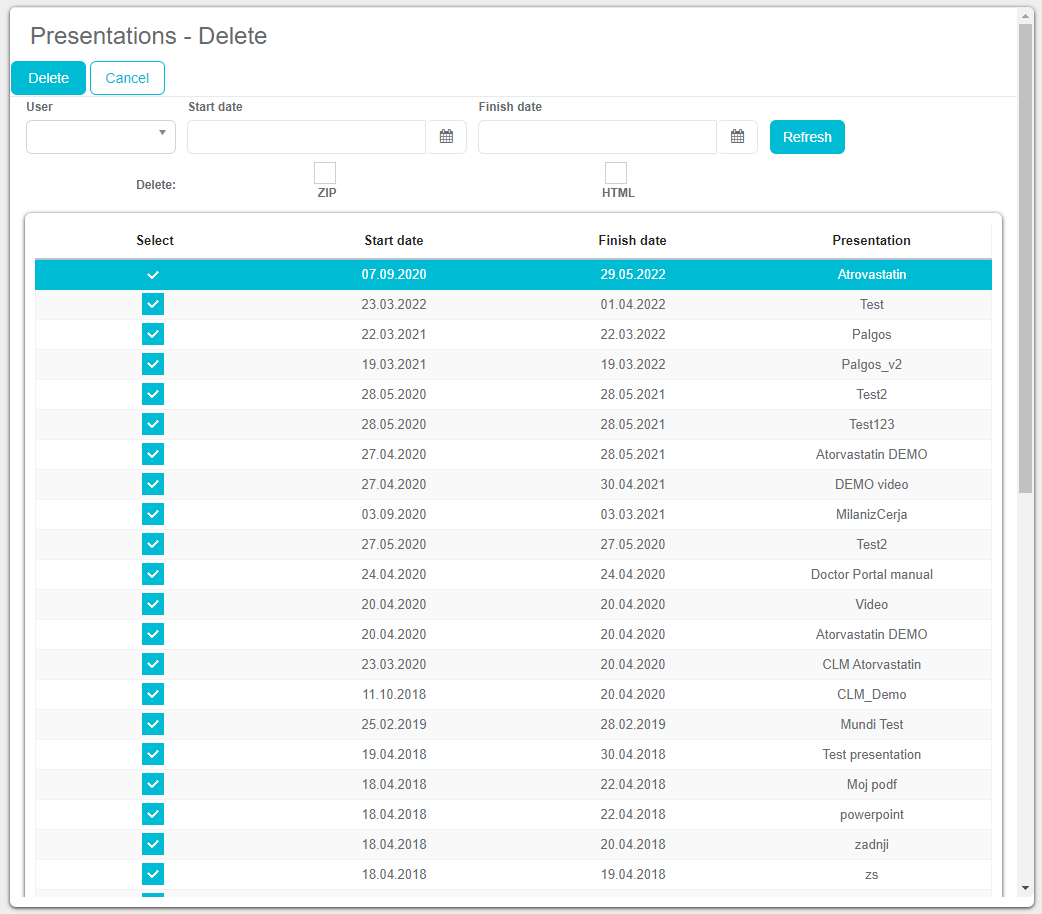
Delete all functionality enables you to delete the presentations from your server.

If is being used to delete old presentations that are no longer being used. To filter the list, additional filters by User, Start and Finish date of the presentation had been implemented. By default all presentations are selected, so please, before deleting the files make sure you are aware what you are deleting.
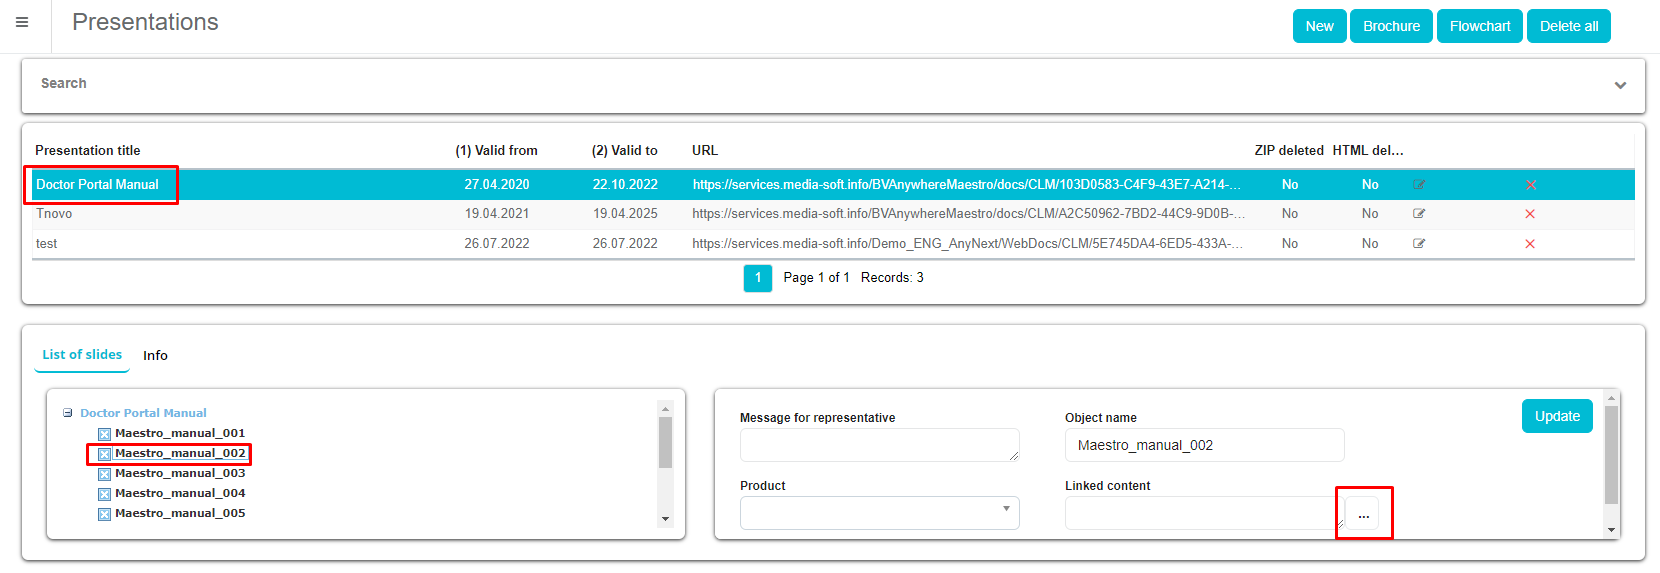
How to link materials In BookVision module there is a possibility to link brochures, to be transferred to some other presentation when a user clicks on some slide. Click on the name of the brochure you wish to link, select slide, and then press „..." to select material that you wish to link.
In this window you can select what material can be shown:
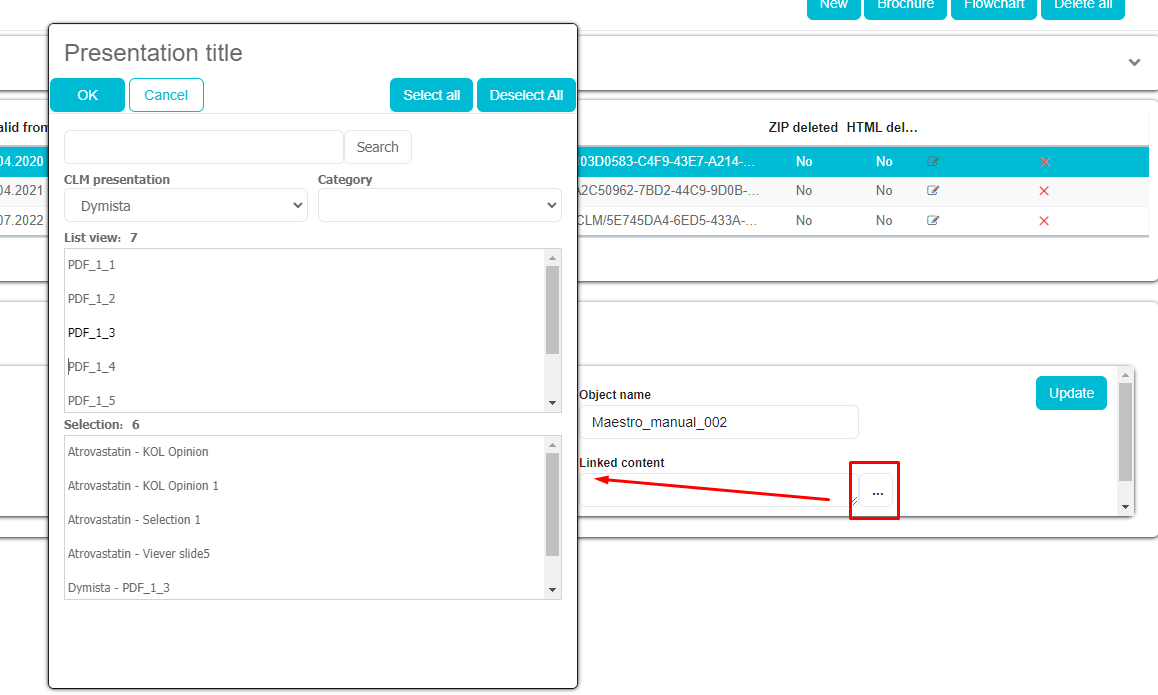
After selection has been made, you can see links:

Note: make sure you press Update/Save button after selection to save the change you have made.
Global files
Global files is feature that allows to use one file in multiple presentations in order to save space on the server. The module is located as a separate submenu in BookVision menu. It is possible to add new files, and delete old/unused ones.
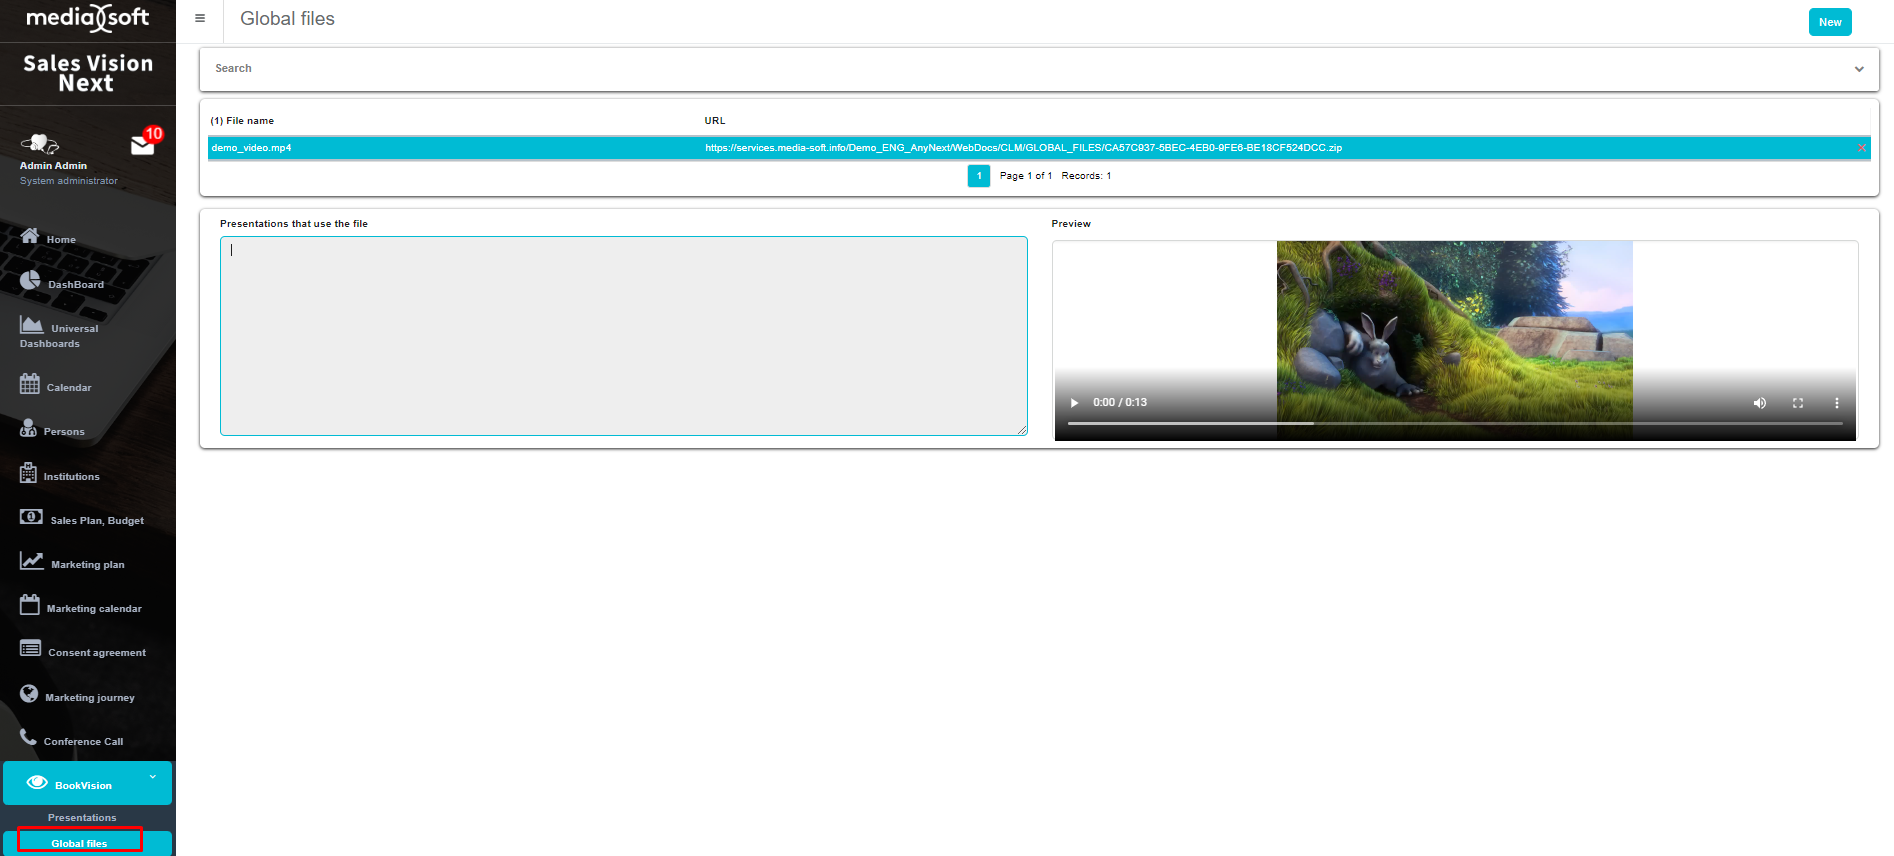
To add new global file just click on New and new window will appear. Click on Choose file button to select a video you wish to upload and once done, click on Upload button to save video to Sales Vision app. Once saved, the video will be displayed on the list of Global files.

Uploading file must be a ZIP file of a video. Uploading file must have one of following extensions: .jpg, .png, .jpeg, .gif, .tiff, .mp4, .mov
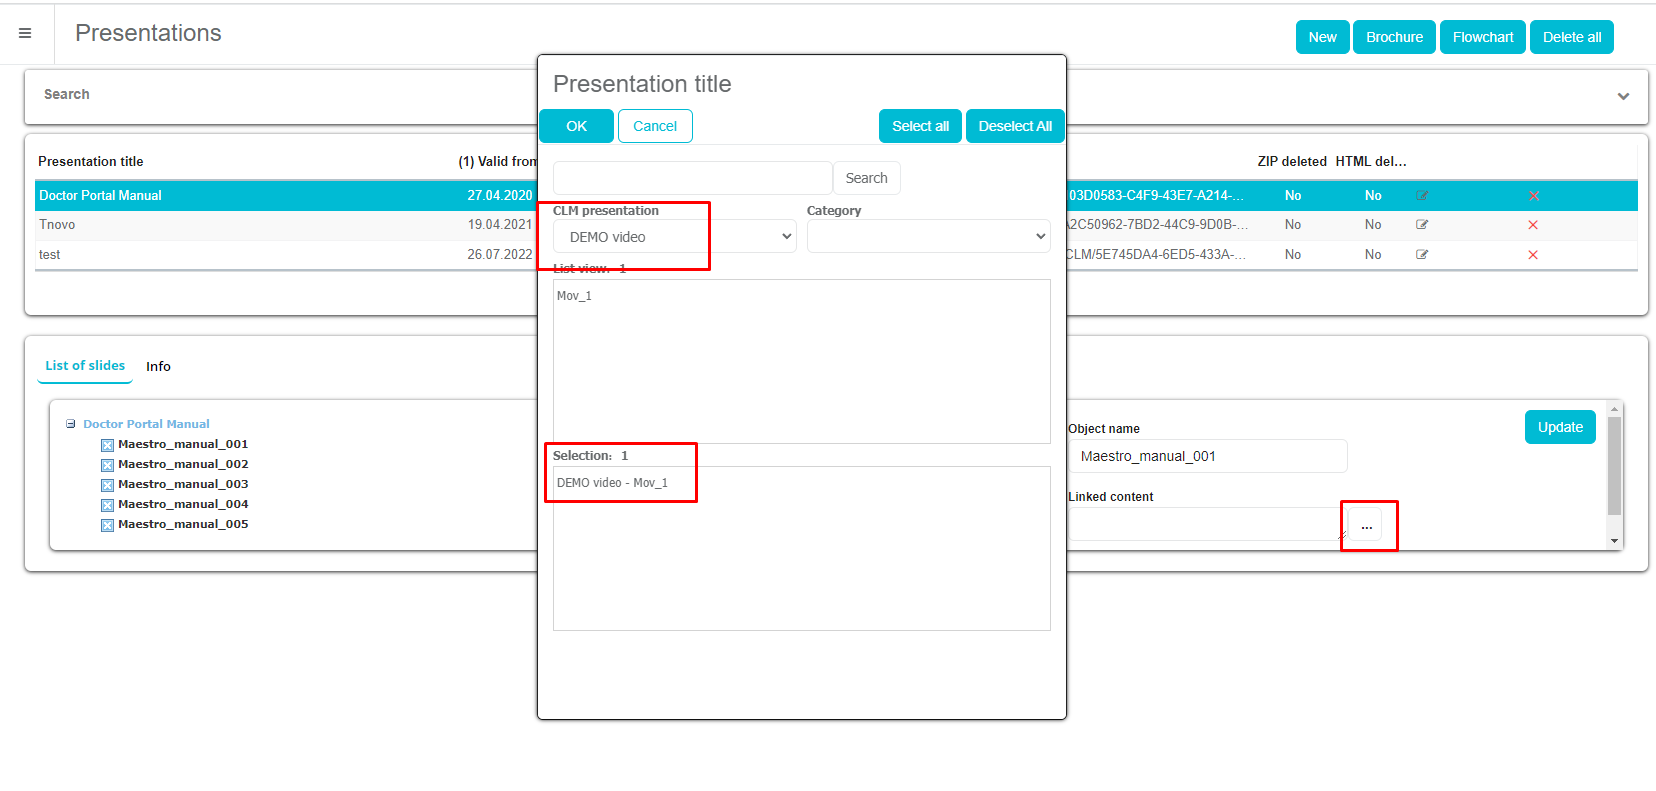
Linking global file with a presentation In Presentations you have to select presentation. Find movie slide, choose Use global file, select file from dropdown list and click on Update.
To delete global file select one from the list and click on Delete button in the end of the row.
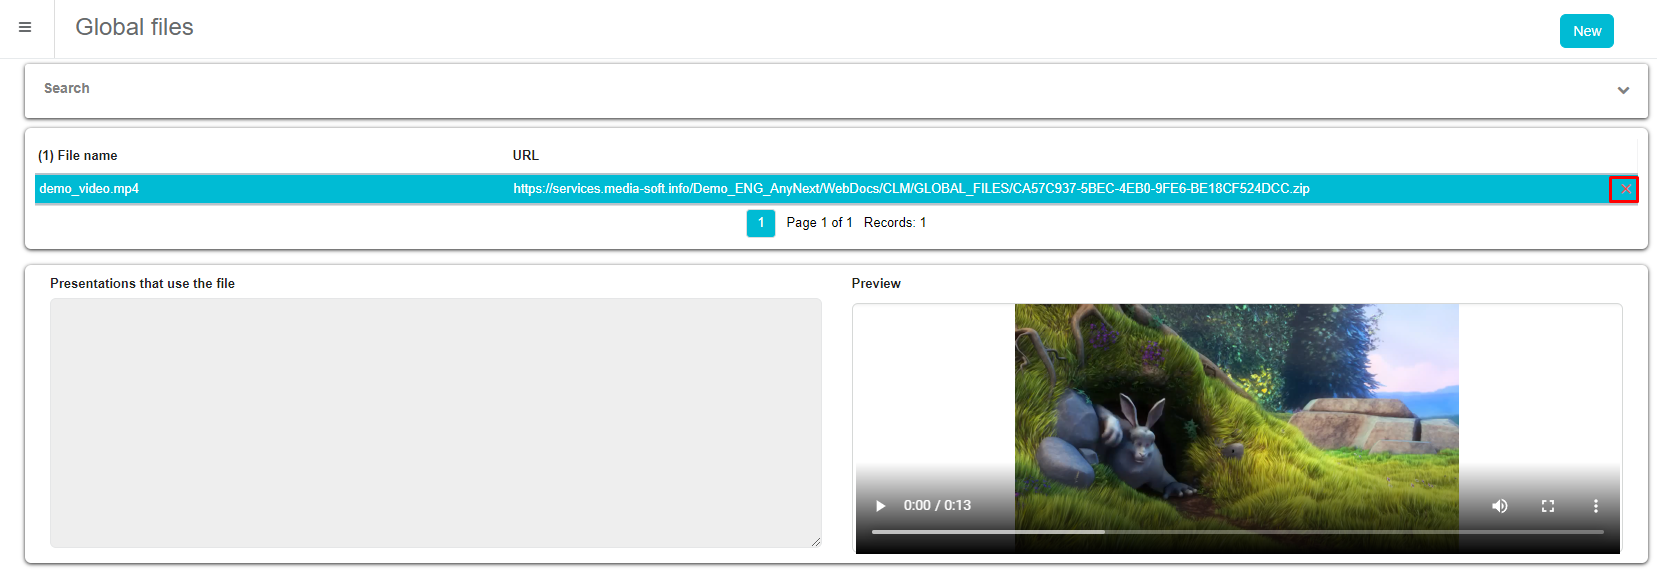
On the right part of the screen it is possible to see presentations which uses selected global file. In Preview it is possible to previev selected global file.

HTML presentations
This chapter is covering the technical part of creating HTML presentations to be displayed in Sales Vision application. The presentation is made like any other HTML but you should pay attention to a few rules that are described below. Inside the example you can see how things work in detail. In order to check if everything is visible, please download CRM iPad Next application from Appstore and test you content directly on the iPad. In order to get access to the Bookvision (app where you upload content) and CRM iPad Next (iPad application where you can present content) please contact Media Soft support department.
Structure
Each presentation contains 2 files with the same name:
- .xml - optional and does not need to be created / uploaded
- .zip Zip file has one folder which contains all content for the presentation (HTML, images, js, css...).
All HTML files must be places in root folder (same name as .zip file) and image files can be used for showing the quick preview of slide in navigation menu direct in presentation on iPad (same name as name of HTML). Media files like videos, PDF's, etc. Should be placed in separate folder, not in root.
All other files that are connected to the HTML can be placed in folders. It's recommended to have all images or videos in one folder in order to avoid duplicates and save space to make presentation lighter.
HTML
Please include following code in header tag of HTML file and corresponding files in src folder of the presentation you are creating:

We can log any div tag and slider object (along with radio buttons). The most important thing to remember is to set same id-s in HTML and XLM files for objects (tags) that need to be logged. Also, „clmLoging" has to be inserted at the end of class attribute for the corresponding tag. Set up for div logging To log div tag we have to define id tag and put „clmLoging" at the end of class tag. Set up for slider logging Below is an HTML sample code for slider element.

Please note the inserted clmLoging class in div tag. Also, note the id attribute of input tag which will be important later. Below is an HTML sample code for radio button element. Please note the „clmLoging" AND „btnLog" class as well as id attributes. This is important because this way you can join slider value and selected button value (values will be saved in database combined in single cell). It is important that „btnLog" is put in first place in class attribute.

To set button values please add the following code in the HEAD section of HTML file.

<input type="hidden" id="NextSlide" value="index5000.html" />
Possibility to define next slide (where the swipe takes you next), and if you don't wish to have the alphabetical order of next slides. If the class of the element that is to be logged contains btnLog, then it is considered to be a slider. Therefore only sliders MUST have btnLog. Others don't.
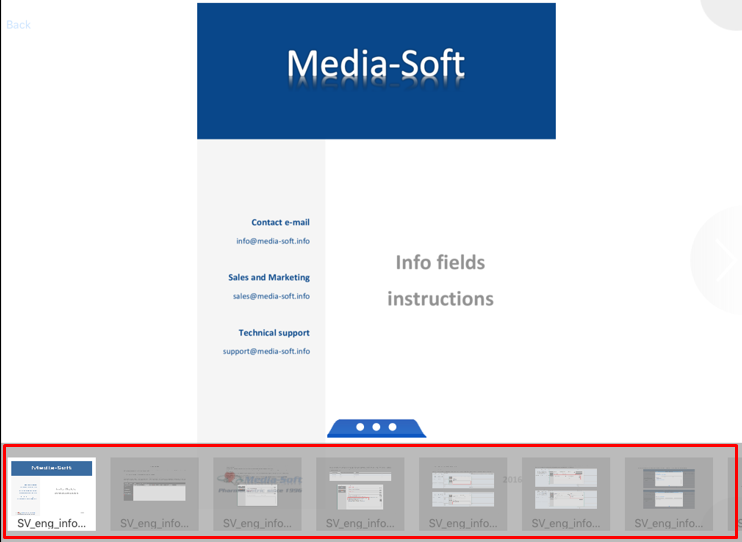
To define mini slides at the bottom of the presentation when displayed on the iPad application, there has to be a smaller image named the same as the slide name within the presentation in the ZIP folder. Like an example on the screenshot below:
The functionality on the iPad app.
XML setup
*Adding a XML file is optional. The navigation in presentation is generated automatically based on the links from html, but if you want specific navigation then XML file should also be included.
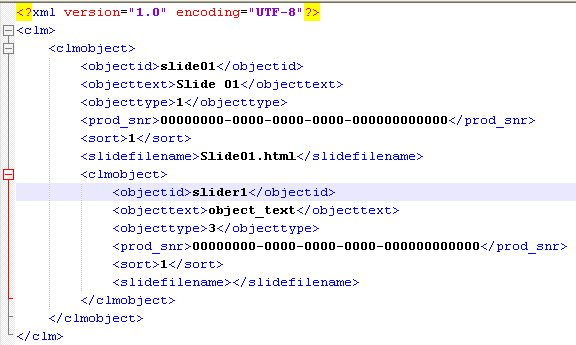
After creating HTML files, you have to create corresponding XML file which is used to create presentation data in database. Please note that every slide has at least one <clmobject> tag. All objects that need to be logged are nested within this <clmobject> tag as shown below.
Tags:
<objectid> - for 1st level it is slide's id (usually the same as slides name). For other levels it's the same id as you entered in HTML file.
<objecttext> - for 1st level it is slide's name. For other levels it's just arbitrary name of object (without spaces and special characters).
<objecttype> - for 1st level it is number 1. For other levels it depends on type of object: 2 is for div element, 3 is for slider, 4 is for multiple choice buttons, 5 for video.
<prod_snr> - in all levels please put null guid (00000000-0000-0000-0000-000000000000). You can later connect product with specific object on slide.
<sort> - used for sorting slides.
<slidefilename> - set slide file name only on first level, name of HTML file.
<NextSlide> - possibility to define next slide (where the swipe takes you next), and if you don't wish to have the alphabetical order of next slides.
All these tags should be included within <clmobject> otherwise you won't be able to upload presentation.
After you compress HTML project in .zip file, you can set presentation via Bookvision by uploading .zip and .xml file (XML is optional and does not need to be created and uploaded).
Hierarchy of the elements and onclick events
We have to detect all elements that are clicked and check if they contain clmLoging in order to write clicks in the log for analysis purposes. In case when the whole element stretches over the whole screen it's impossible to find the exactly selected element and thus this functionality doesn't work properly. The hierarchy must be set correctly in order to detect the right element. The solution is to set the proper z-index on each div.
<div class="vid slide remove_clicked" style="z-index:100;">
<video src="videos/video.mp4" muted loop autoplay type="video/mp4"></video>
</div>
Some elements like pictures shouldn't have onclick events. Please use the following:
<div class="class_name" data-slide="slide_name" onclick="">
Video inside CLM presentations
In order to open video on button, please open separate .html page with video defined there
<button class="slide clmLoging" id="slide" style="z-index:1000" onclick="openPage('Vid1001_1.html')">a</button>`
<div class="content" data-slide="1001video">
<!-- START CONTENT -->
<video width="100%" height="100%" controls autoplay>
<source src="video.mp4" type="video/mp4">
</video>
</div>
If you were to have PDFs inside ZIP of the CLM presentation, but without any group levels defined for the presentation itself, all of the PDFs will be added to the end of the presentation.
Thumbnails
If you would like to see slide preview inside slide navigation on iPad, for each index.html, thumbnail must be added with the same name as associated html (jpg format).
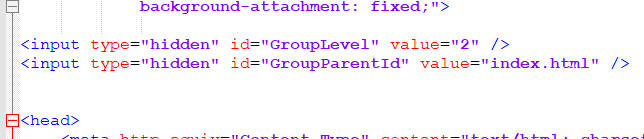
Functionality to set up thumbnails as groups
You can define the Group Level and Group Parent ID within the definition on HTML CLM presentation. If the presentation has group levels and parent ID definition, from the SR perspective, the same layout of the thumbnails will be displayed as in the standard CLM presentation. The thumbnails are located in the lower part of the screen. But the list of thumbnails will include only the final slides and not the main groups.
Example of the CLM INDEX definition:
Additionally, in local settings of an iPad app, each user can decide what is the action after sliding to the last slide. When using Groups and Parent Groups in the HTML presentation display, depending on the local setting on the iPad (located under Send&Receive Data -> Customized user settings -> System options group -> "CLM - action for last slide in group") action for last slide in group can be:
- Step up: Moves you one step up
- Back to start: brings you to the main index
- Stop: swipe disabled. The default setting for this local option.
PDF inside ZIP CLM presentation that contains grouplevels
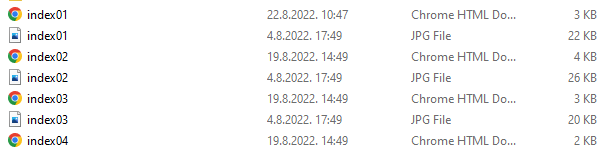
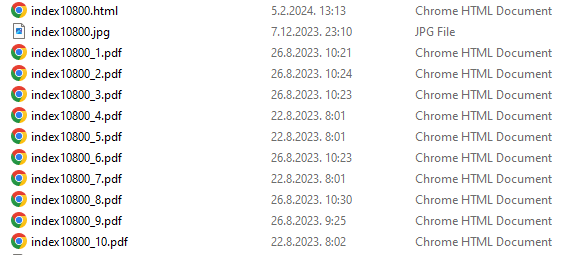
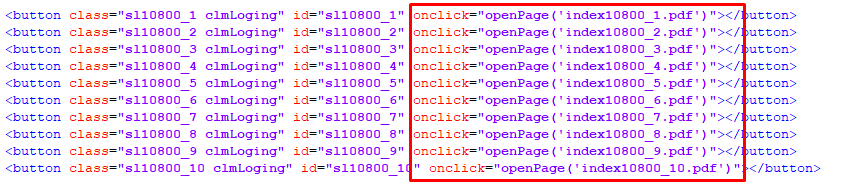
If you were to have PDFs inside the ZIP file that are supposed to open onclick/button click, first step is to have those PDFs called the same name as the parent that they belong to, for example if there is index10800.html slide and it contains 10 buttons that on click open PDF files, then those PDFs should be called index10800_1.pdf, index10800_2.pdf, etc...
Next step is the index10800.html definition:
The PDFs will be seen on the "mini-slides" section and directly accessible, and they will be grouped together with the .html file that they belong to, and if they don't have any defined .html file that they belong to, then they will be grouped together with the first slide of the presentation. For example:

index10300_1.pdf, index10300_2.pdf, index10300_3.pdf have index10300.html associated with them, so they're grouped together on the "mini-slides" showcase.

Index10400_1.pdf & index10500_1.pdf don't have any .html file that they are associated with, and for that reason are grouped together with the first .html slide of the presentation

Helpful Tips&Tricks during CLM implementation
Here are advises on how to make sure that the implementation of CLM in your company goes as smoothly as possible. Situation: is it working properly? make sure to check how does the presentation you have uploaded look like on an iPad device; Situation: the presentation is visible for preview, but the list of persons is empty check it is visible for persons. If it isn't, check on Anywhere if you have connected this presentation to speciality of selected person; if presentation is not visible, make sure that is Active, meaning that the Valid from and Valid to are valid for today and joined to the user; after new presentation upload, check if you have selected and joined fields User, Speciality and Category. Classification and Person type fields are being used only as additional restrictions. Situation: titlebar contains header images check if the images are visible on the titlebar; is there a smaller image named the same as the slide name within the presentation? Situation: navigation of custom slide in presentation on button click check in the HTML definition if you have set class clmLoging. Furthermore, you need to have "onclick="" so application can know which page is next. Example: if you click on „Back" button as defined in the printscreen below, you will be taken to index 3.

check if all buttons are working properly. Meaning that they have been well defined in HTML file and by clicking on each button you are taken to the slide you were supposed to be taken to. Situation: new user does not see presentations if you are adding a new user to the database, meaning that somebody new had joined your team, make sure to edit all active presentations and join this new user to presentations. It is not done automatically.
Situation: can I prevent slide swipe? no, you can not prevent a user to switch to the next slide. Situation: can I open a PDF within some other CLM presentation? yes, please check the chapter on Linked content to learn how to open presentation within some other presentation. Situation: do I need to connect slides by using Flowchart? no, this will be done automatically according to HTML definition. You can change the connections if needed. Situation: I do not like Like and Dislike buttons on the presentation you can hide them using system option 730. Please check our Admin manual to check for other system options available for CLM category. Situation: where can I see the presentations displayed to doctors? check the Standard reports for StoryPad category for all available analysis related to CLM data.
Situation: can users send these presentations by email
yes, but please contact Media-Soft Support Team to set up initial settings for email sending.
Sample CLM
What does a CLM presentation look like? Here is one example of CLM HTML presentation. When uploading a CLM presentation, you will upload a ZIP file to Sales Vision Anywhere, BookVision module.
![]()
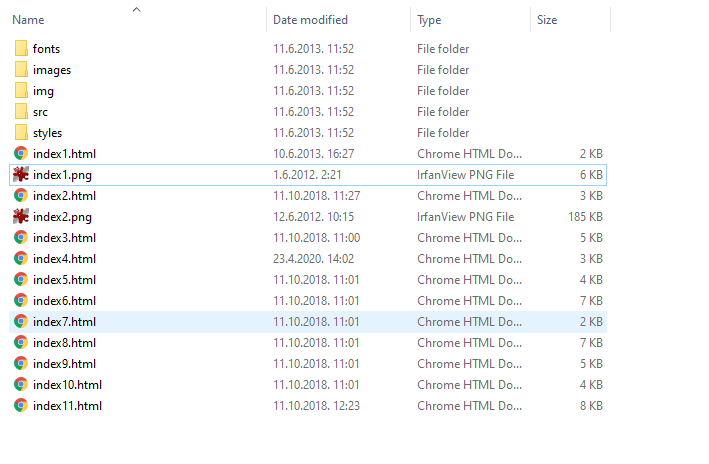
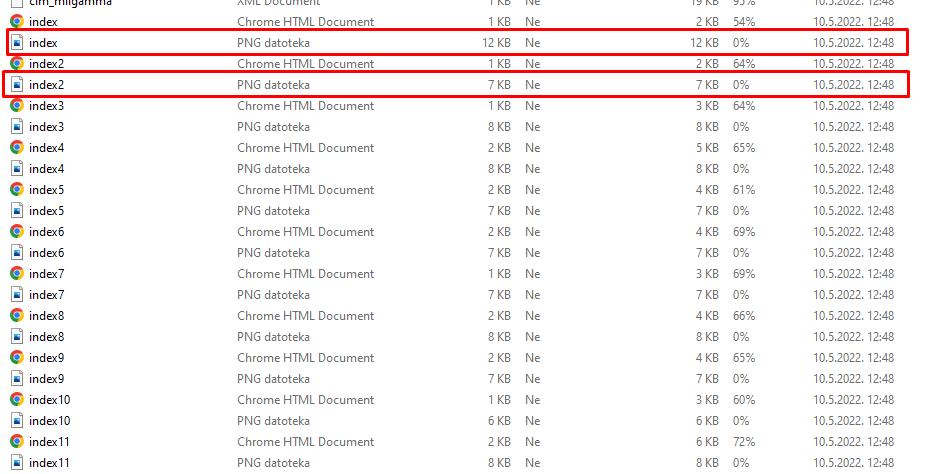
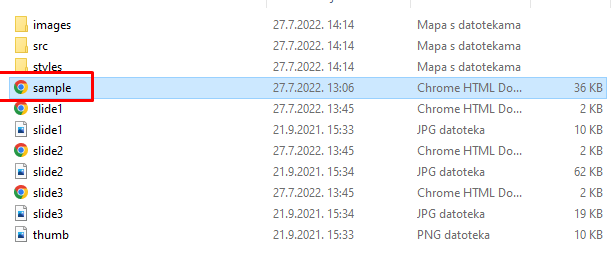
If we extract this file, you are able to see the structure:
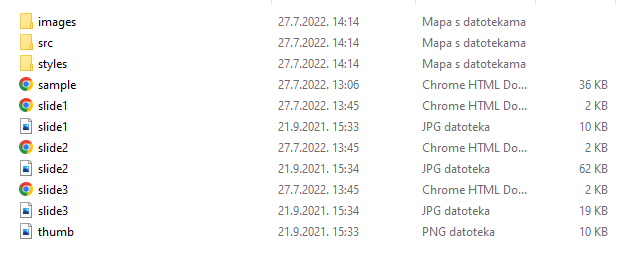
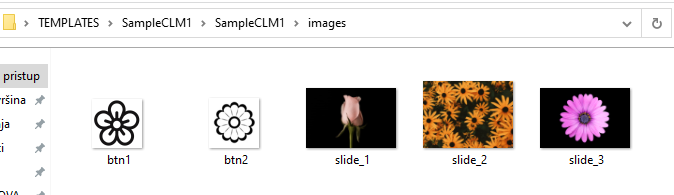
Folder images contain all the images used in the presentation. The names of these images have to be the same as the one defined in HTML.
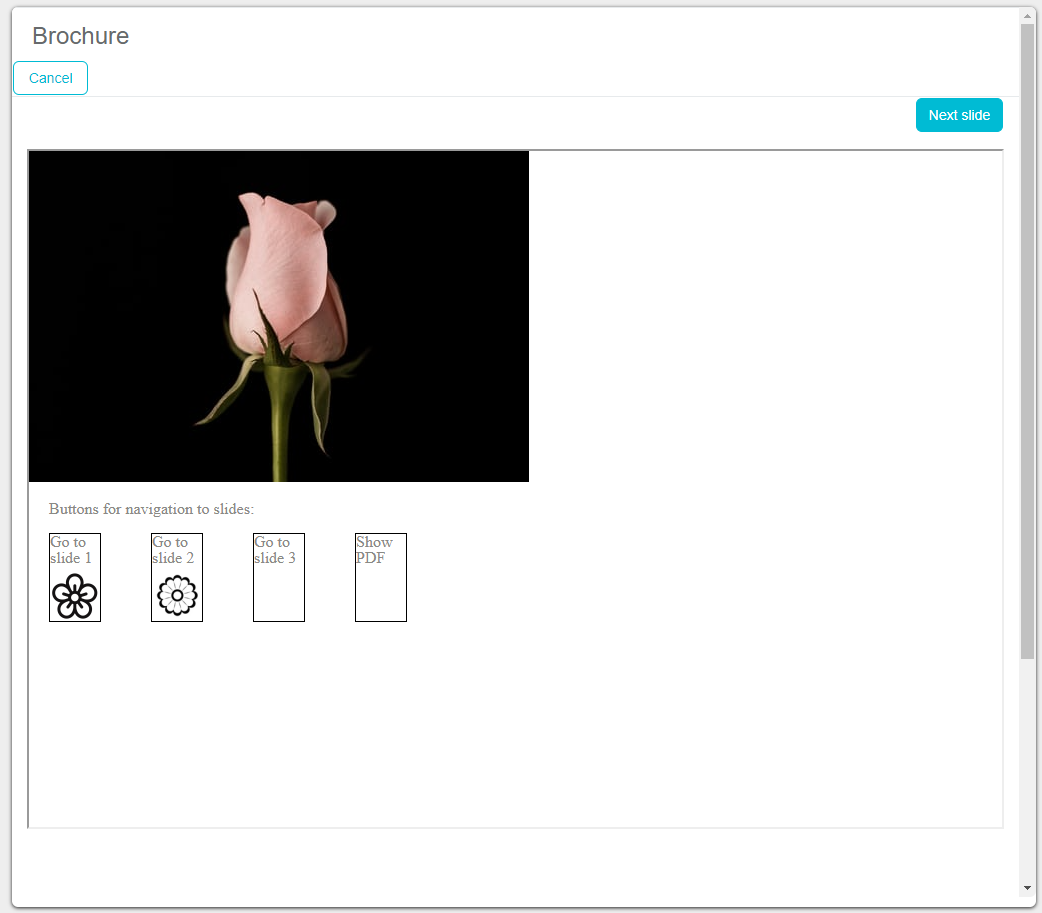
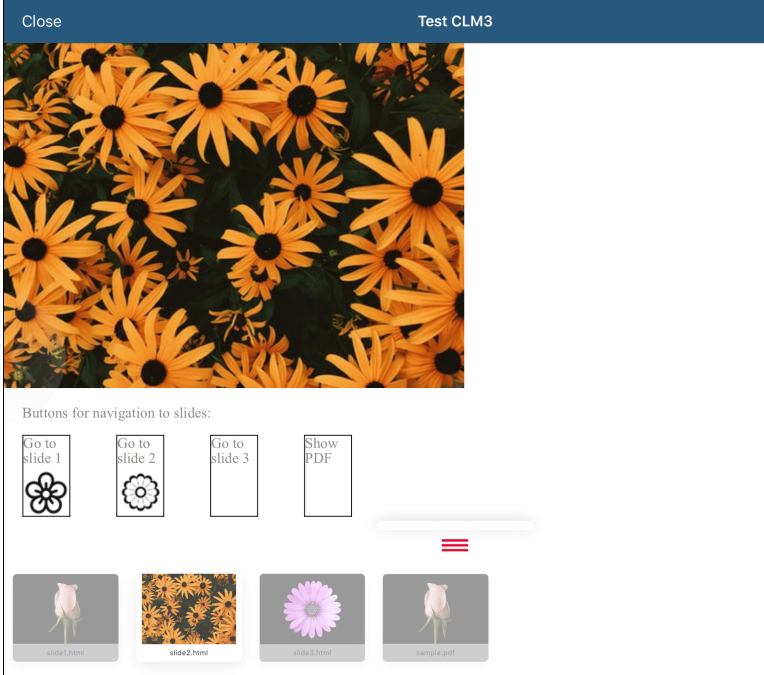
Preview of the second slide by using the Brochures button after uploading the presentation to Sales Vision application.
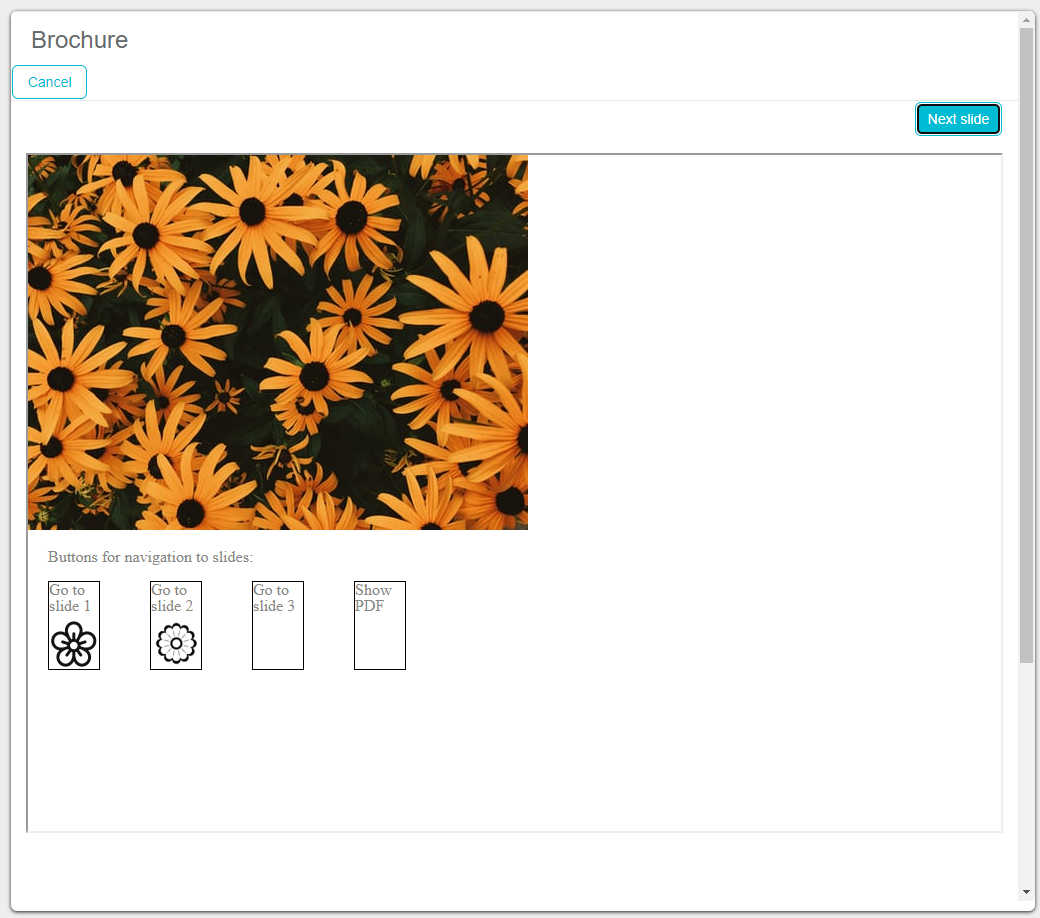
In the lower part of the screen there are buttons used for navigation. For example, by clicking on the first image you will be taken to slide nr 1. By clicking on the second image, you will be taken to second slide, on the third image to slide nr 3 and by clicking on the last button, a PDF file will be opened. This PDF file is in the upload file as well, in our sample HTML it is called "Sample".
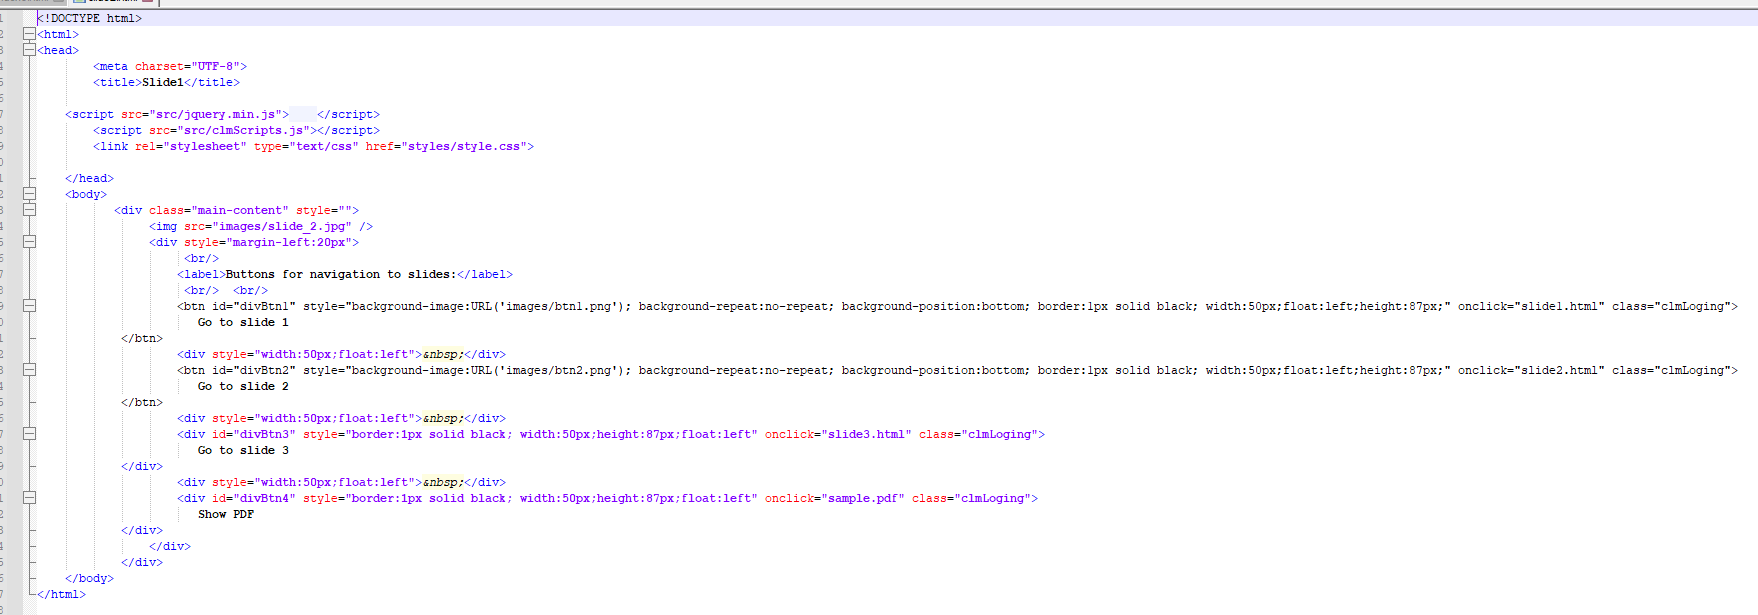
What does the HTML definition of this example look like?
<html>
<head>
<meta charset="UTF-8">
<title>`Slide1`</title>
<script src="src/jquery.min.js"></script>
<script src="src/clmScripts.js"></script>
<link rel="stylesheet" type="text/css" href="styles/style.css">
</head>
<body>
<div class="main-content" style="">
<img src="images/slide_2.jpg" />
<div style="margin-left:20px">
<br/>
<label>Buttons for navigation to slides:</label>
<br/> <br/>
<btn id="divBtn1" style="background-image:URL('images/btn1.png'); background-repeat:no-repeat; background-position:bottom; border:1px solid black; width:50px;float:left;height:87px;" onclick="slide1.html" class="clmLoging">Go to slide 1</btn>
<div style="width:50px;float:left"> </div>
<btn id="divBtn2" style="background-image:URL('images/btn2.png'); background-repeat:no-repeat; background-position:bottom; border:1px solid black; width:50px;float:left;height:87px;" onclick="slide2.html" class="clmLoging">Go to slide 2</btn>
<div style="width:50px;float:left"> </div>
<div id="divBtn3" style="border:1px solid black; width:50px;height:87px;float:left" onclick="slide3.html" class="clmLoging">Go to slide 3</div>
<div style="width:50px;float:left"> </div>
<div id="divBtn4" style="border:1px solid black; width:50px;height:87px;float:left" onclick="sample.pdf" class="clmLoging">Show PDF</div>
</div>
</div>
</body>
</html>
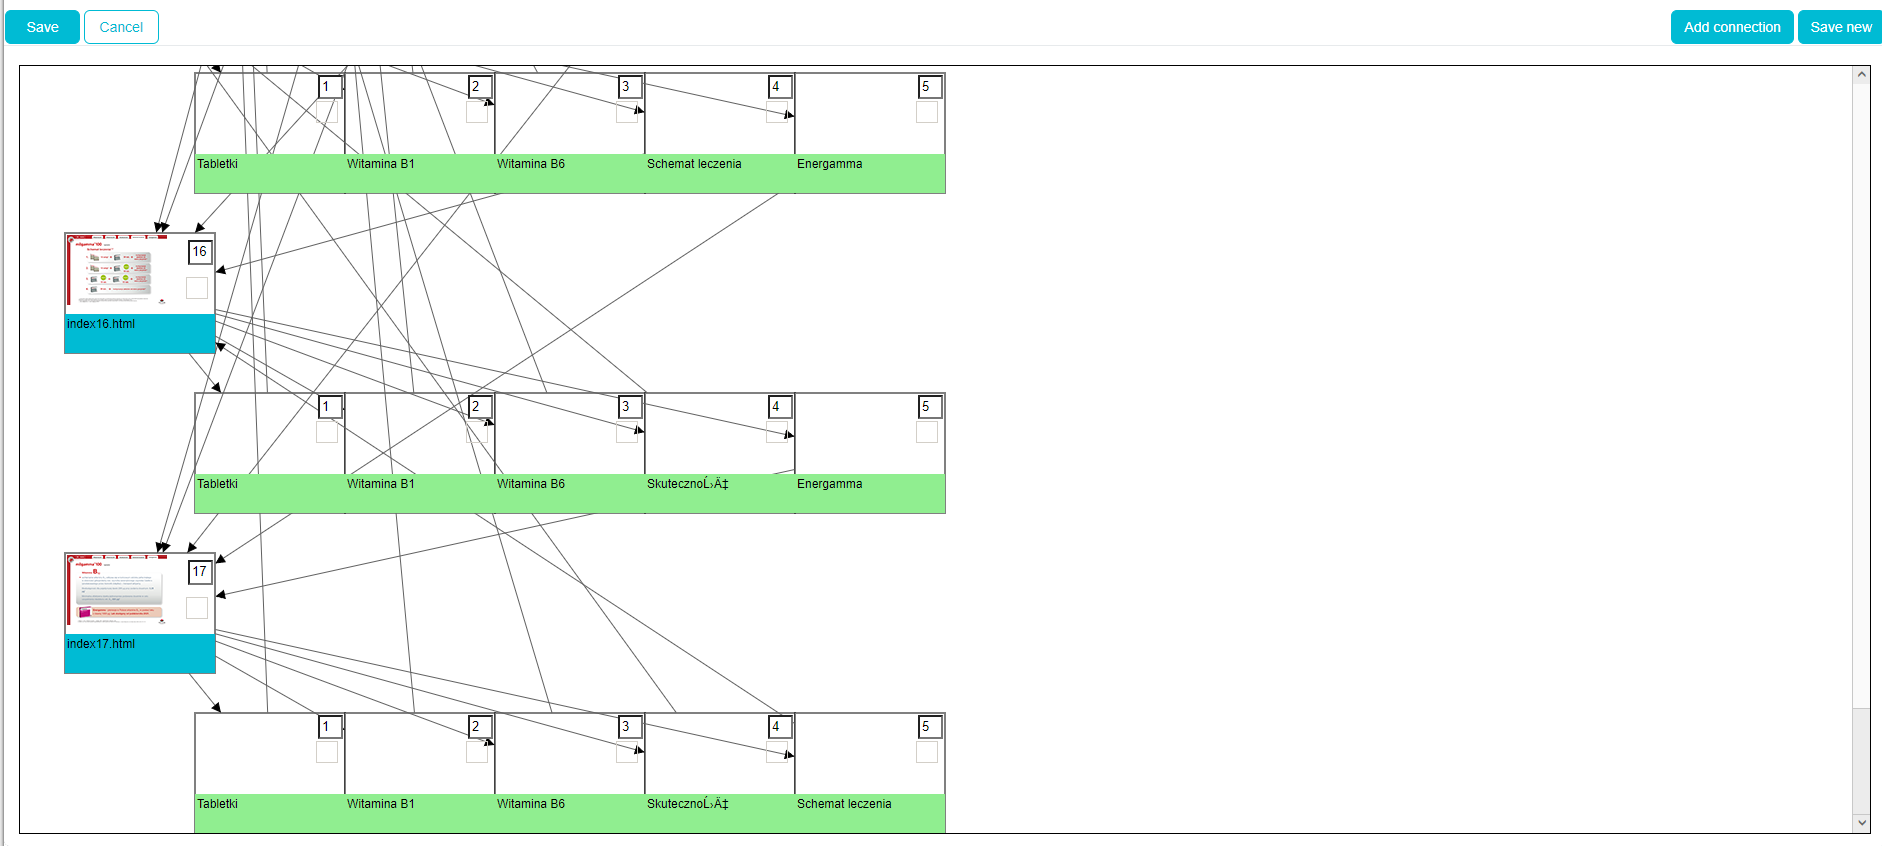
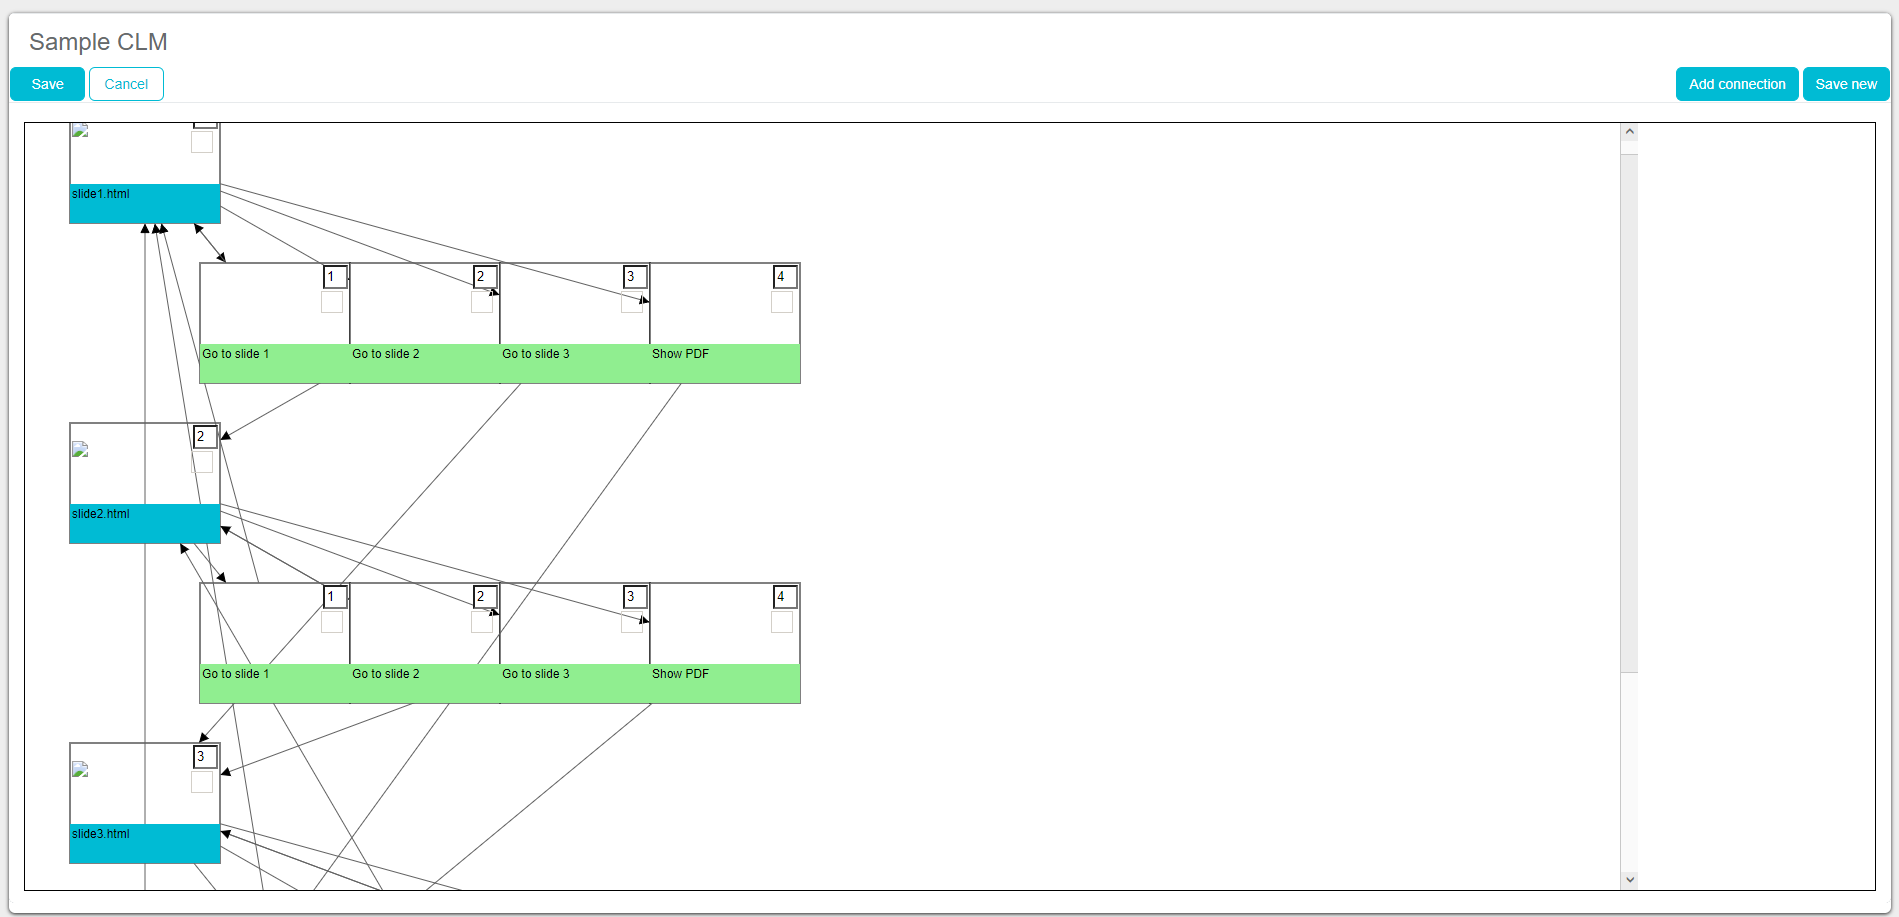
Preview of connections set in HTML by using Flowcart button after uploading the presentation to Sales Vision app:
What does this slide look like on the Sales VisionNext iPad app?
Preview of connections set in HTML by using Flowcart button after uploading the presentation to Sales Vision app: