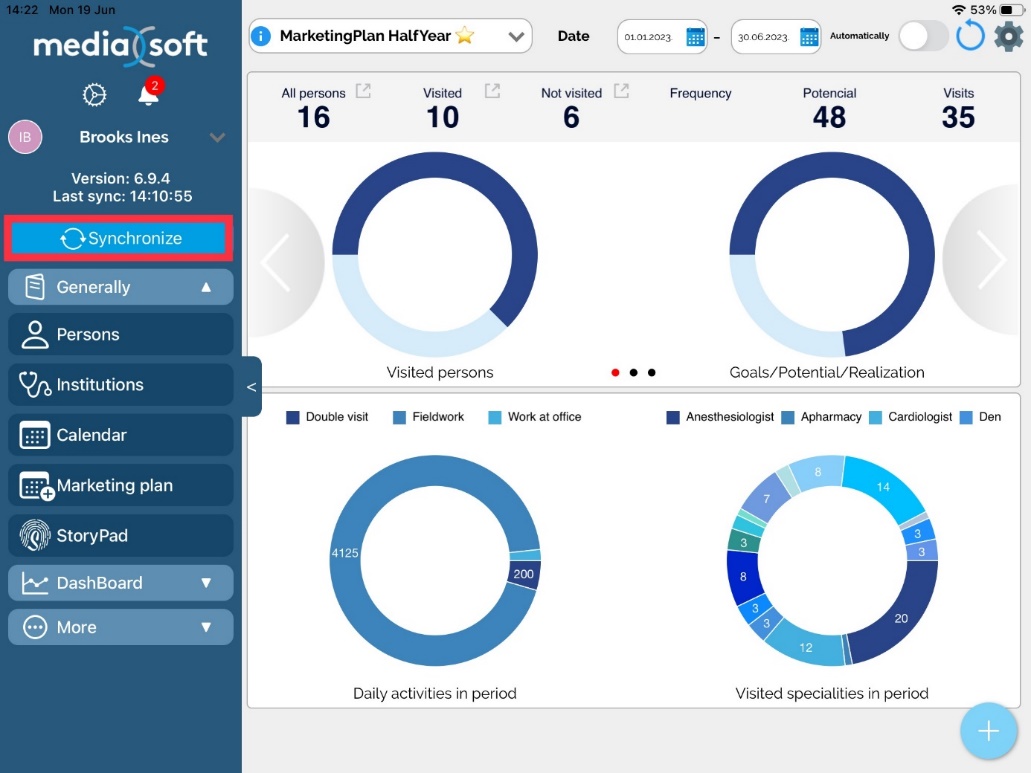
Synchronization
Synchronize (first button) allows us to Send and Receive Data to and from the central server.
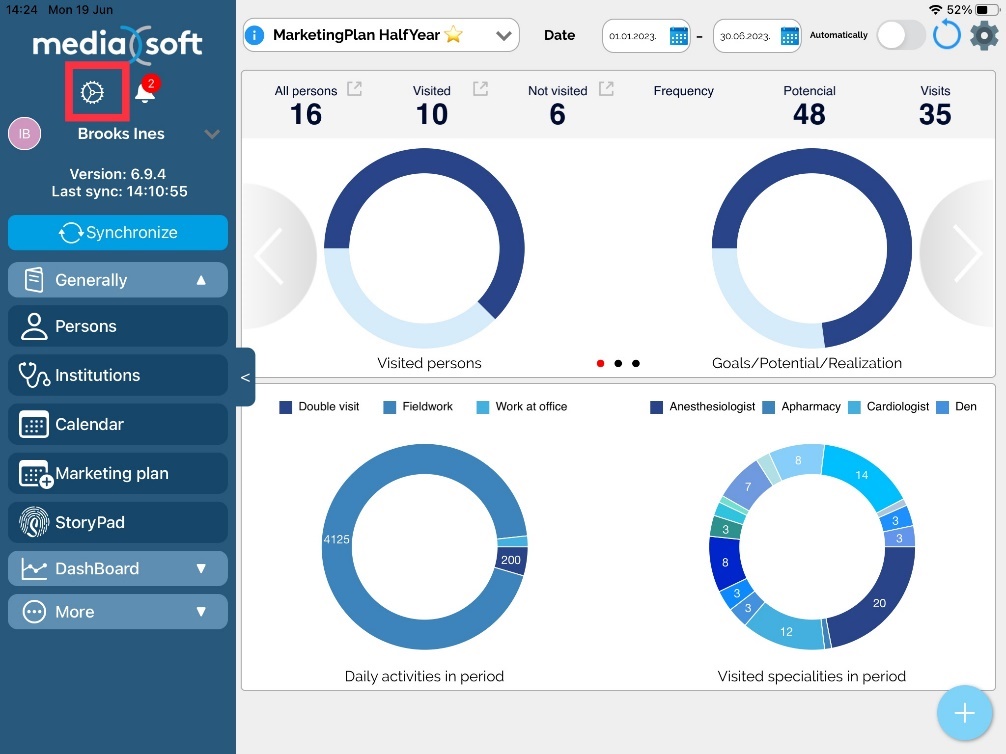
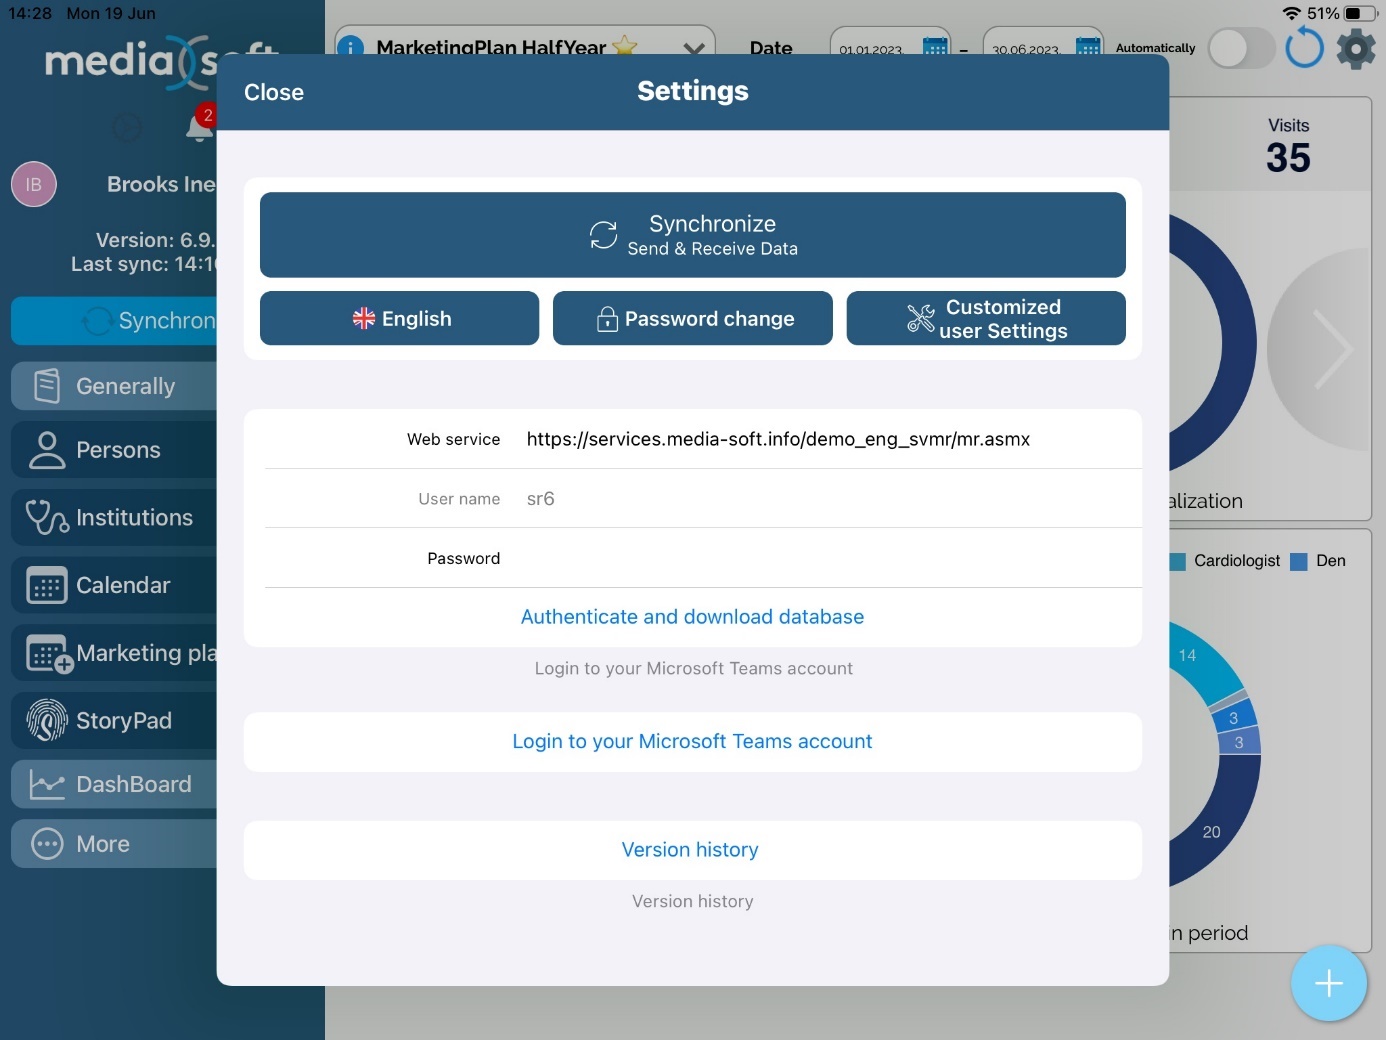
Also, except first option we can change the Language, change password and access Customized user Settings, all by clicking on this button:
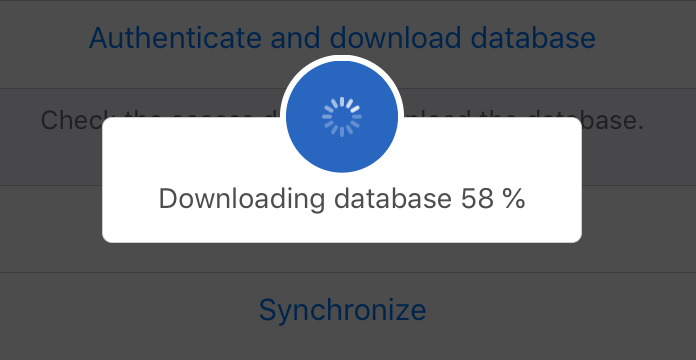
Expanding the Authenticate and download database we can see the info about web service and username, and also download the complete database which will replace current. Be sure when you are doing this because there is no going back to previous. When downloading is started we can see the download progress in the progress bar like on the following figures:
After we start, first is all prepared for starting with the download process.
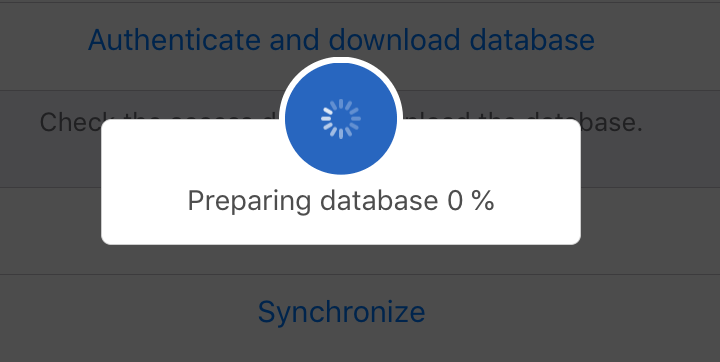
Next, database is being prepared for the download.

And after preparing is finished, download is started.
After successfully download, the following window pops up:
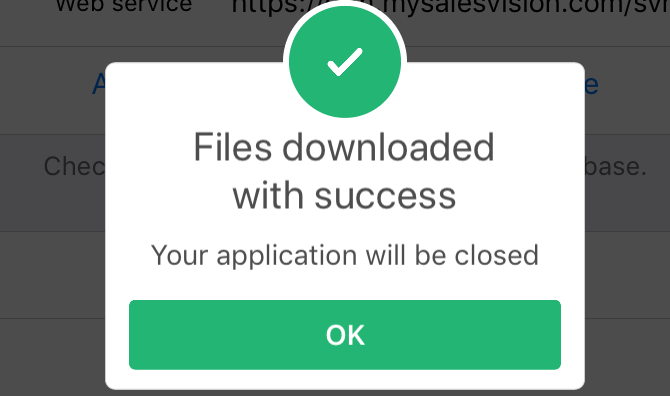
By pressing OK button application retrieves the database and it applies to the application. Important thing to remember is, if you download database without previously synchronizing, the data will still be sent to the server.
Make sure you are connected to the Internet for all of followings steps.
Synchronize will gain all changes made in Anywhere or Windows application and will send changes from iPad to server. This option must be used because all entered data is stored local on iPad and needs to be uploaded on server. It is recommended to use it often so data will not be lost.
Login to your Zoom account will opet a window for login to Zoom account.
In Language selection we can choose between languages that are set by Administrator in Admin application.
Check for updates will compare current version on iPad and version on server. If there is new version on server, you can retrieve it.
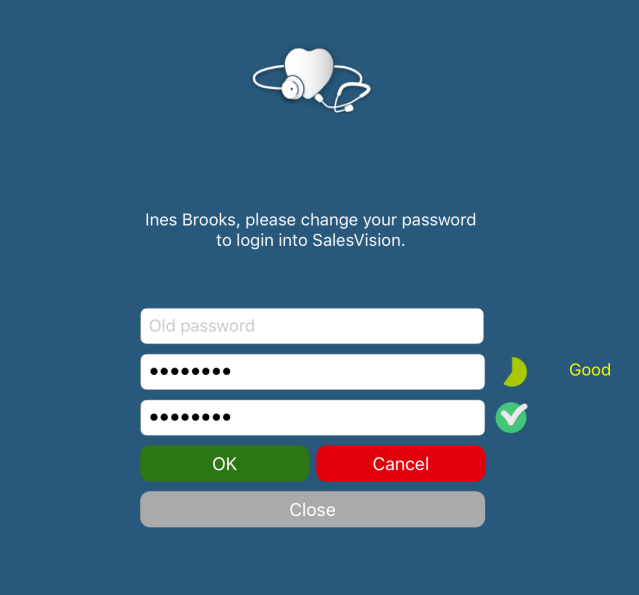
Password change will give you possibiltyy to can change your password
We can change password by clicking on Password change button . When window opens, we must enter current password (if now there is no password field needs to stay blank) and new password two times (two times is because of a security). When entering new password, on right side next to the field we can see strength. After password is set, click on OK to finish or Cancel to remove text in fields. Close button will close window and return to Settings window.
Following figure shows possible customizations in Calendar and System options.
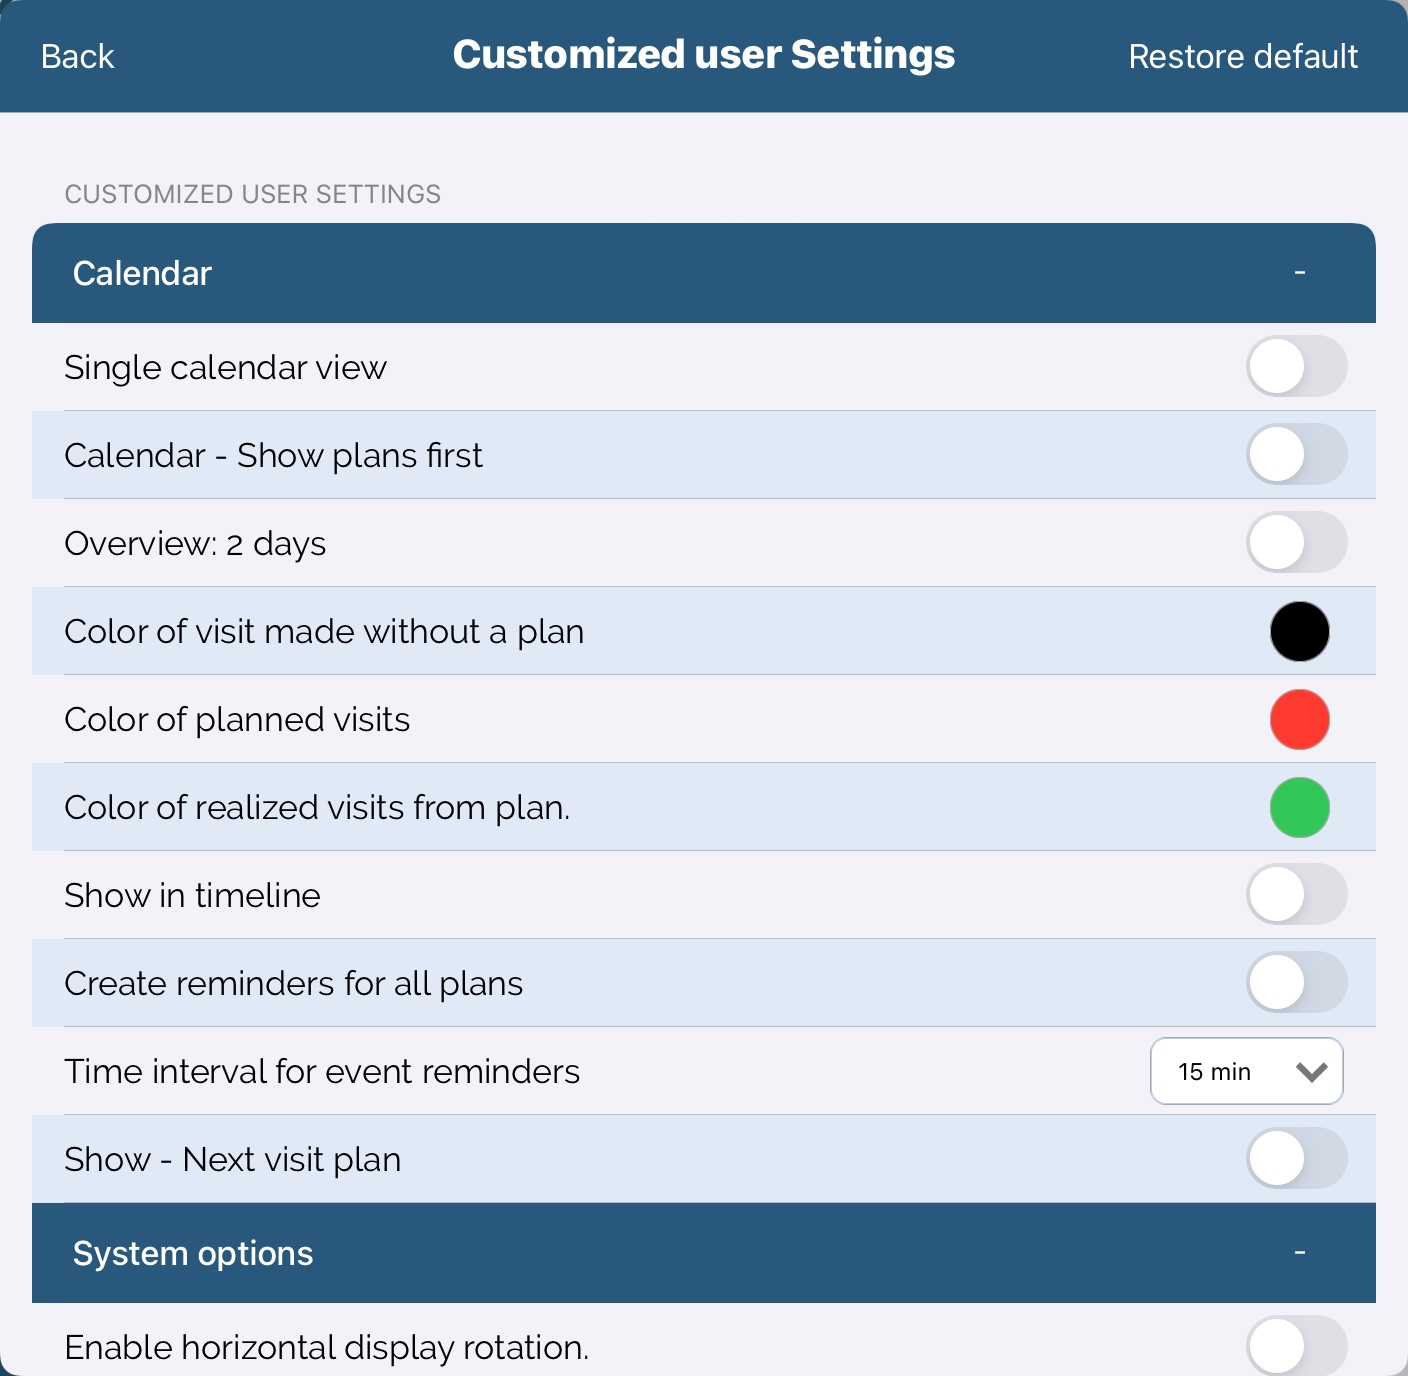
These user settings are stored locally on the iPad device. They are reset to defaults if we reinstall complete application or reset them manually.
As you can see there is an option Color scheme. When you tap on colored circle in that line, you can choose which color do you want to use. We will select green to show you how it work’s. That color is used to highlight on which person or institution you are positioned on.
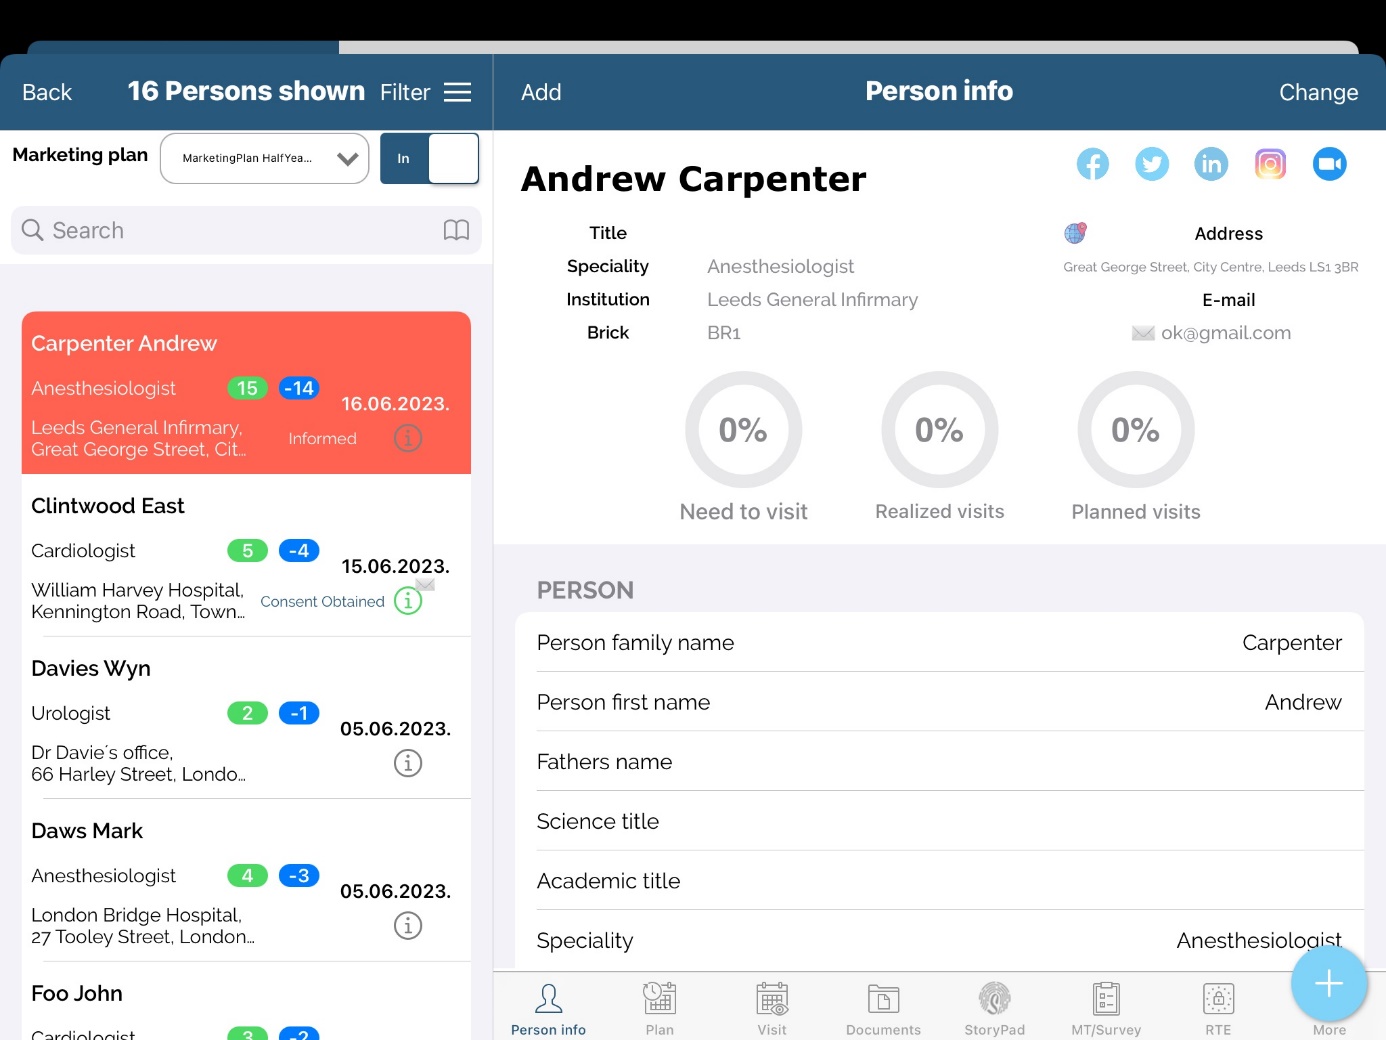
As you can see on the picture below, we are positioned on person “Carpenter Andrew” and he is highlighted with dark blue color, which is default.

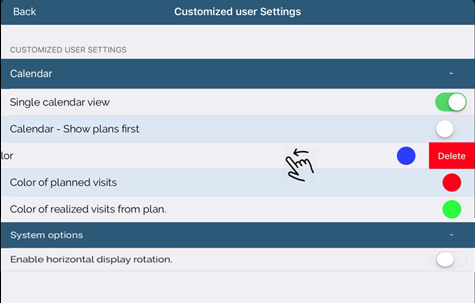
Changed Color scheme example:
If we want for example one of the setting to default we simply swipe option to the left and press delete or simply swipe all the way to the left (see the following figure).
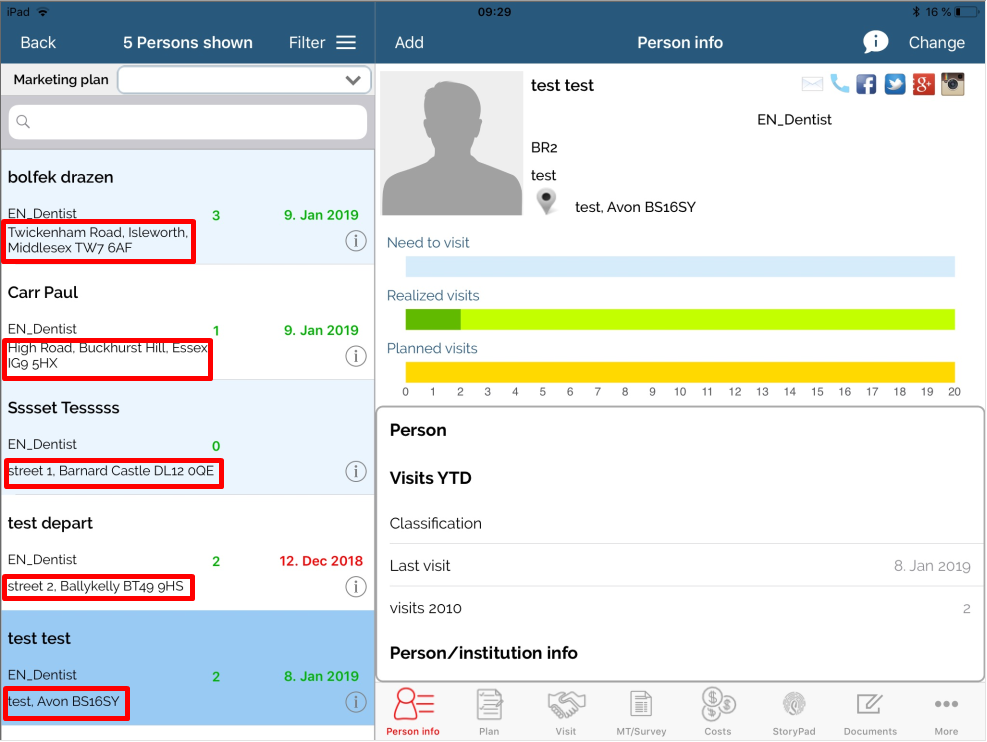
Recently, we have added new option in Customized user Settings and it is called Person list: Show the work addresess of the person which enables visibility of the work address of the person in person list (picture under) .