Routing AI *
You can find Route AI In category More.
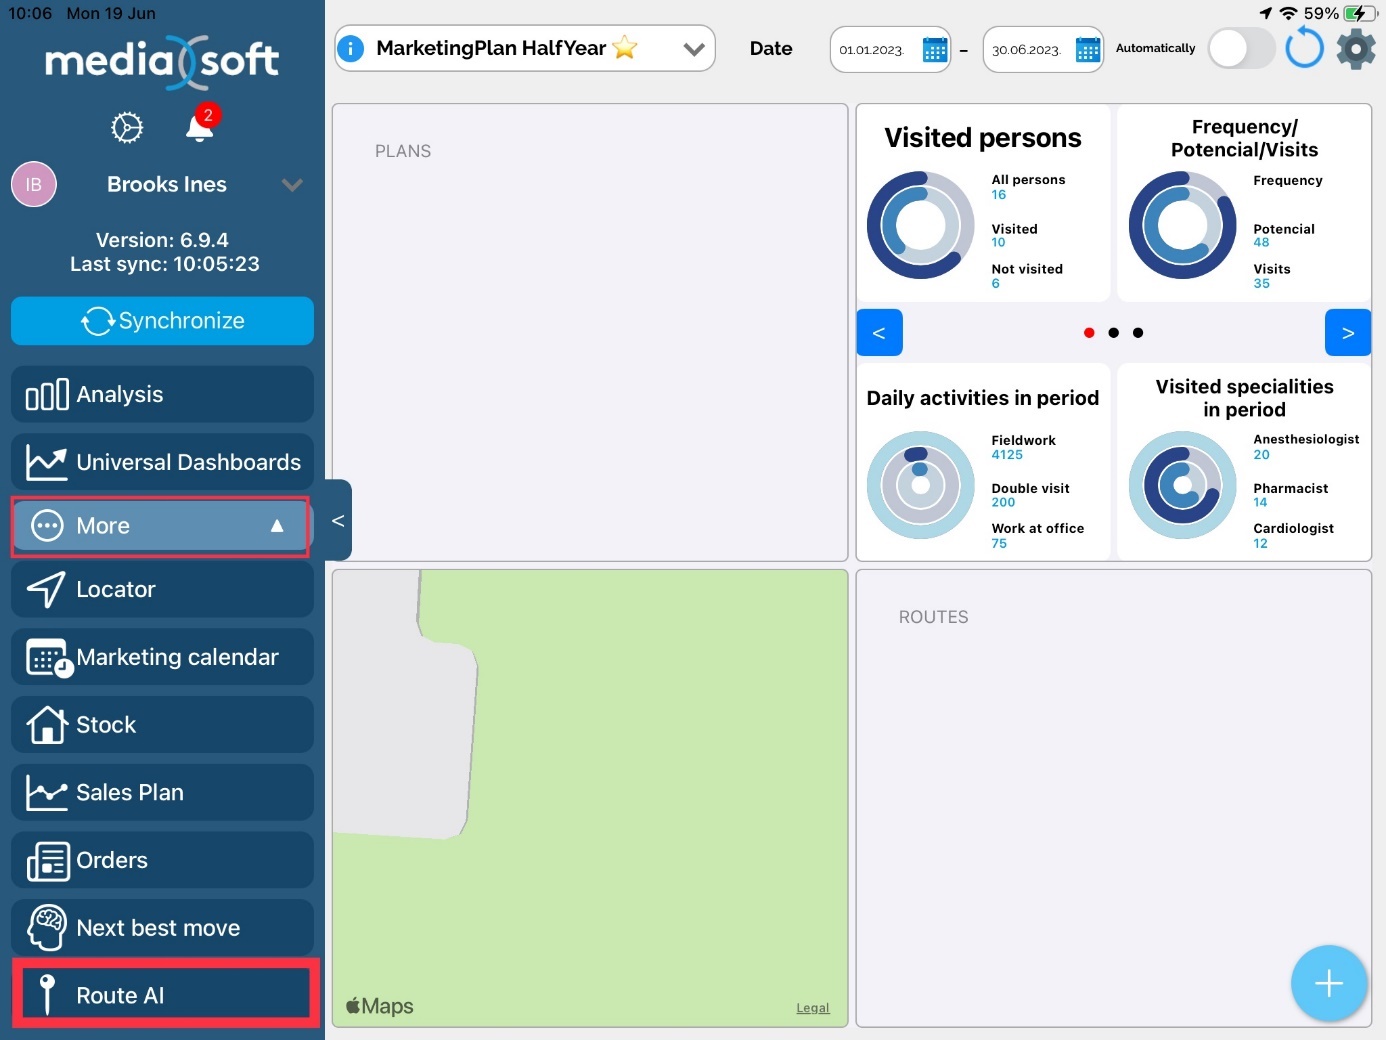
This is an option in licence. For more informations contact our Support team.
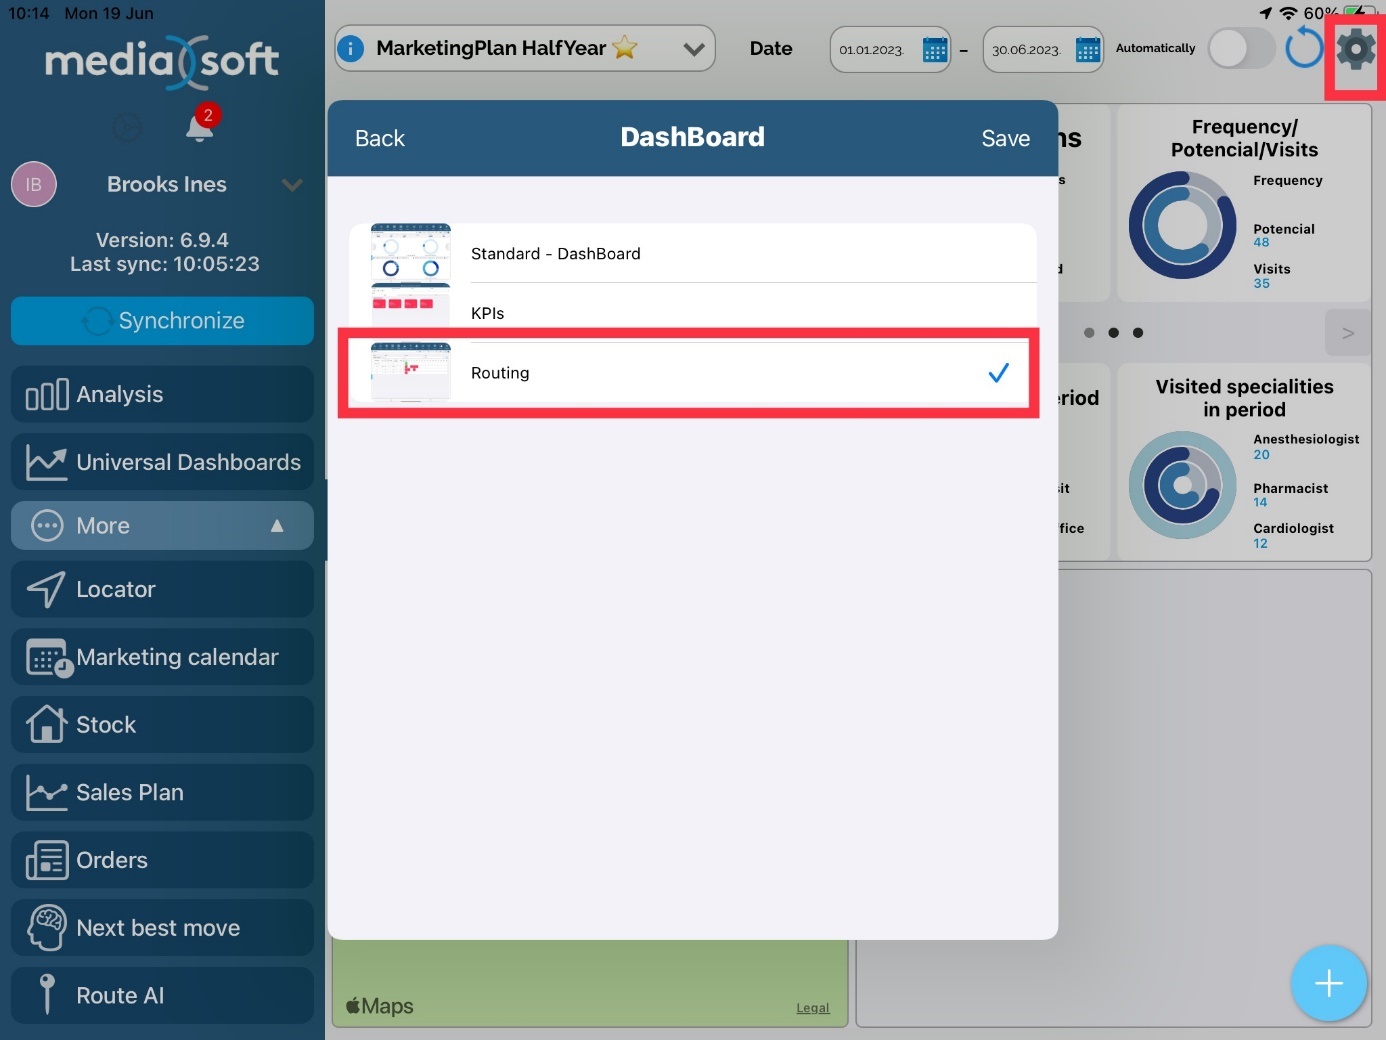
You can set Routing as your default dashboard view.
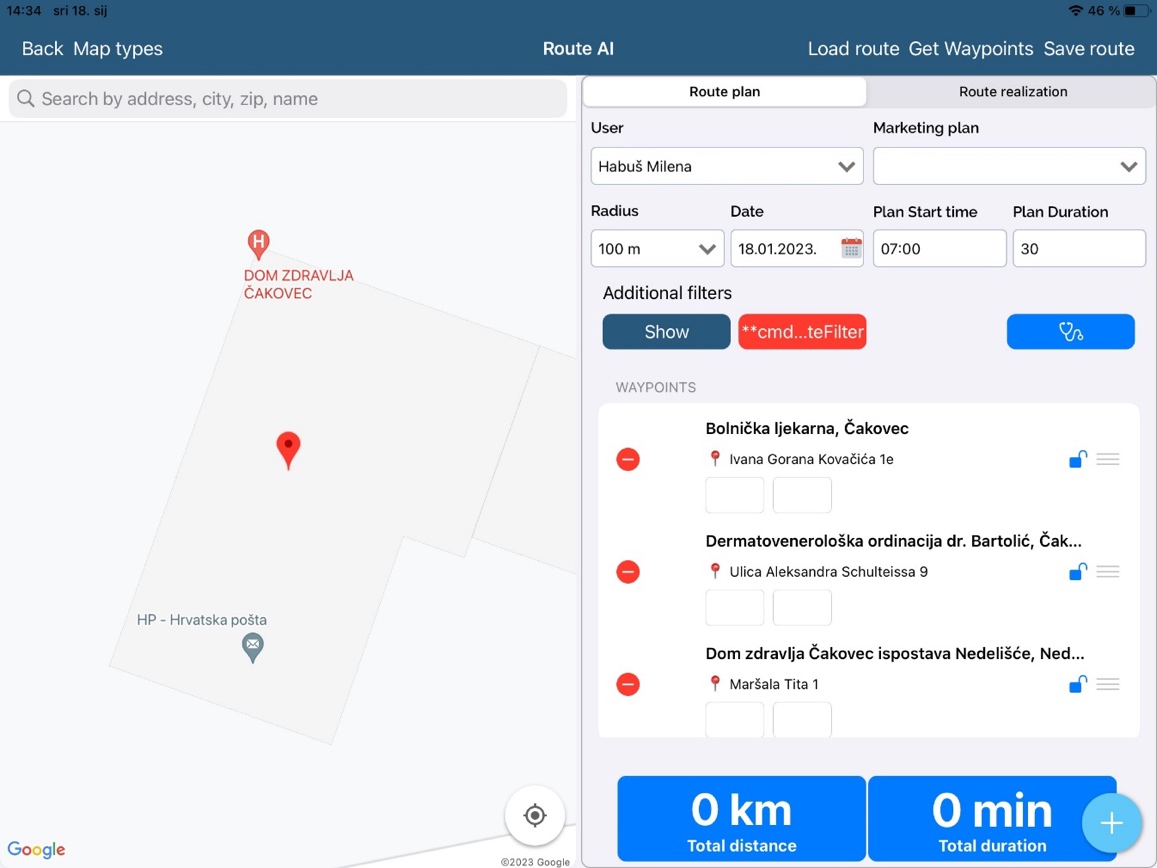
Starting screen in Routing AI module:
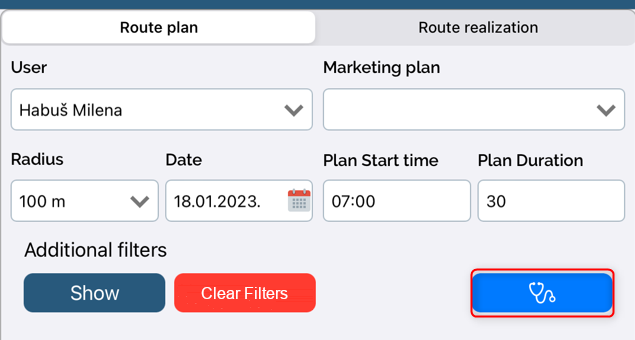
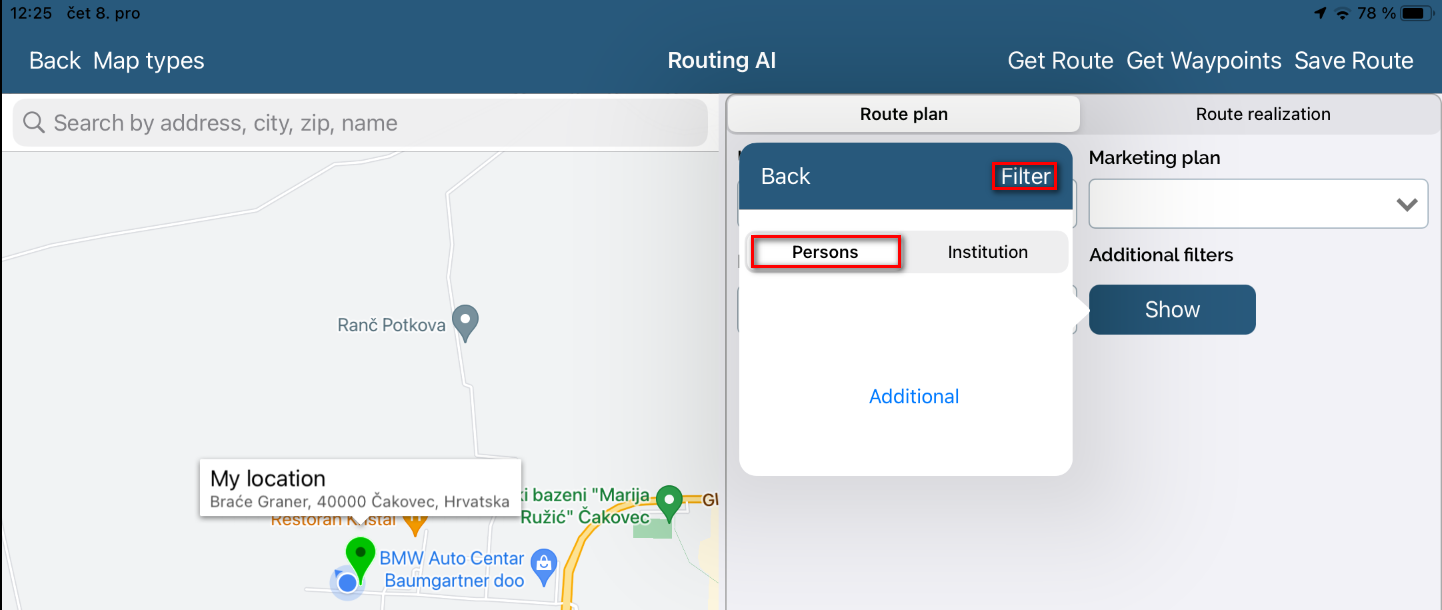
By clicking on the button “Show”, you will get a possibility to show persons or institutions.
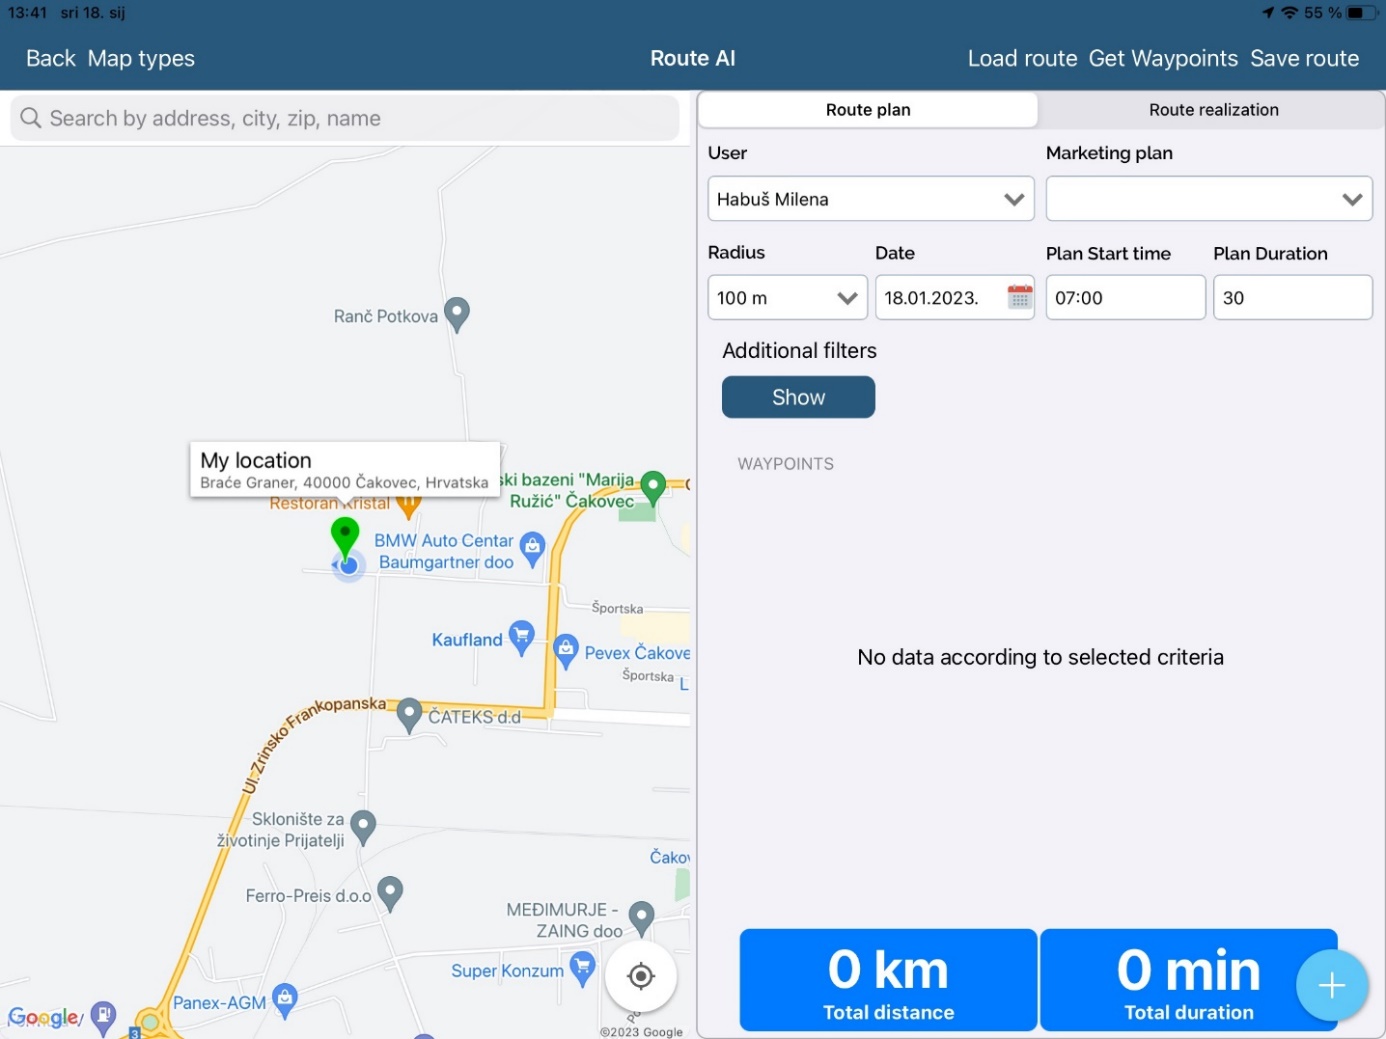
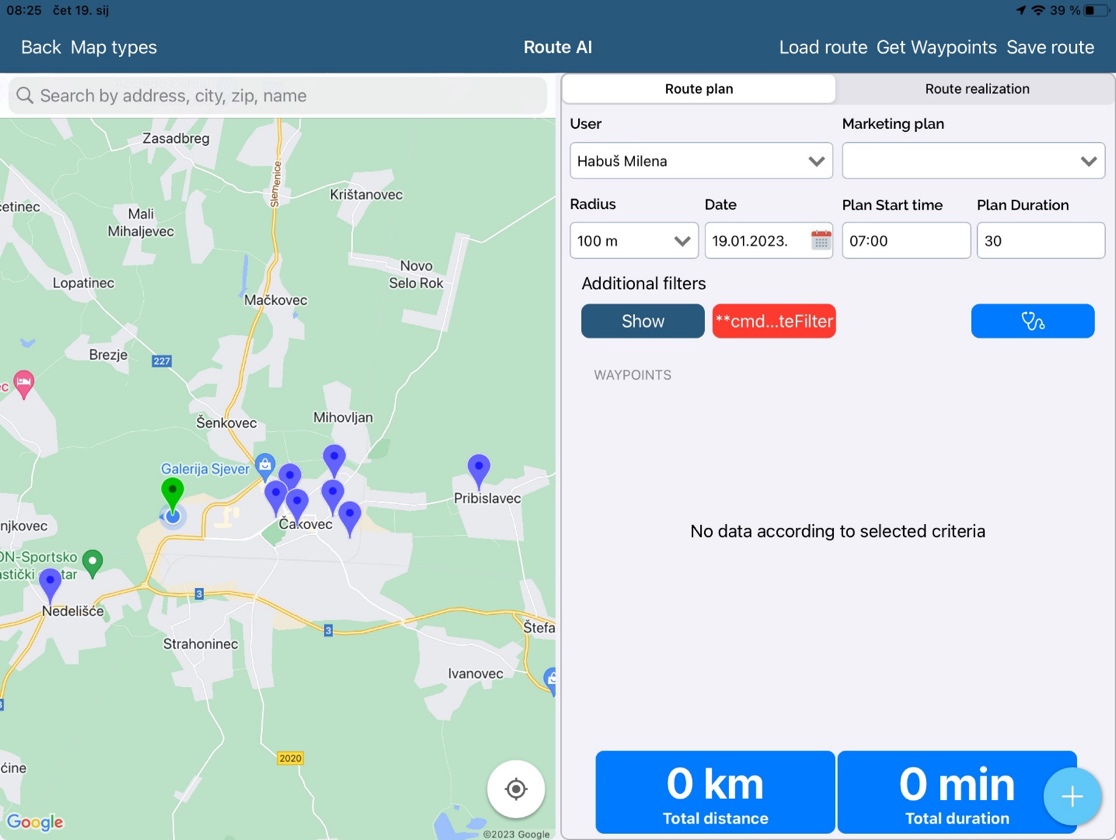
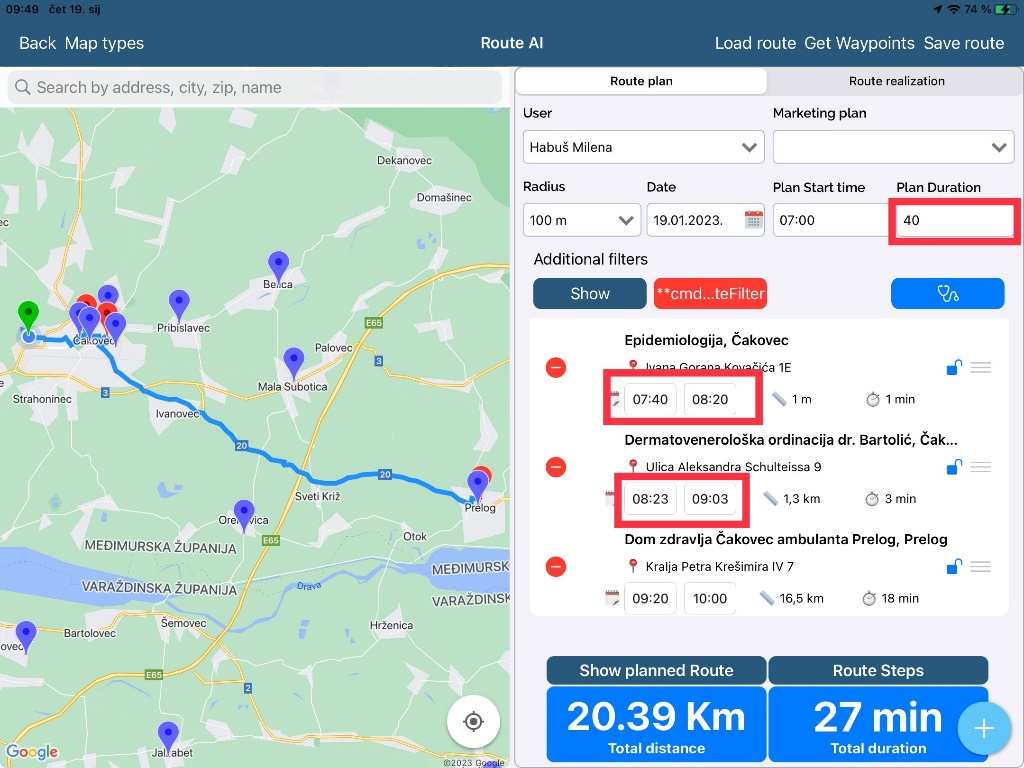
For deep filter, click on “Additional”.
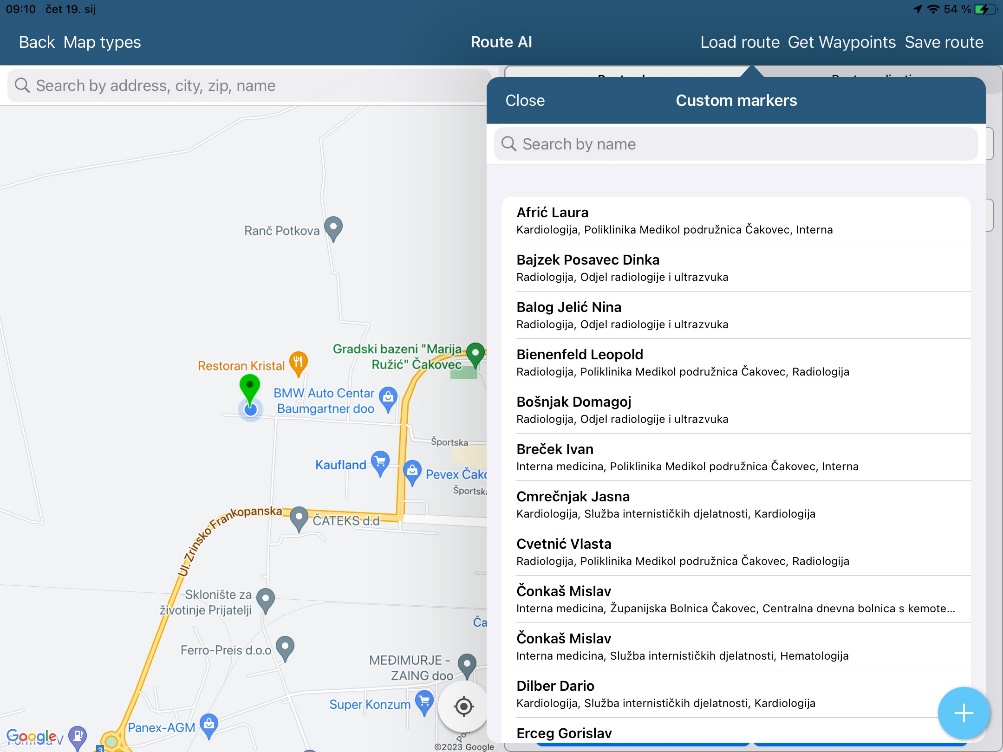
By clicking on the button “Filter” you will get a list of persons or institutions.

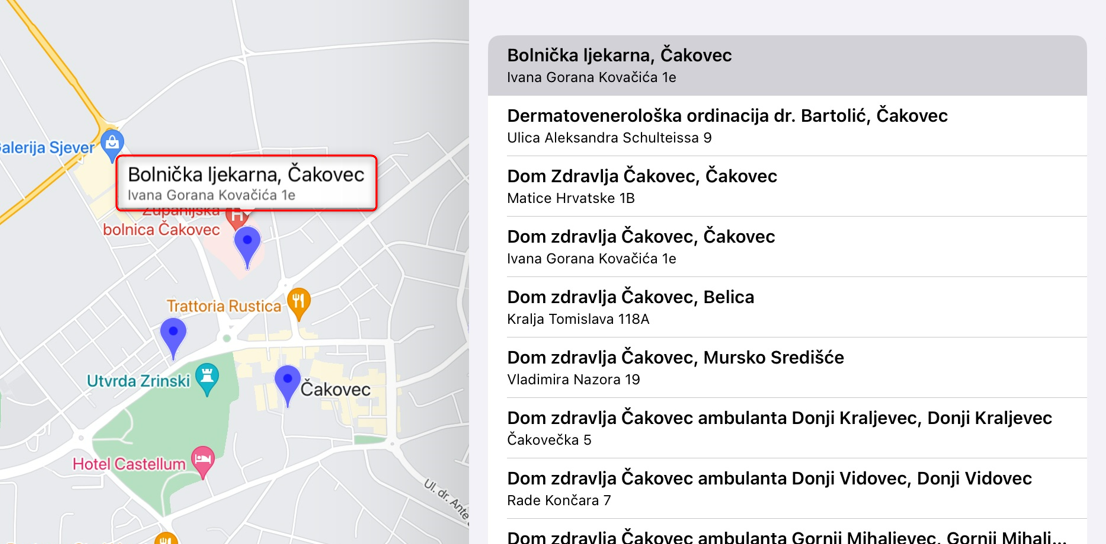
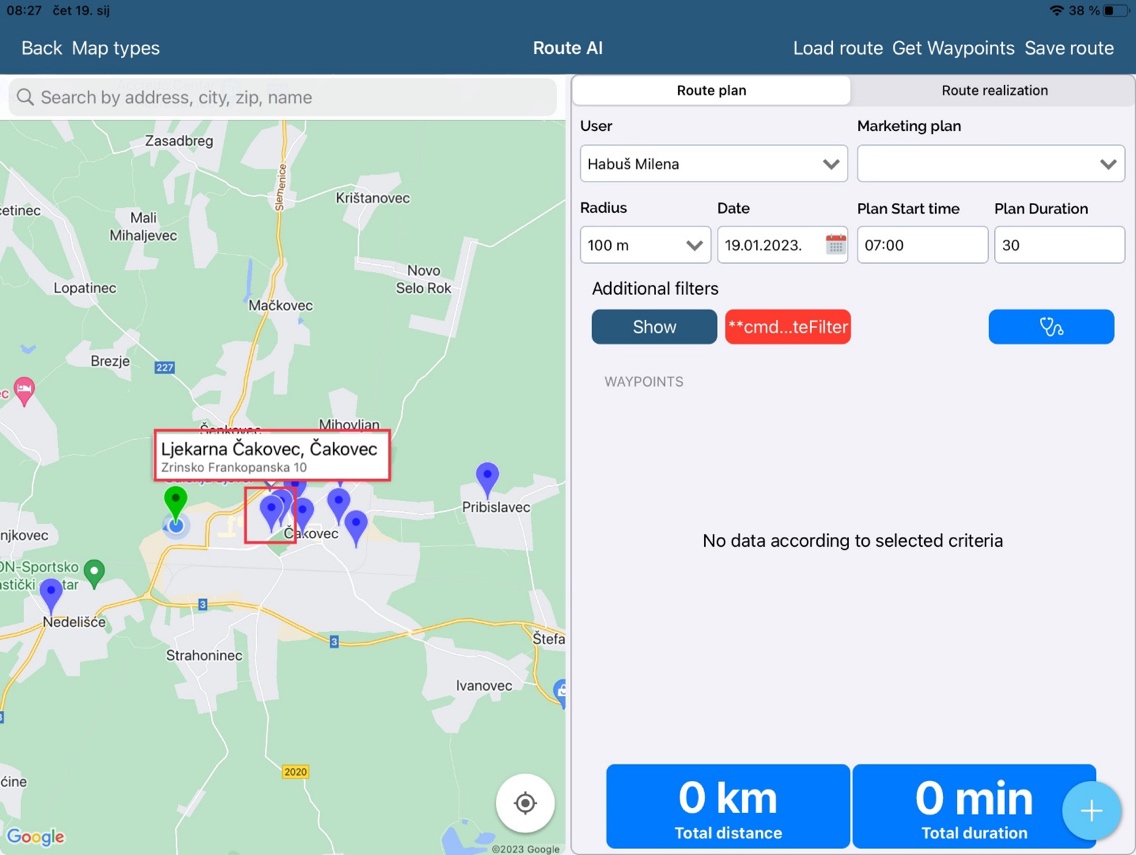
When you click on marked icon below, you will get the list of institutions.
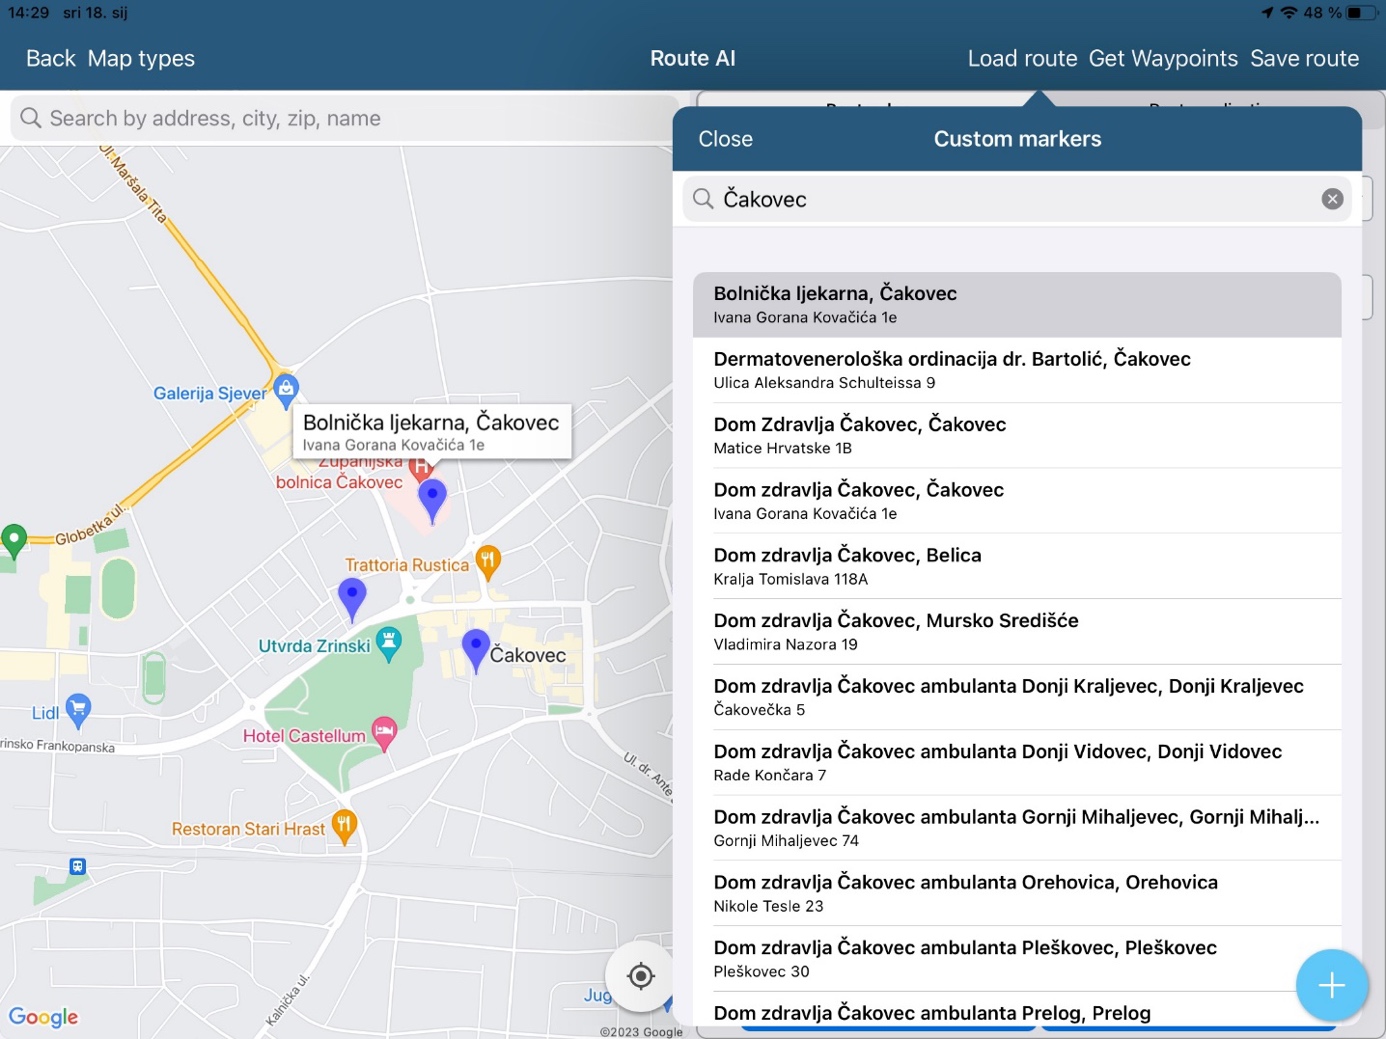
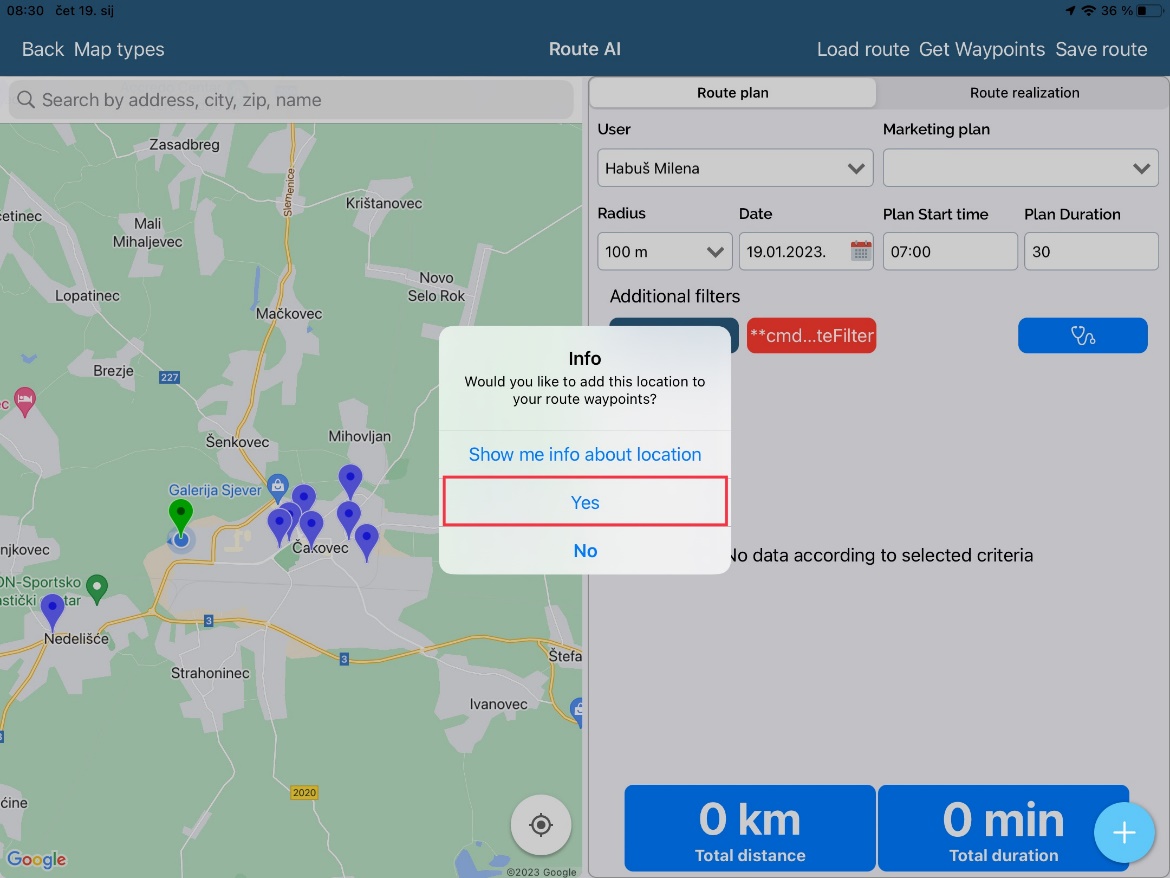
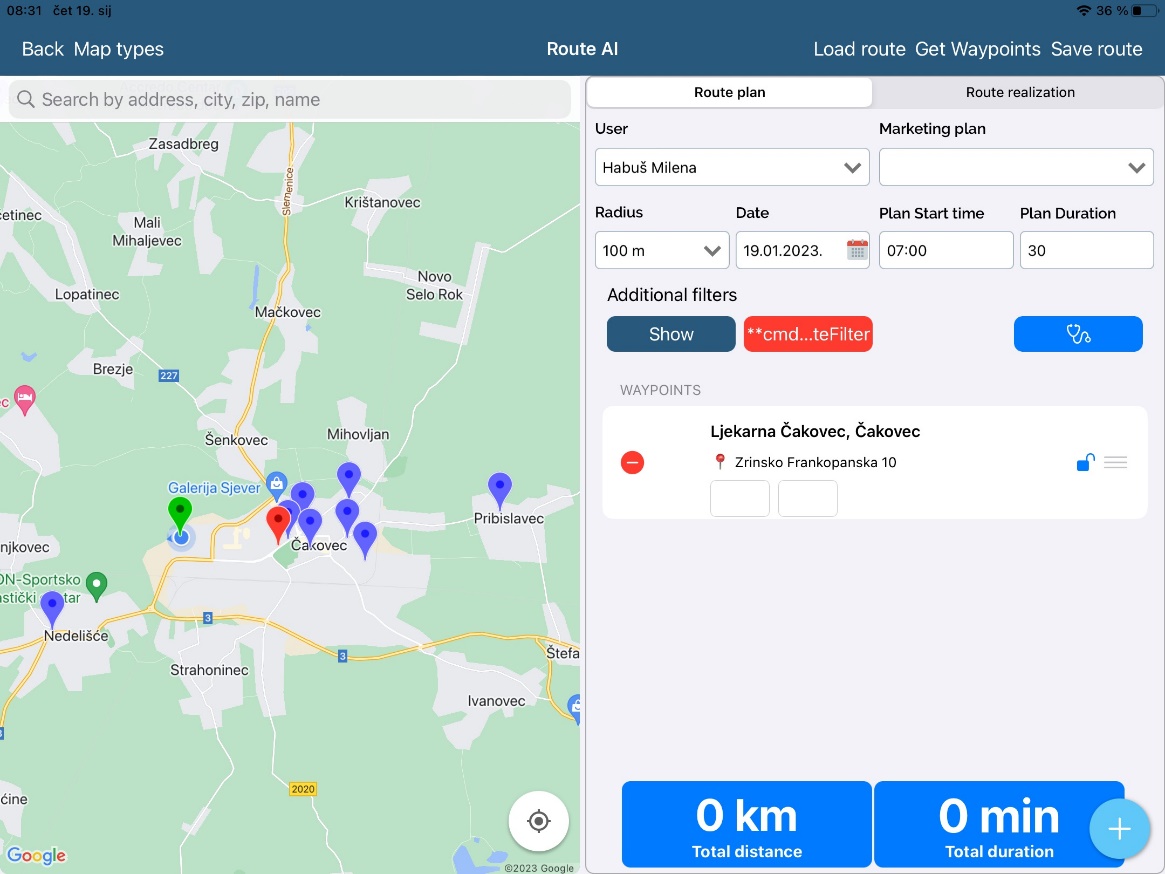
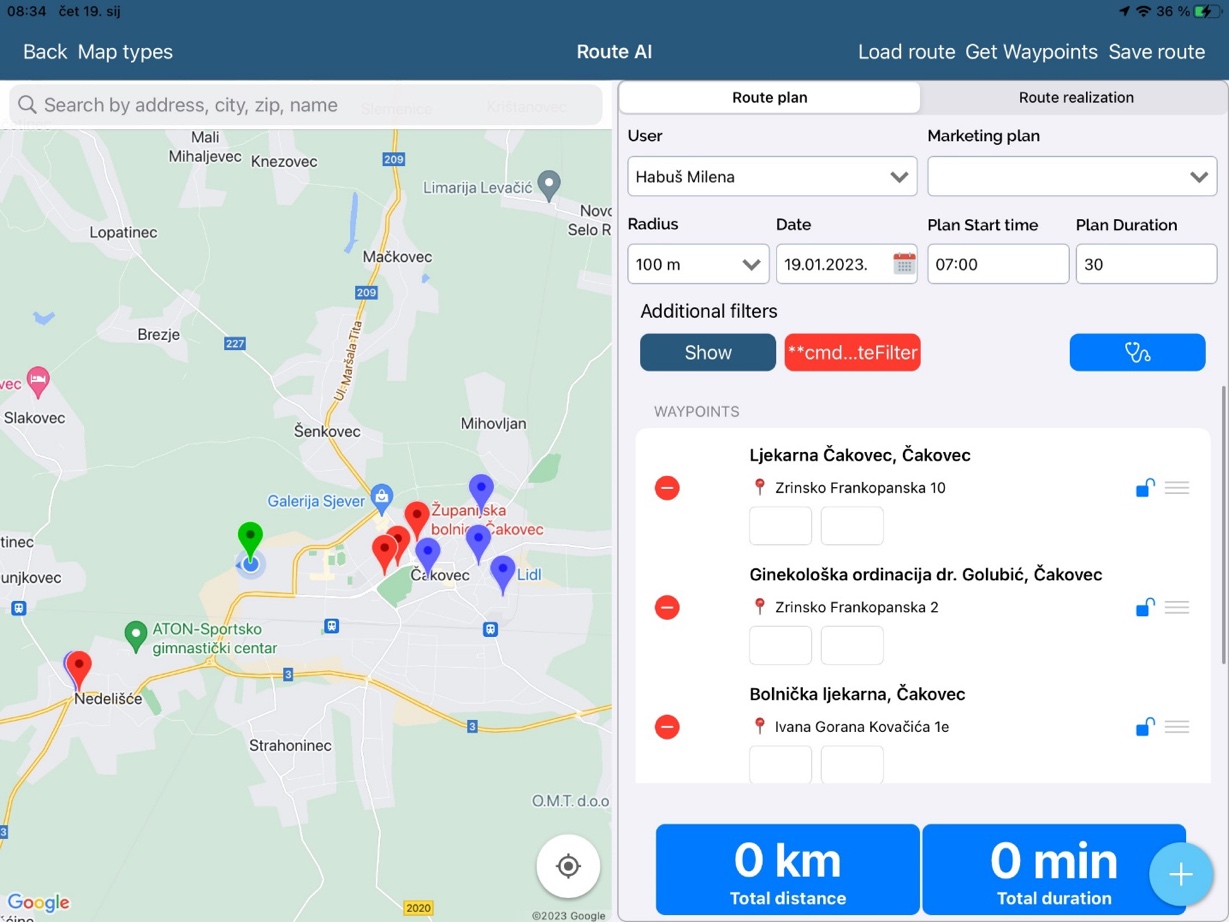
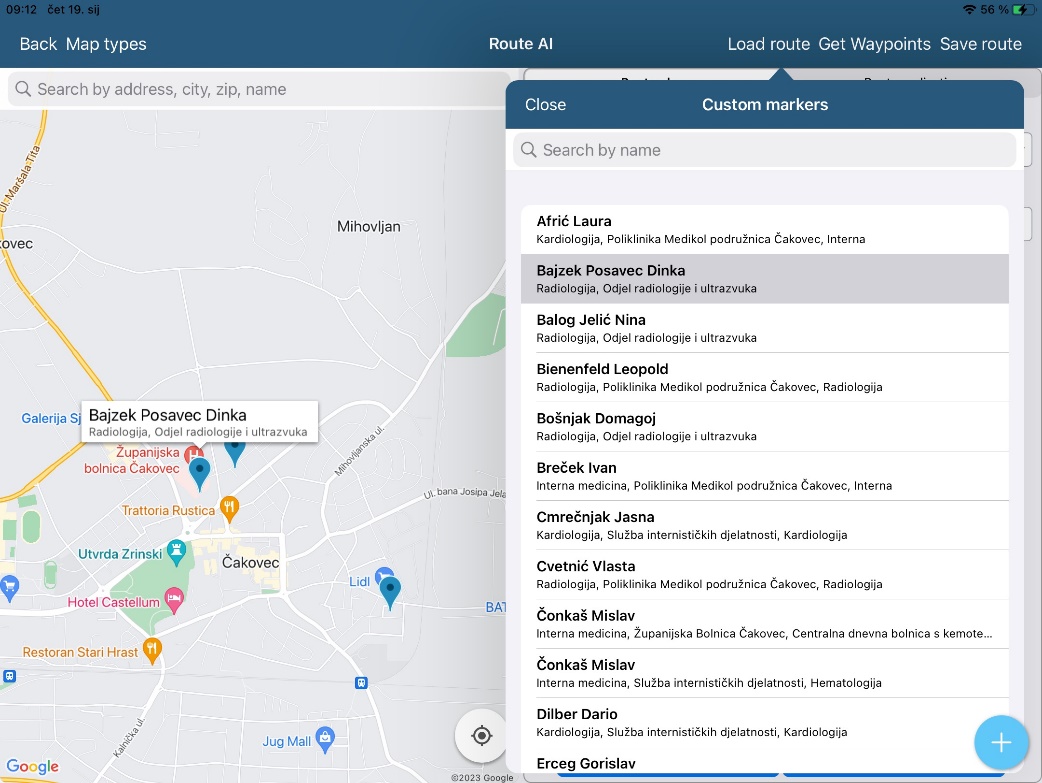
To create a waypoint, click on desired institution:
Next, click “Yes” as marked on the picture below:

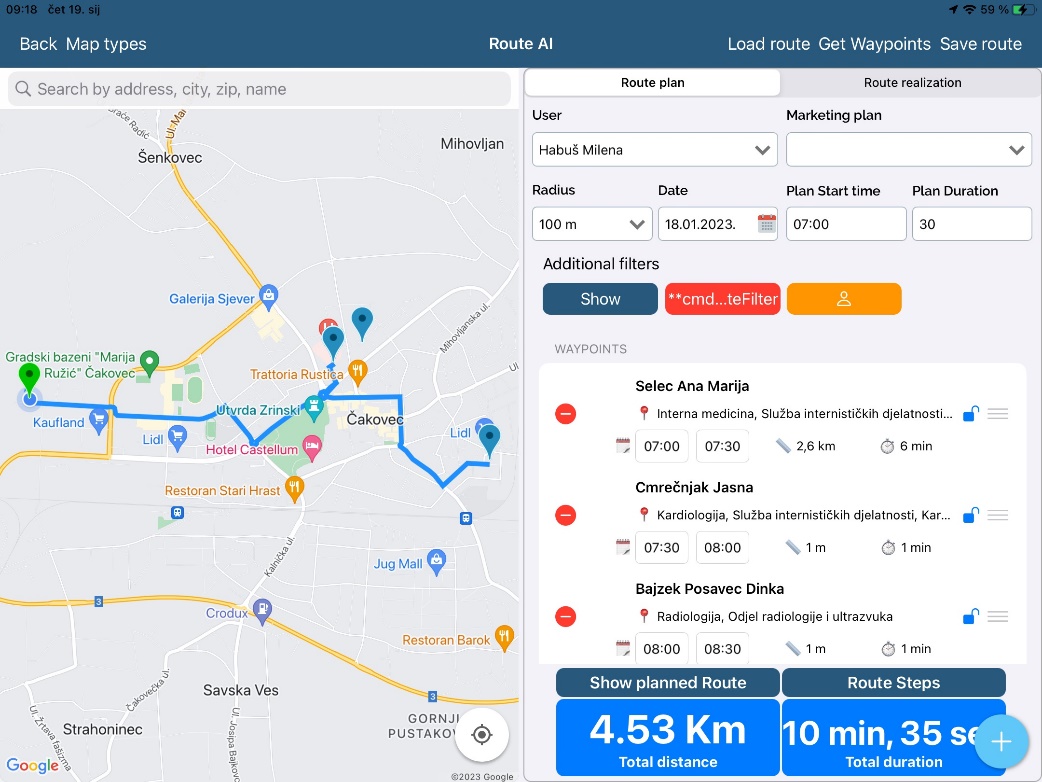
Click “Get Route” for app to calculate the best route.
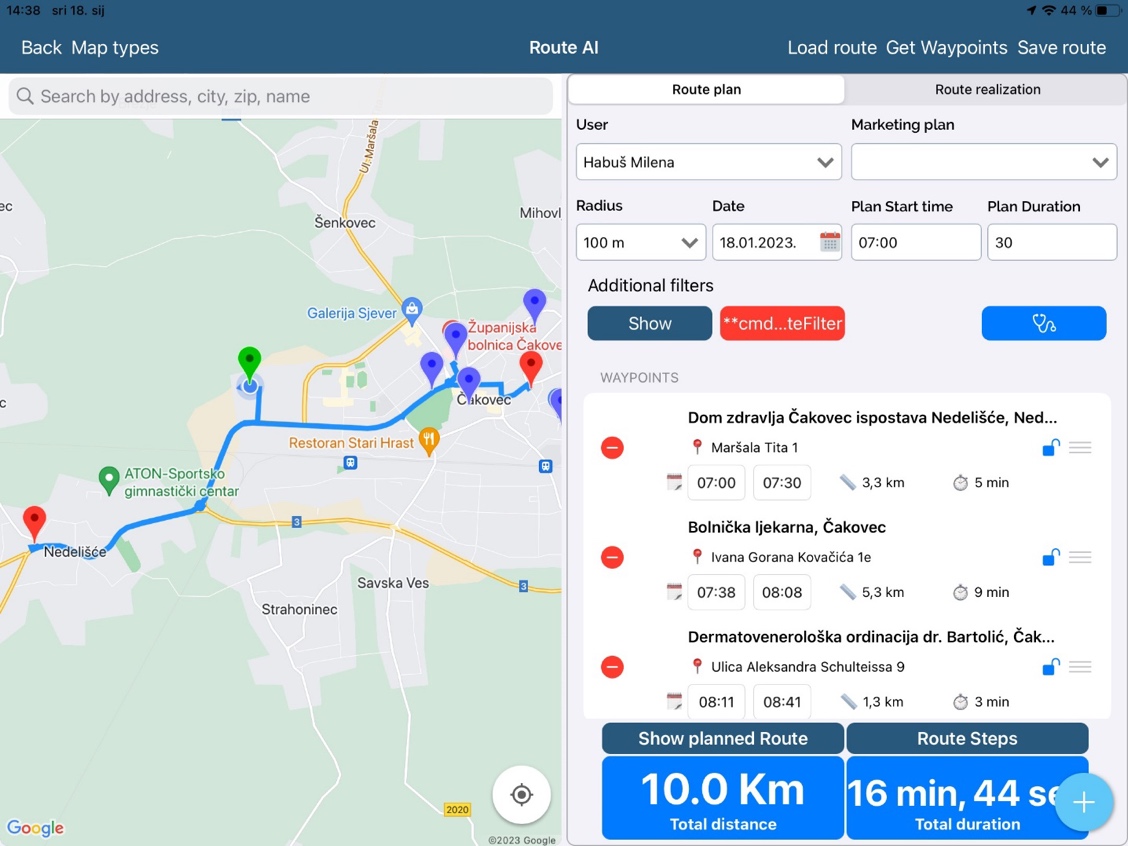
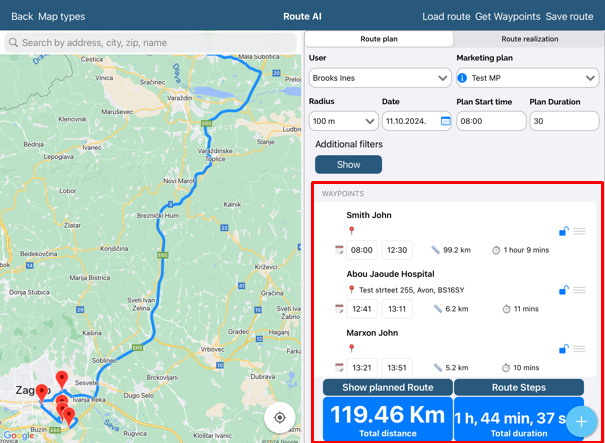
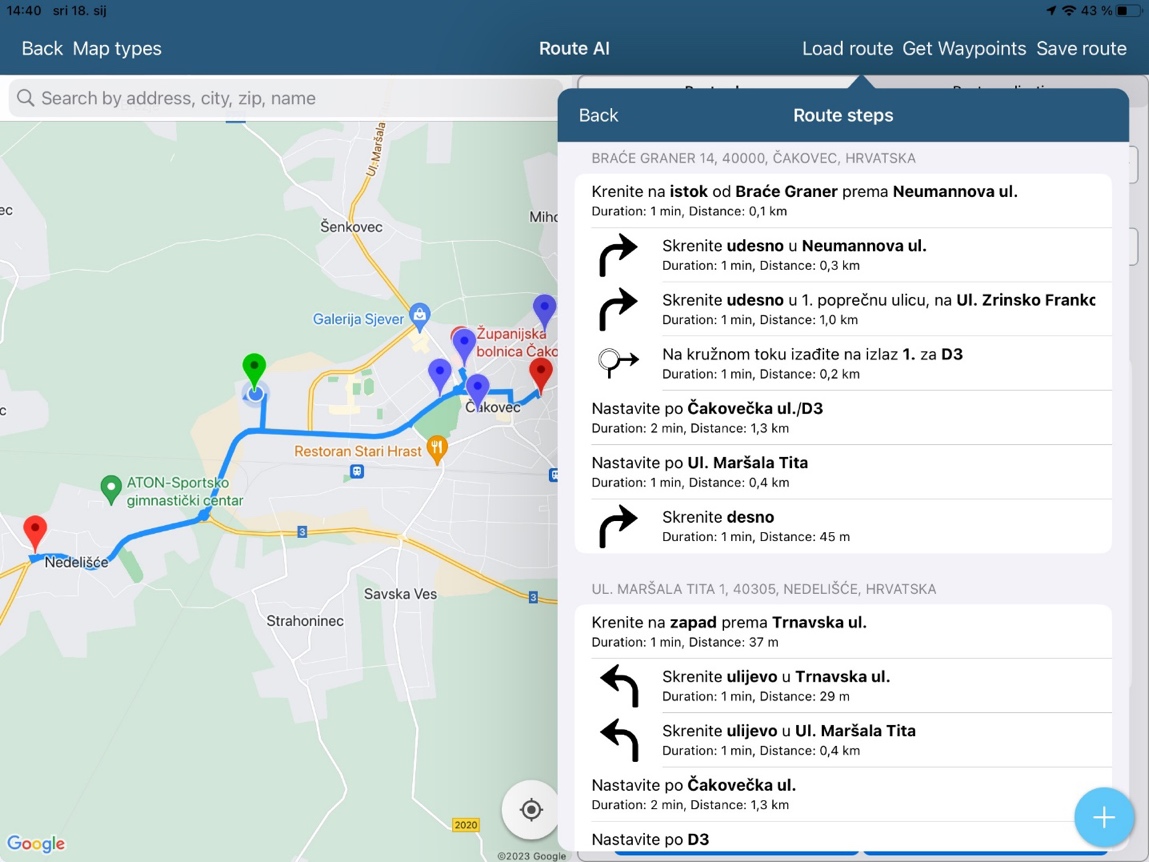
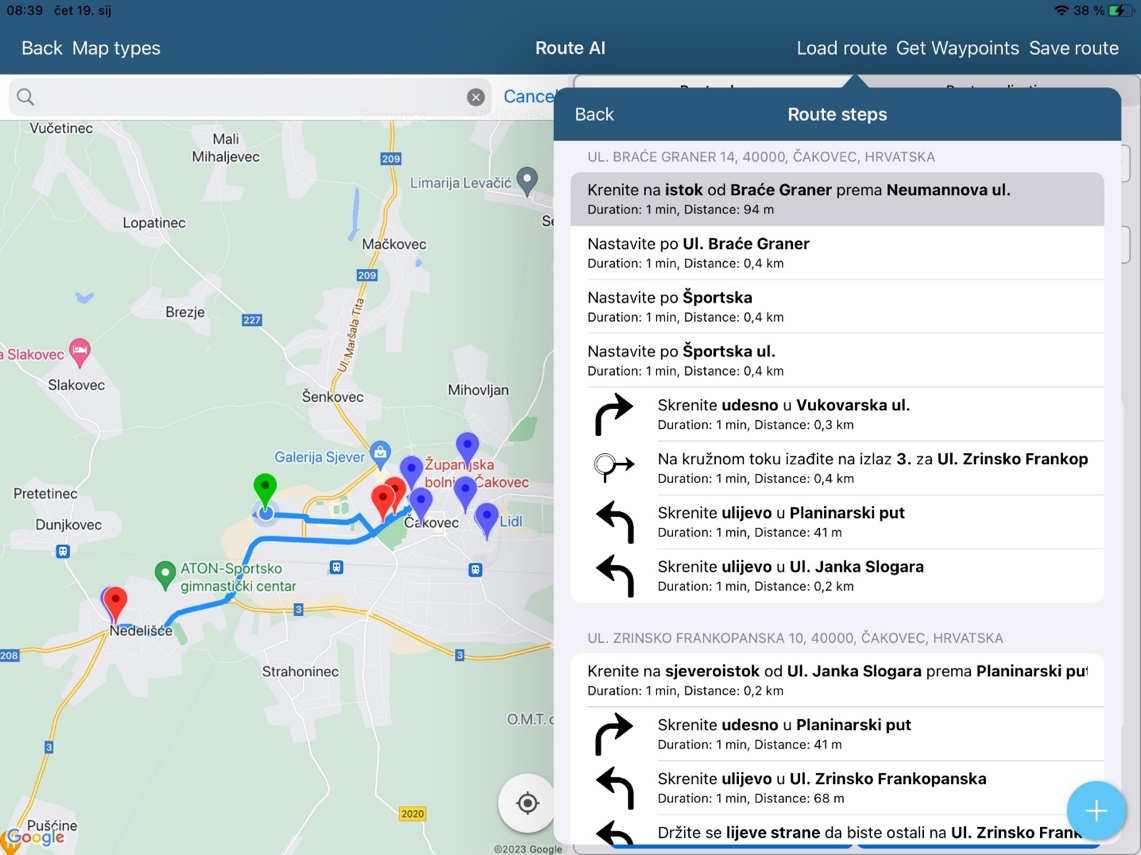
Click on “Route steps” to see exact details of the route.
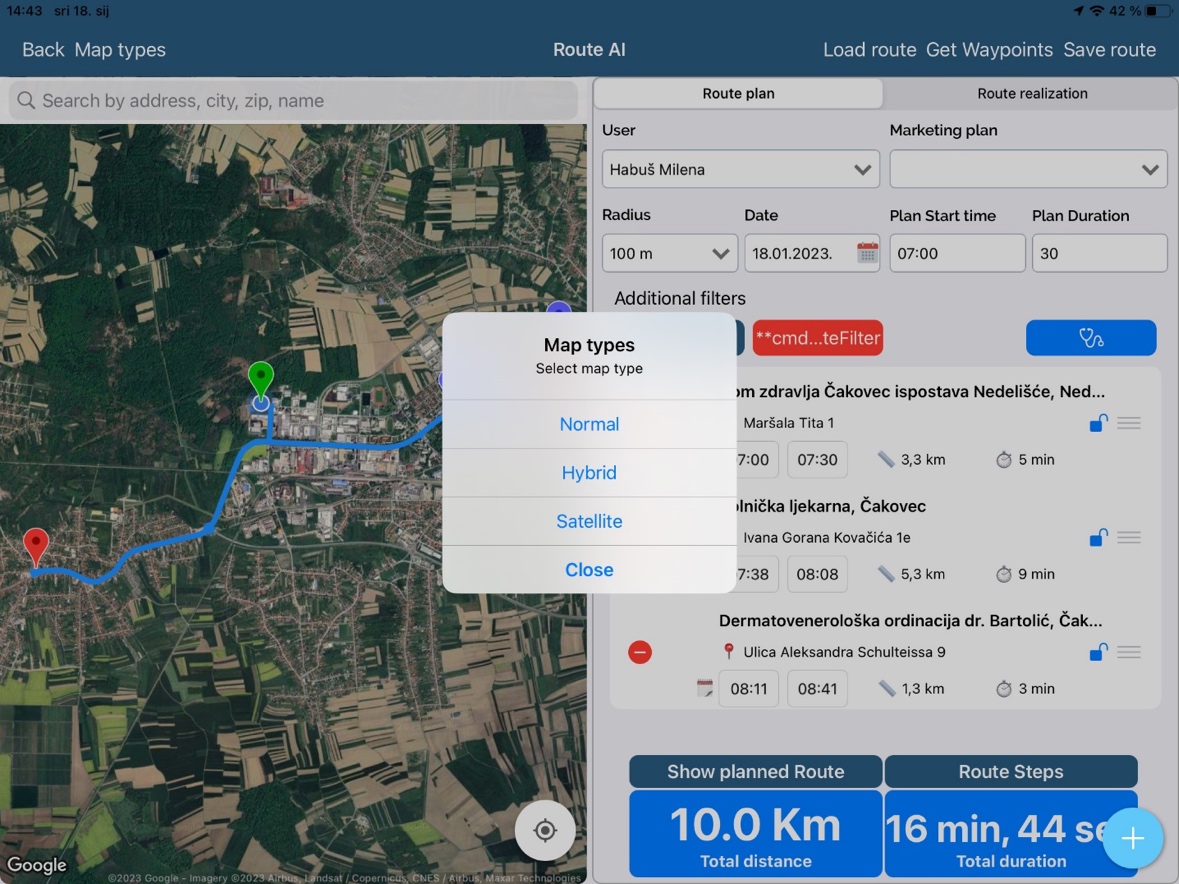
By clicking on the “Map Types” we can change the map type between normal, combined and satellite.
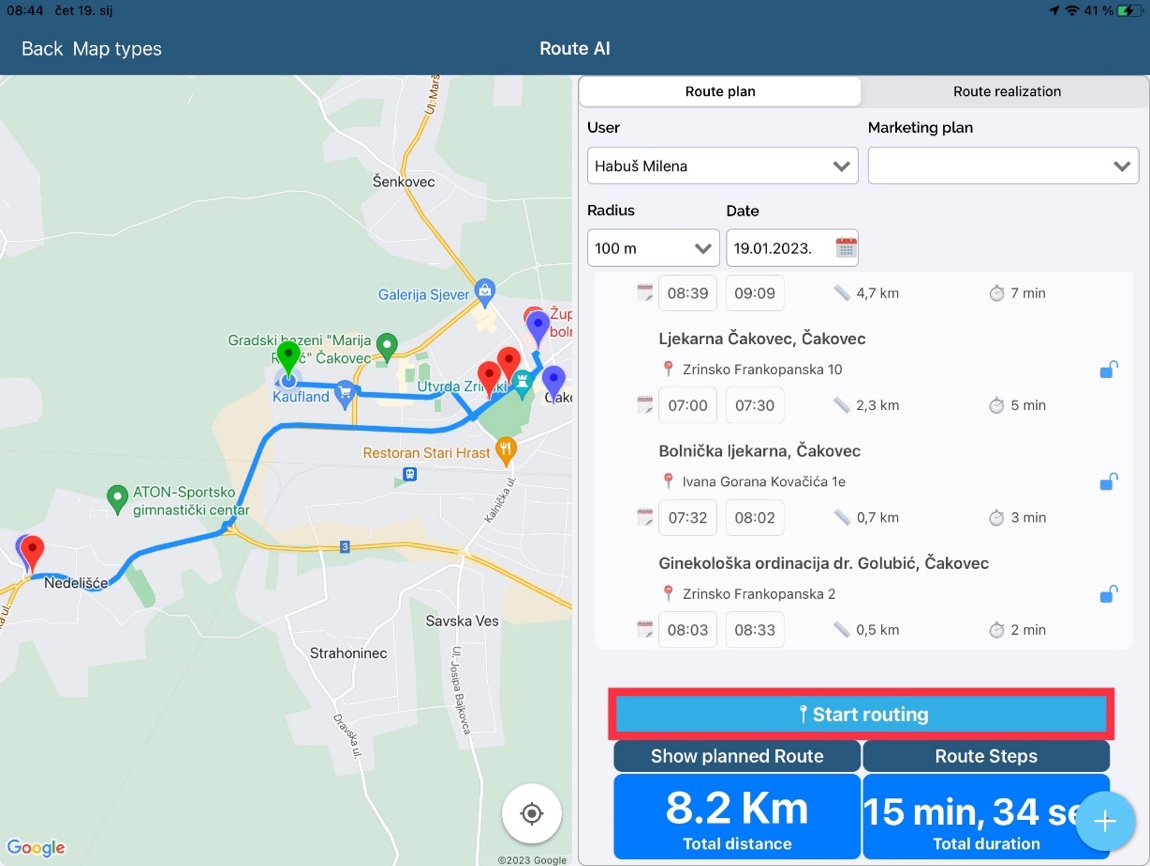
We save route for specific date by clicking on “Save route”. After the route is saved, you cannot make additional changes.
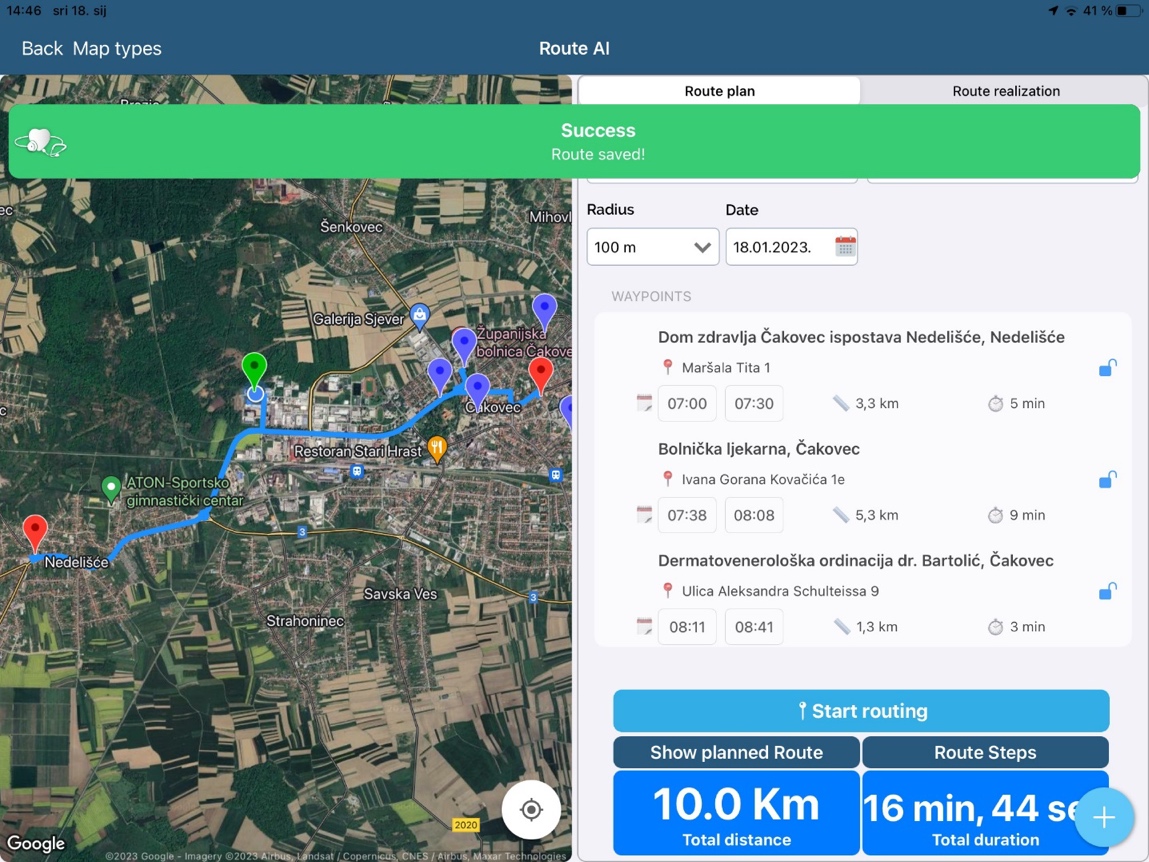
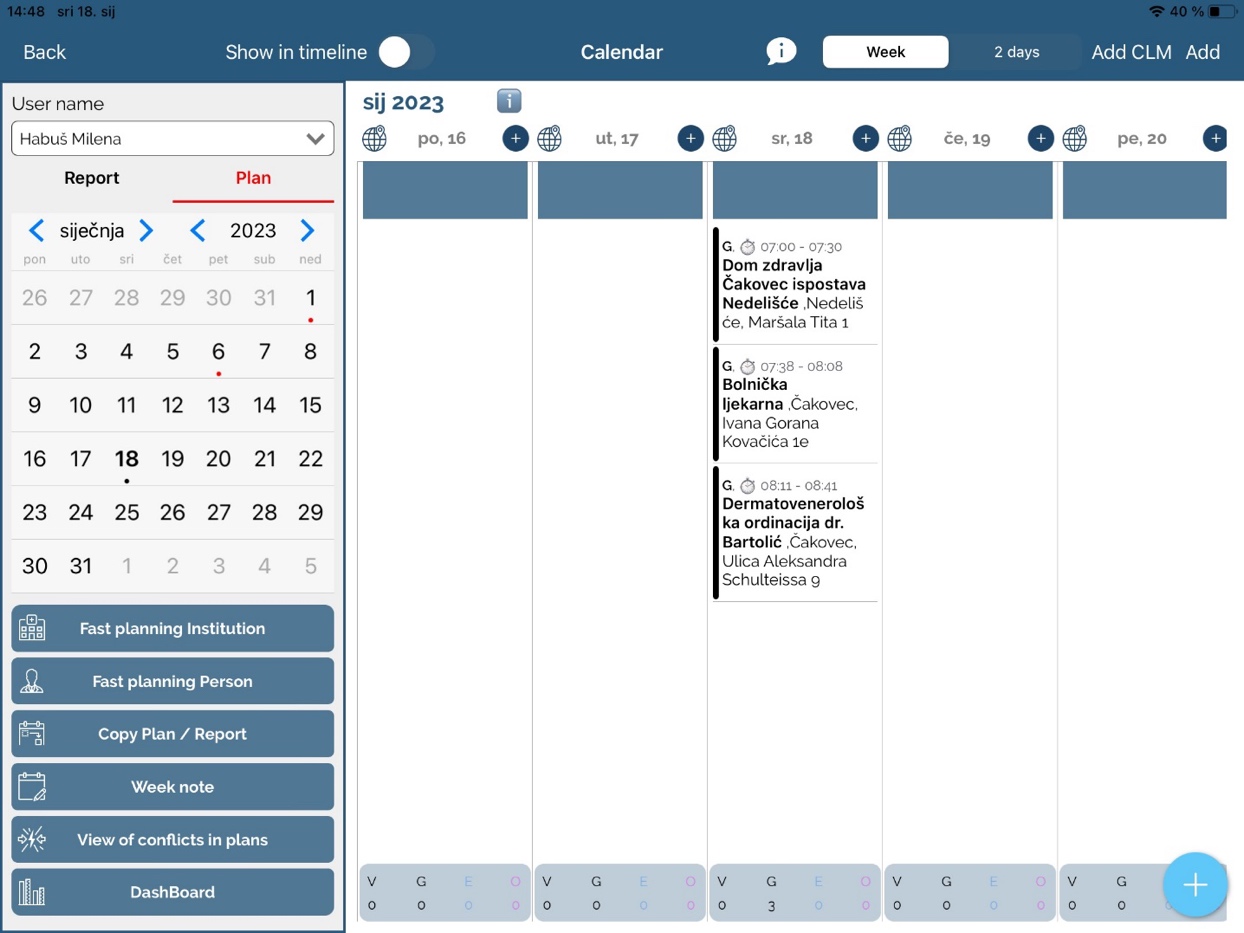
After saving the route, visit plans are created in the calendar:
Creating plans (waypoints) directly from the map
Searching by persons/institutions for list creation and setting locations on the map.
We click on location tag on the map, and then on the name of person/institution.
To confirm waypoint/plan creation, click on “Yes”:
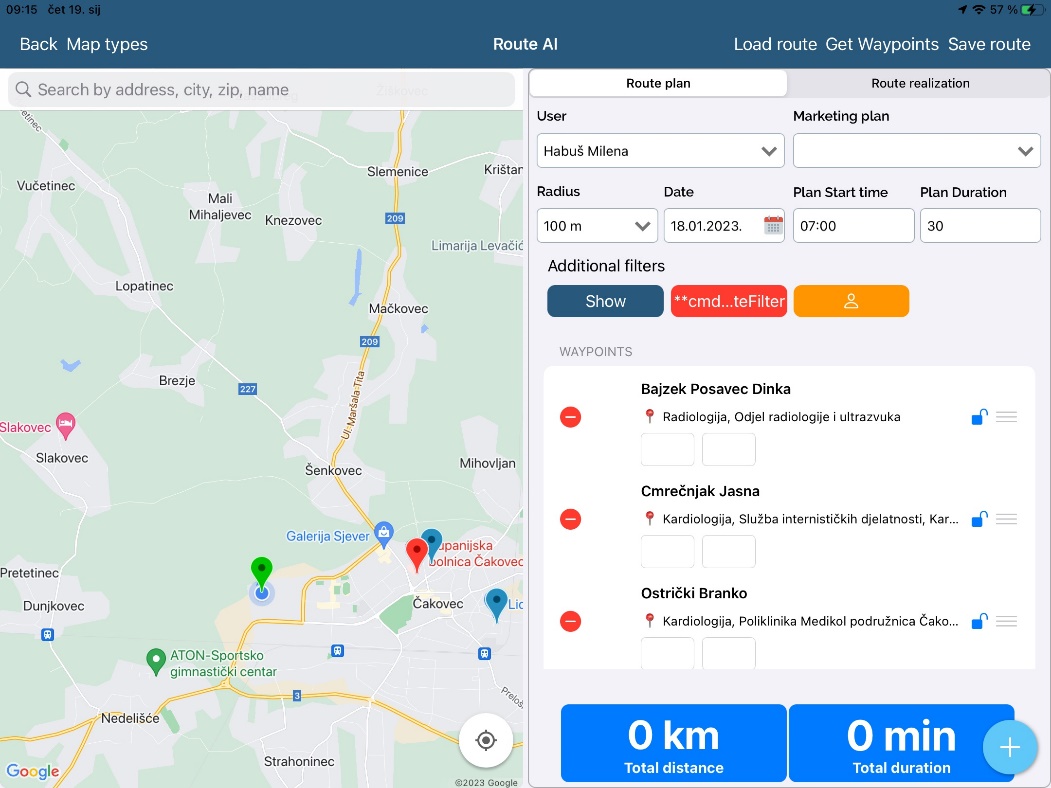
We create the rest of the plans, set up the order of the plans and click “Load Route”.
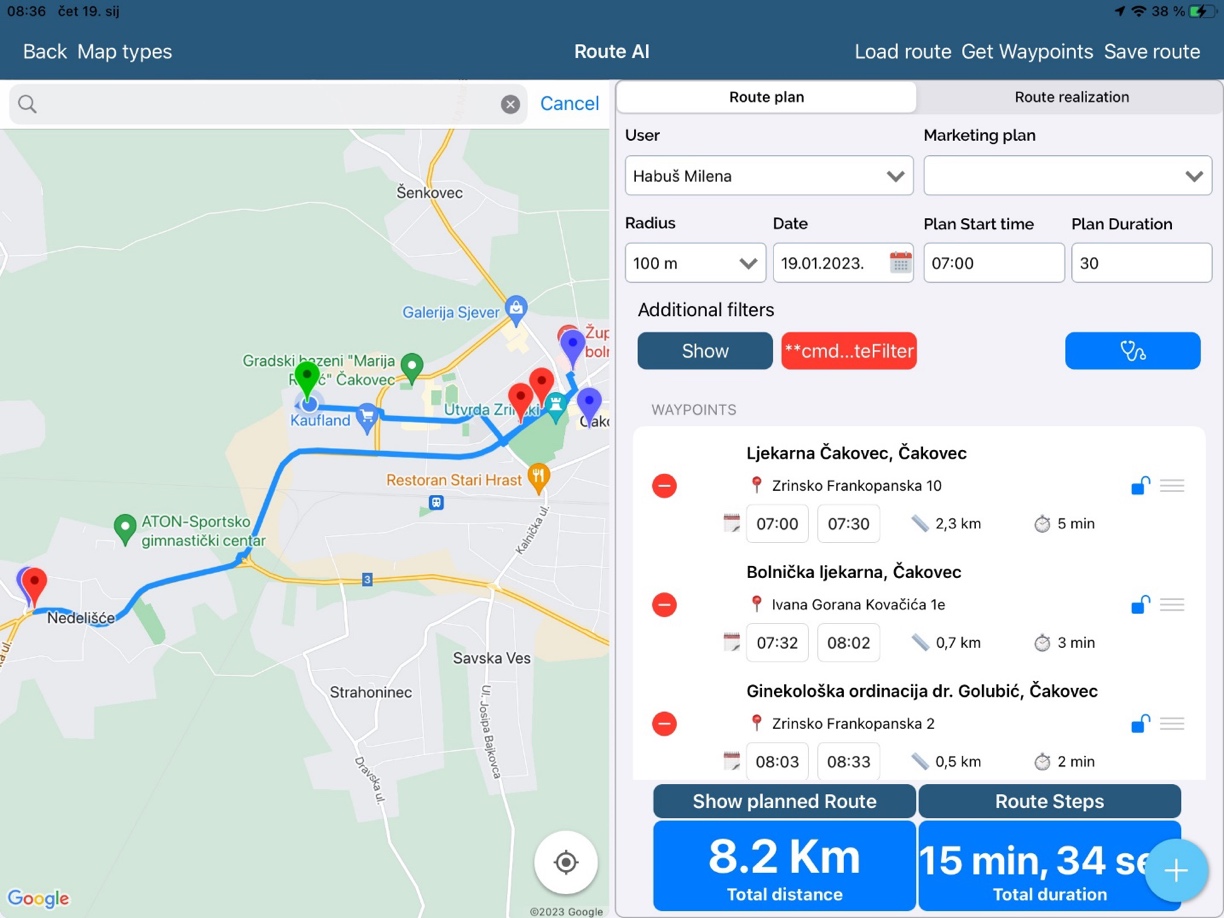
If needed, change the order of the plans and get route again.
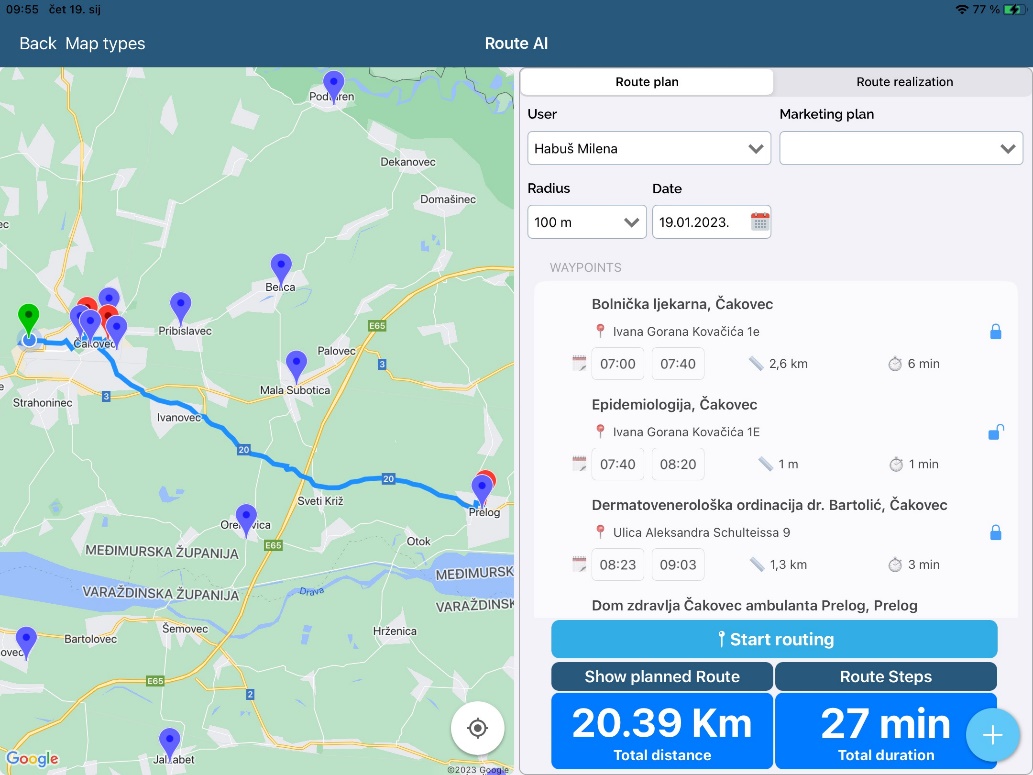
After the route is saved, you can start the route:
Click on marked square to get back to the route:
In calendar, if you click on globus button, the route is opened (if it exists for the day).
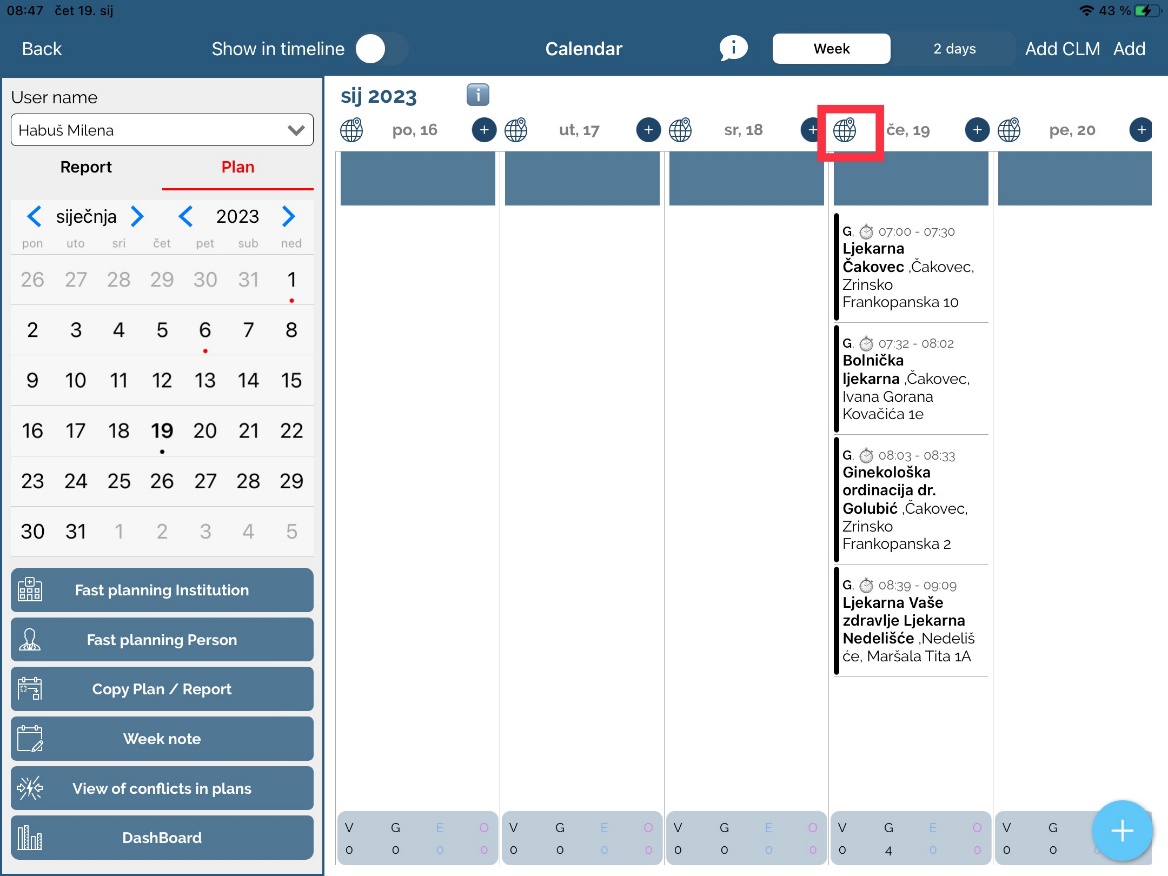
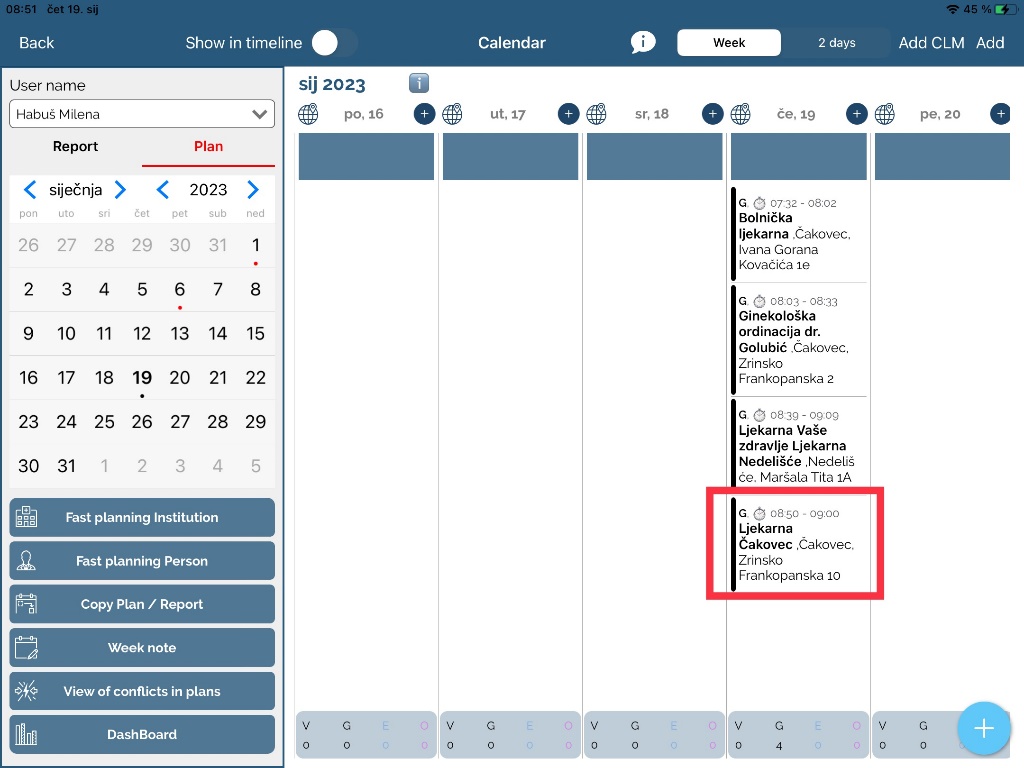
When you change the time of the plan, in the calendar, it also changes in the route.

If the system option 227 – Show the coordinates of institution for person – Persons on the map are shown on the institution locations.

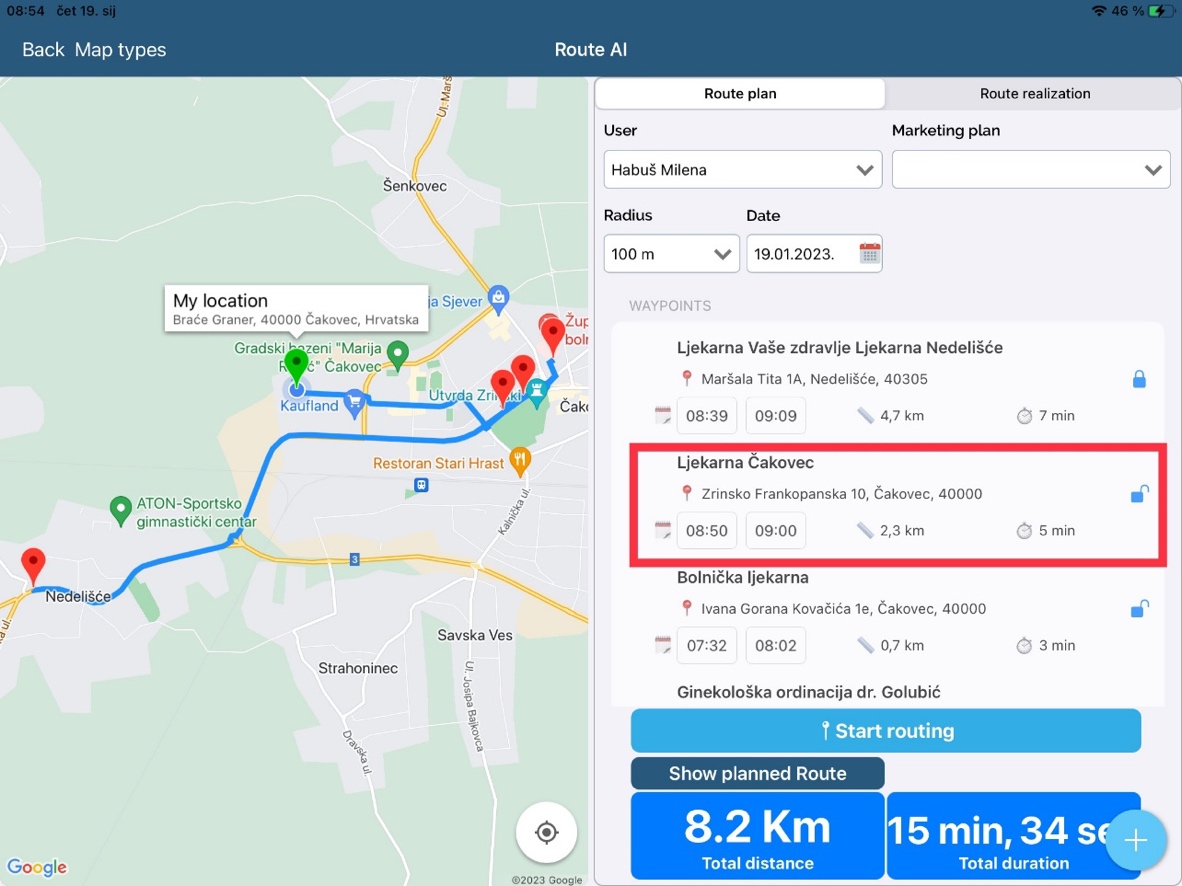
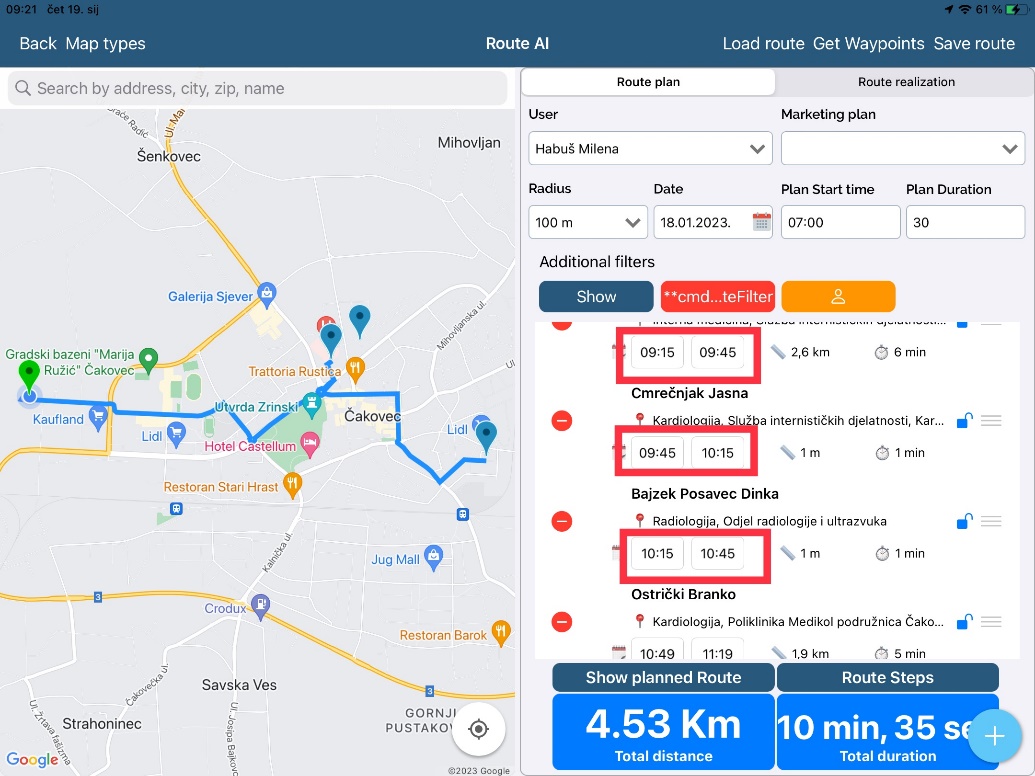
After the route is created, we can change the time of planned visits.
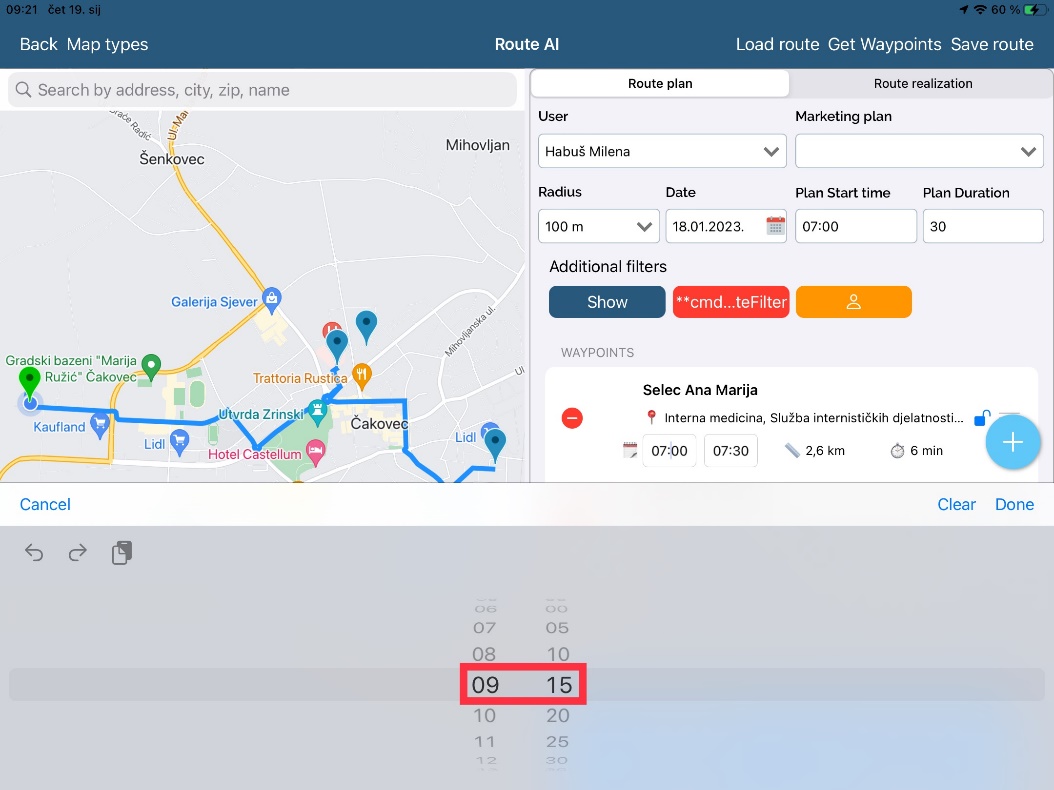
After we change the time on the first plan, scheduled times will automatically change for other plans, too, except for the first one.
If you change the visit time in calendar for one plan, the scheduled time change is updated on the route too.
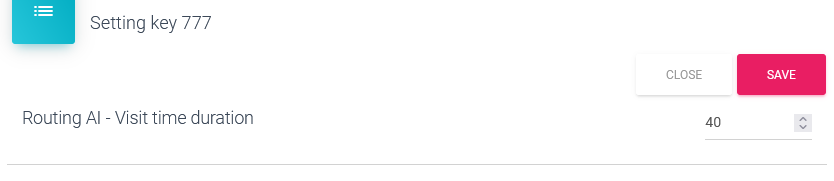
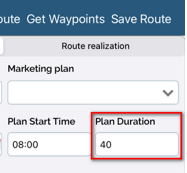
In system option setting 777, we set up time interval for visit creation in iPad Next application.
Now, all plans are in one list, locked and unlocked waypoints.
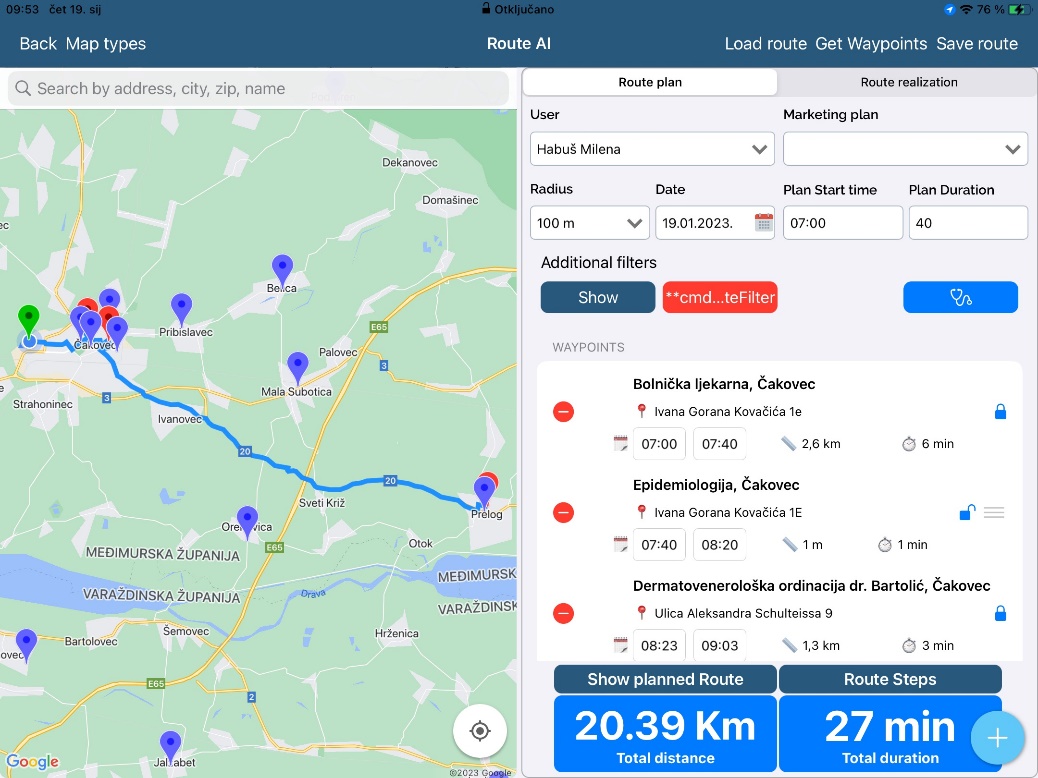
After saving, the order stays the same.
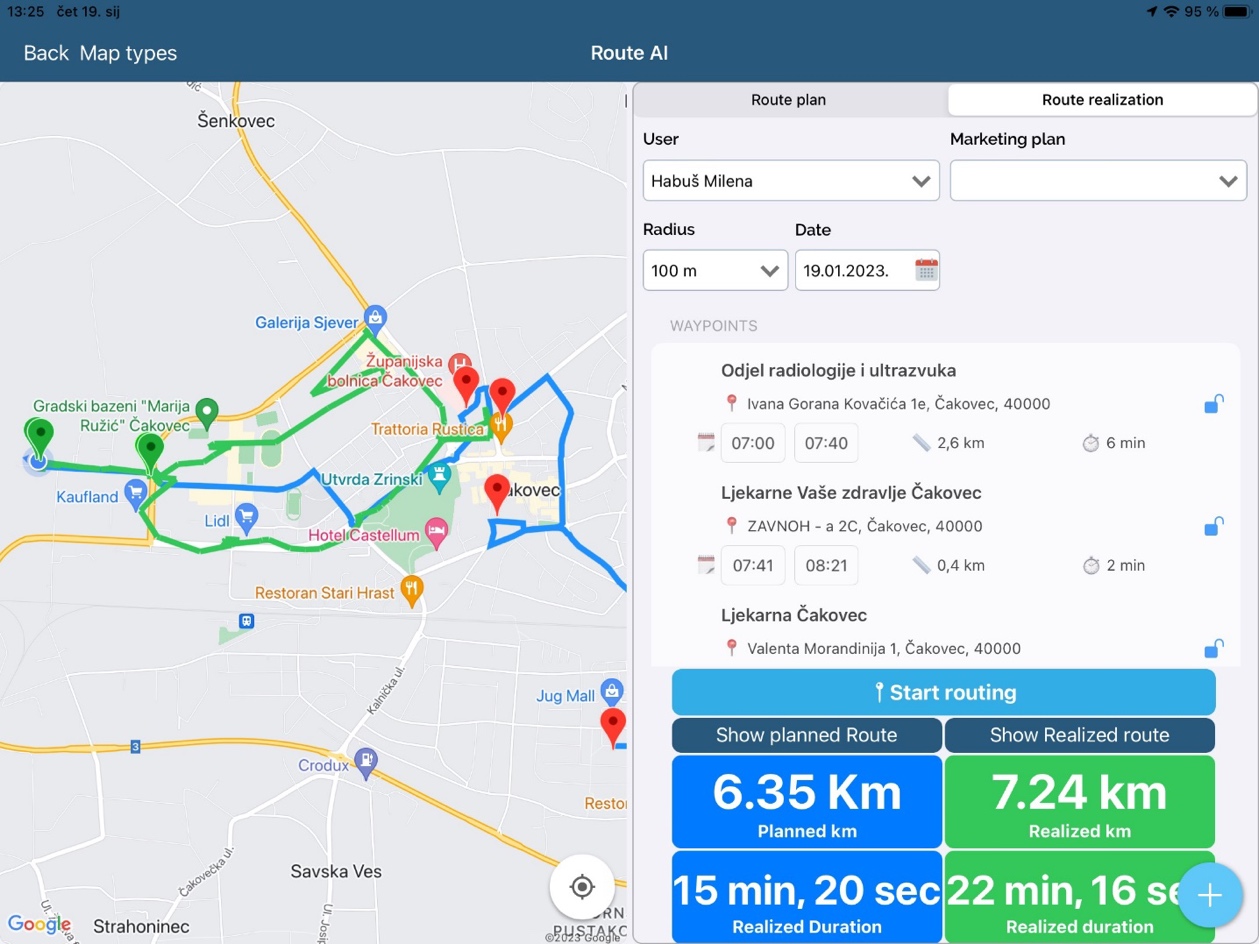
Planned route vs. realized route in real location:
Blue line – planned
Green line – realized
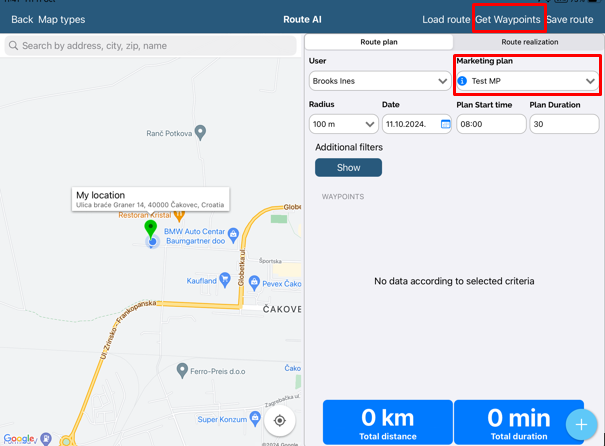
Route with Marketing Plan by selection
First we have to define amount of visits to persons and/or institutions in the marketing plan. (This is something that administrator does)

With MP selected in the Route AI module, we can click on “Get Waypoints” button and the system will create a routing plan for the amount of persons and institutions defined in the MP as pictured above, based on the factors in “Auto-route settings” once again defined by the administrator.