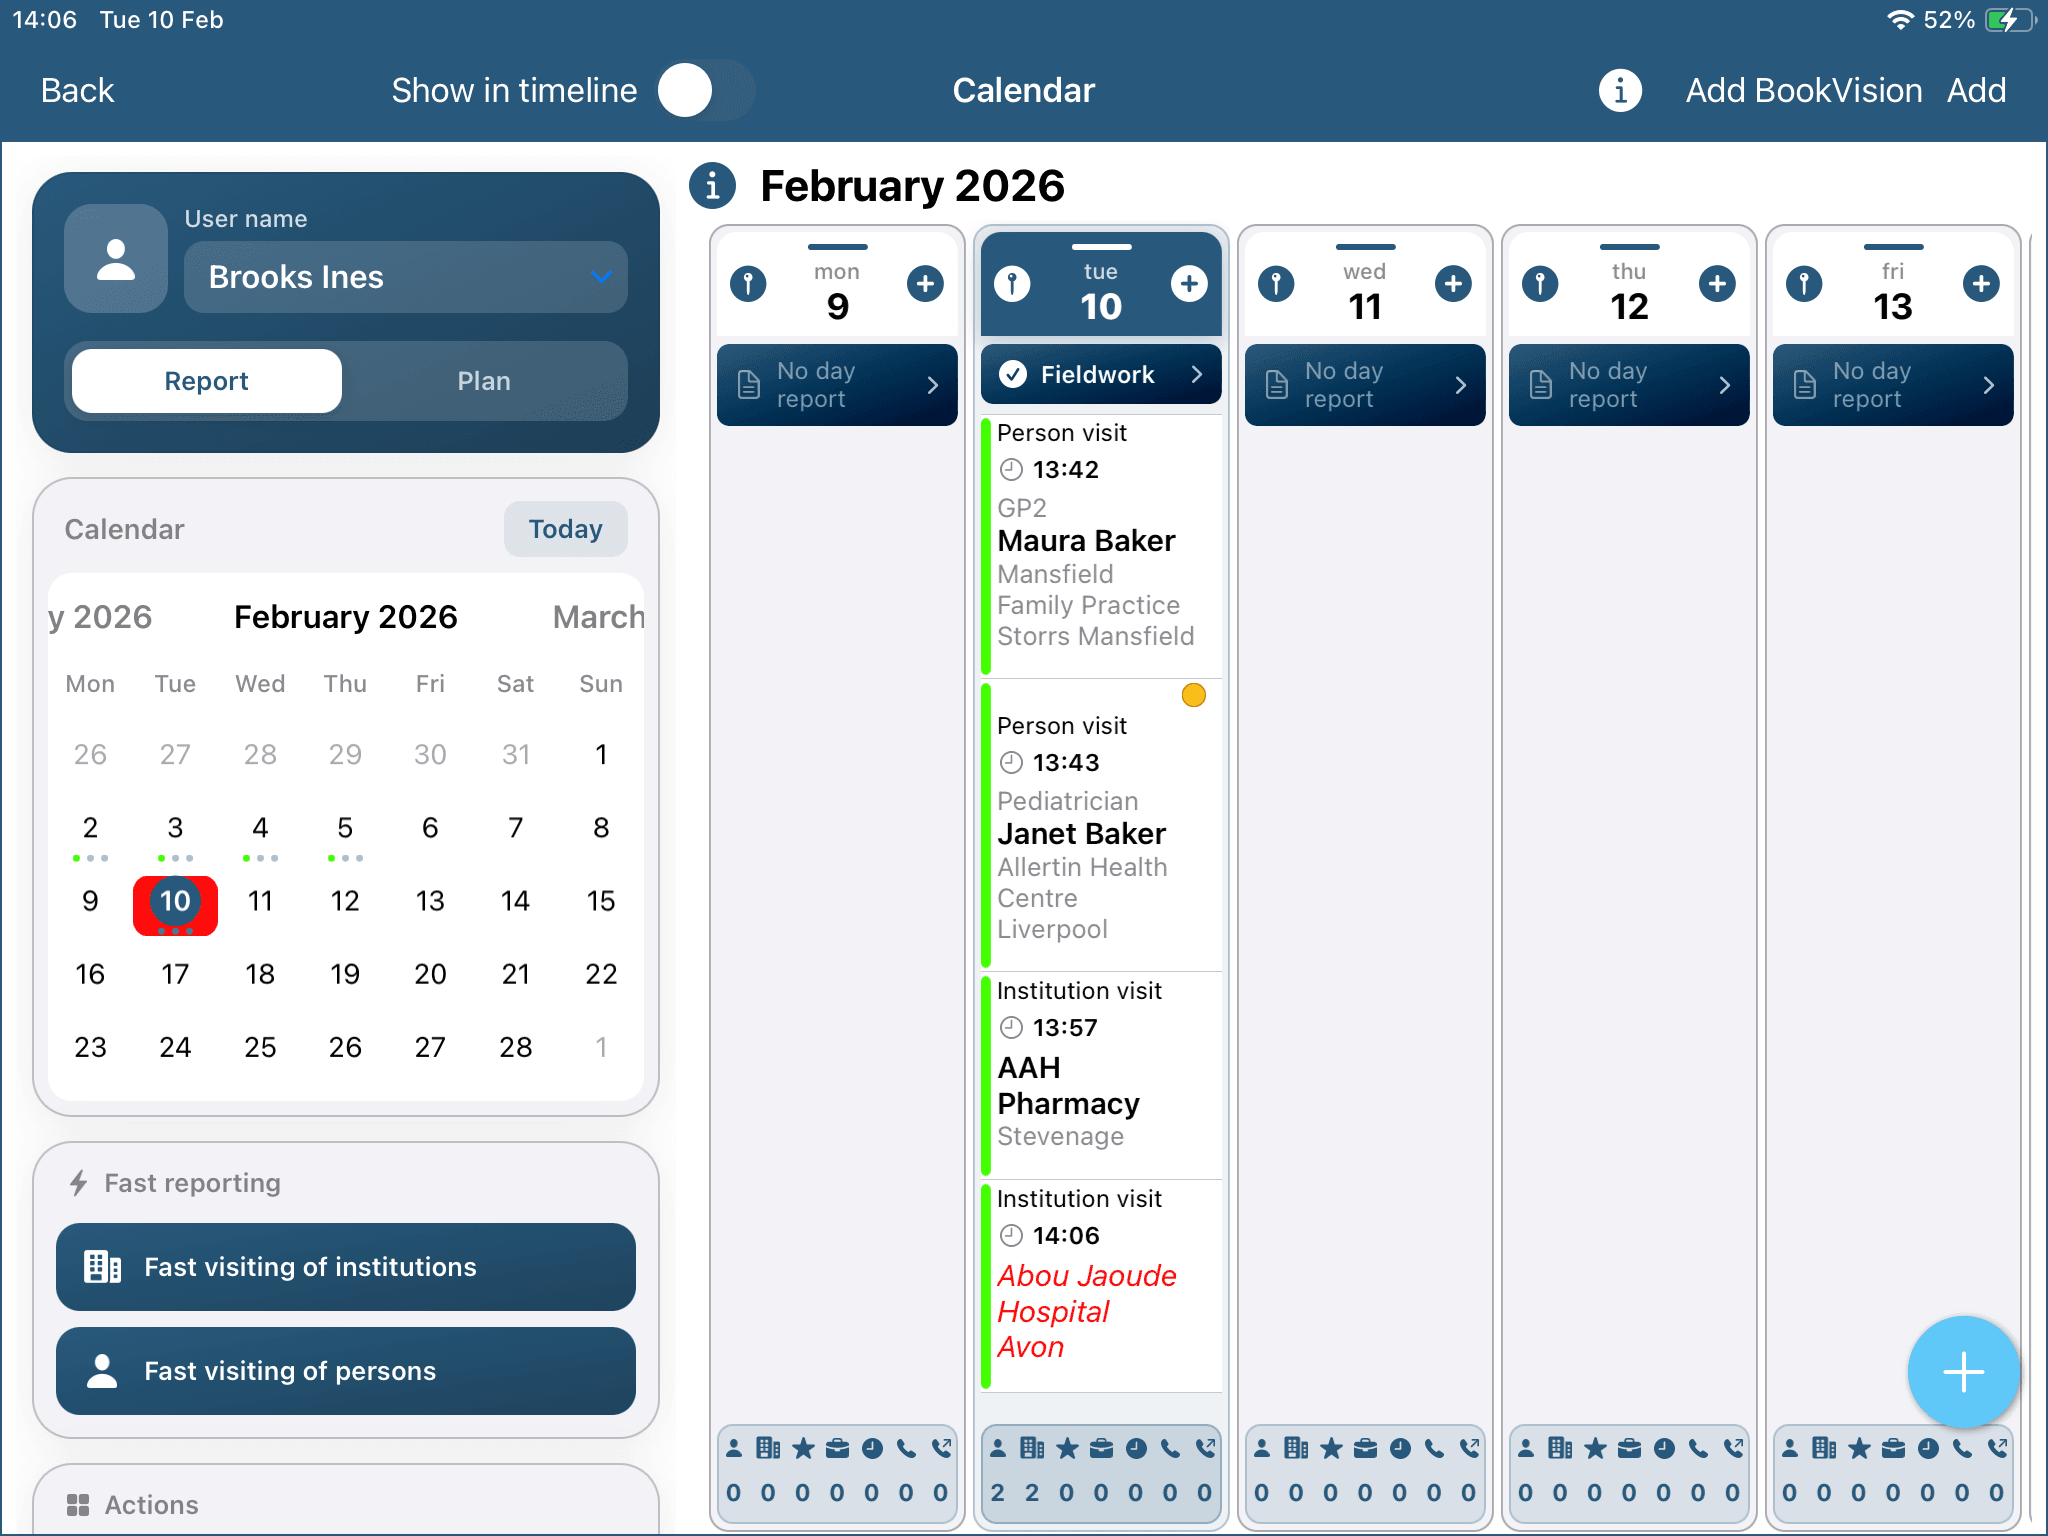
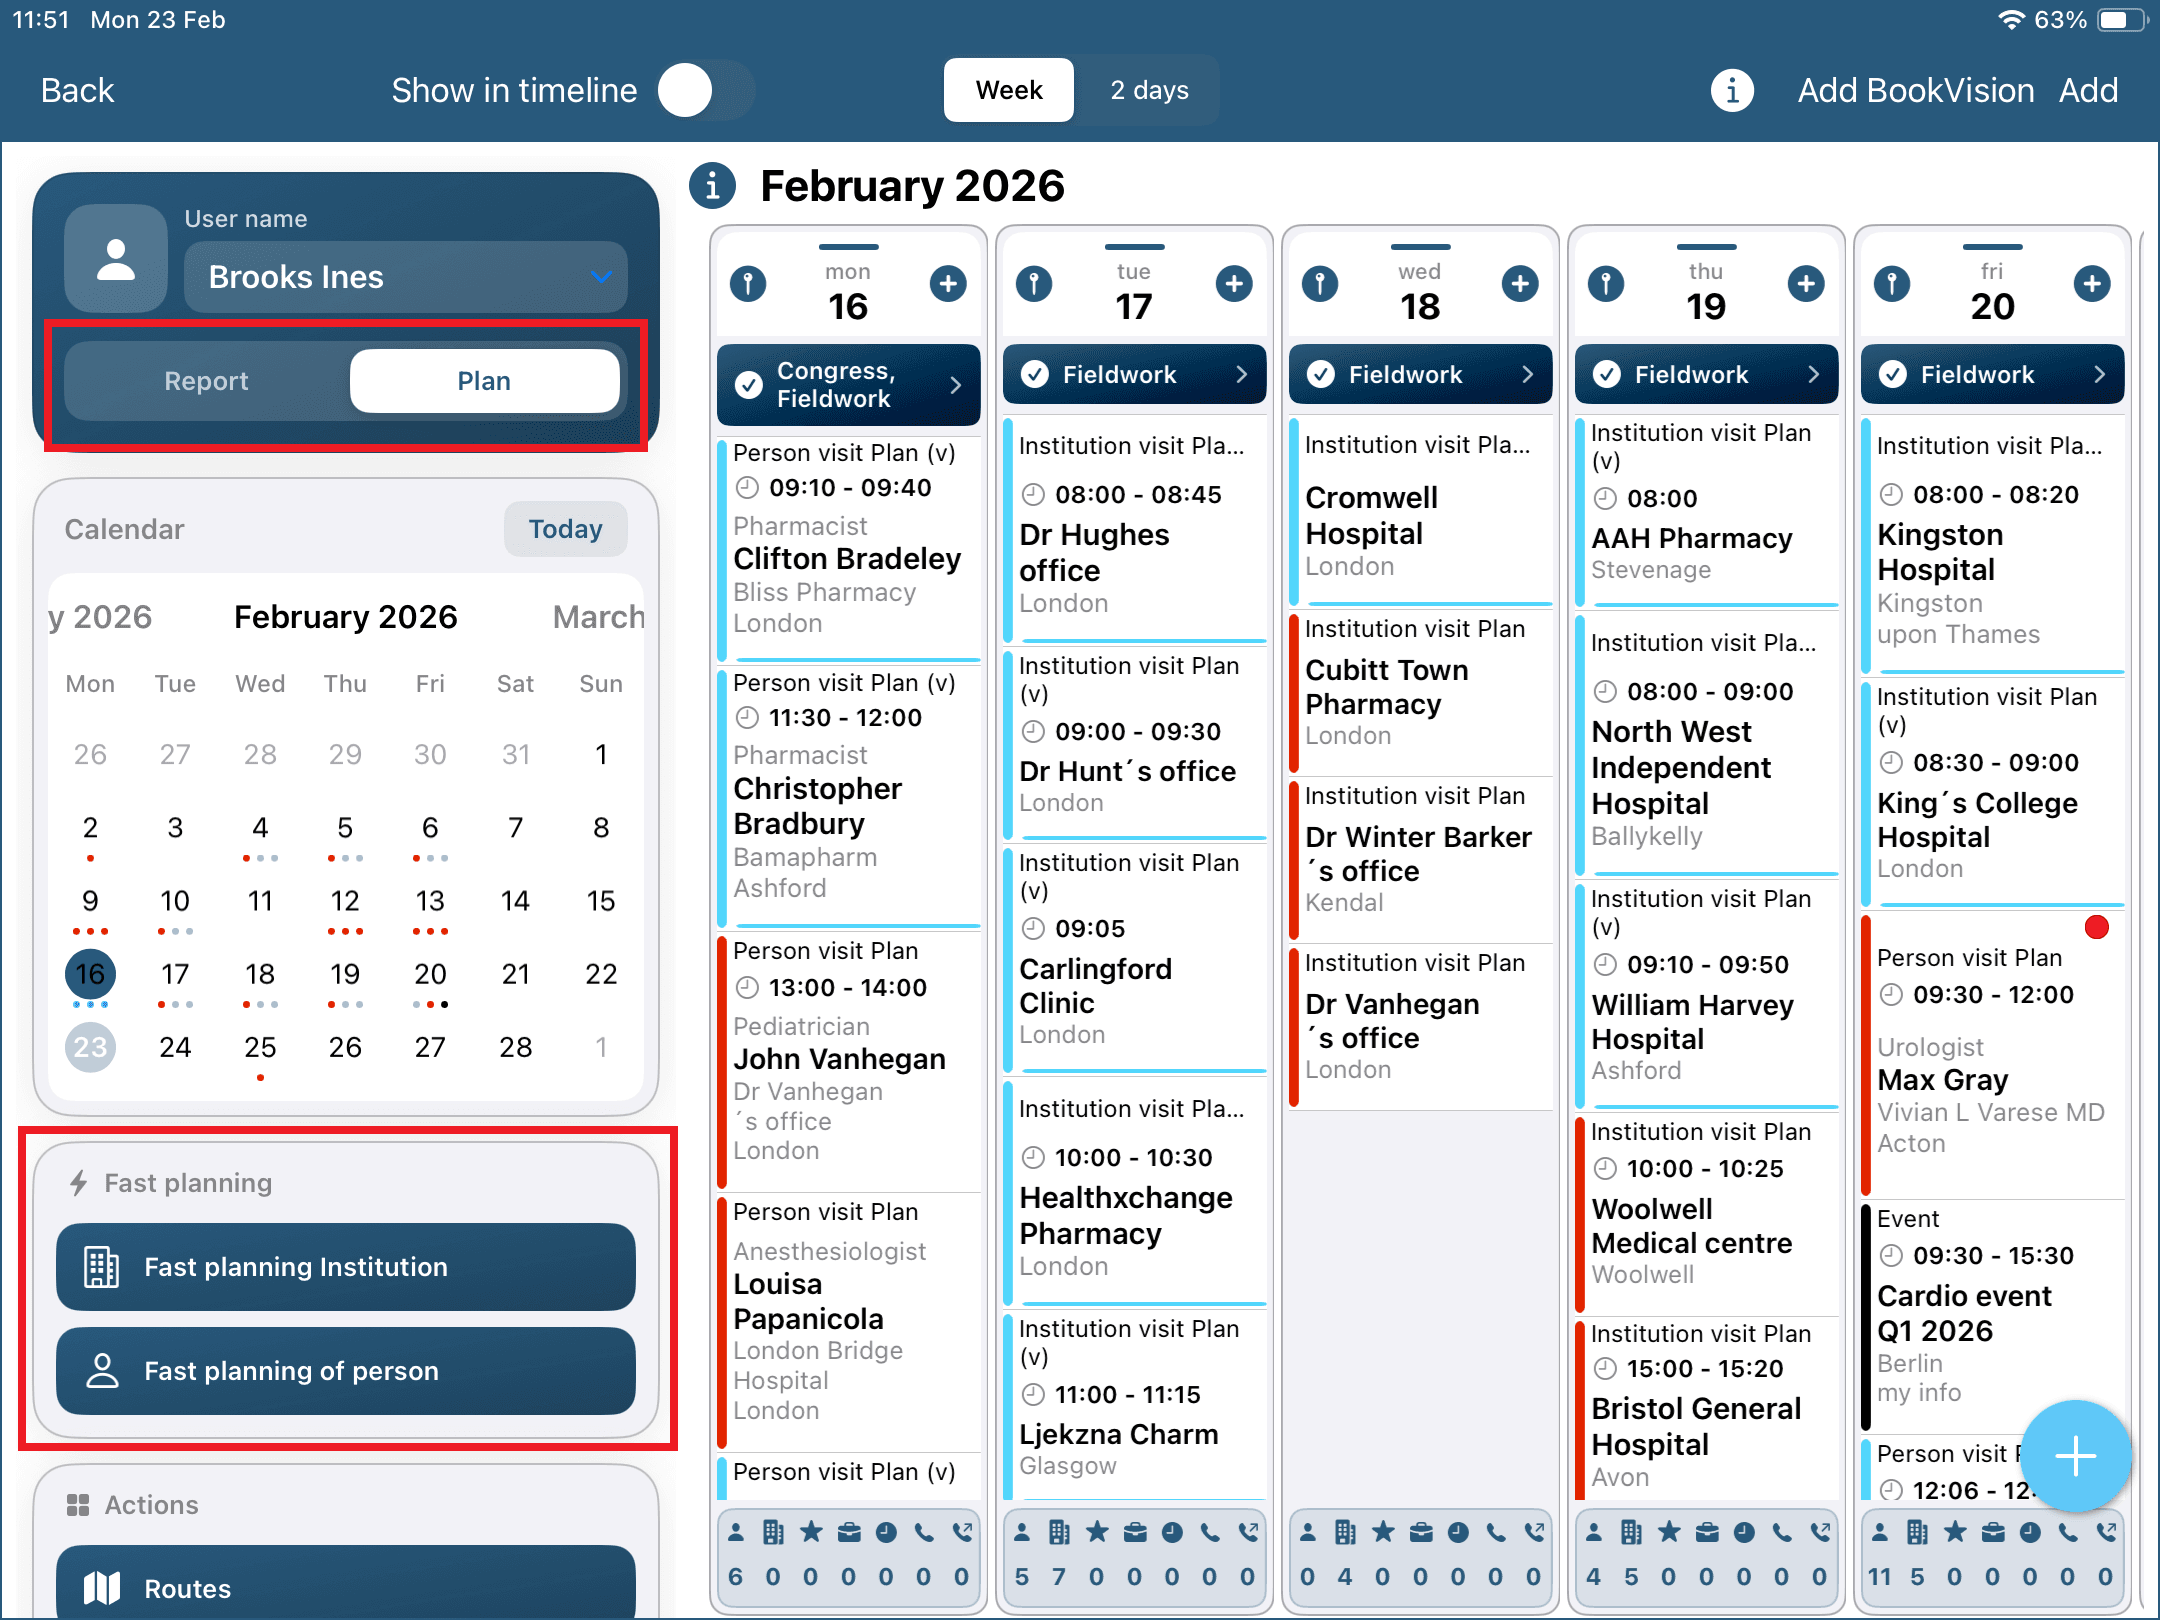
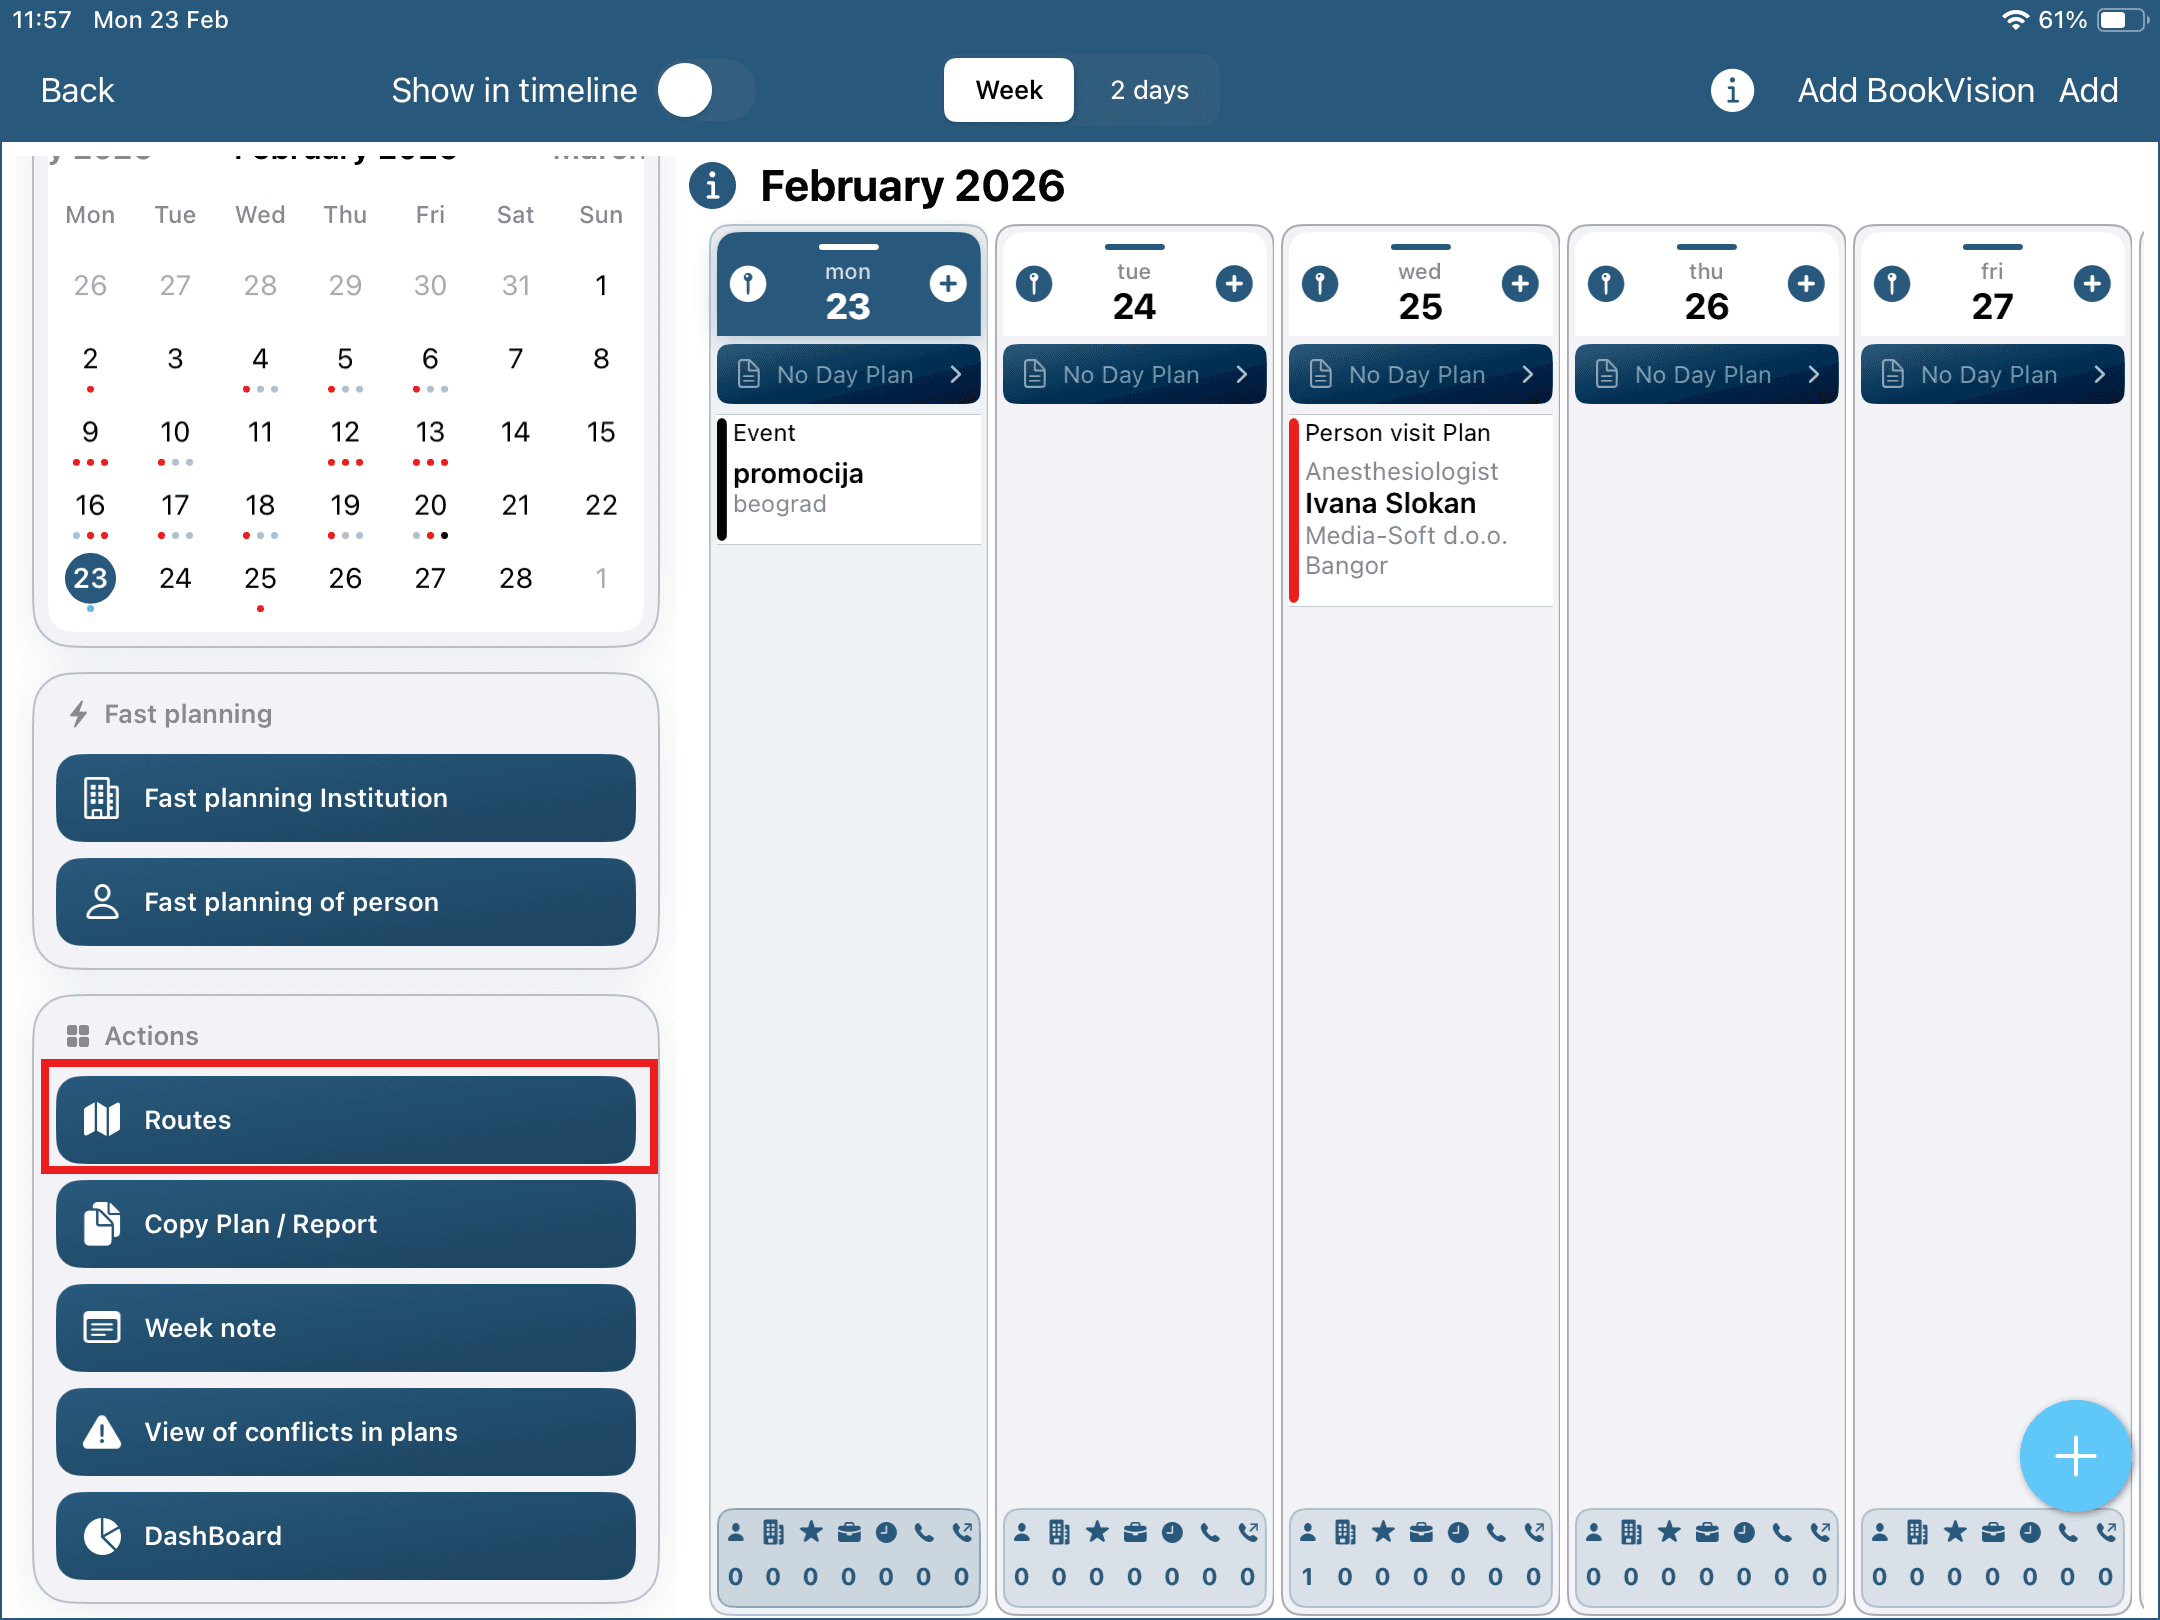
Calendar
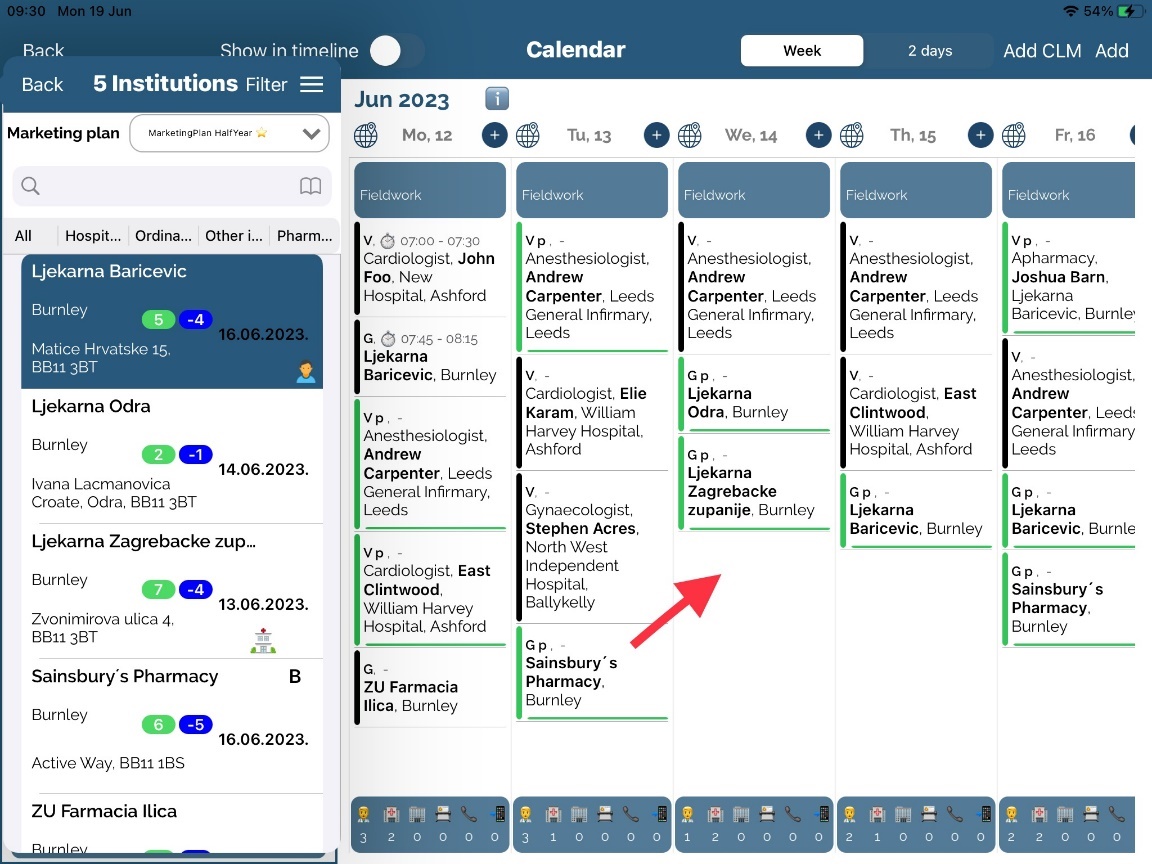
Calendar module is specialized for planning and monitoring all activities. Planning visits, reporting on the visits and other activities are very simple to track and take much less time. In main module press Calendar icon and Calendar screen will be shown, set by default for current week.![route.PNG]
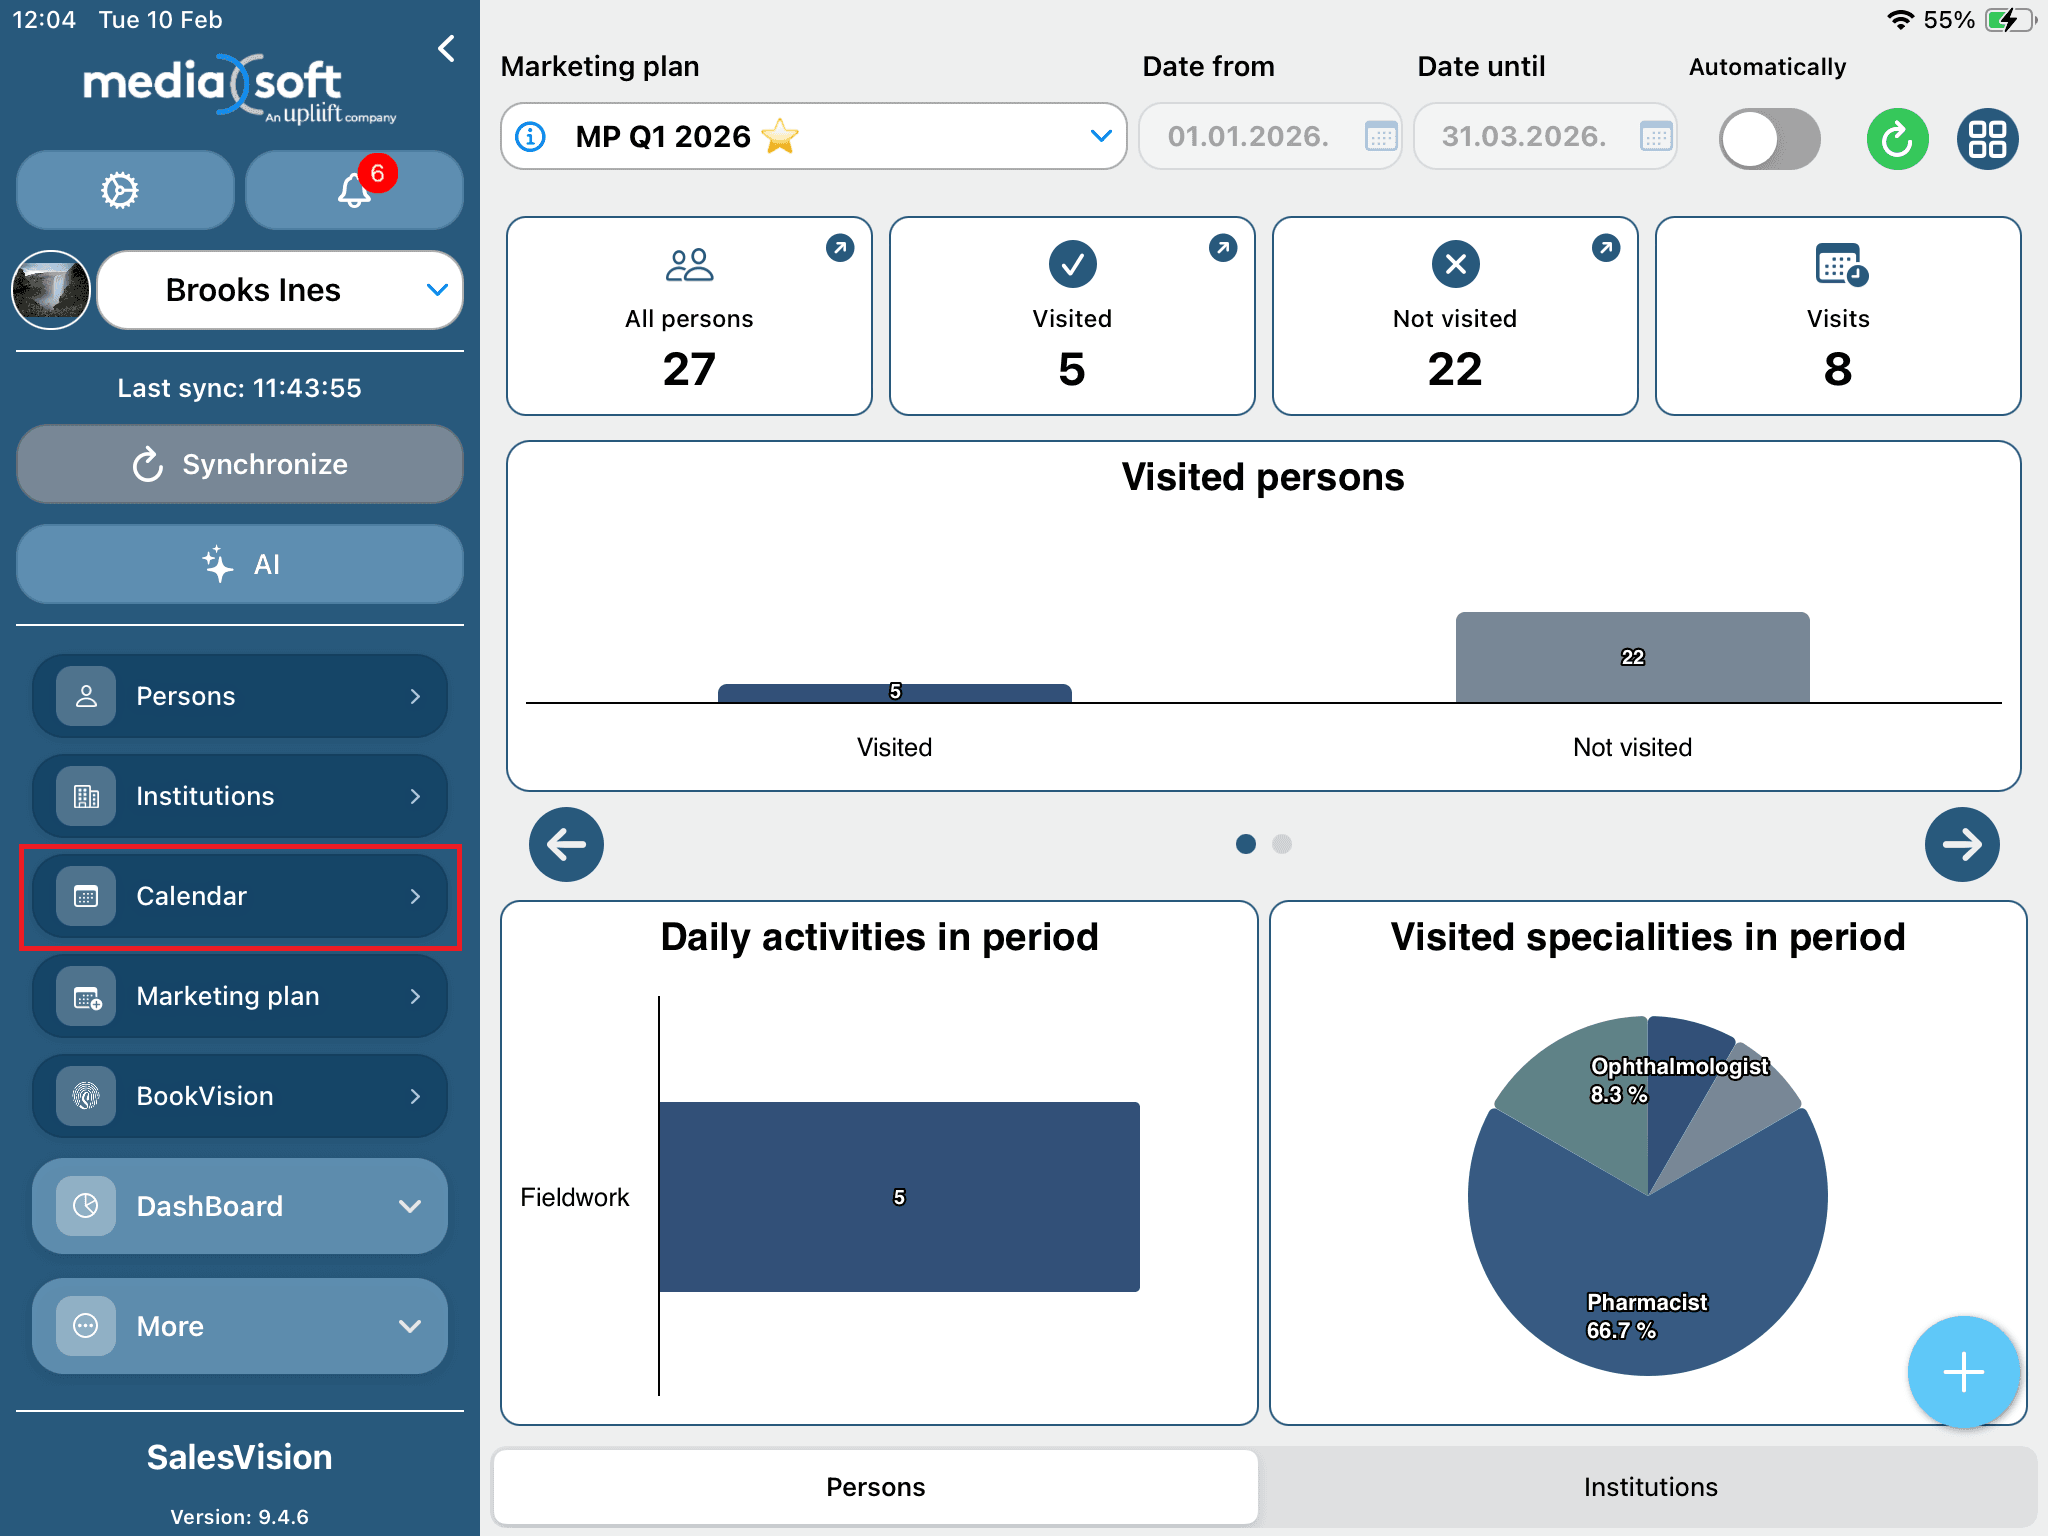
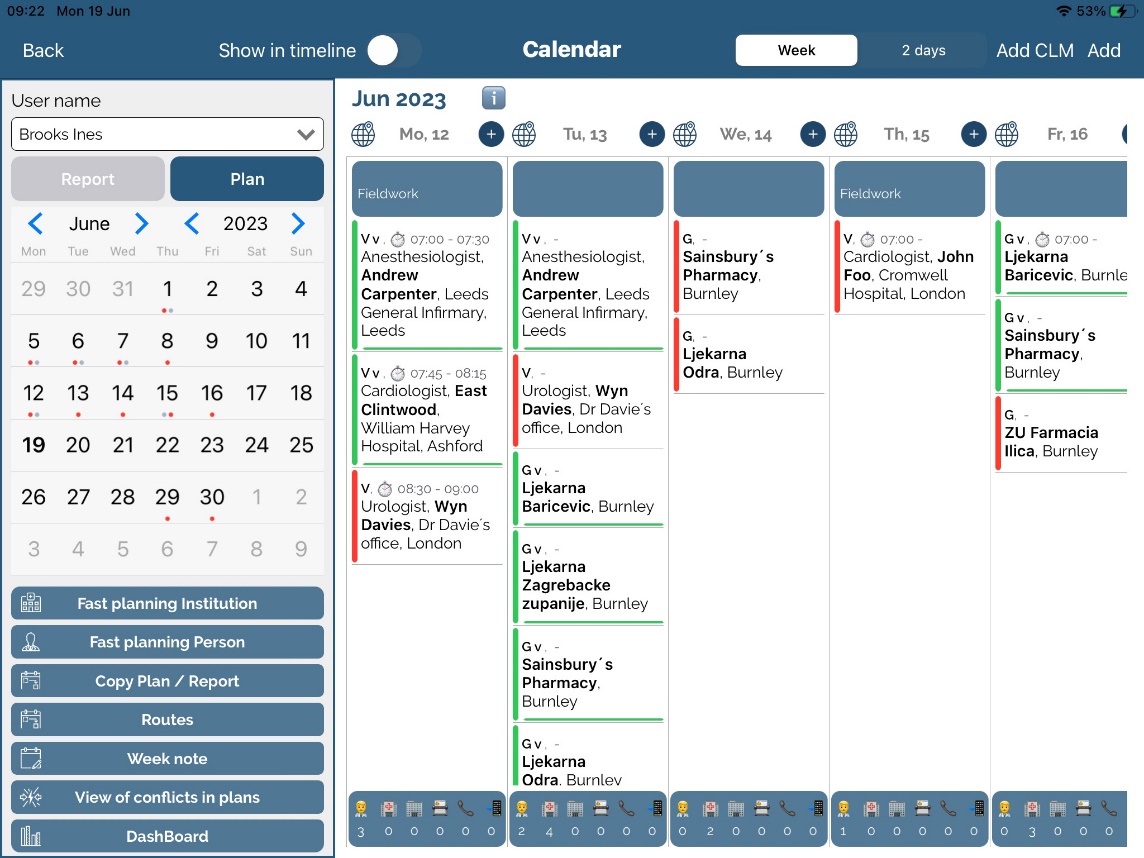
Calendar consists of the three parts. On the left top part of the screen you can see Sales representative name, button for Visit/Plan and Calendar. This part is used for changing view between days/months/years and visit/plan. Below visit/plan tabs, there are four icons. Two for fast visiting/fast planning, third one for plan copying and creating routes and last one for week note.
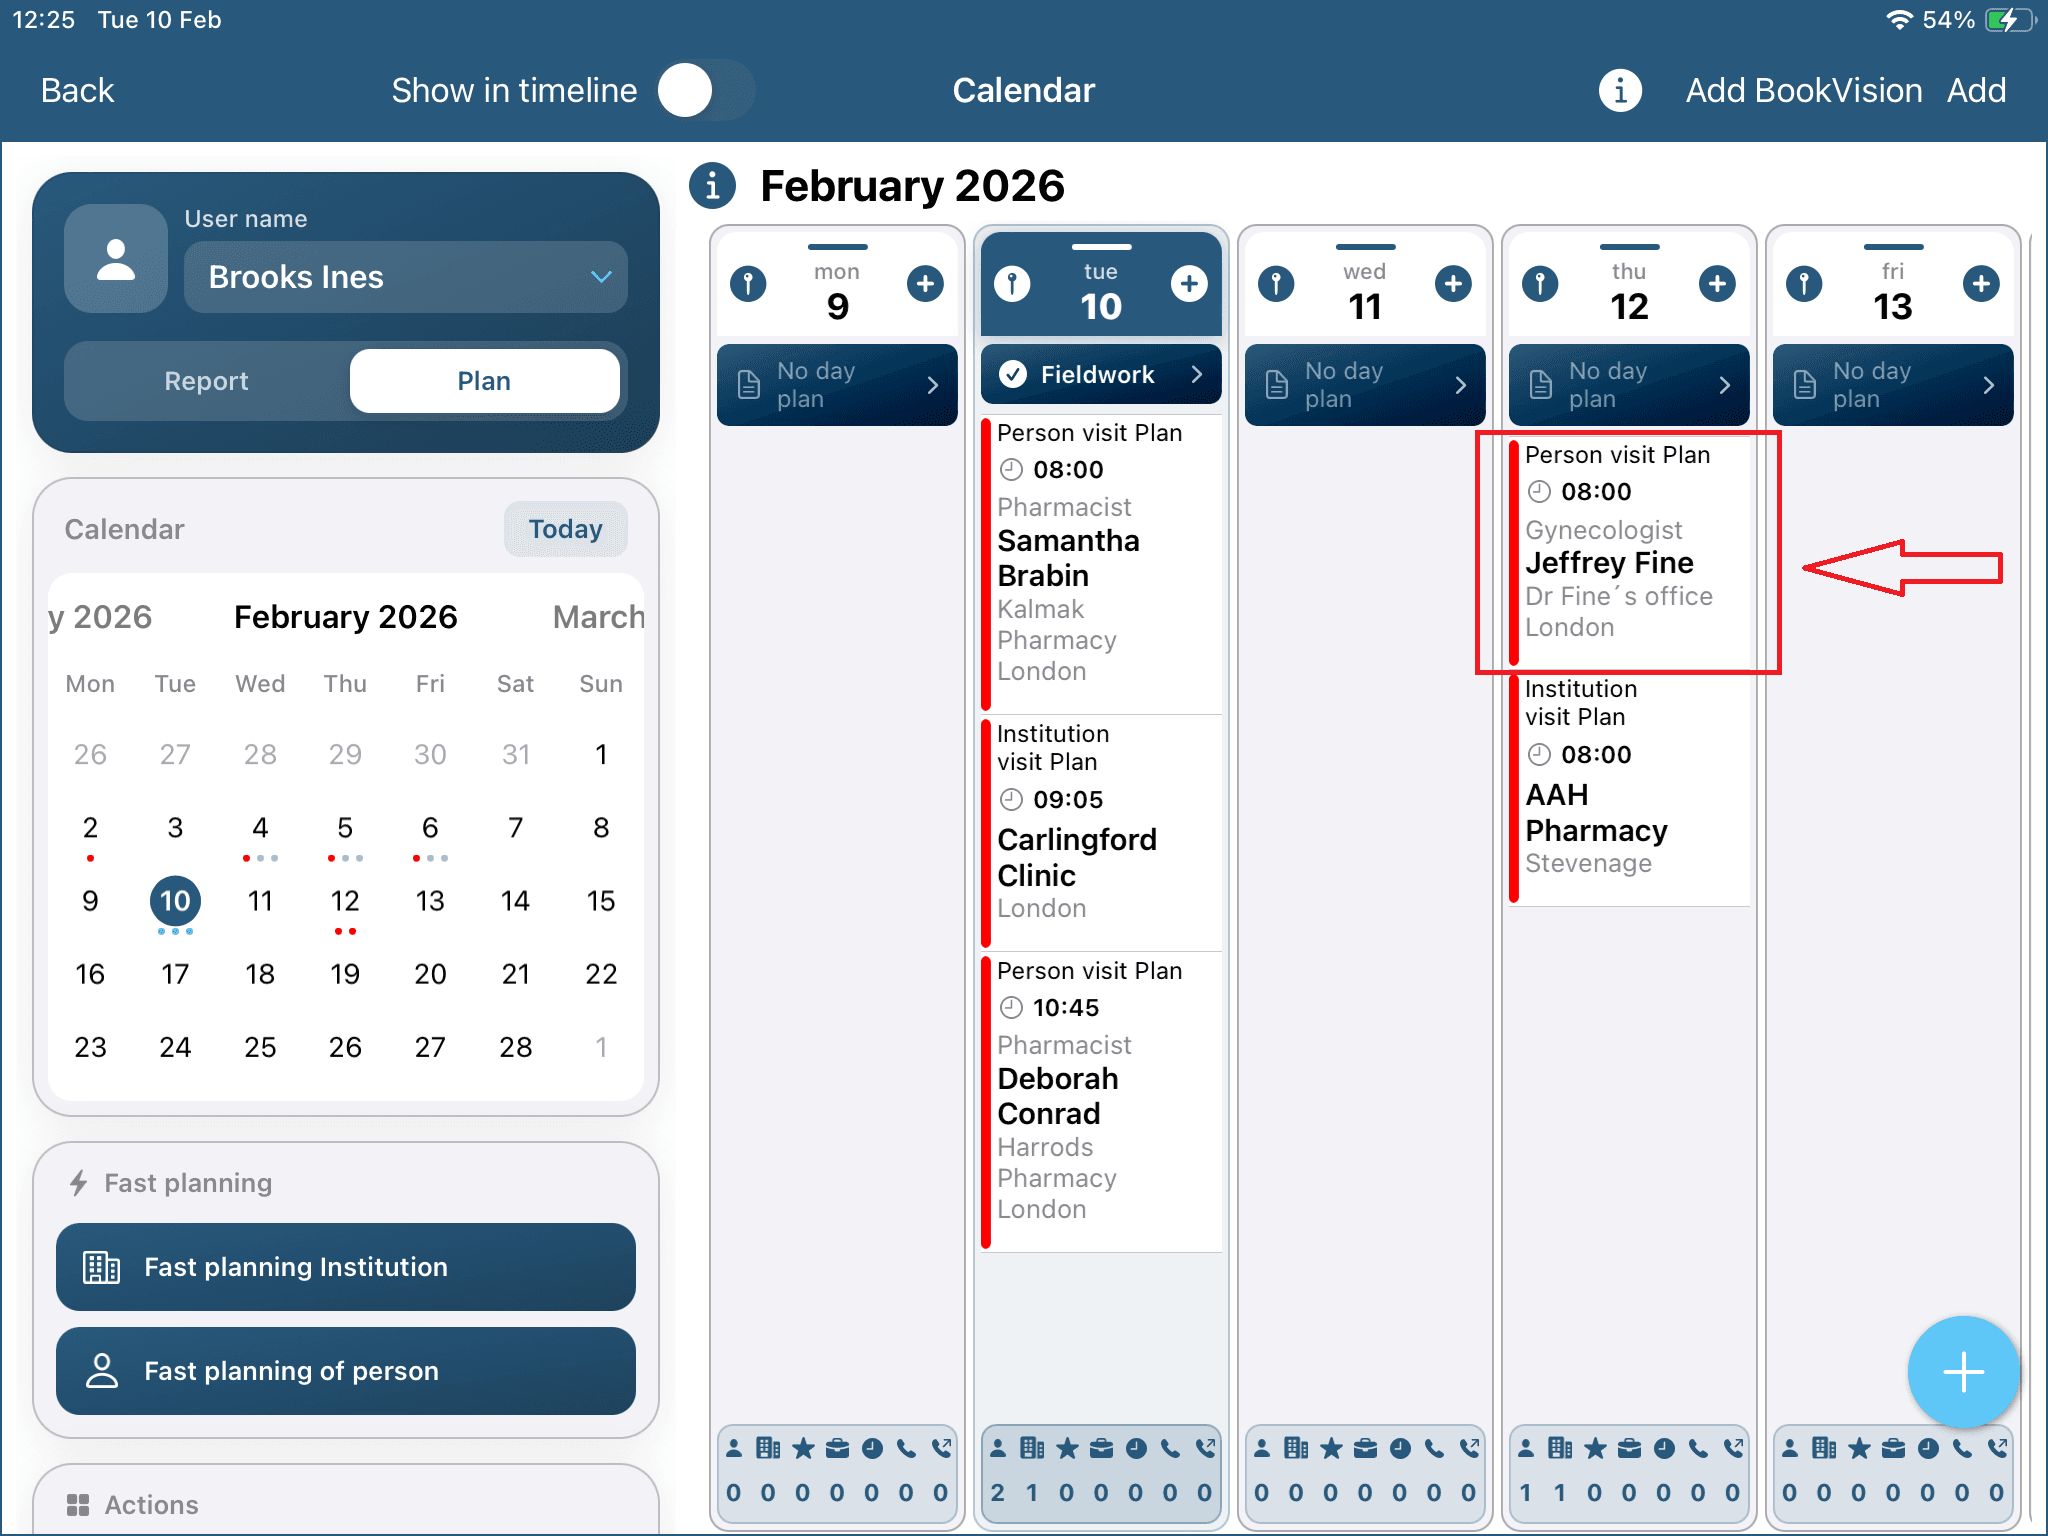
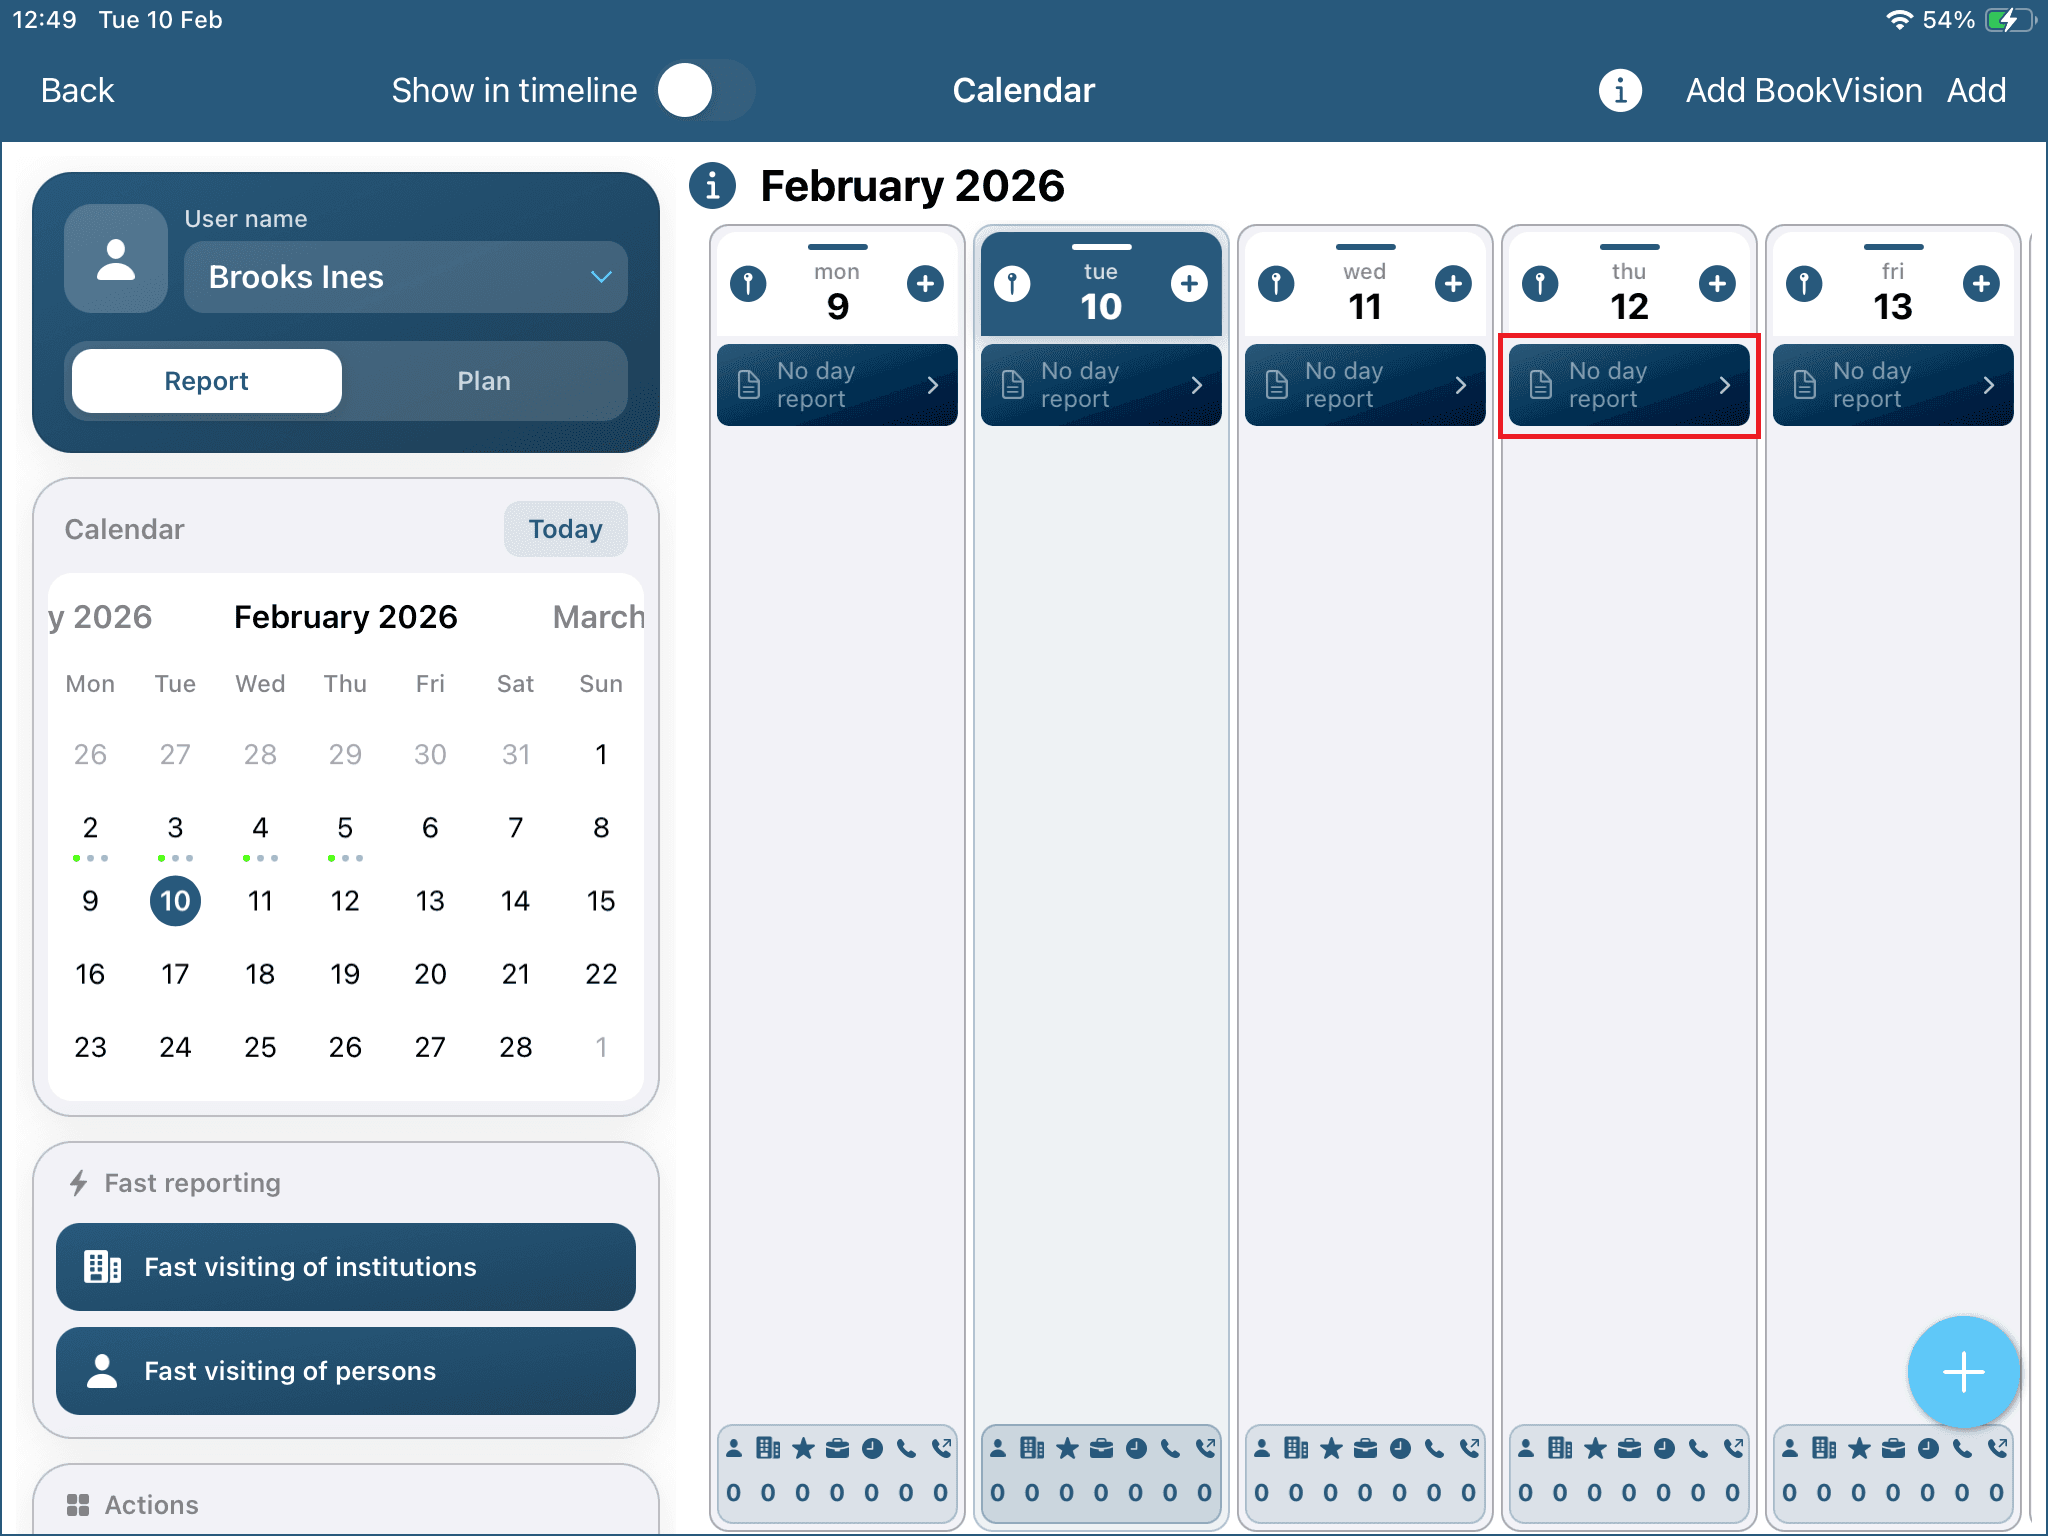
In the left bottom part you can see simple graph statistic with day activities and visits. Whole right part of screen is showing days for current week. This is a main part and we are using it for adding, editing, deleting and viewing visits and plans.
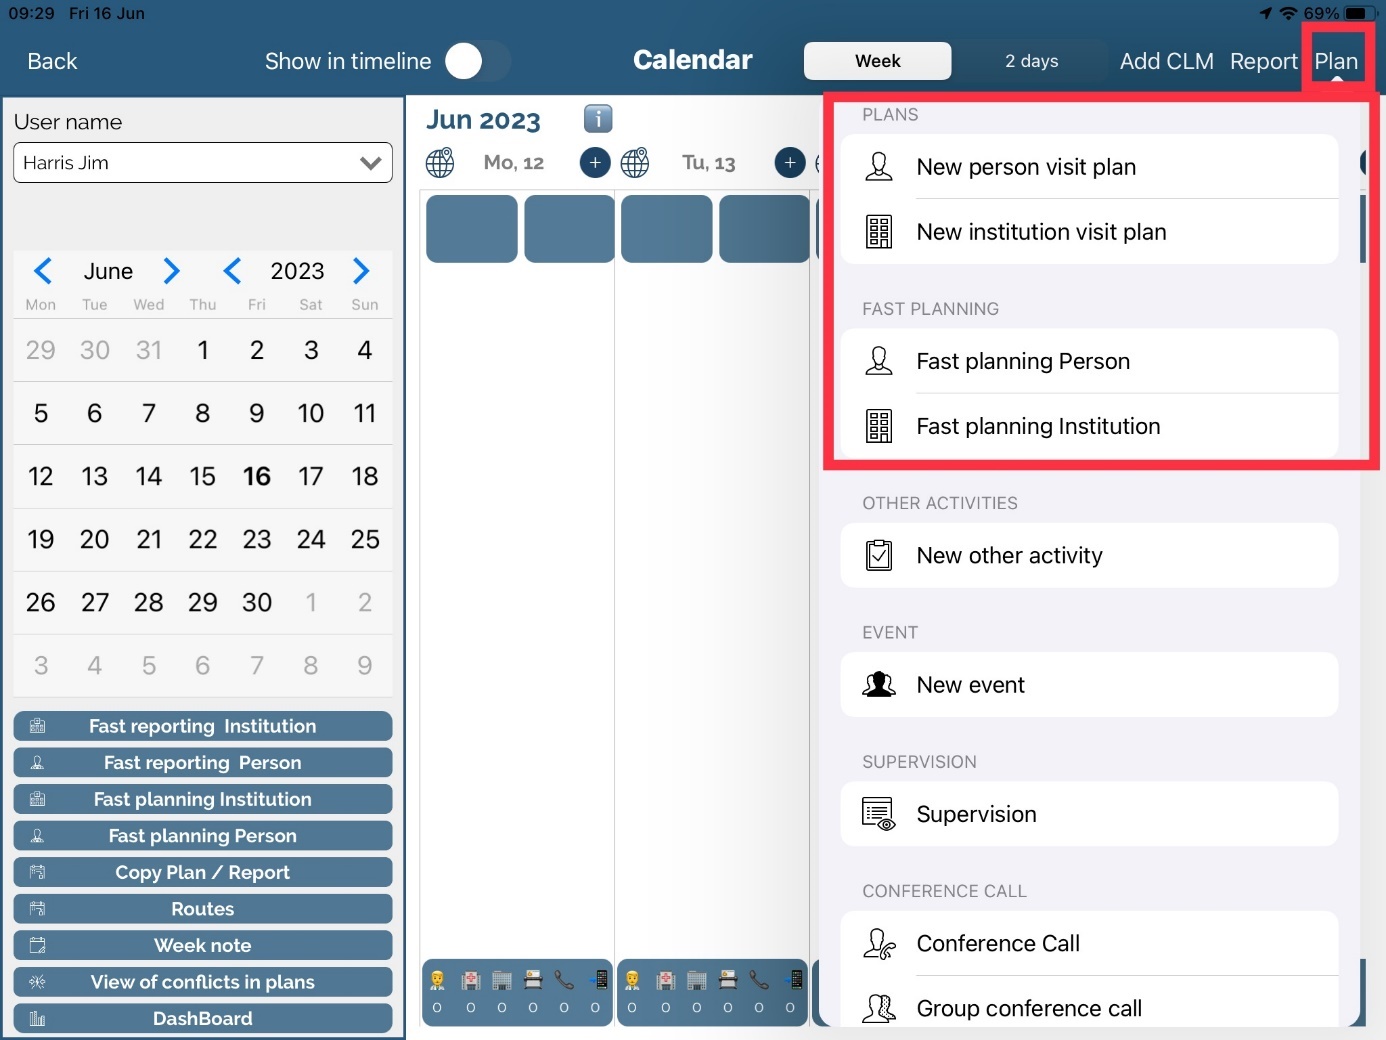
Plan
To plan visits and events, press on Plan button.
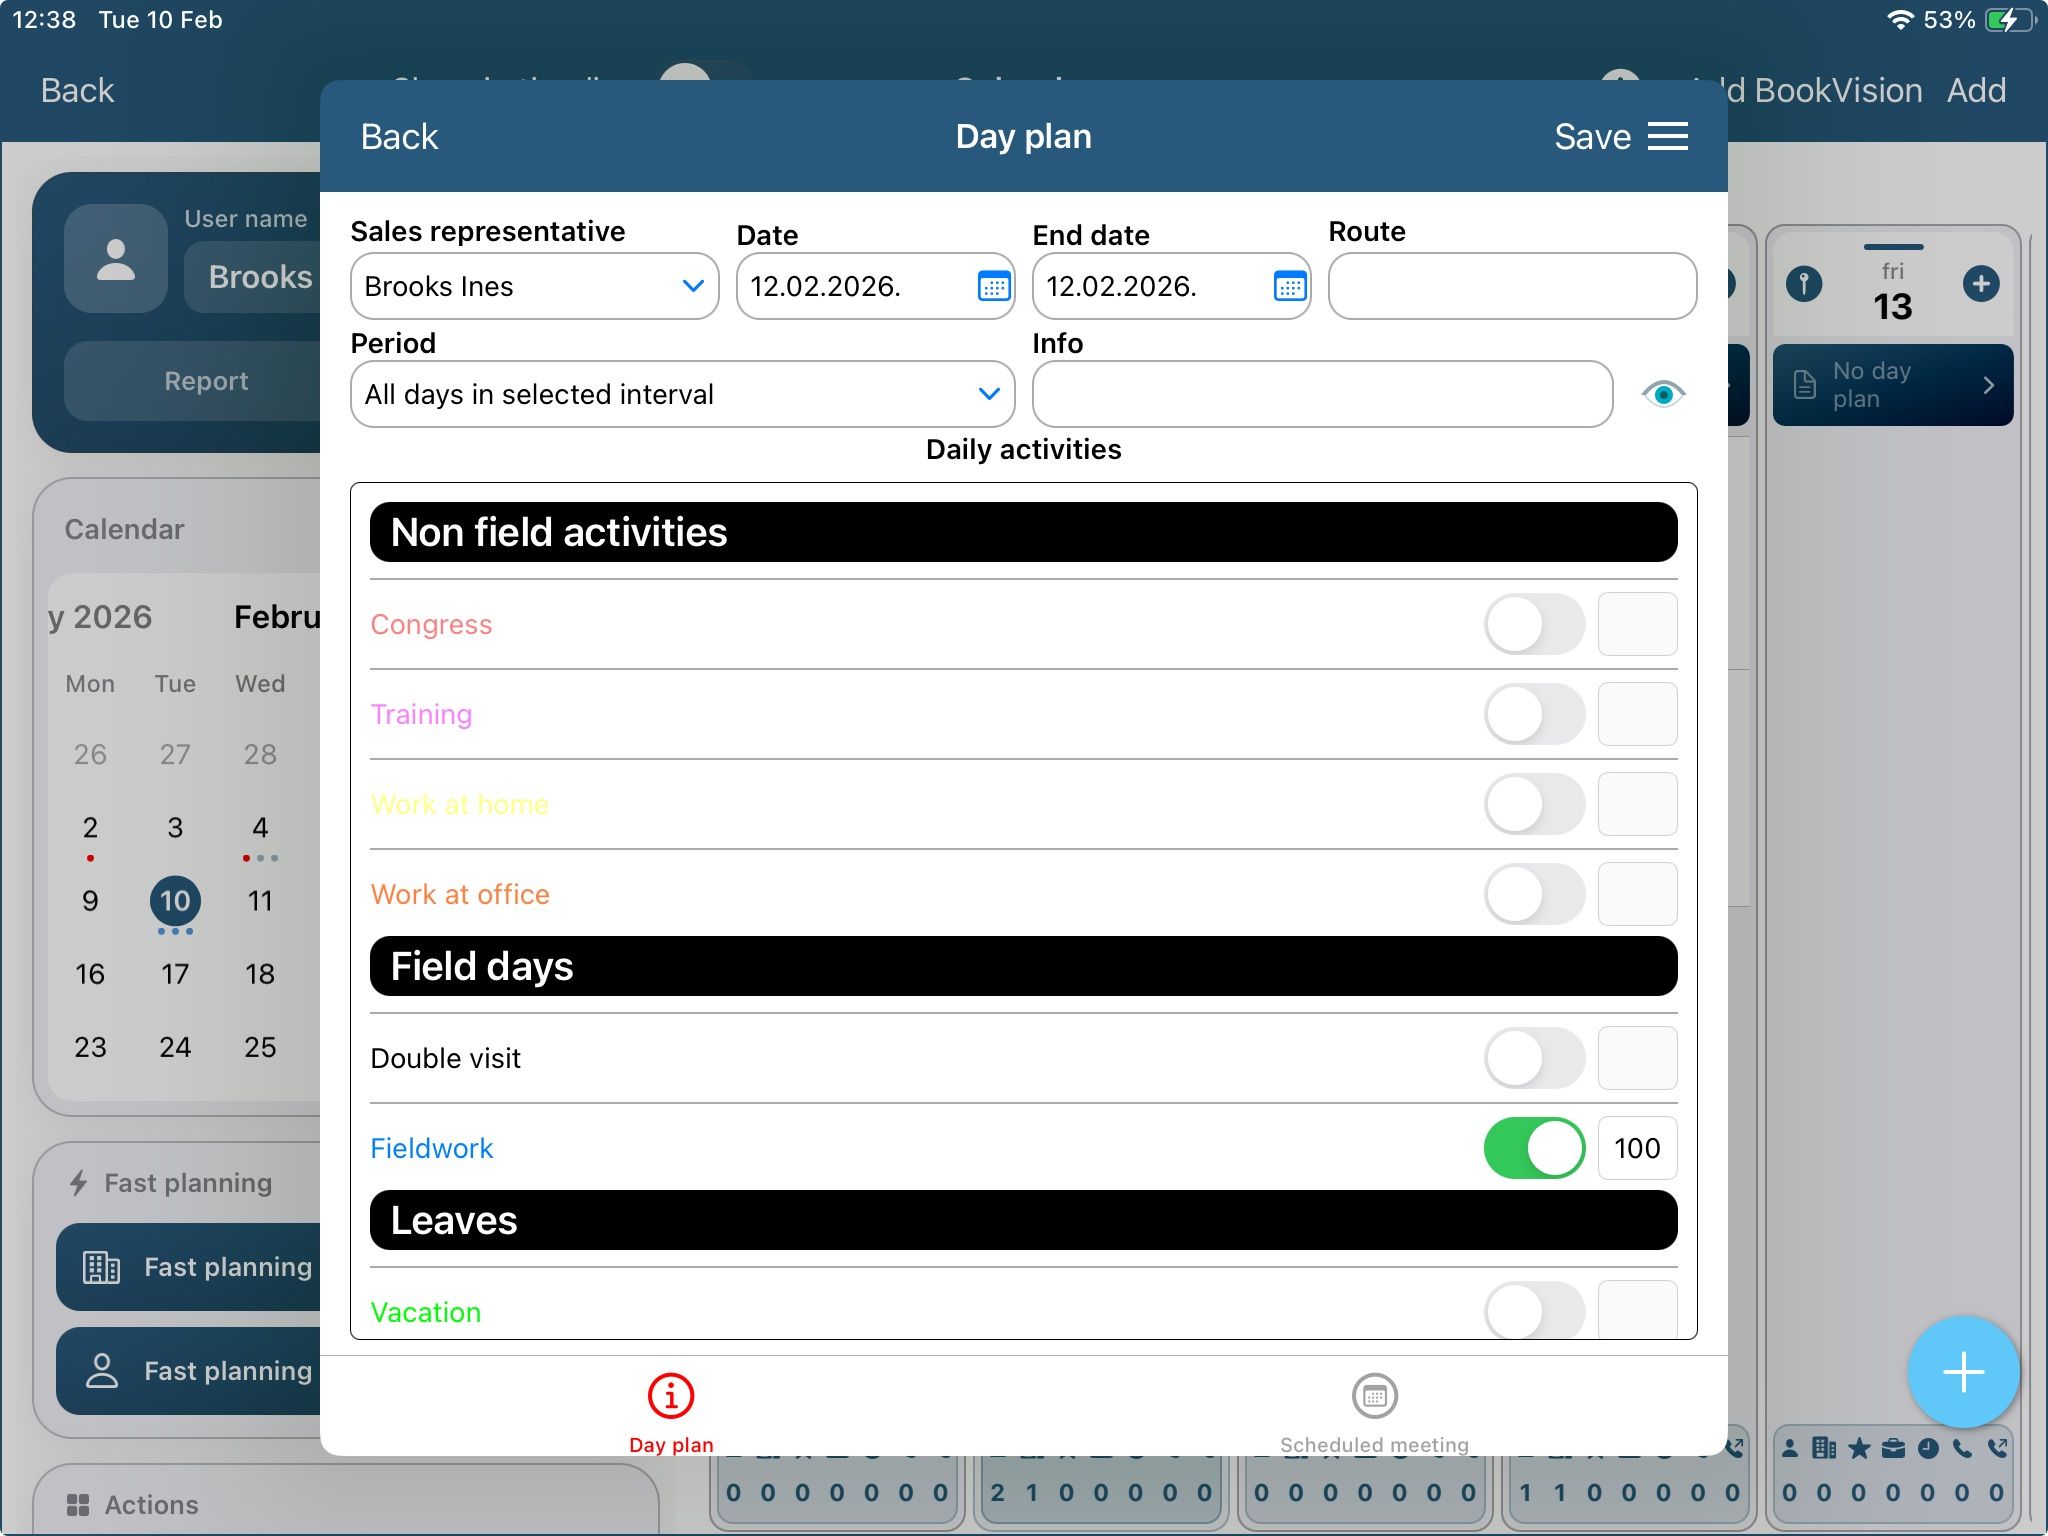
Adding day plan
In Plan view you can add Day plan for selected day by pressing on Blue square.
In Day plan view you can enter Route, Info and Activities. Date will be automatically set for today but it can be changed. In bottom part of this window you can see Daily activities where you can select planned activity from activity list. Sum of all activities must be 100% (if percentages are not 100%, you will get warning message). When you have entered all the data press Save button and new Day plan will be shown in Plan view.
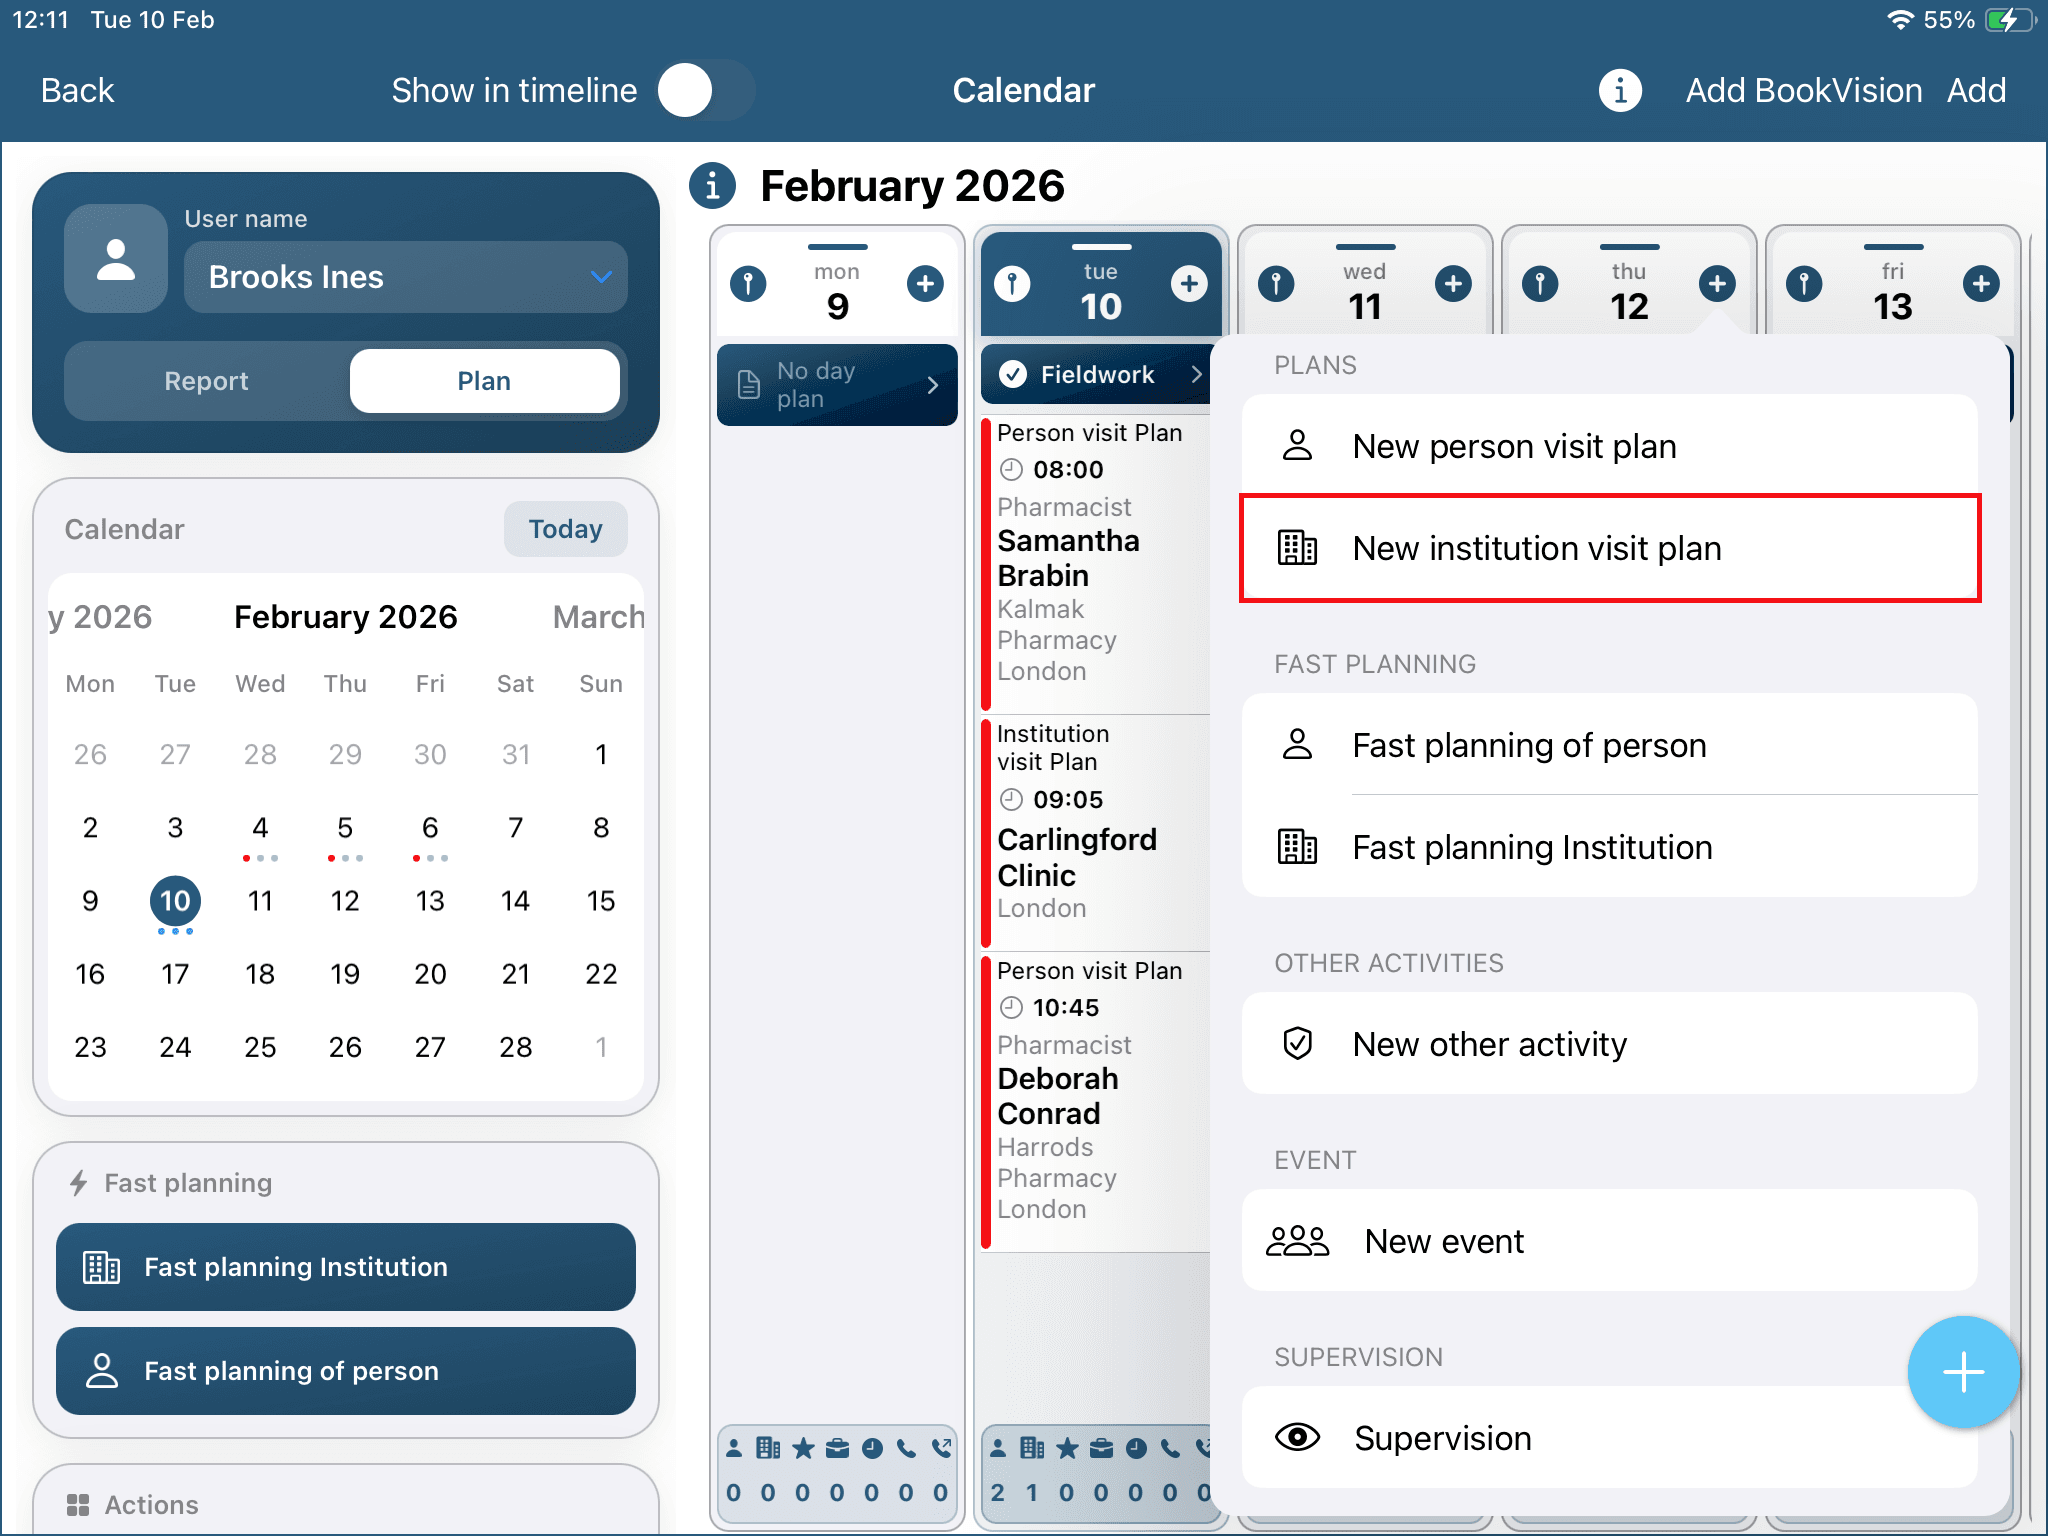
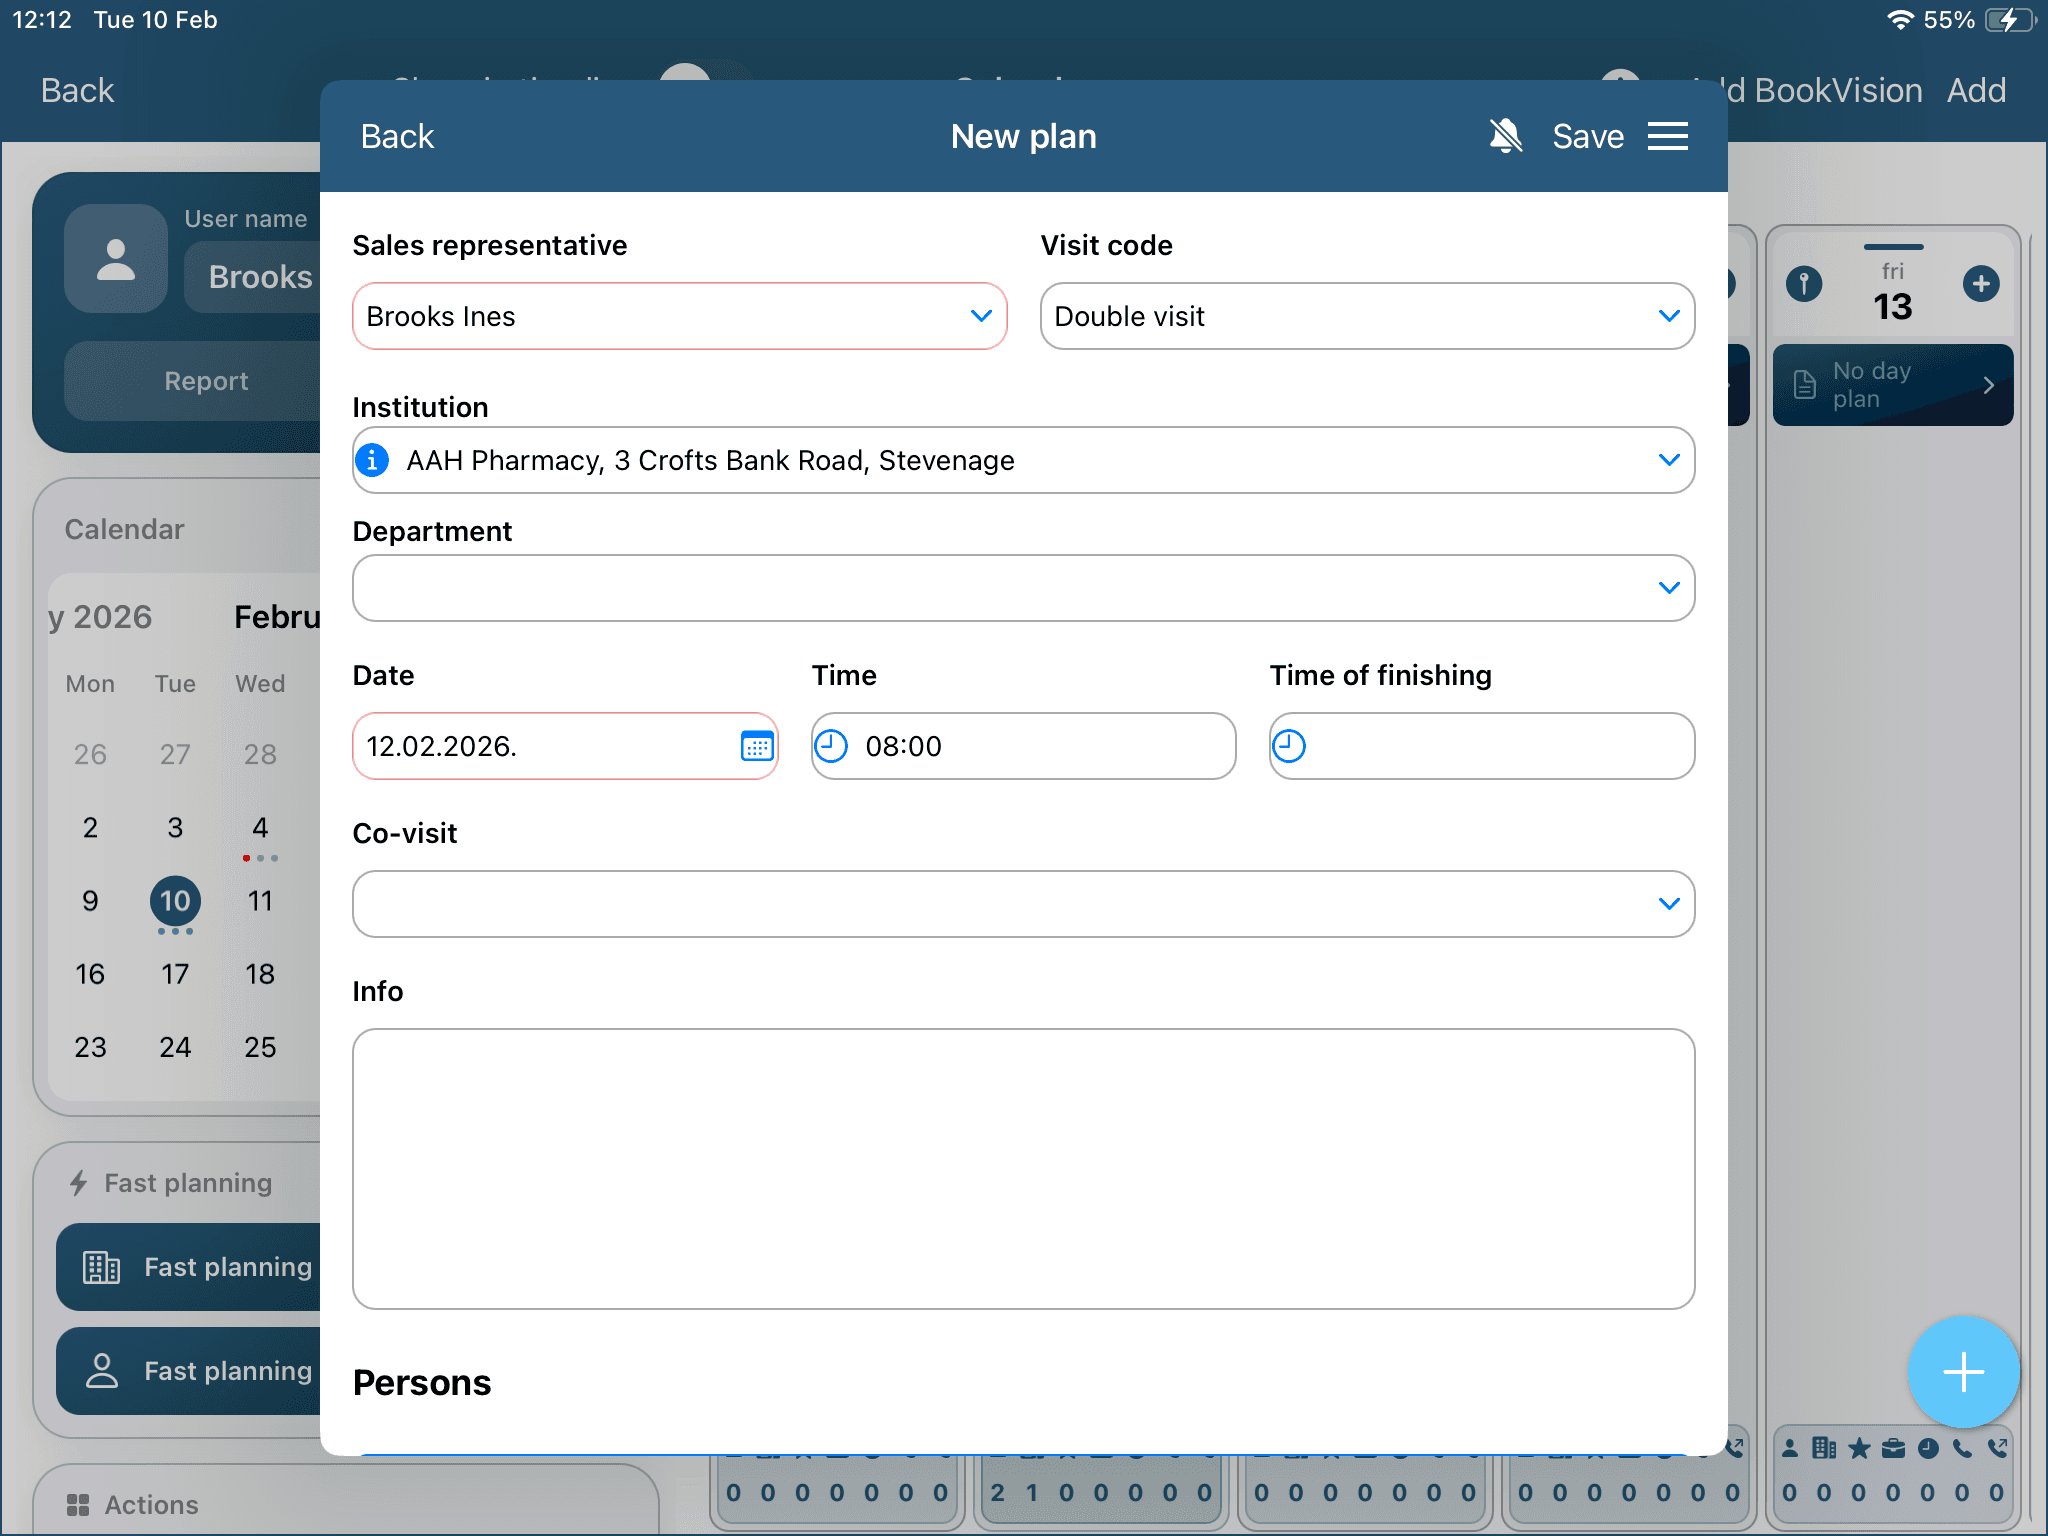
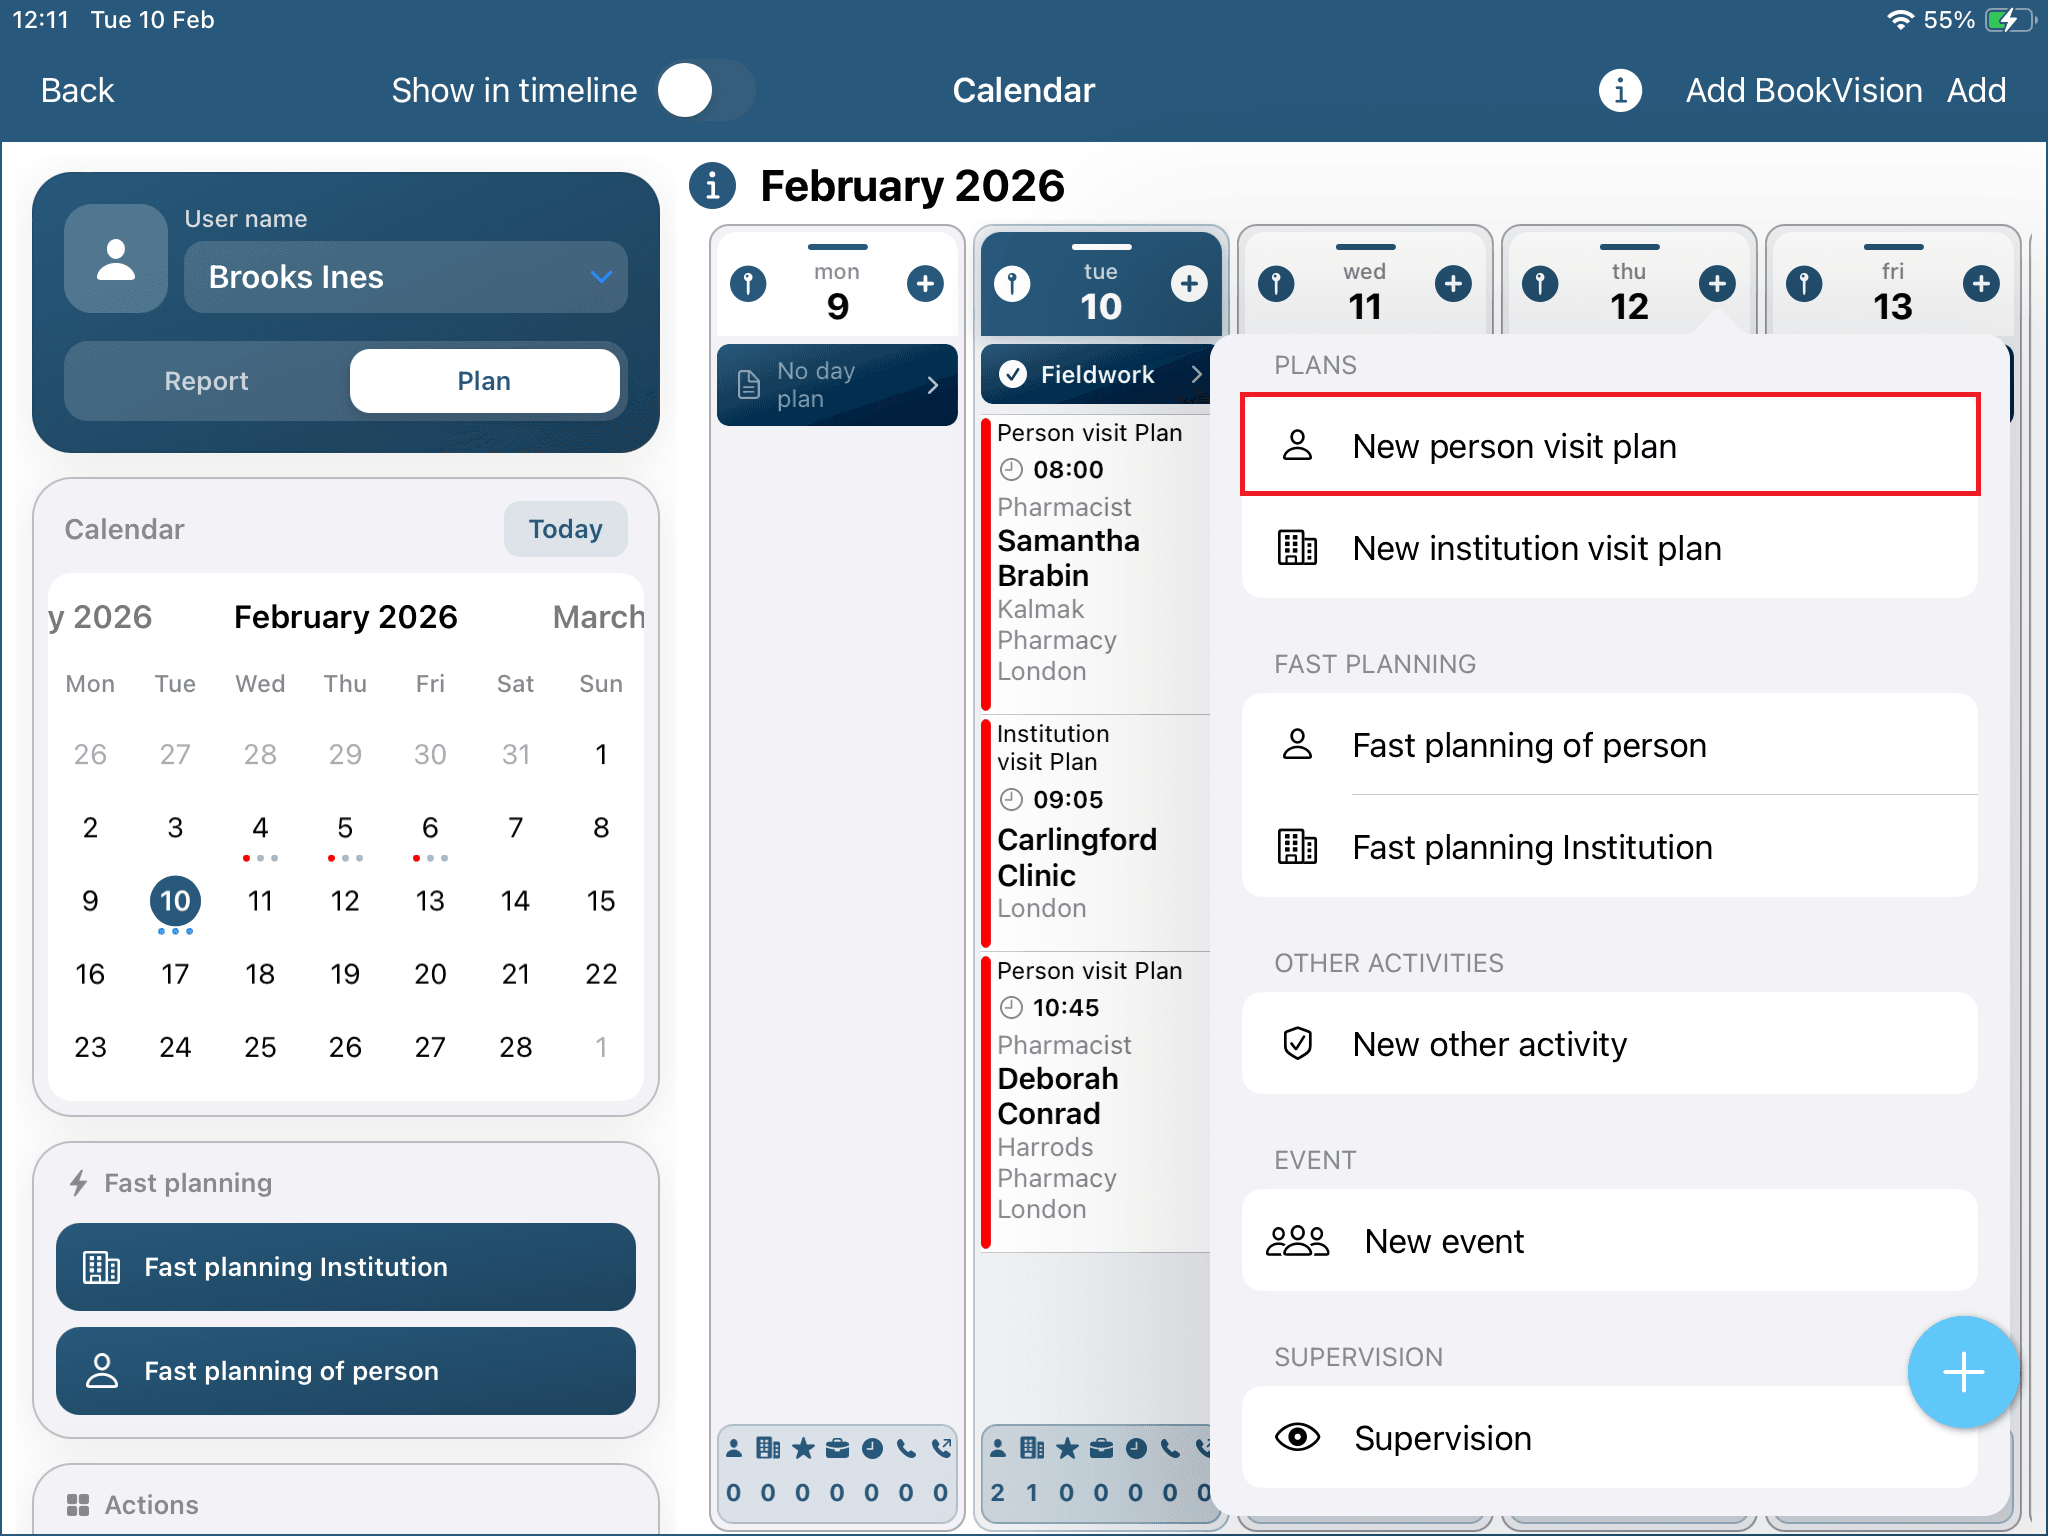
Adding plan for institution
In plan view press New institution visit plan button.
Here you can enter data such as Institution, Date (by default it is set for today but you can change it), Time, Visit code and Info.
You can make a report from plan by pressing on „≡” and New report from plan button and a window for adding new report will be opened (adding a visit will be described in the following chapter). By pressing on “i” button next to the institution name, info for this institution will be opened.
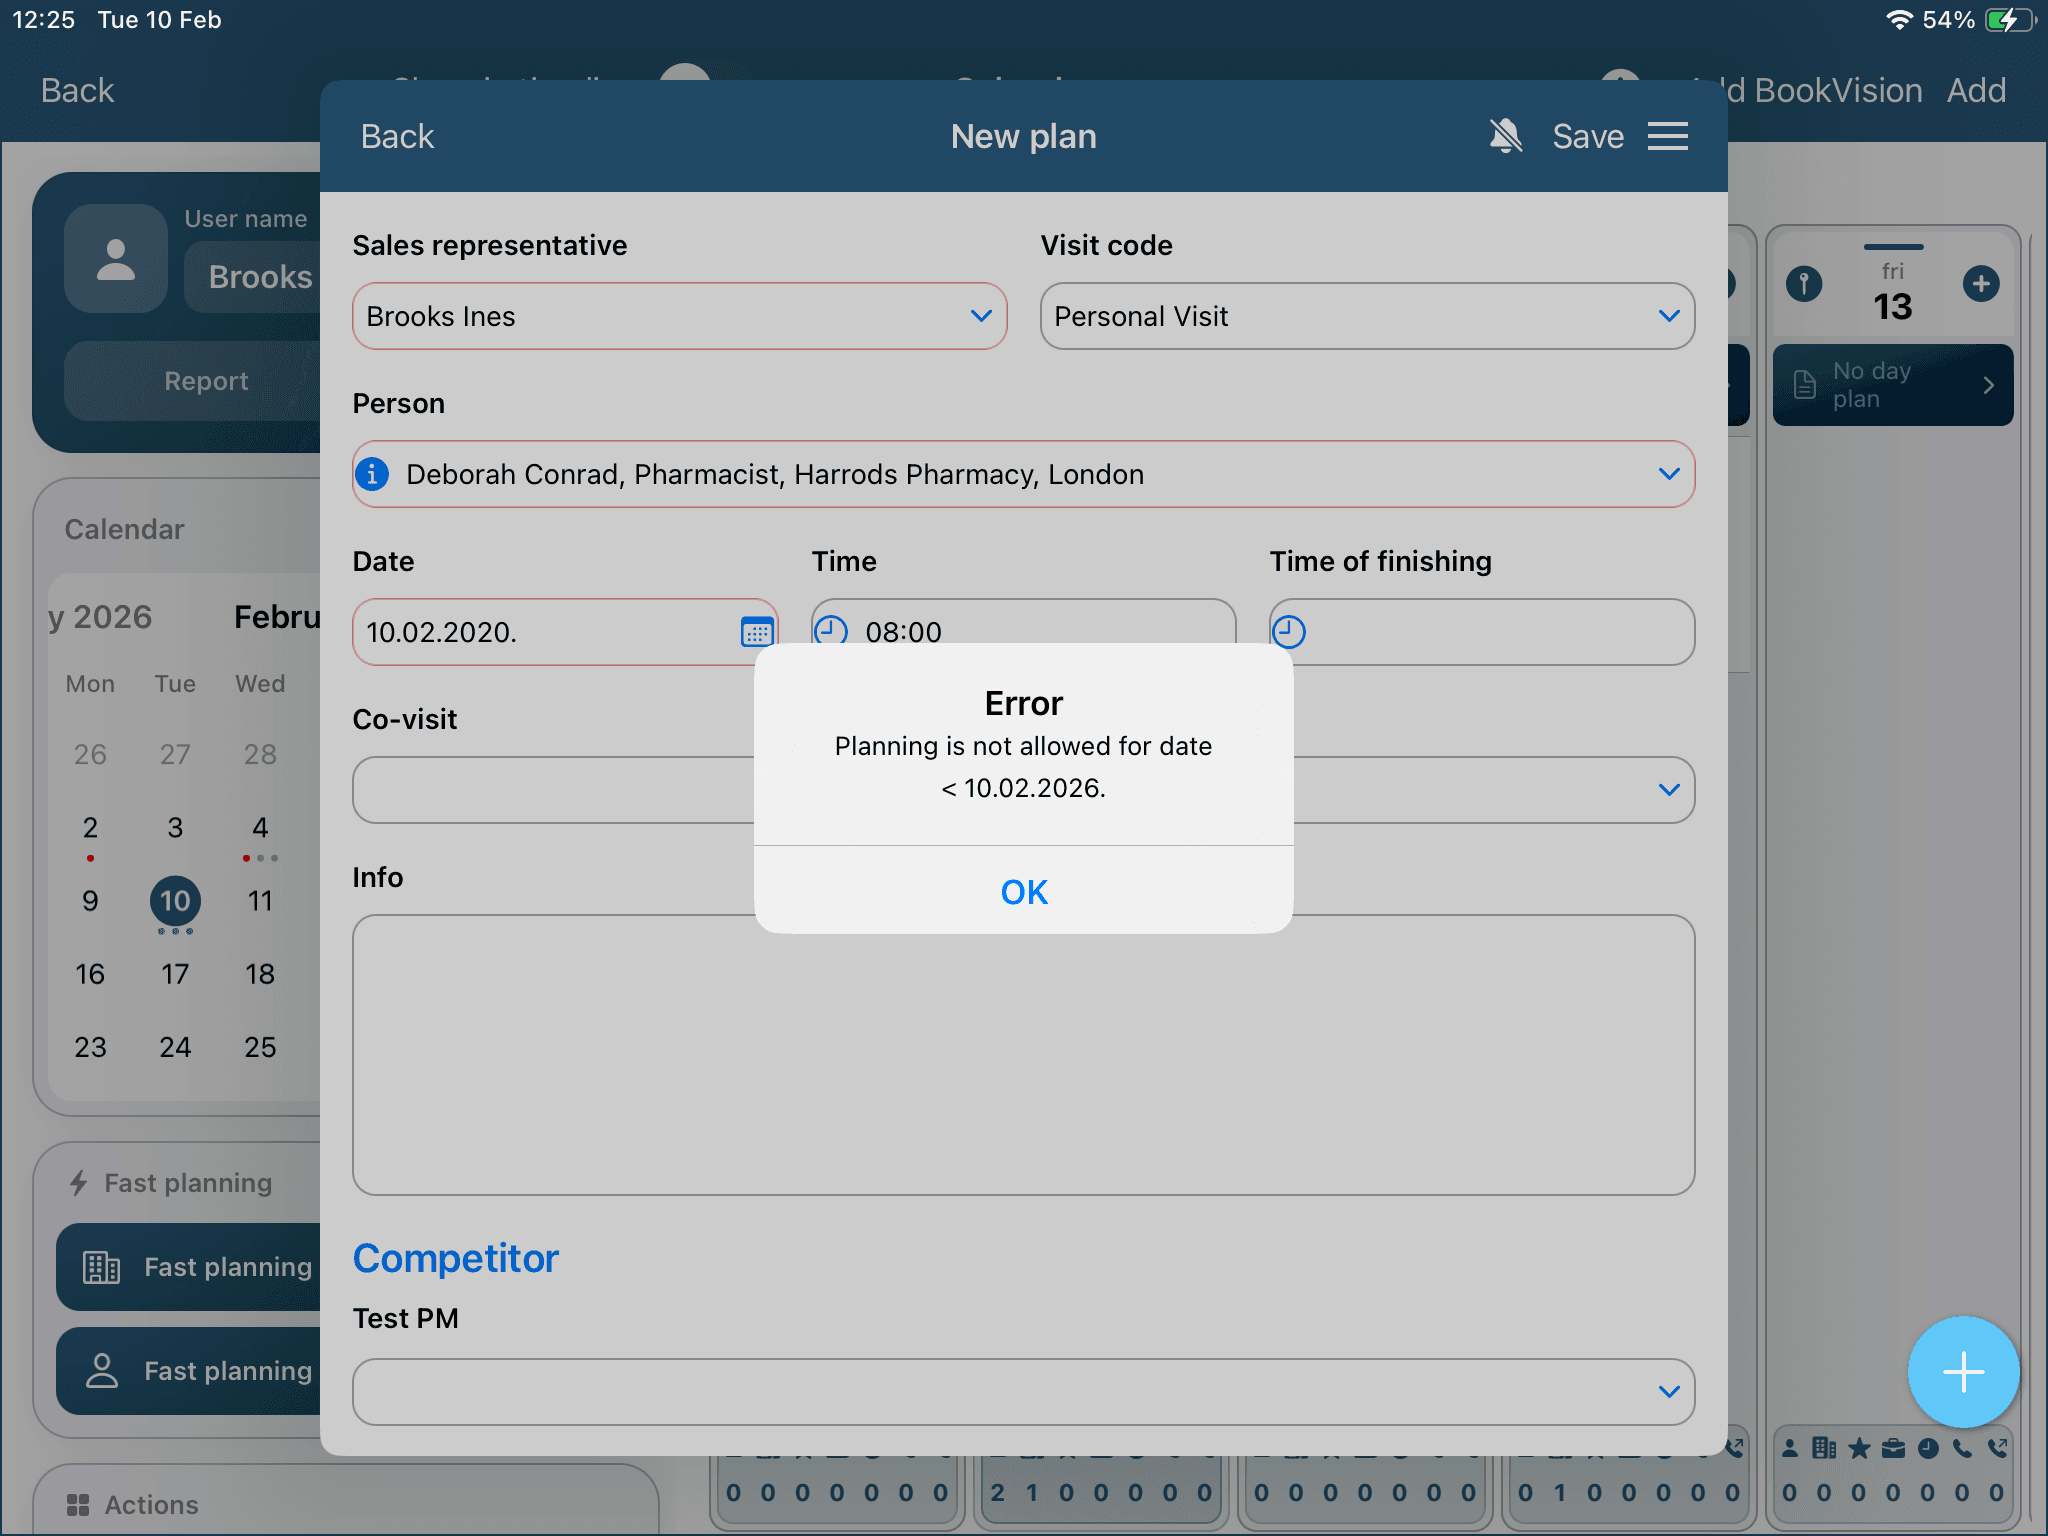
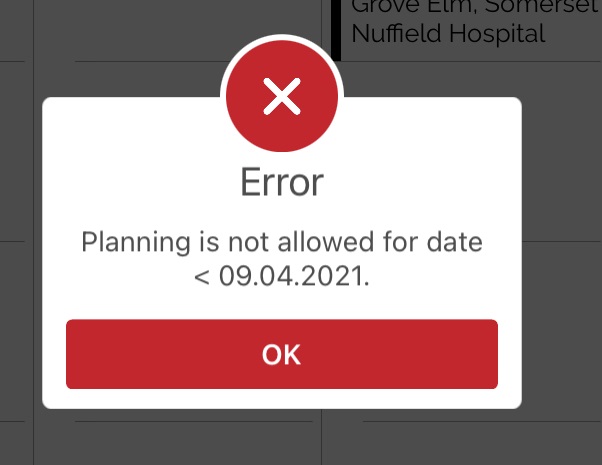
After entering all data, press Save button to save that plan for visiting this institution. A new plan has been added to the list. If you click Back, data will not be saved. You can not add a Plan for a institution for a day in the past. If you select a day in the past and try to add a new plan you will get an info message.
Adding plan for a person
In plan view press New person visit plan button.
Here you can enter data such as Person, Date (by default it is set for today but you can change it), Time, Visit code and Info.
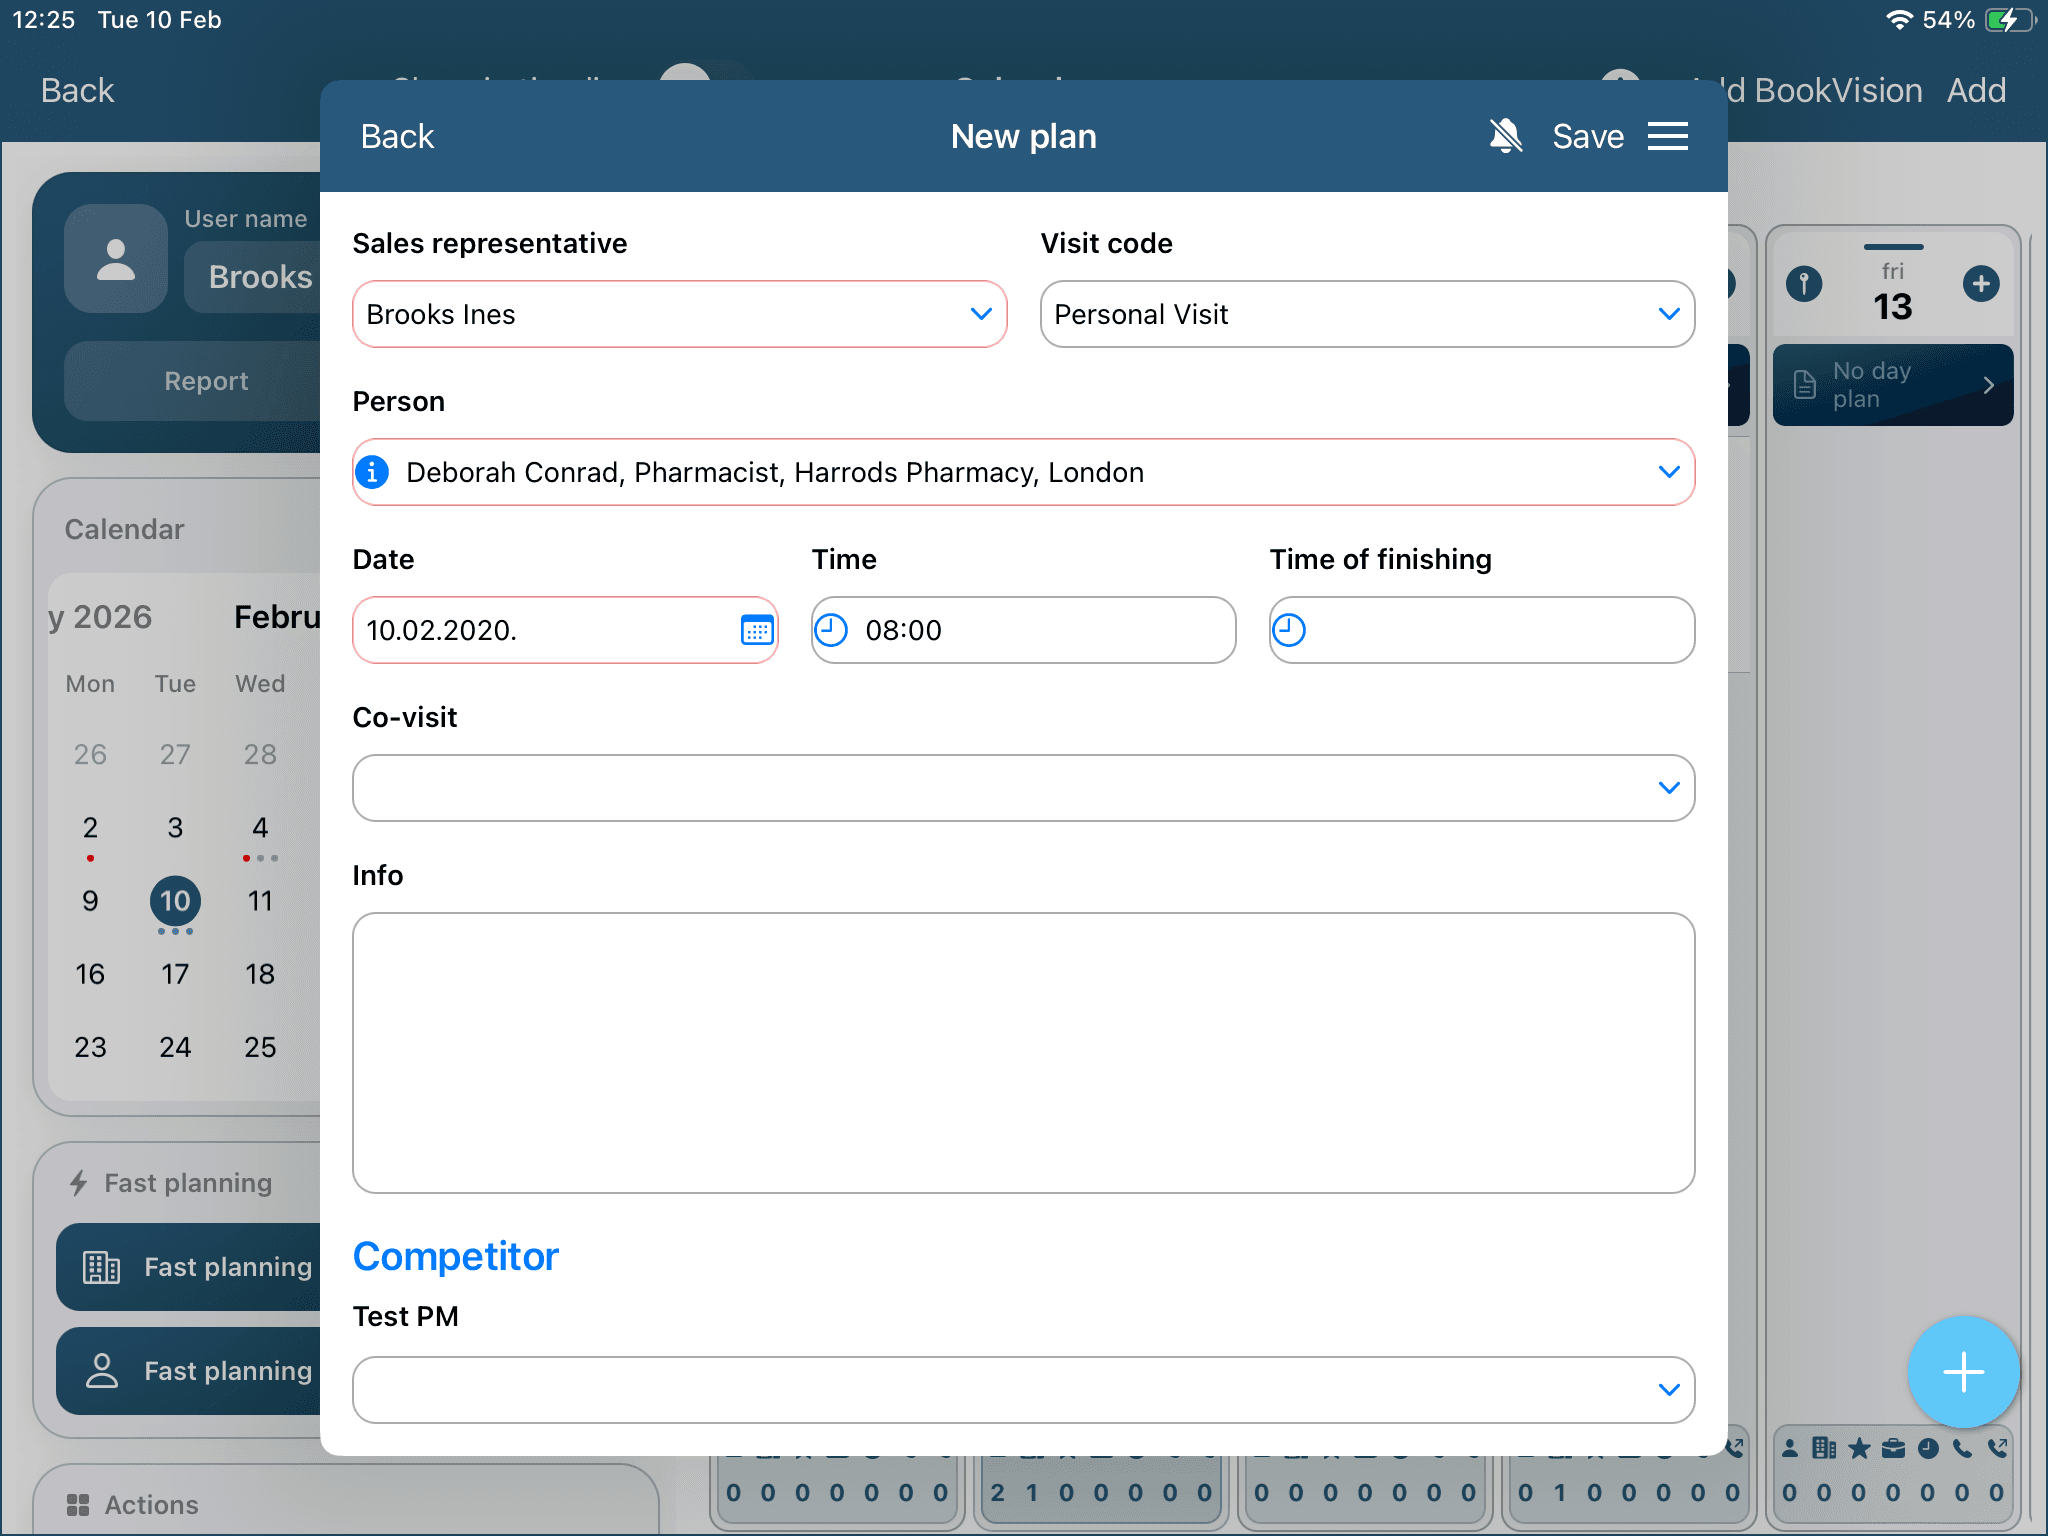
Person is mandatory so we need to choose it. Press on button in person field and list will be shown. Press on the name of person you want to add to your plan and swipe left on it, then press Choose.
Also, there is a Filter button. It is the same as in Person module.
You can also make a report from plan by pressing on “≡” and Create visit from plan button and a new window for adding new report will be opened (adding a visit will be described in the following chapter). By pressing on an “i” button next to the person's name, info for this person will be opened.
After entering all data, press Save button to save that plan for visiting this person. A new plan has been added to the list. If you click Back, data will not be saved.
You can not add a Plan for a person for a day in the past. If you select a day in the past and try to add a new plan you will get an info message.
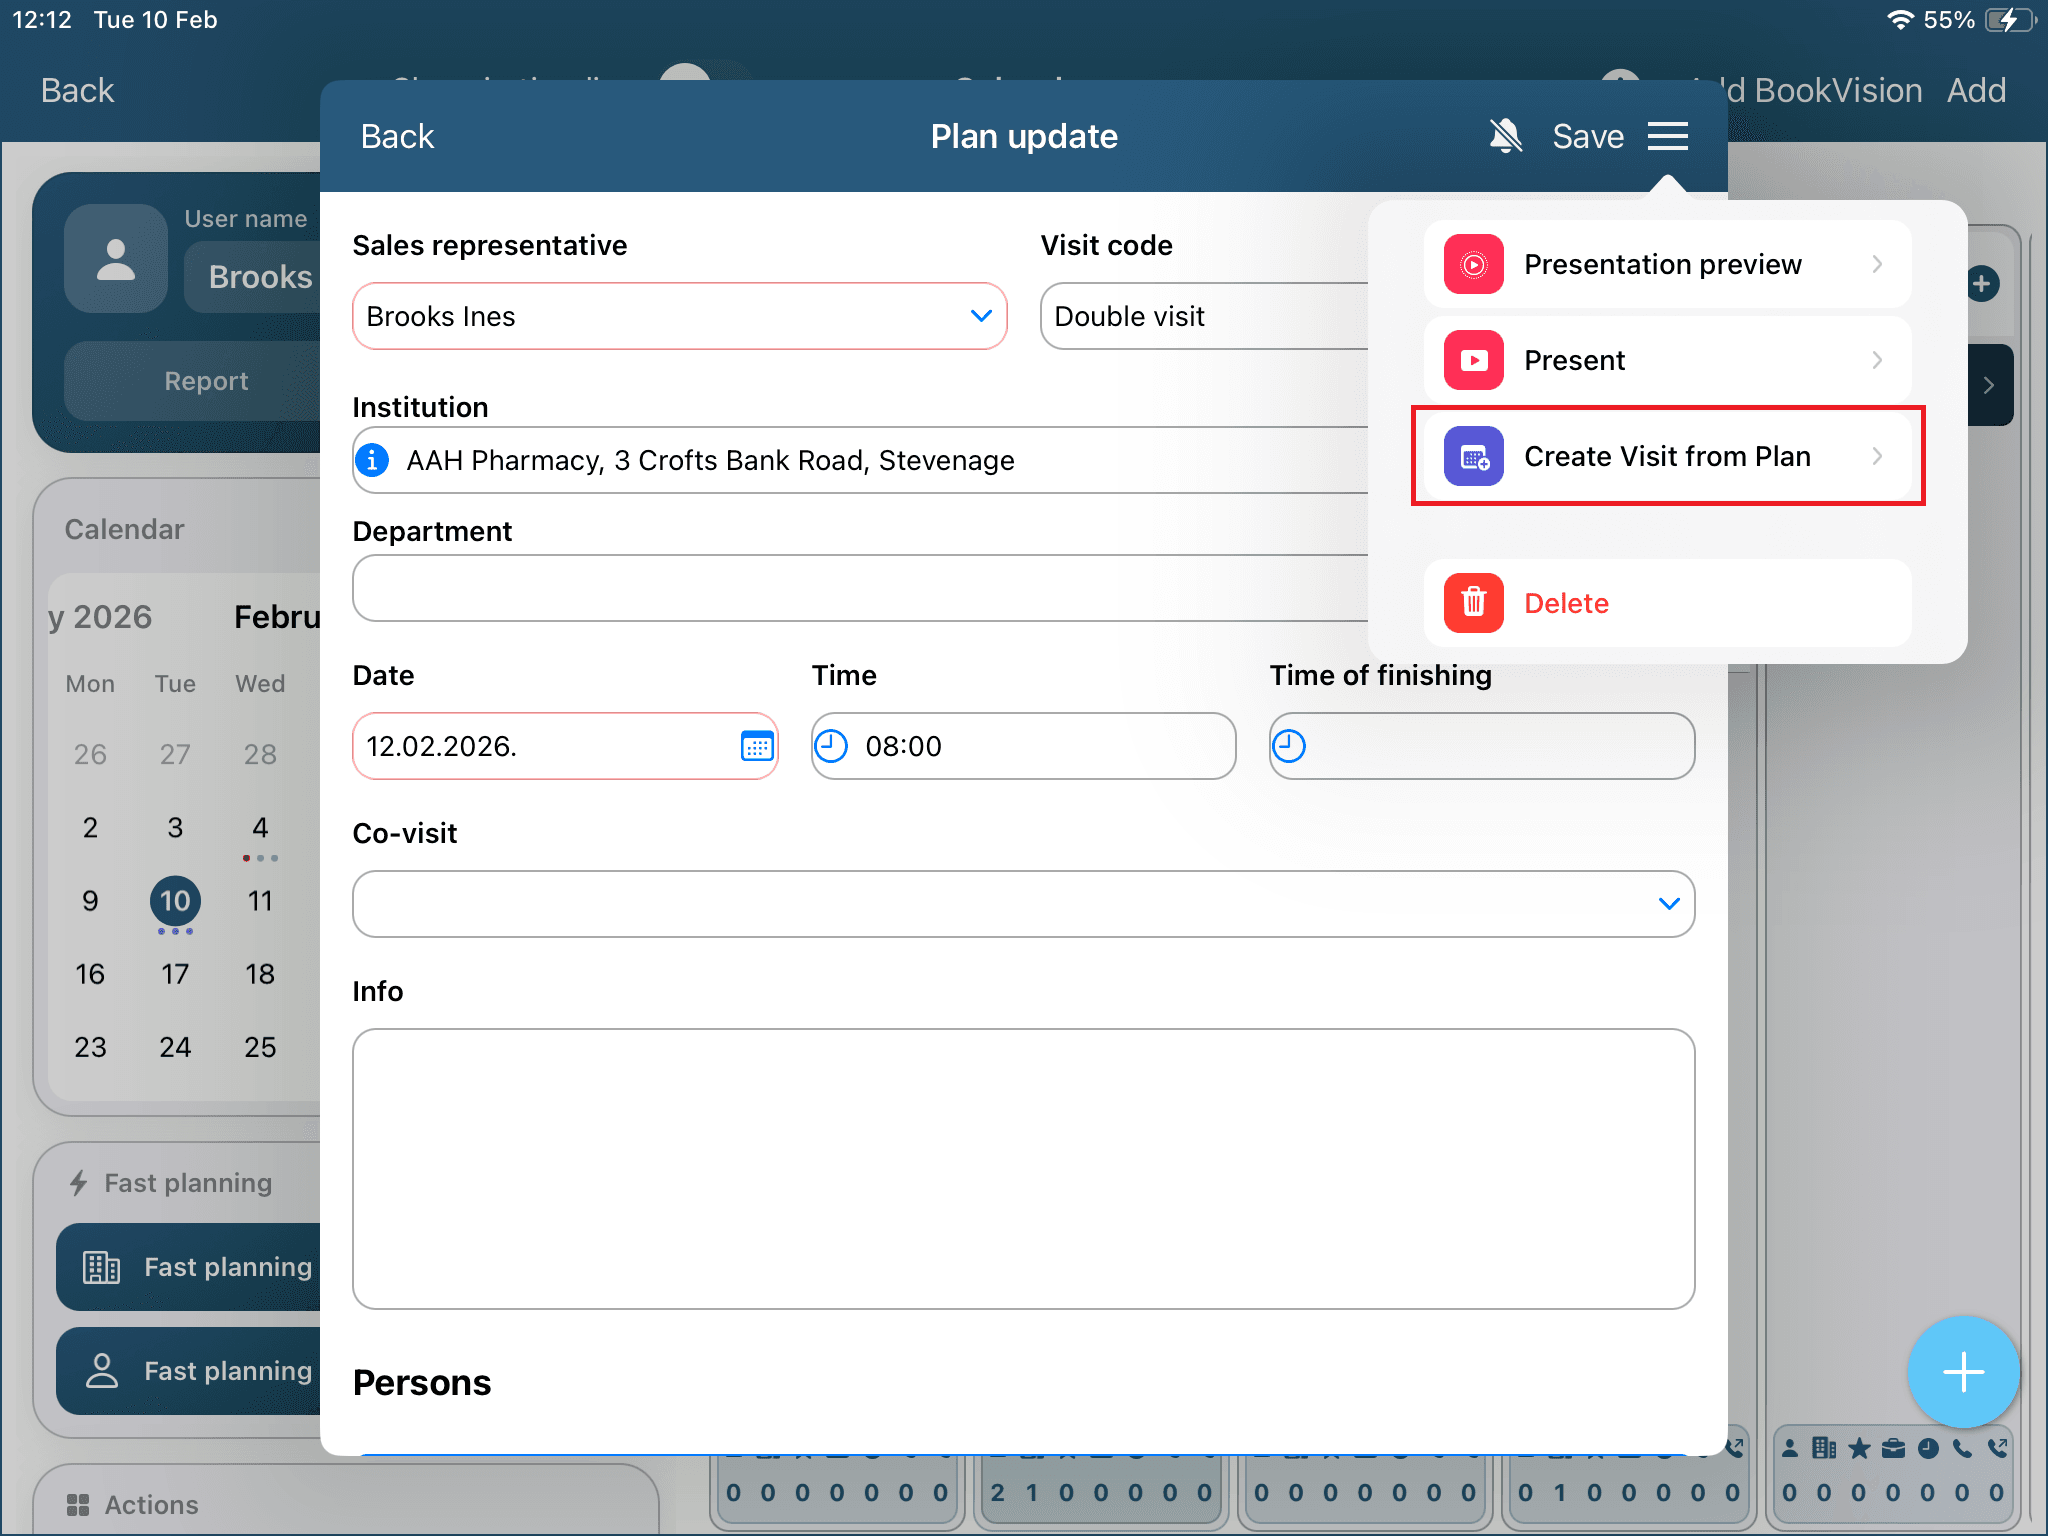
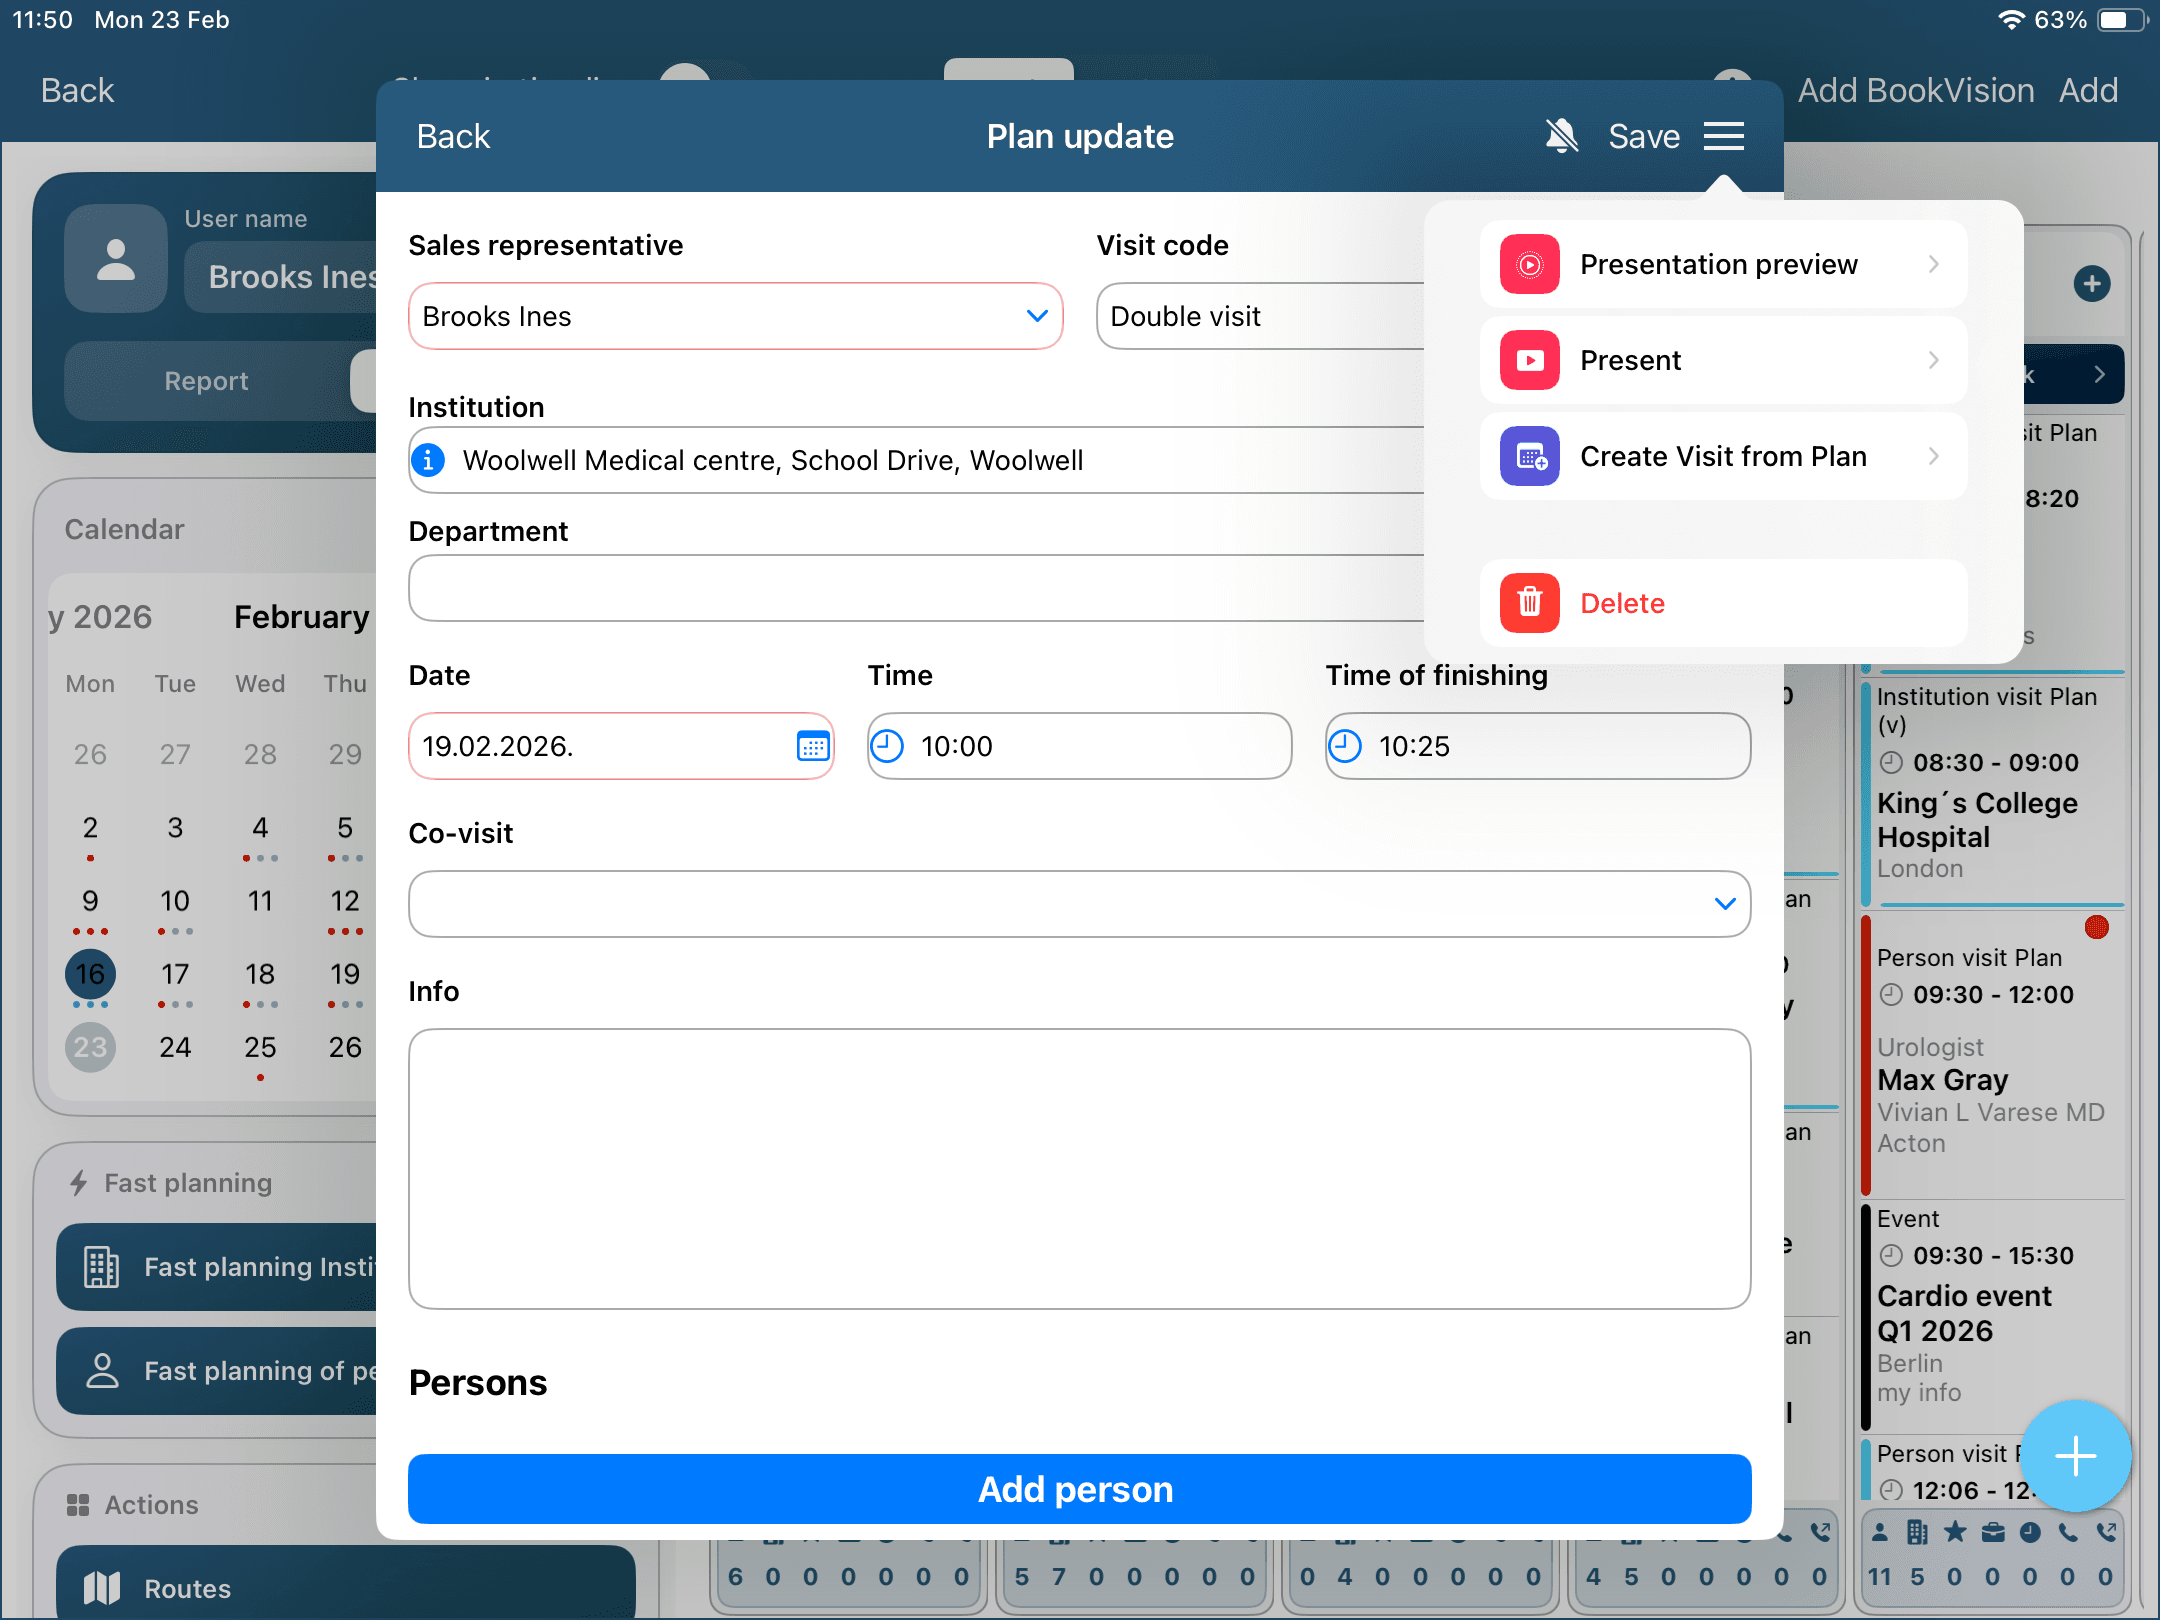
Creating Visit from Plan
Once when Plan is created , you can easily create Visit from it. It can bed one by just double clicking on created plan and window with new Visit will open (pictures bellow). In this example, created Plan is on Catherine Adams, and when you double click on it, Visit will be open and you just click Save button. The other way is to open the plan, click on hamburger menu and click „Create visit from plan“.
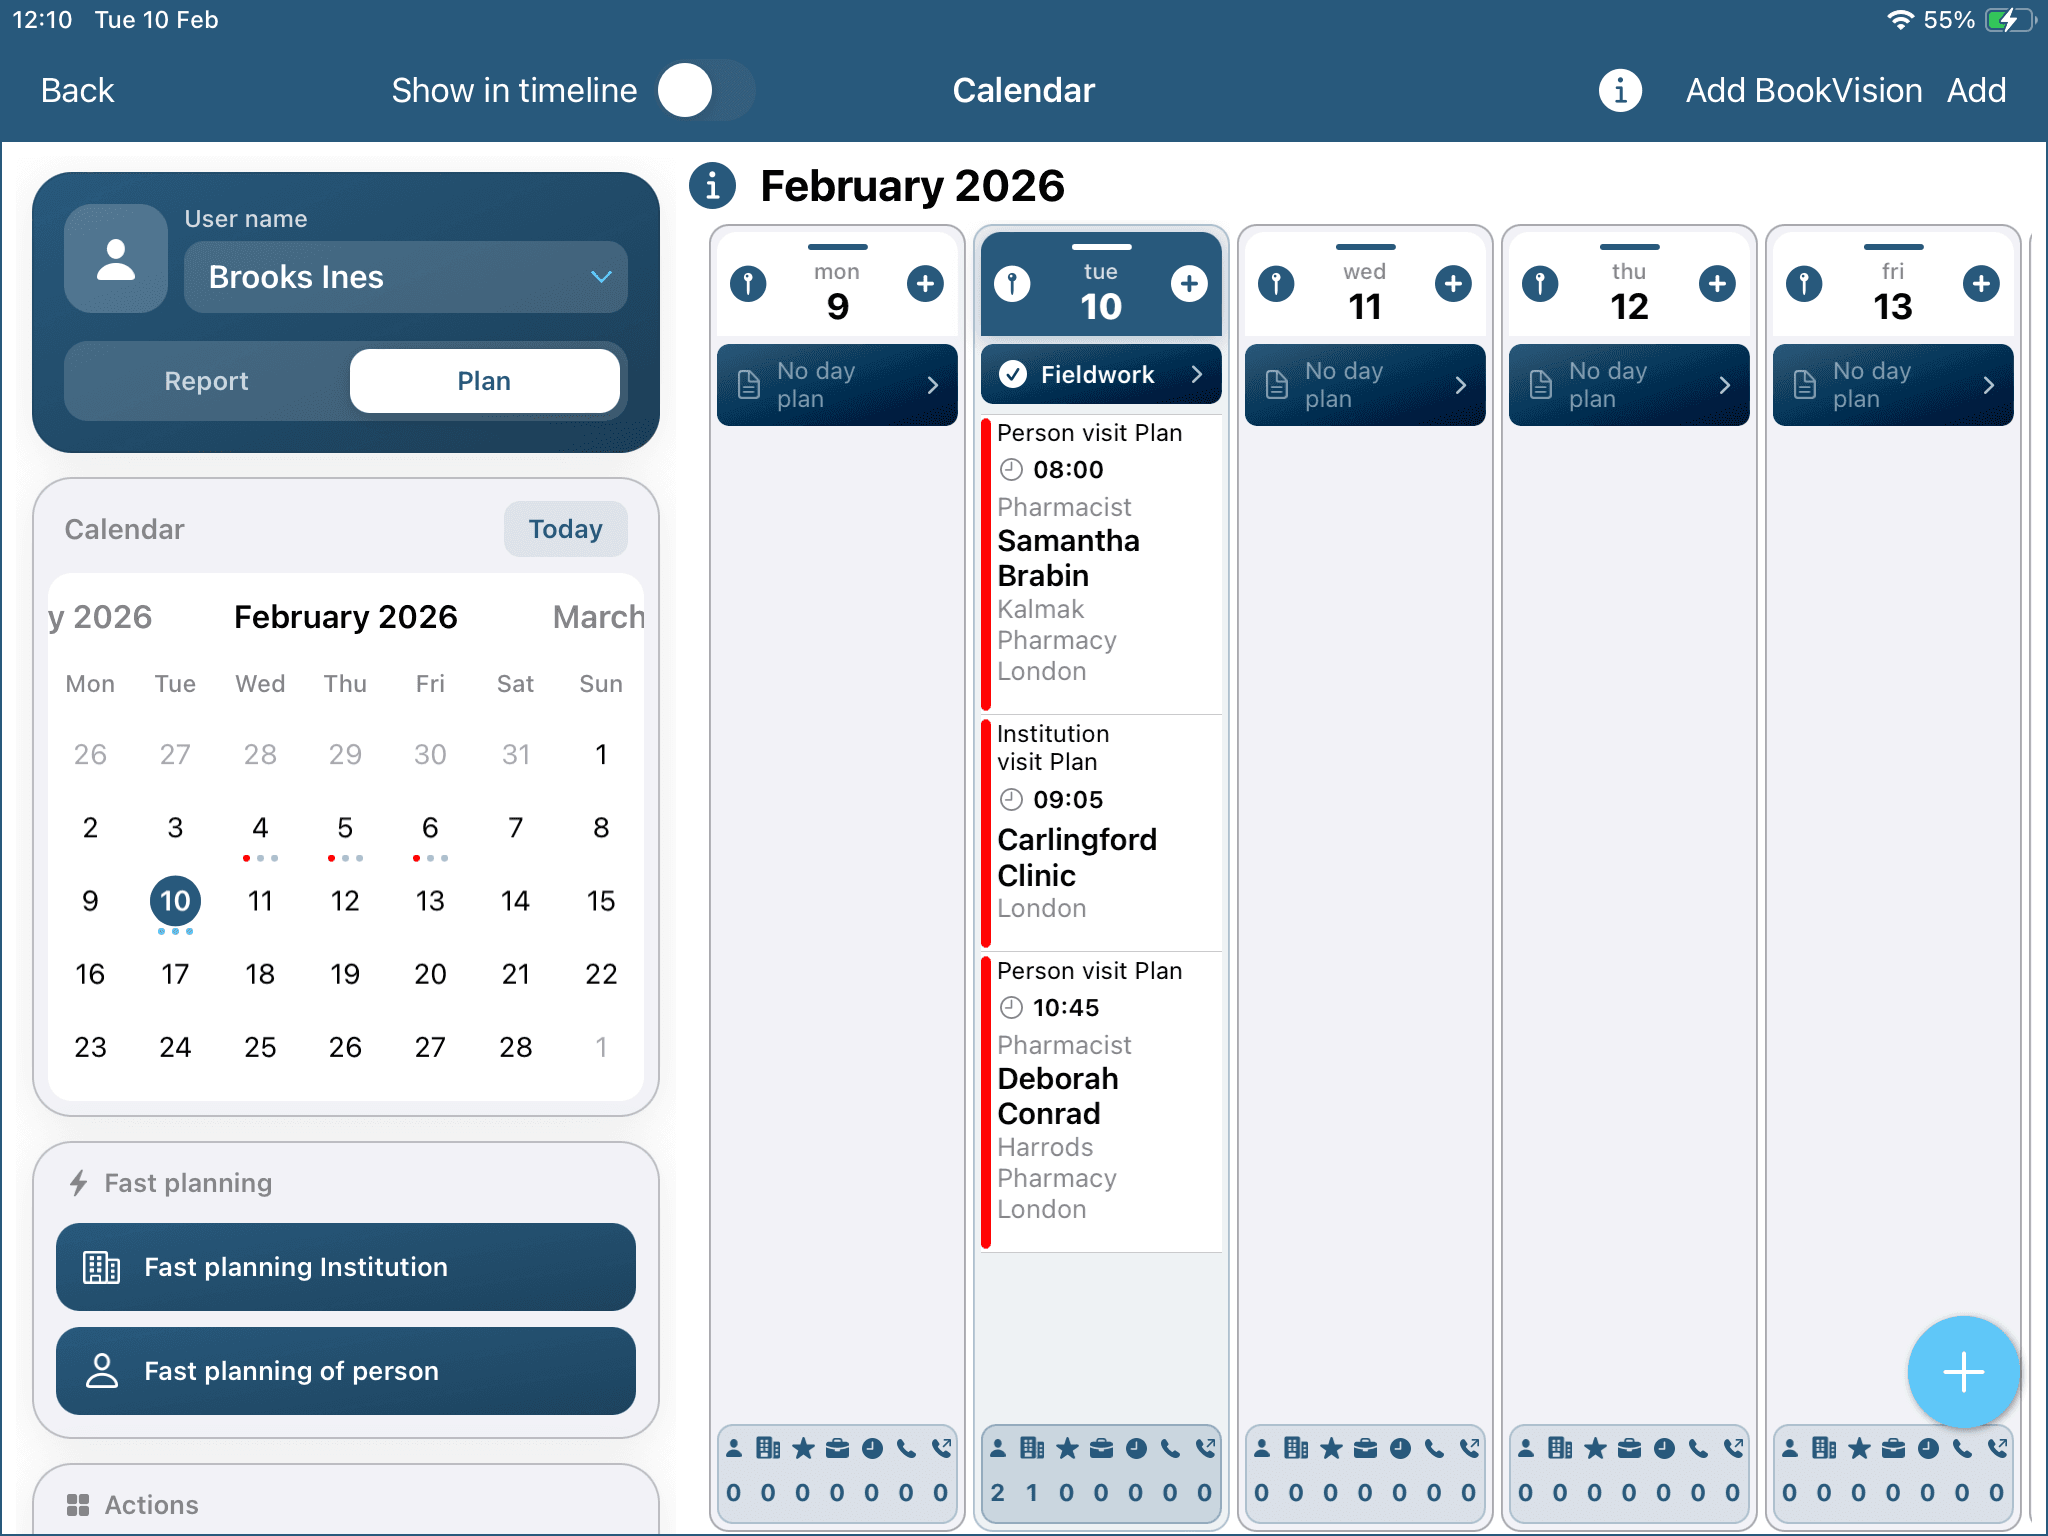
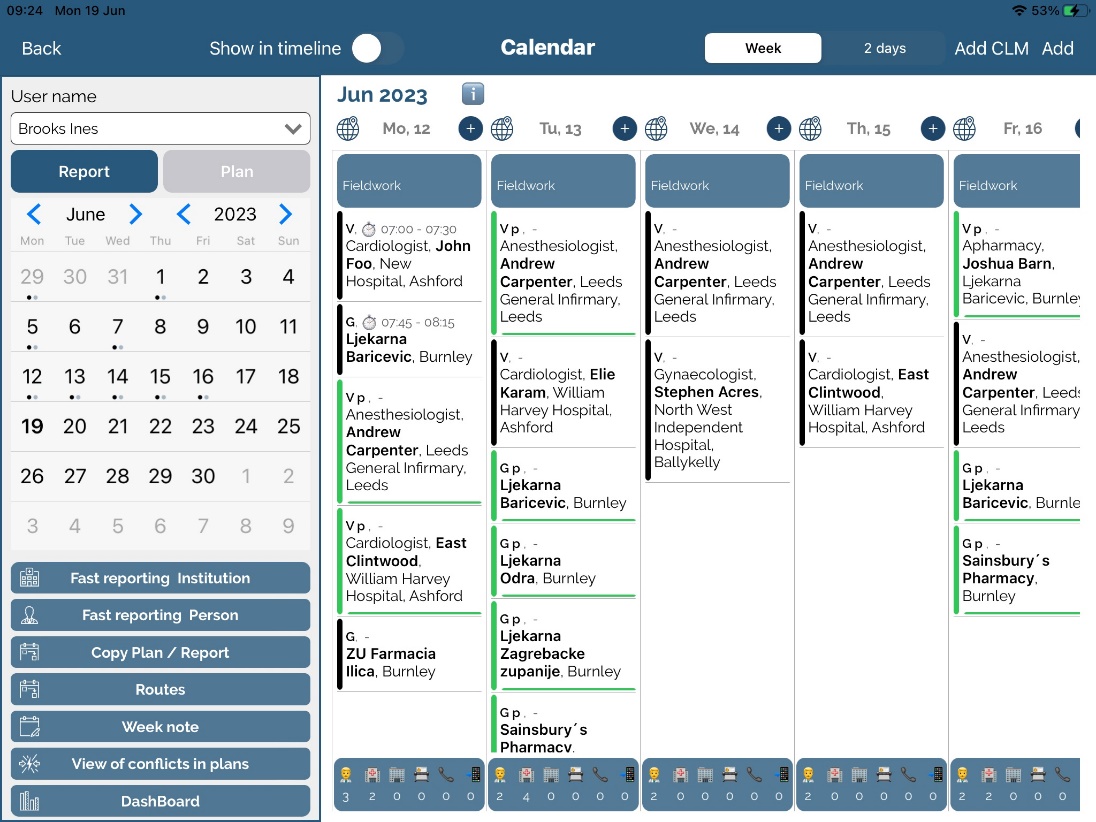
Switch to Visit tab in the upper left part of the screen:
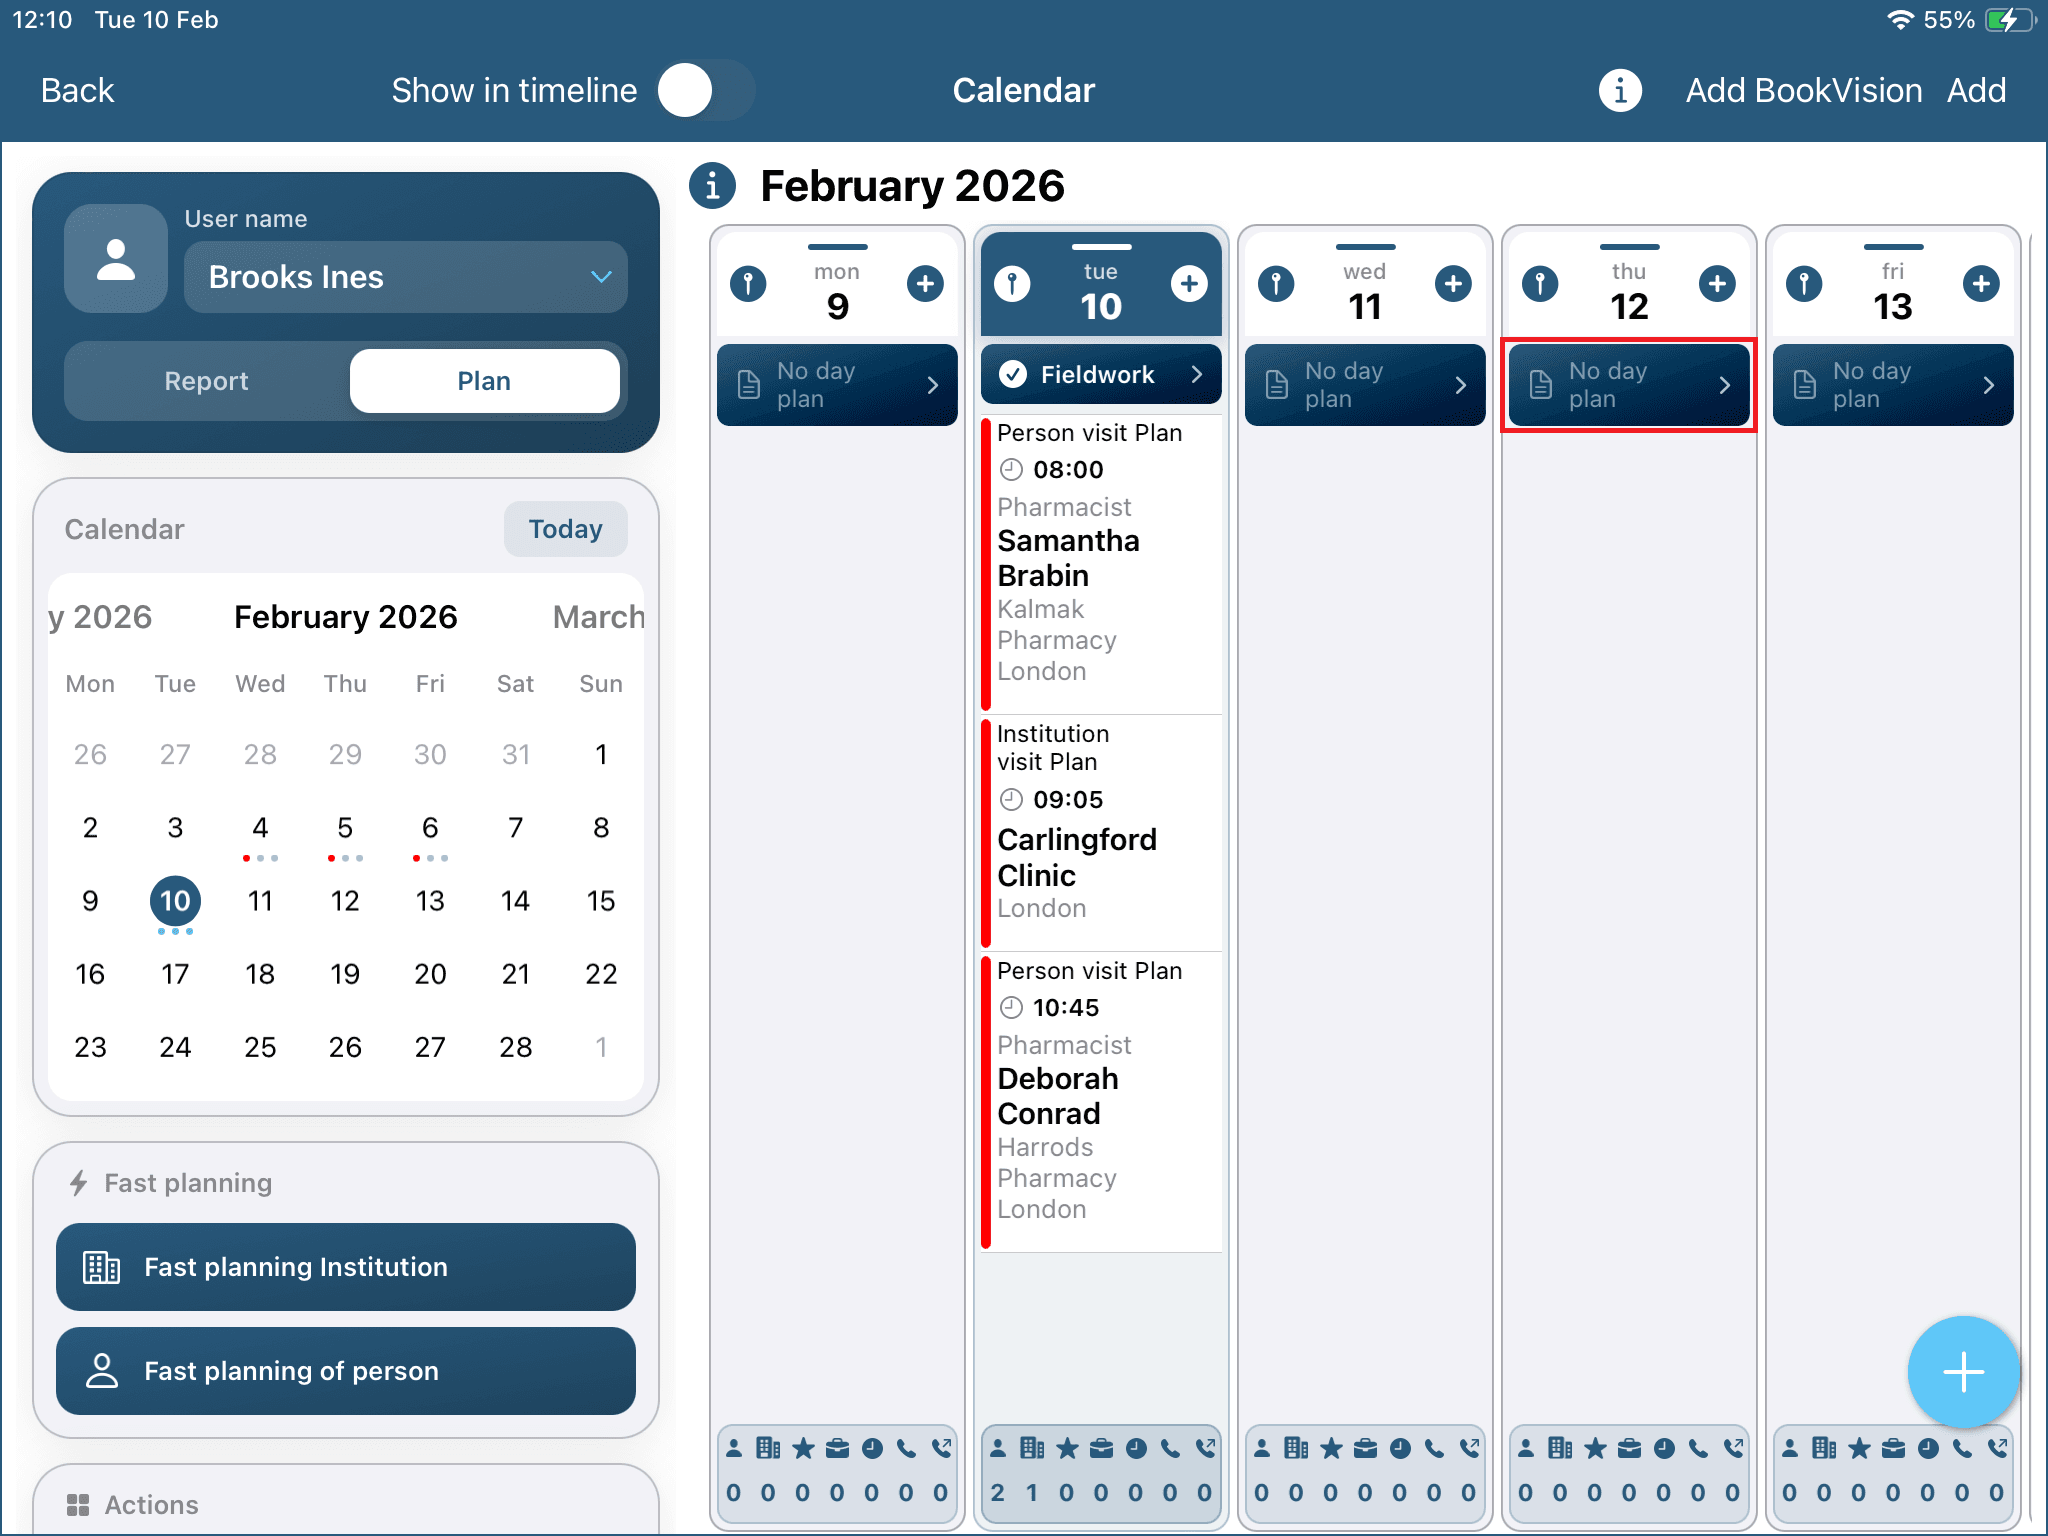
In visit view you can add Day report for a selected day by pressing on Blue square.
Visit
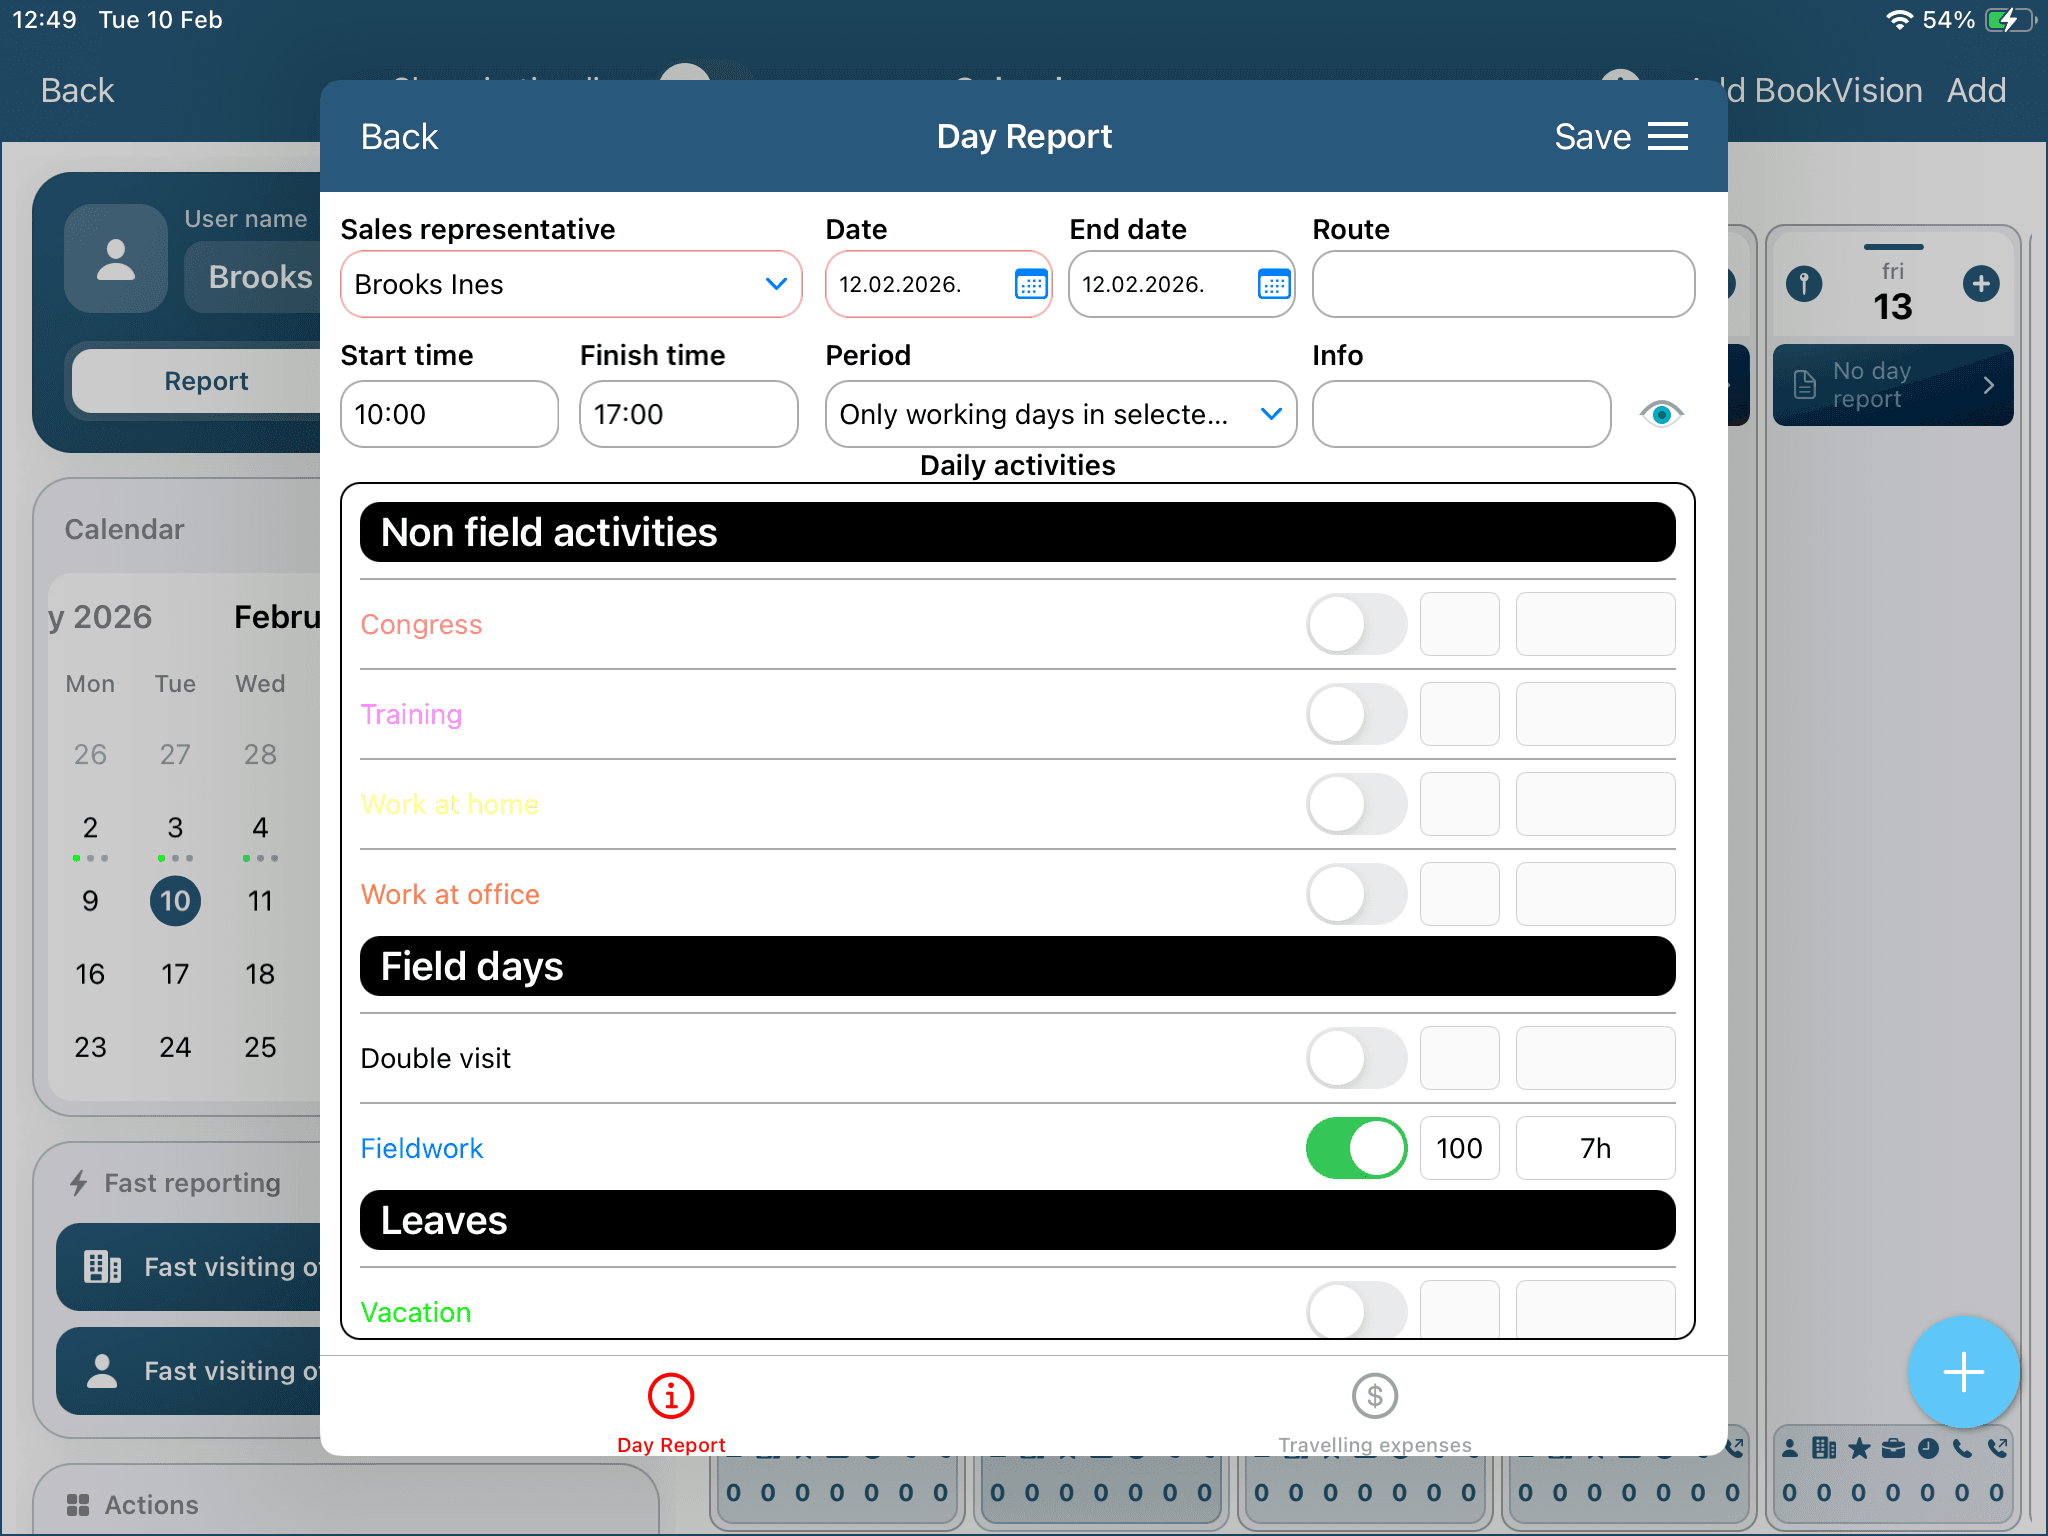
Adding day report
In Day report view you can enter Route, Info and Activities. Date will be automatically set for today but you can change it. In bottom part of this window you can see Daily activities where you can select planned activity from activity list. Sum of all activities must be 100% (if percentages are not 100%, you will get warning message). When you have entered all the data press Save button and new Day report will be shown in visit view.
Adding visit for an institution
Adding a new visit is very similar to previously described adding a new plan. On visit view press New institution visit report.

Here you can enter data such as Institution, Visit code, Date (by default it is set for today but you can change it), Time and Info. Institution is mandatory so we need to choose it. By pressing on an „i“ button next to the institution name, info for this institution will be opened. Press on button in institution field and list will be shown. Press on the name of institution you want to add to your visit and swipe left on it, then press Choose. Also, there is a Filter button which is the same as in Institution module.
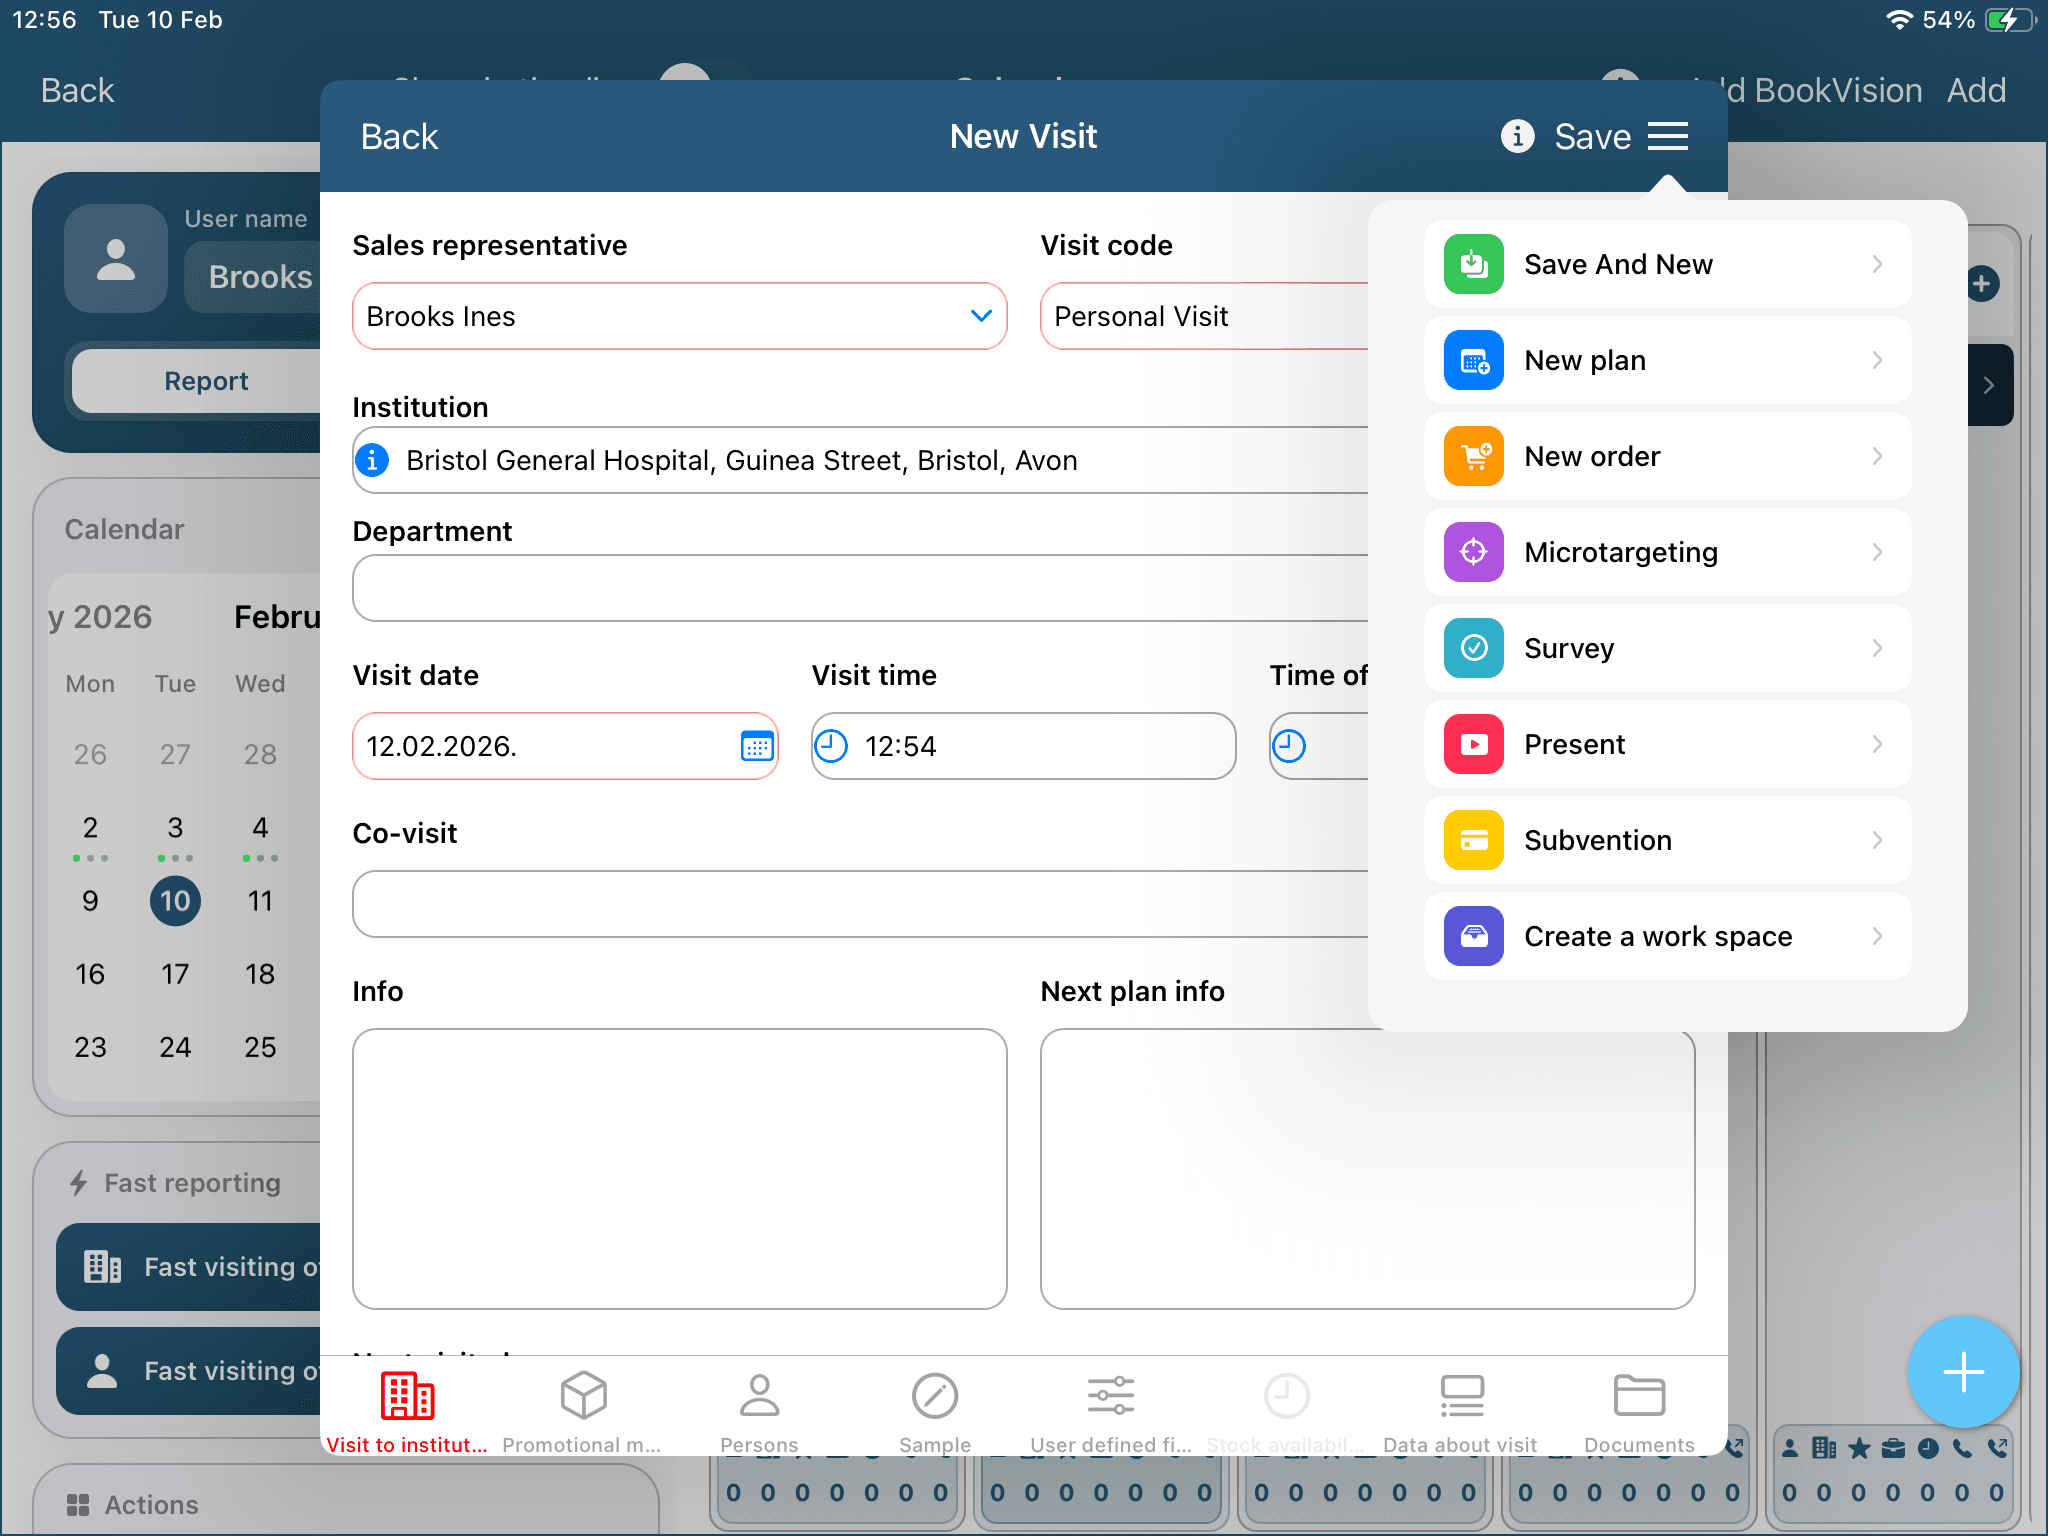
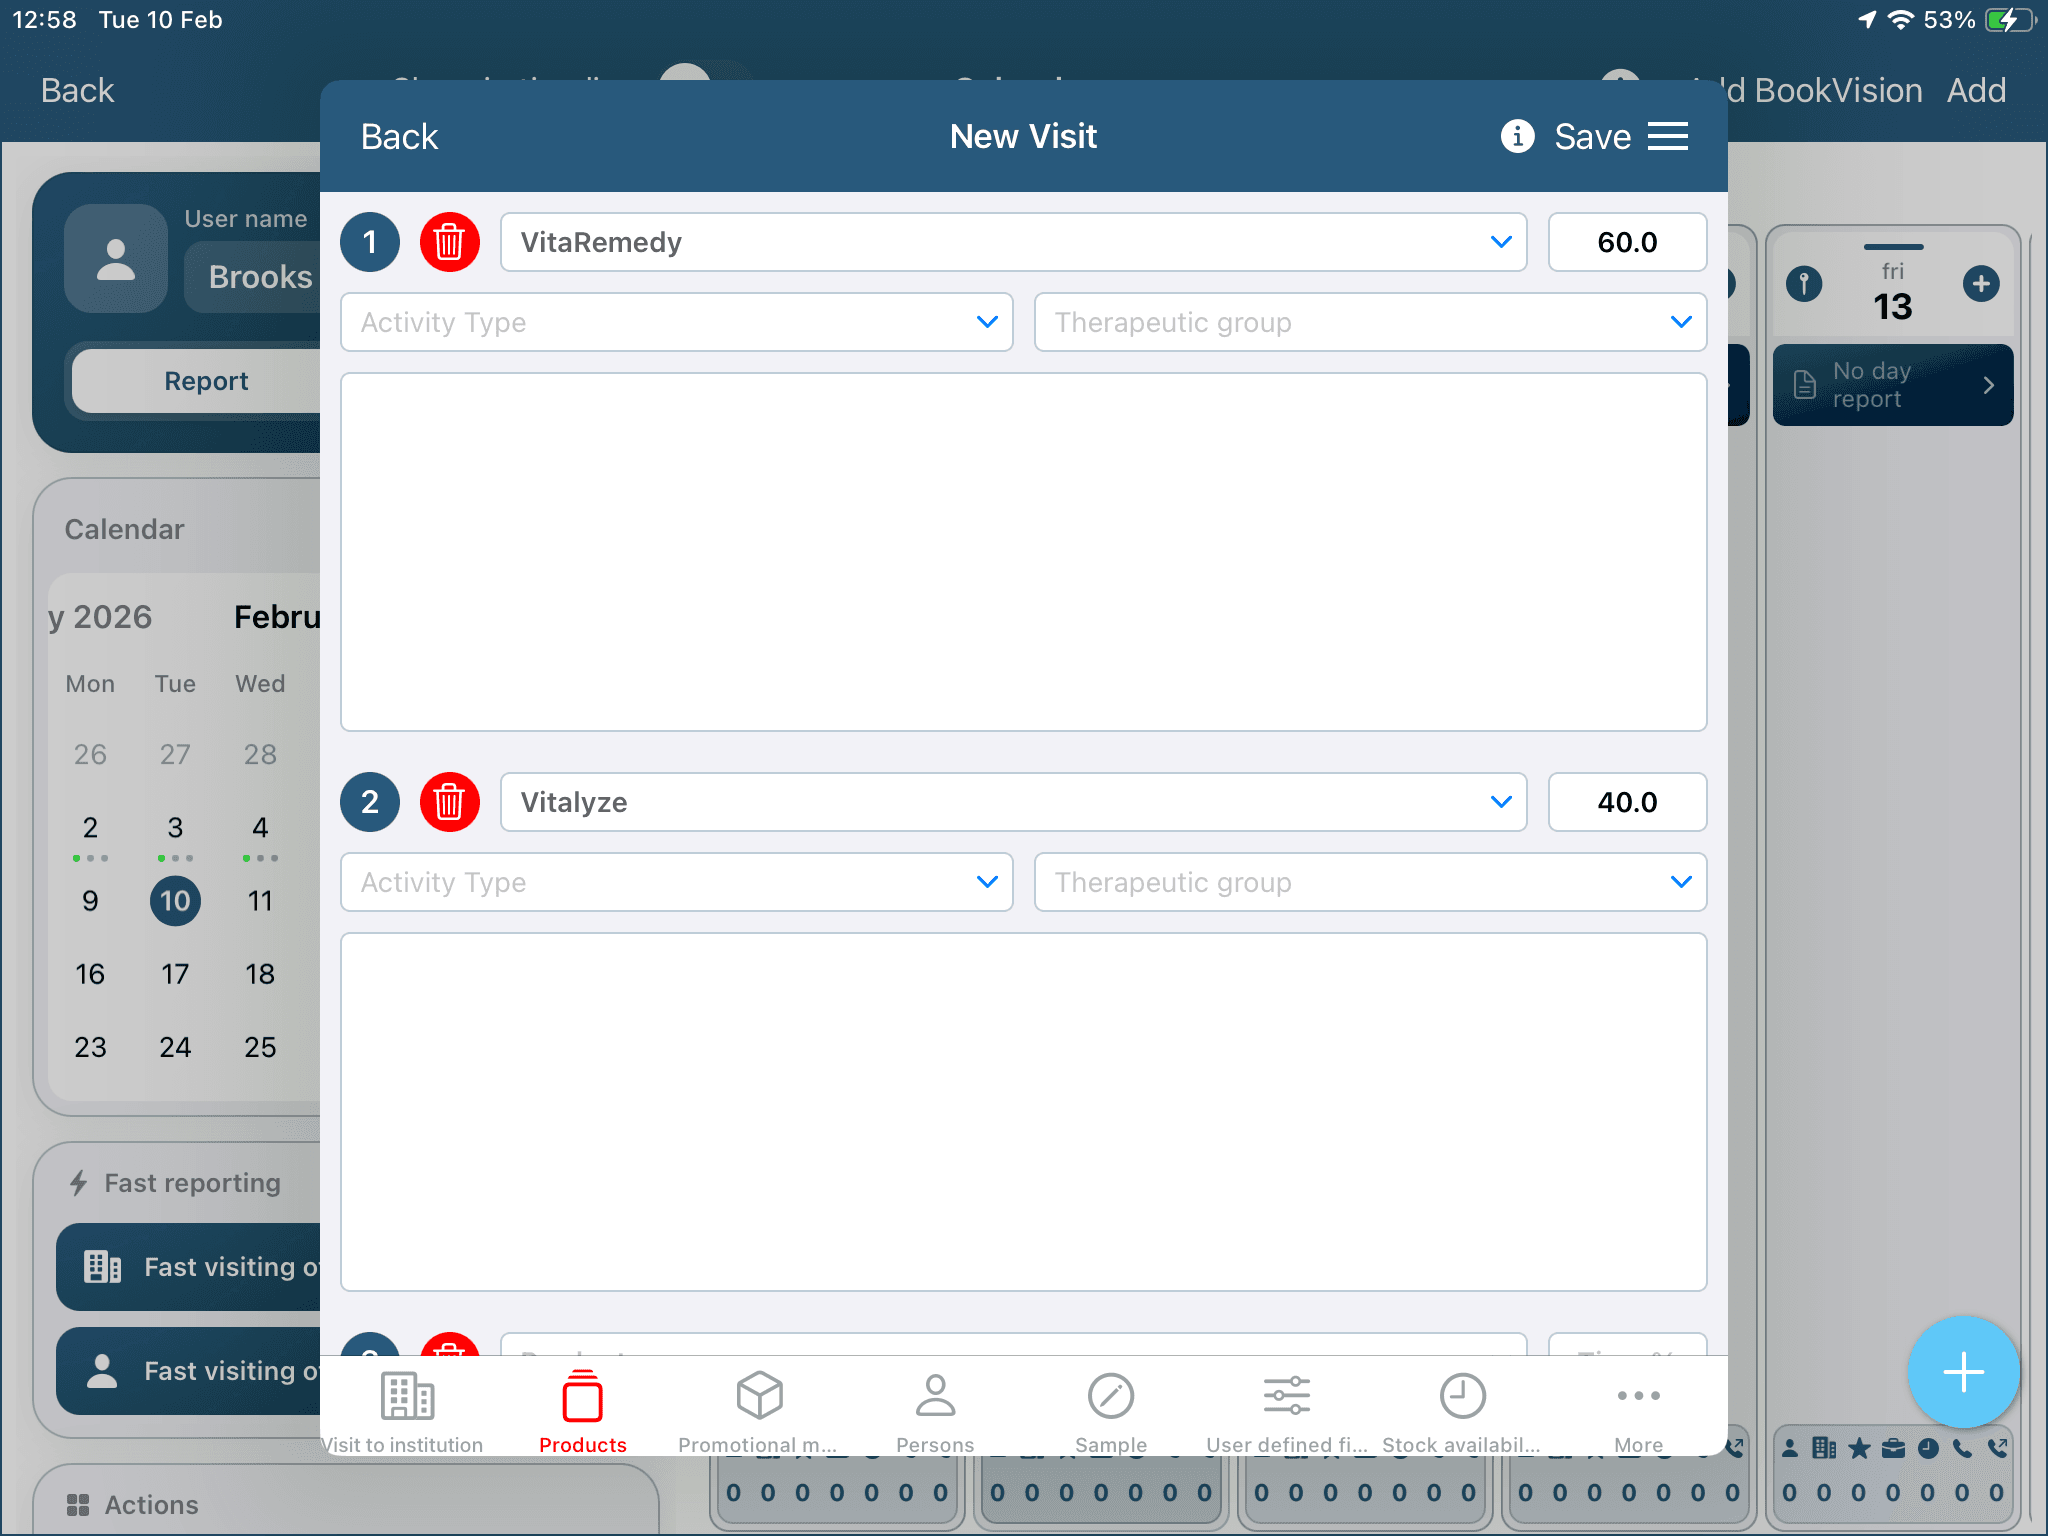
When you are making visit to institution there is a more options which are not in plans. They can be found in „≡“ button. First is Save and new which is used for making fast visit. When you click this option, it will automatically save current visit and open a new clear window. Another one is New plan which is making a plan from this report (adding plan is described earlier). The third one is New order where we can make order for products, with quantity and prices overview. This is the same as earlier described in Institution modul. Rest are Microtargeting, Surveys and Present.
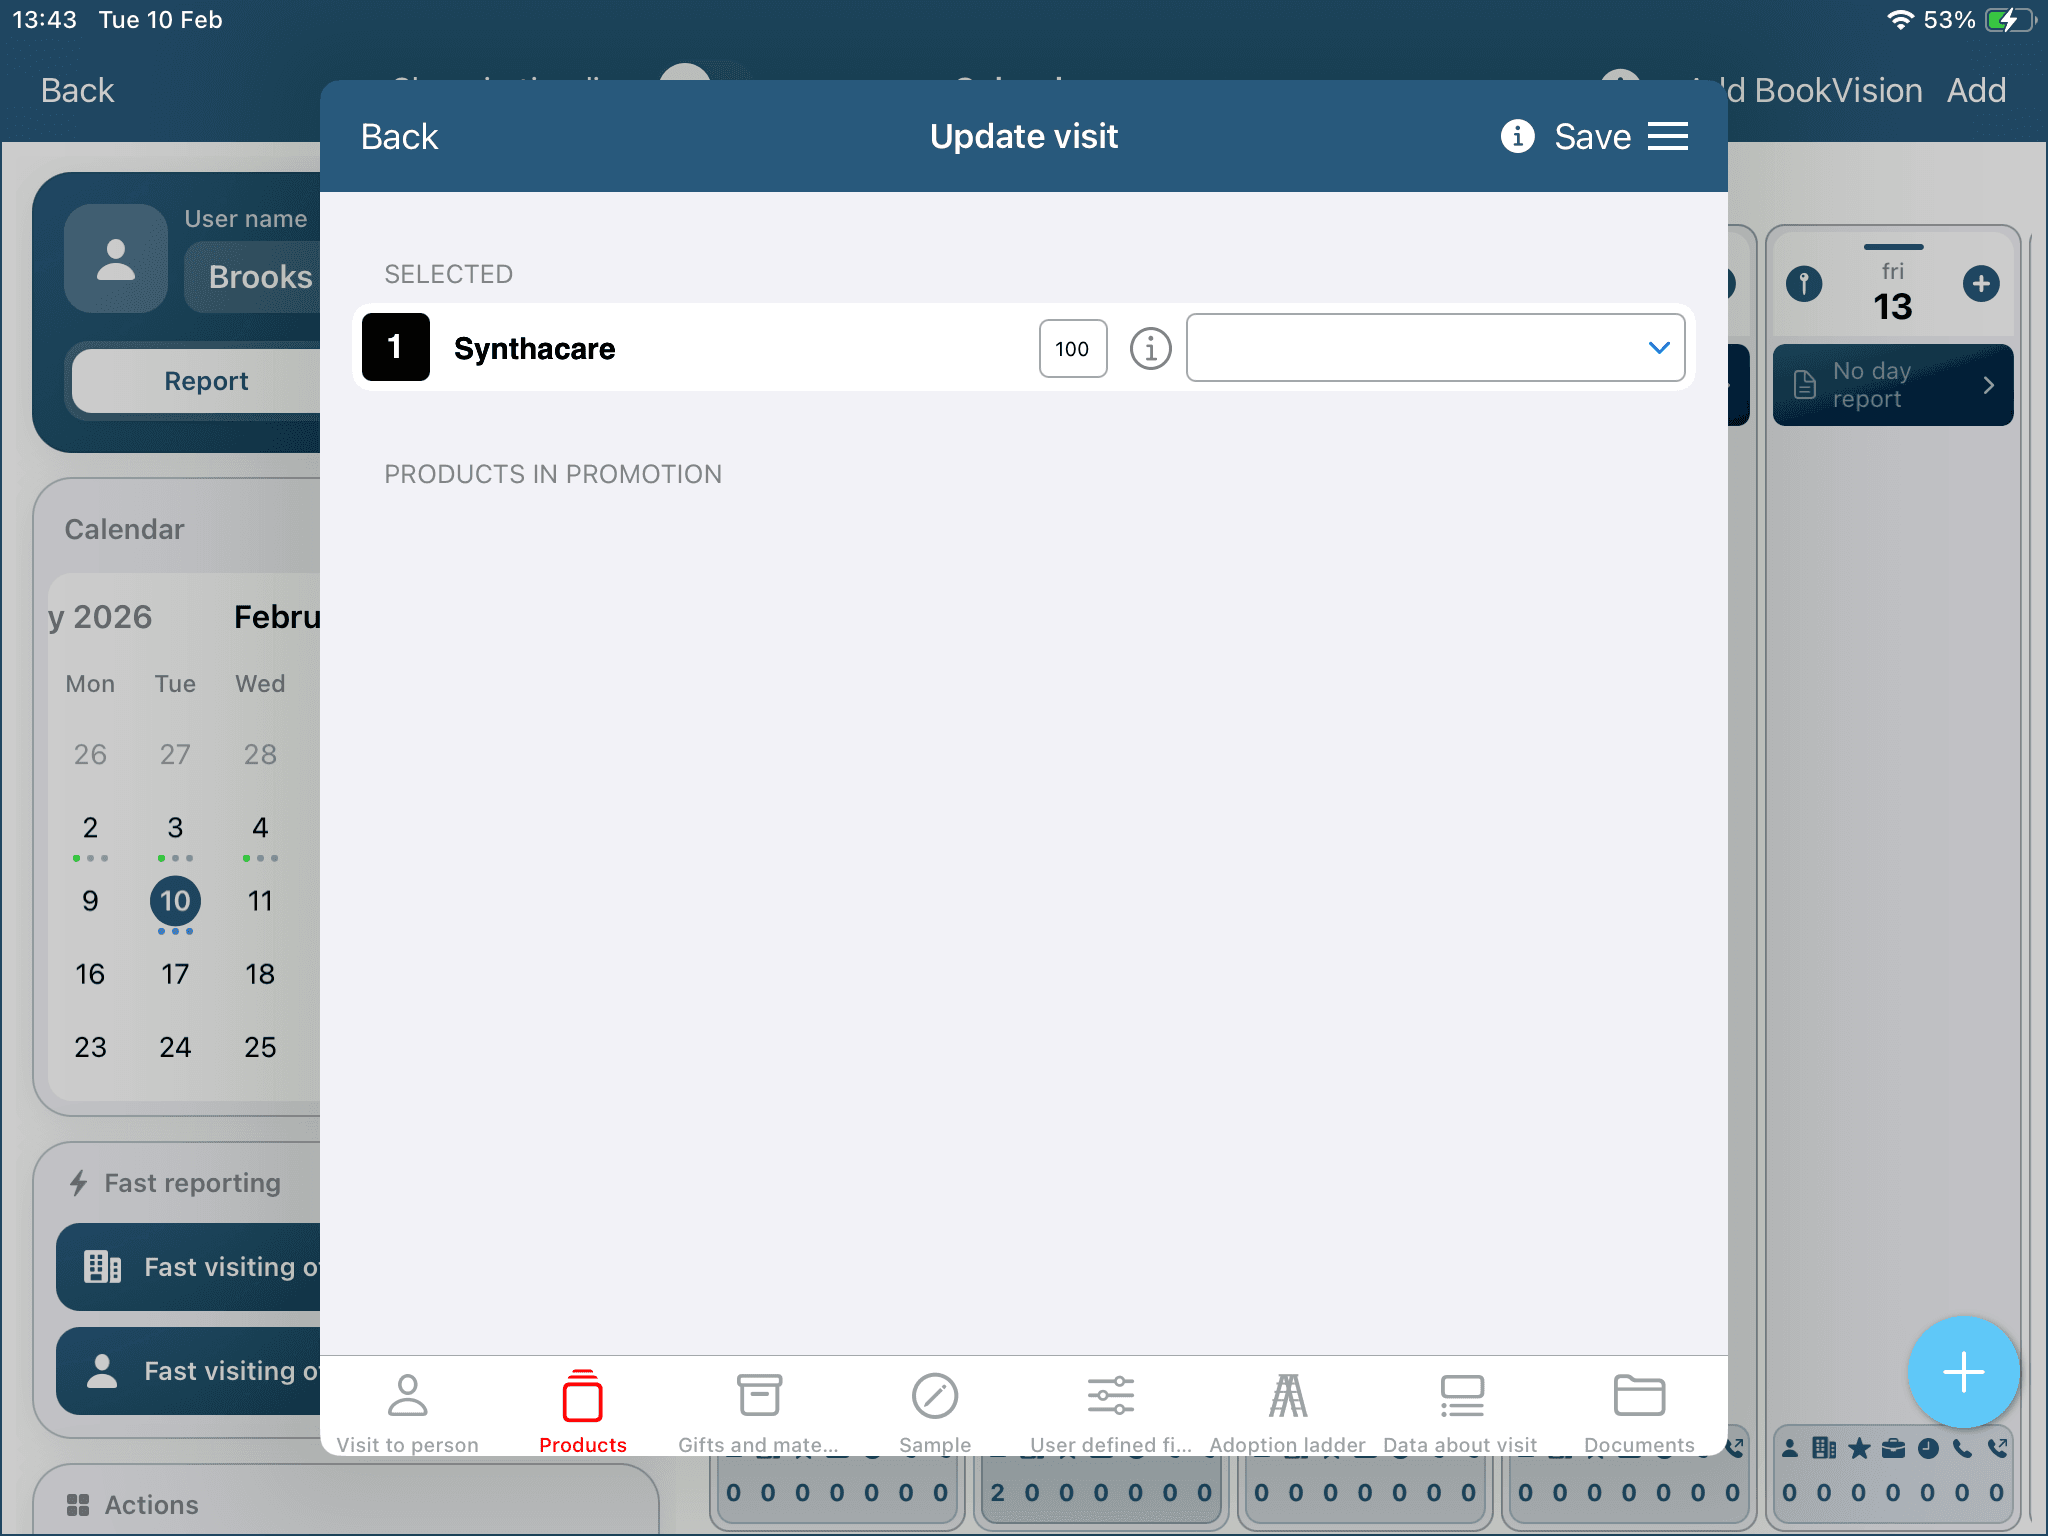
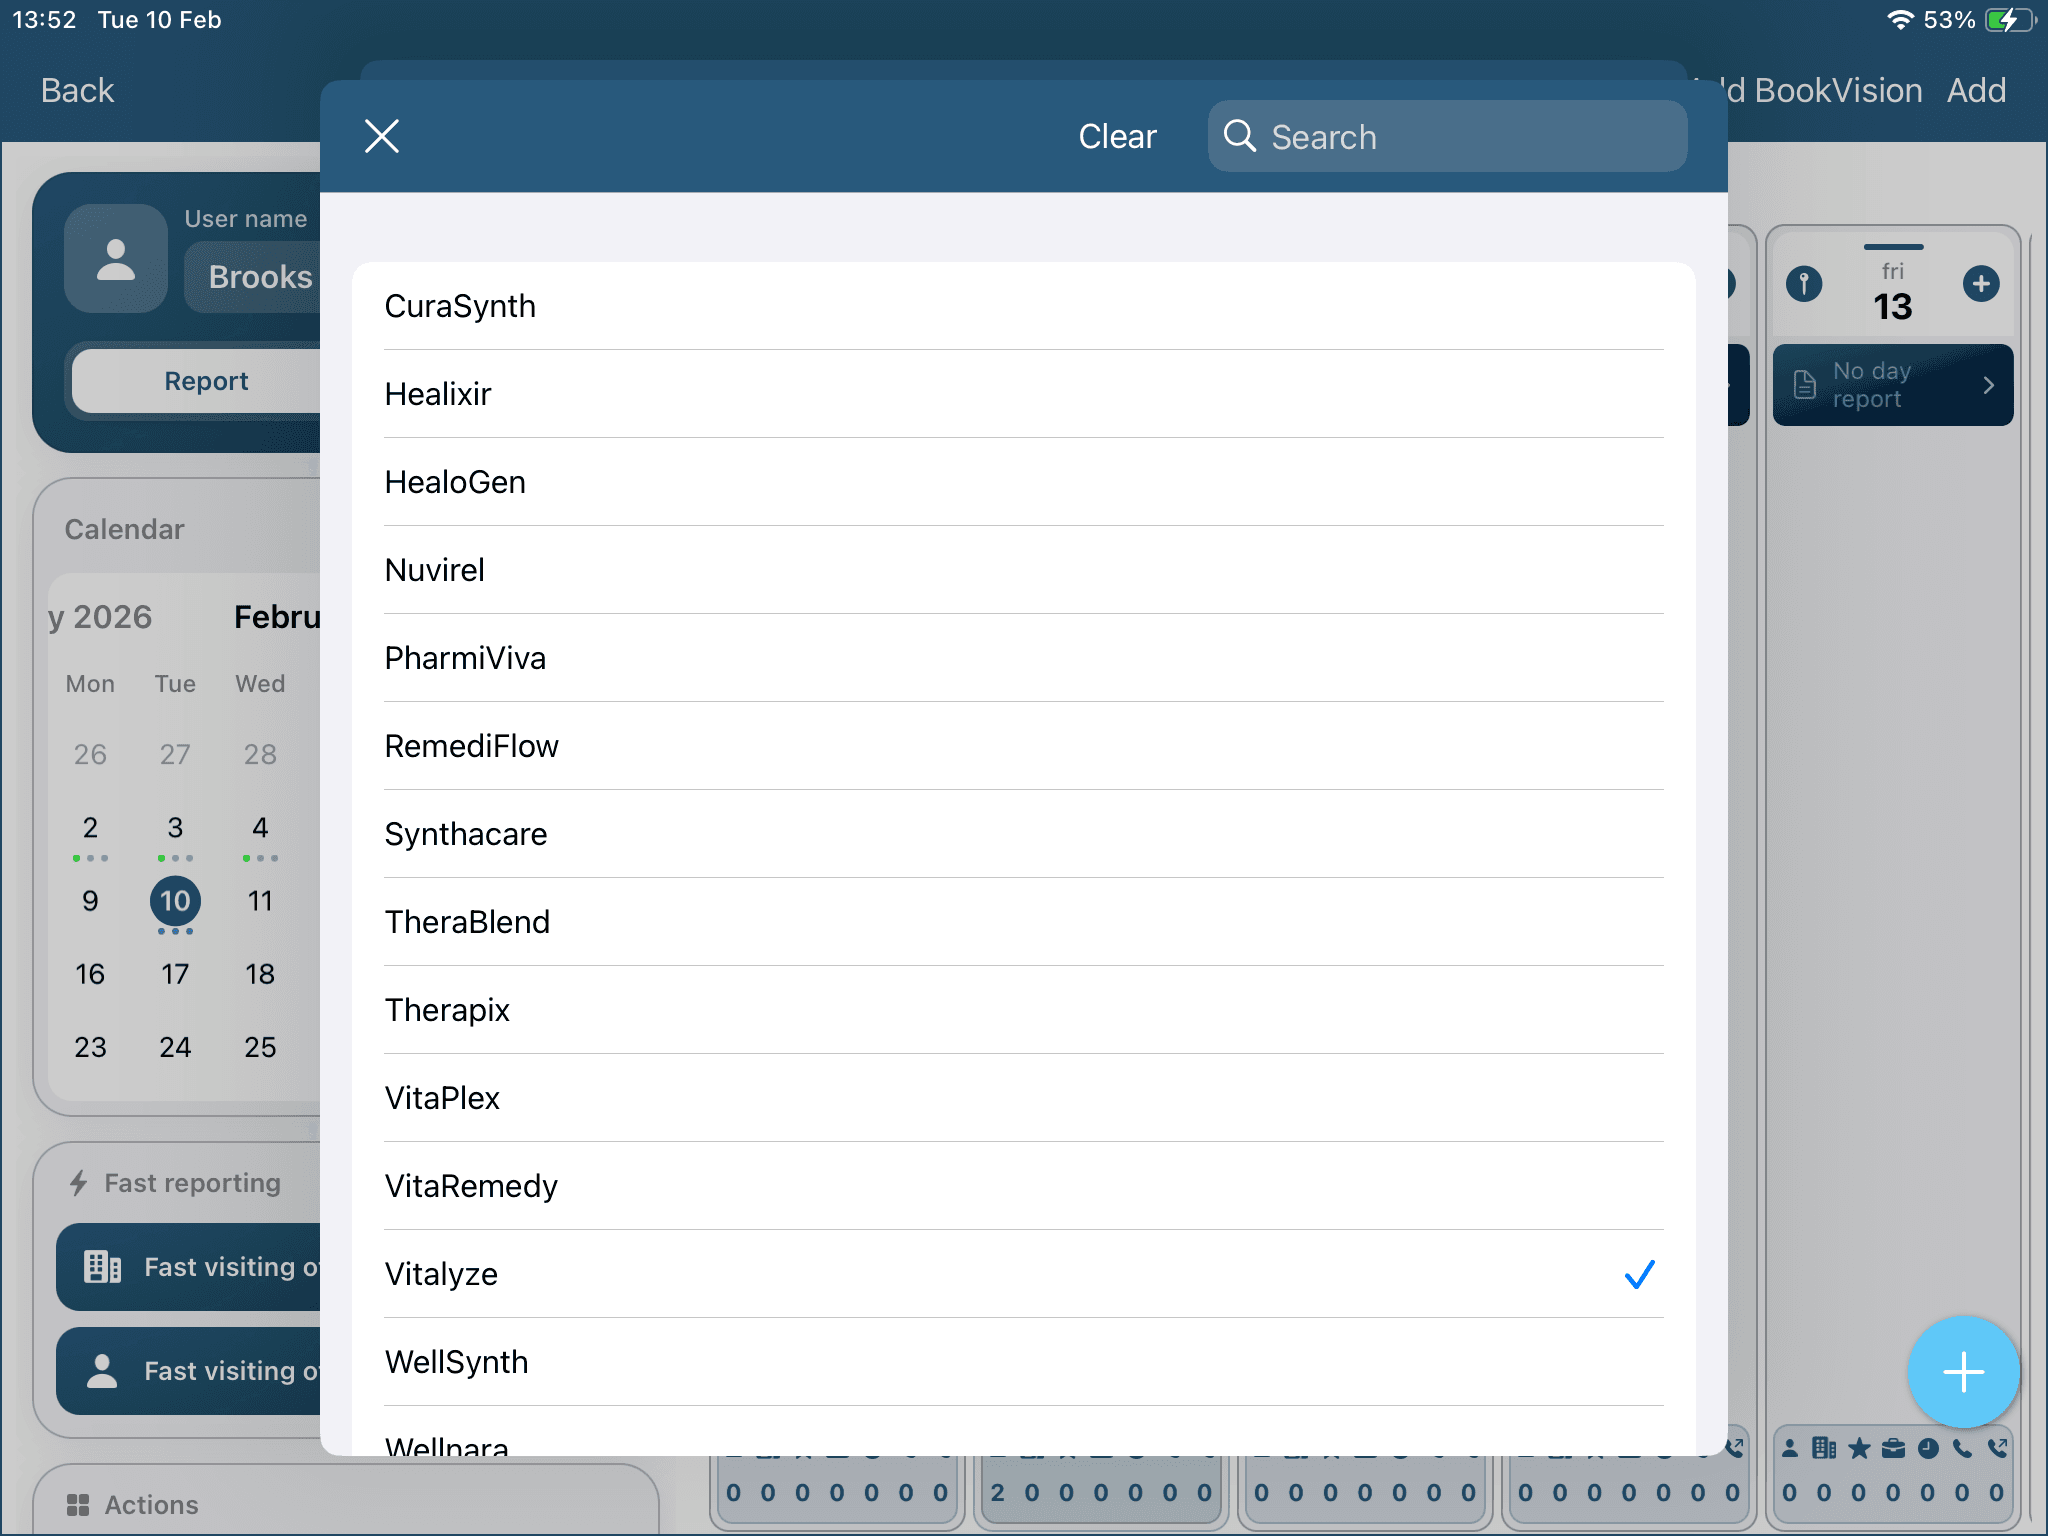
Additionaly, except all options in „≡" button, we can see eight tabs at bottom of window. Visit tab is shown by default and it is main part. Second tab is Products in promotion where you can select products, materials and gifts and enter informations about them. Choose one or more products from the drop down list. When product is selected, percentage will be shown. This percentage represents the % of total visit time in which you have spoken about some product. Values are set by default but you can change them manually by pressing on value and entering a new one. When all data is entered press Save button. If you do not select products total sum of 100% and you try to save entry, you will get info message.
Products can also be shown on the first tab “Visit to institution” by enabling option 839 in the admin application.
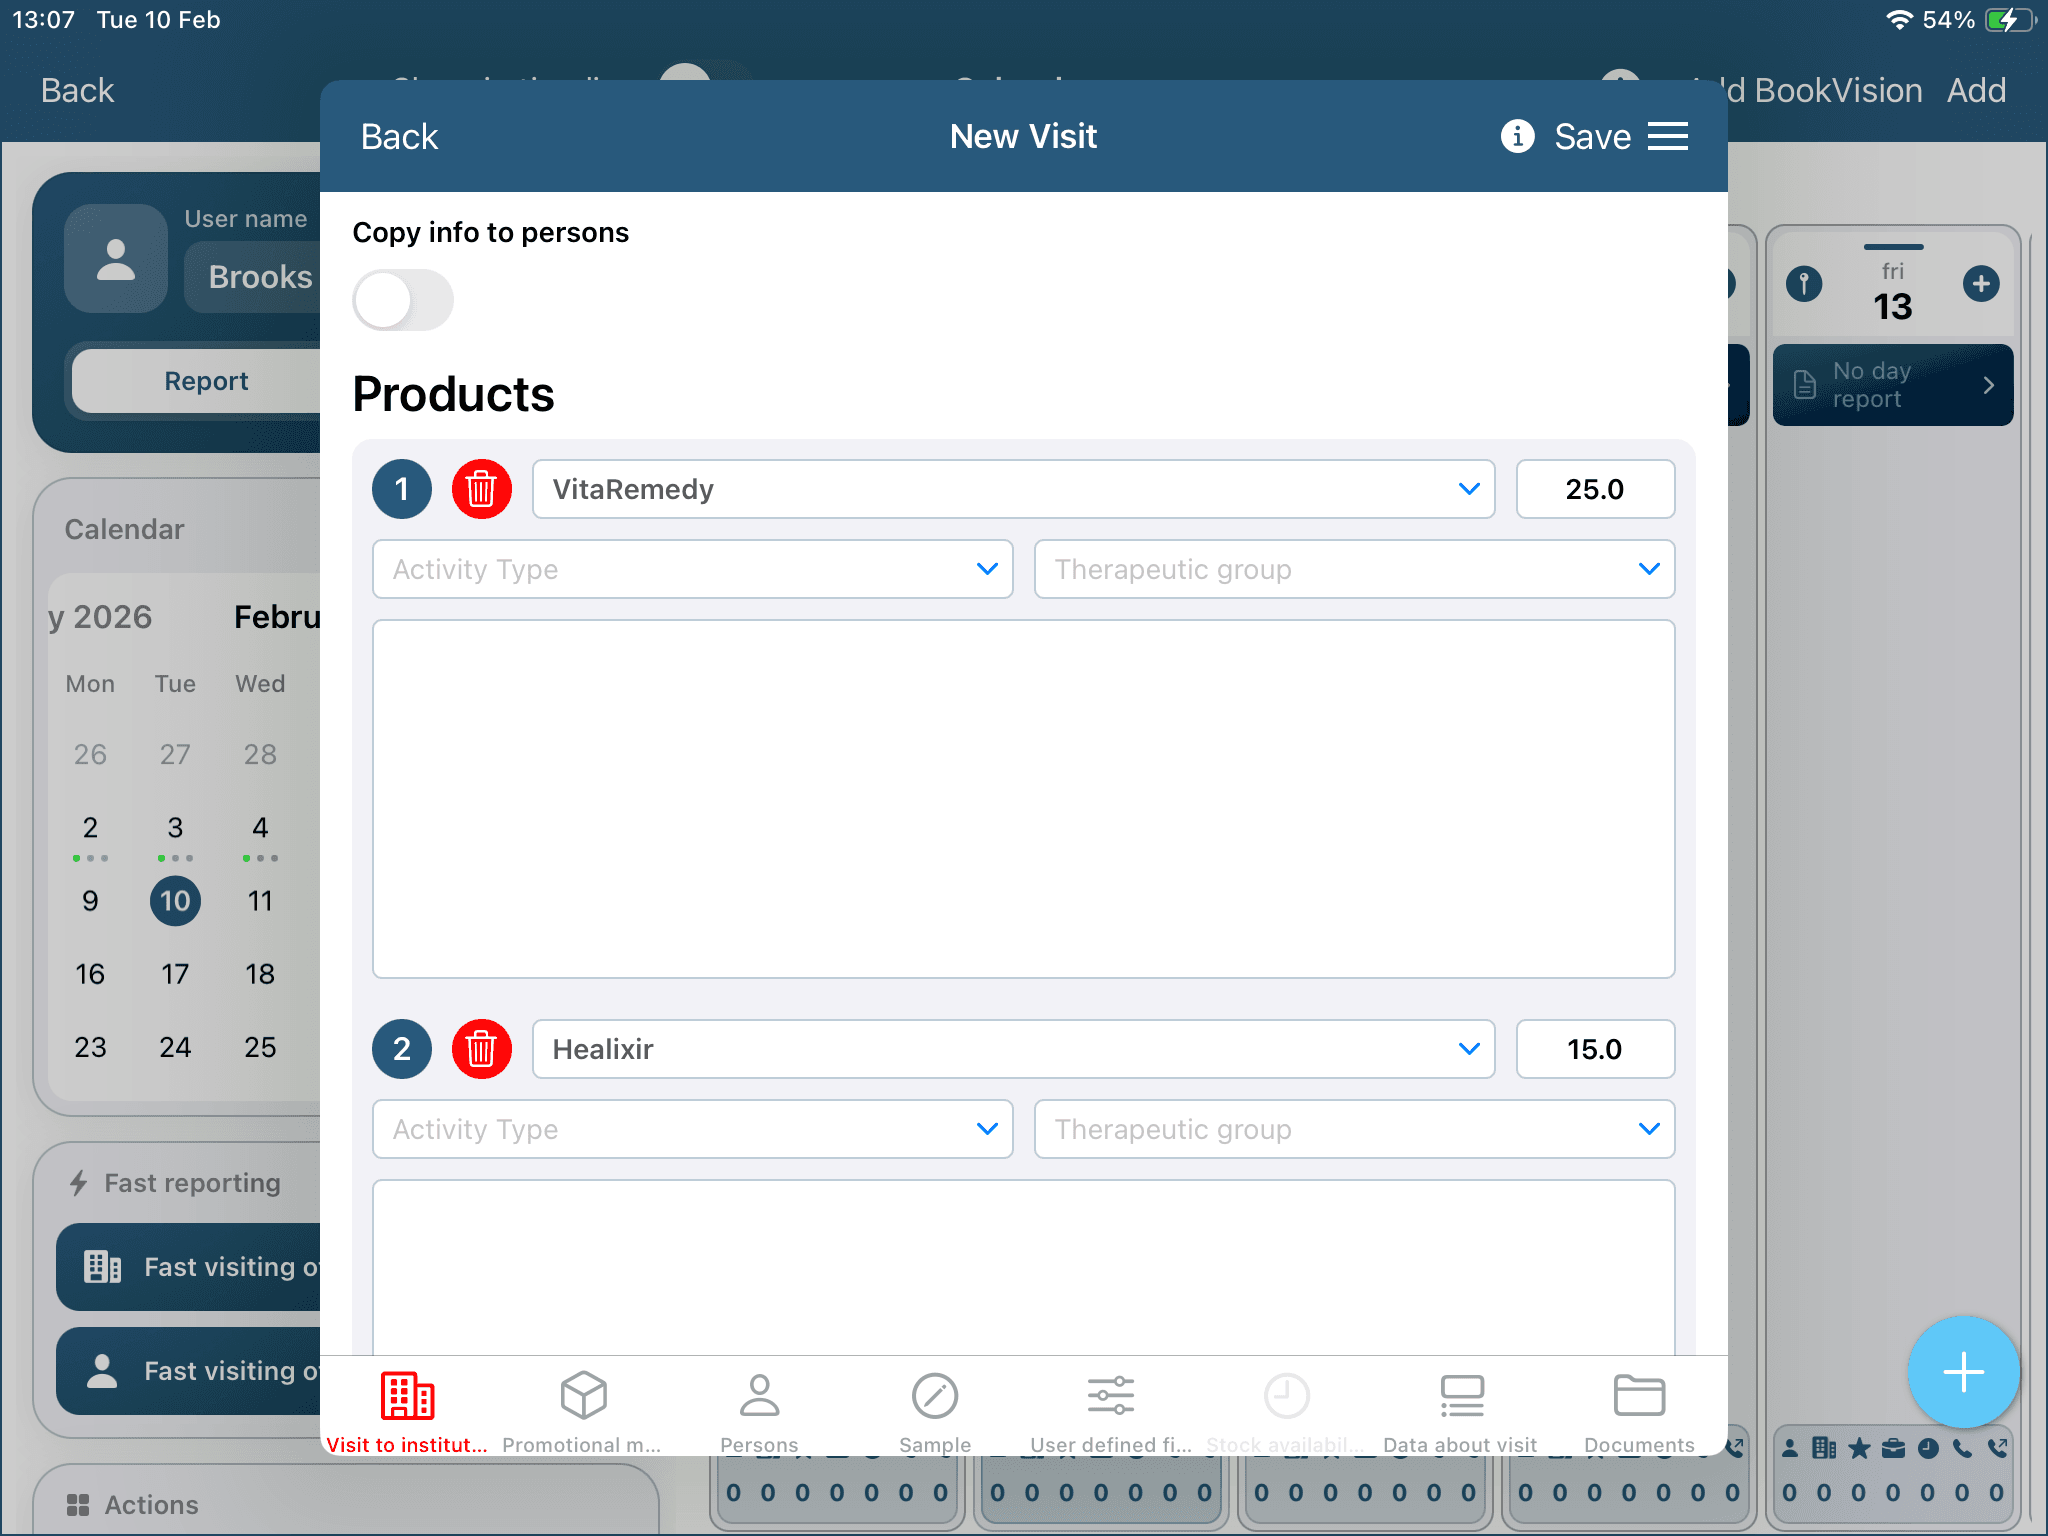
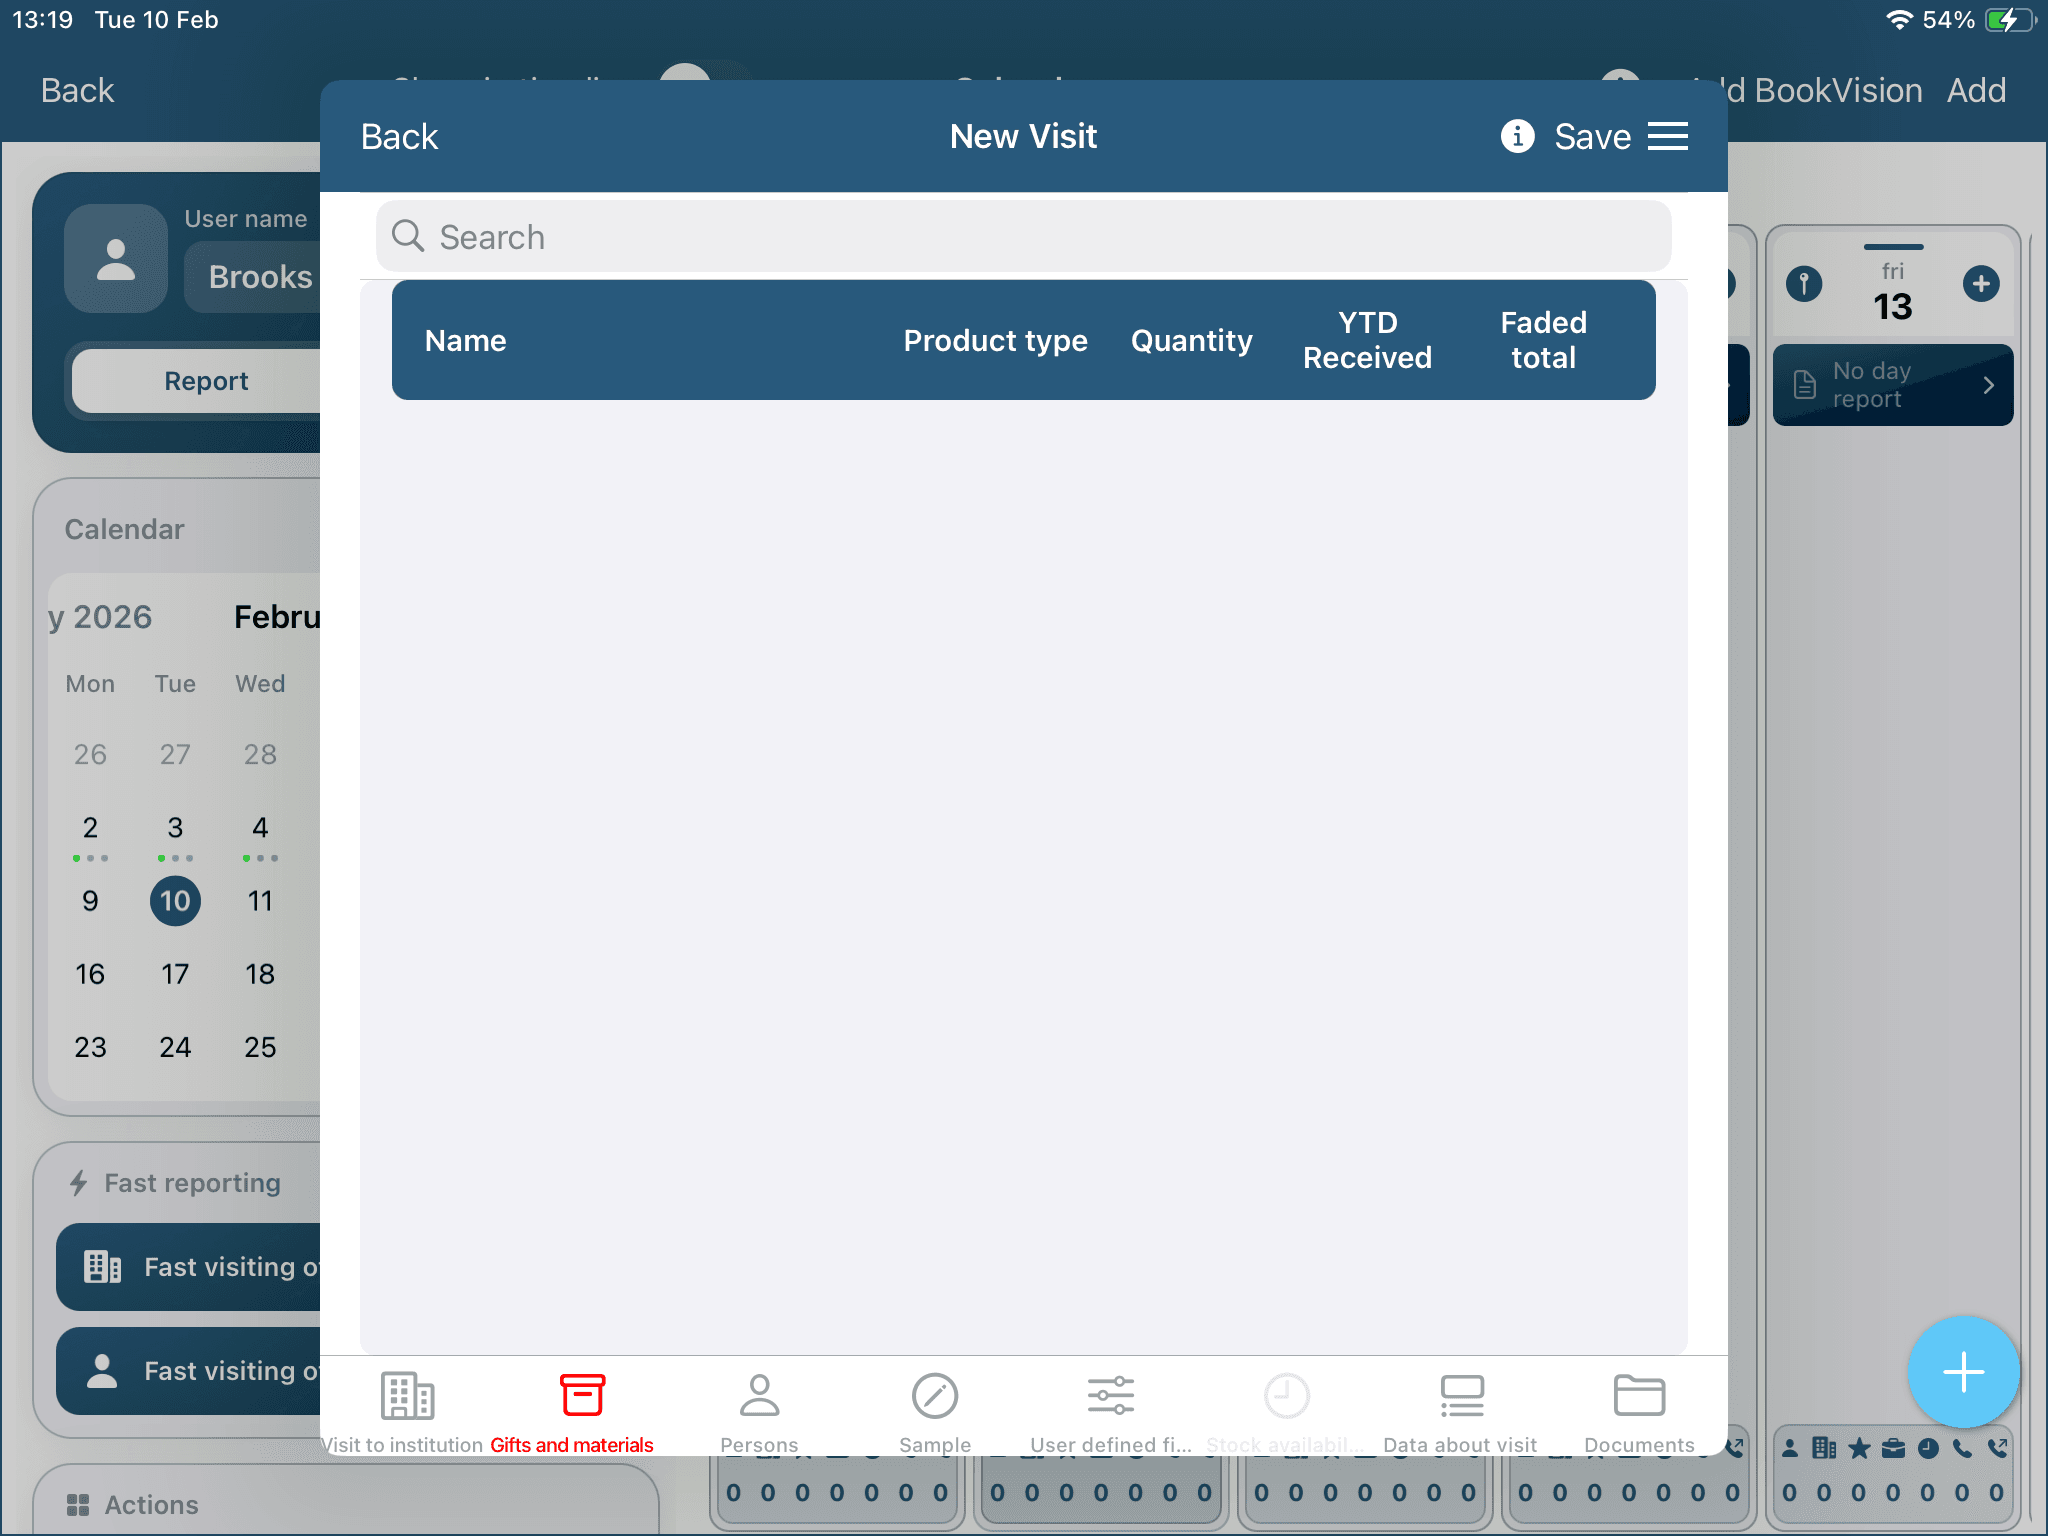
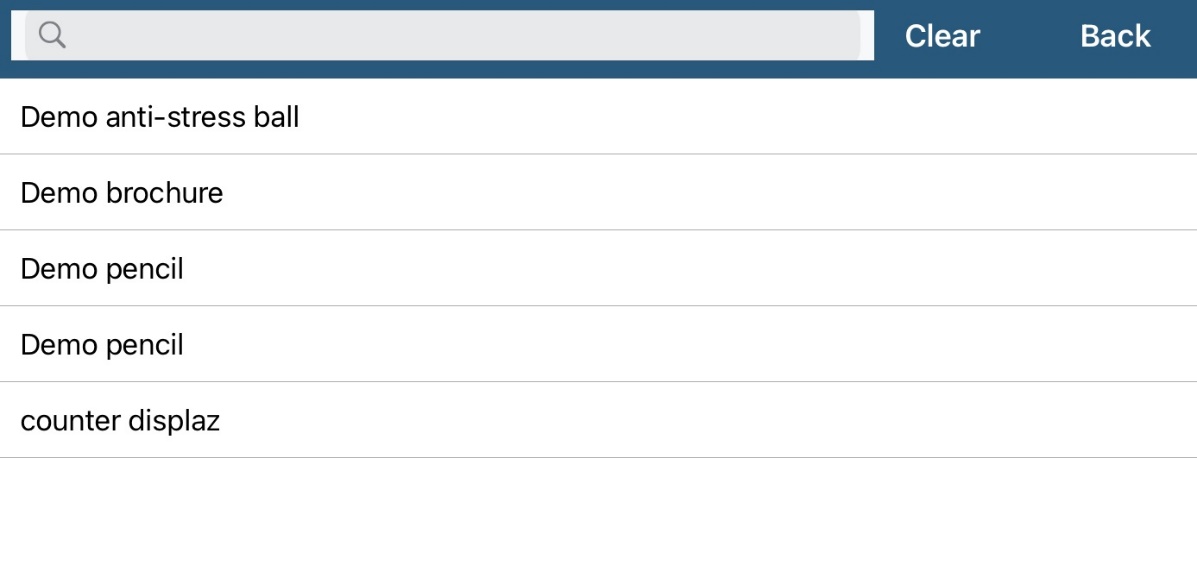
There is also a new section named Gifts and materials that display name and the product type that is used during the visit. The product type can be Literature, Gift and Promotional material.
Third tab Sample , fourth tab User defined fields and Data about visit will be described later in manual. Sixth tab is Tasks where you can see tasks that are connected to this Institution.
After entering all data, press Save button to save that visit for this institution. A new visit has been added to the calendar view. If you click Back, data will not be saved. You can not add a visit for an institution for future. If you select any day in future and try to add a new visit you will get an info message.
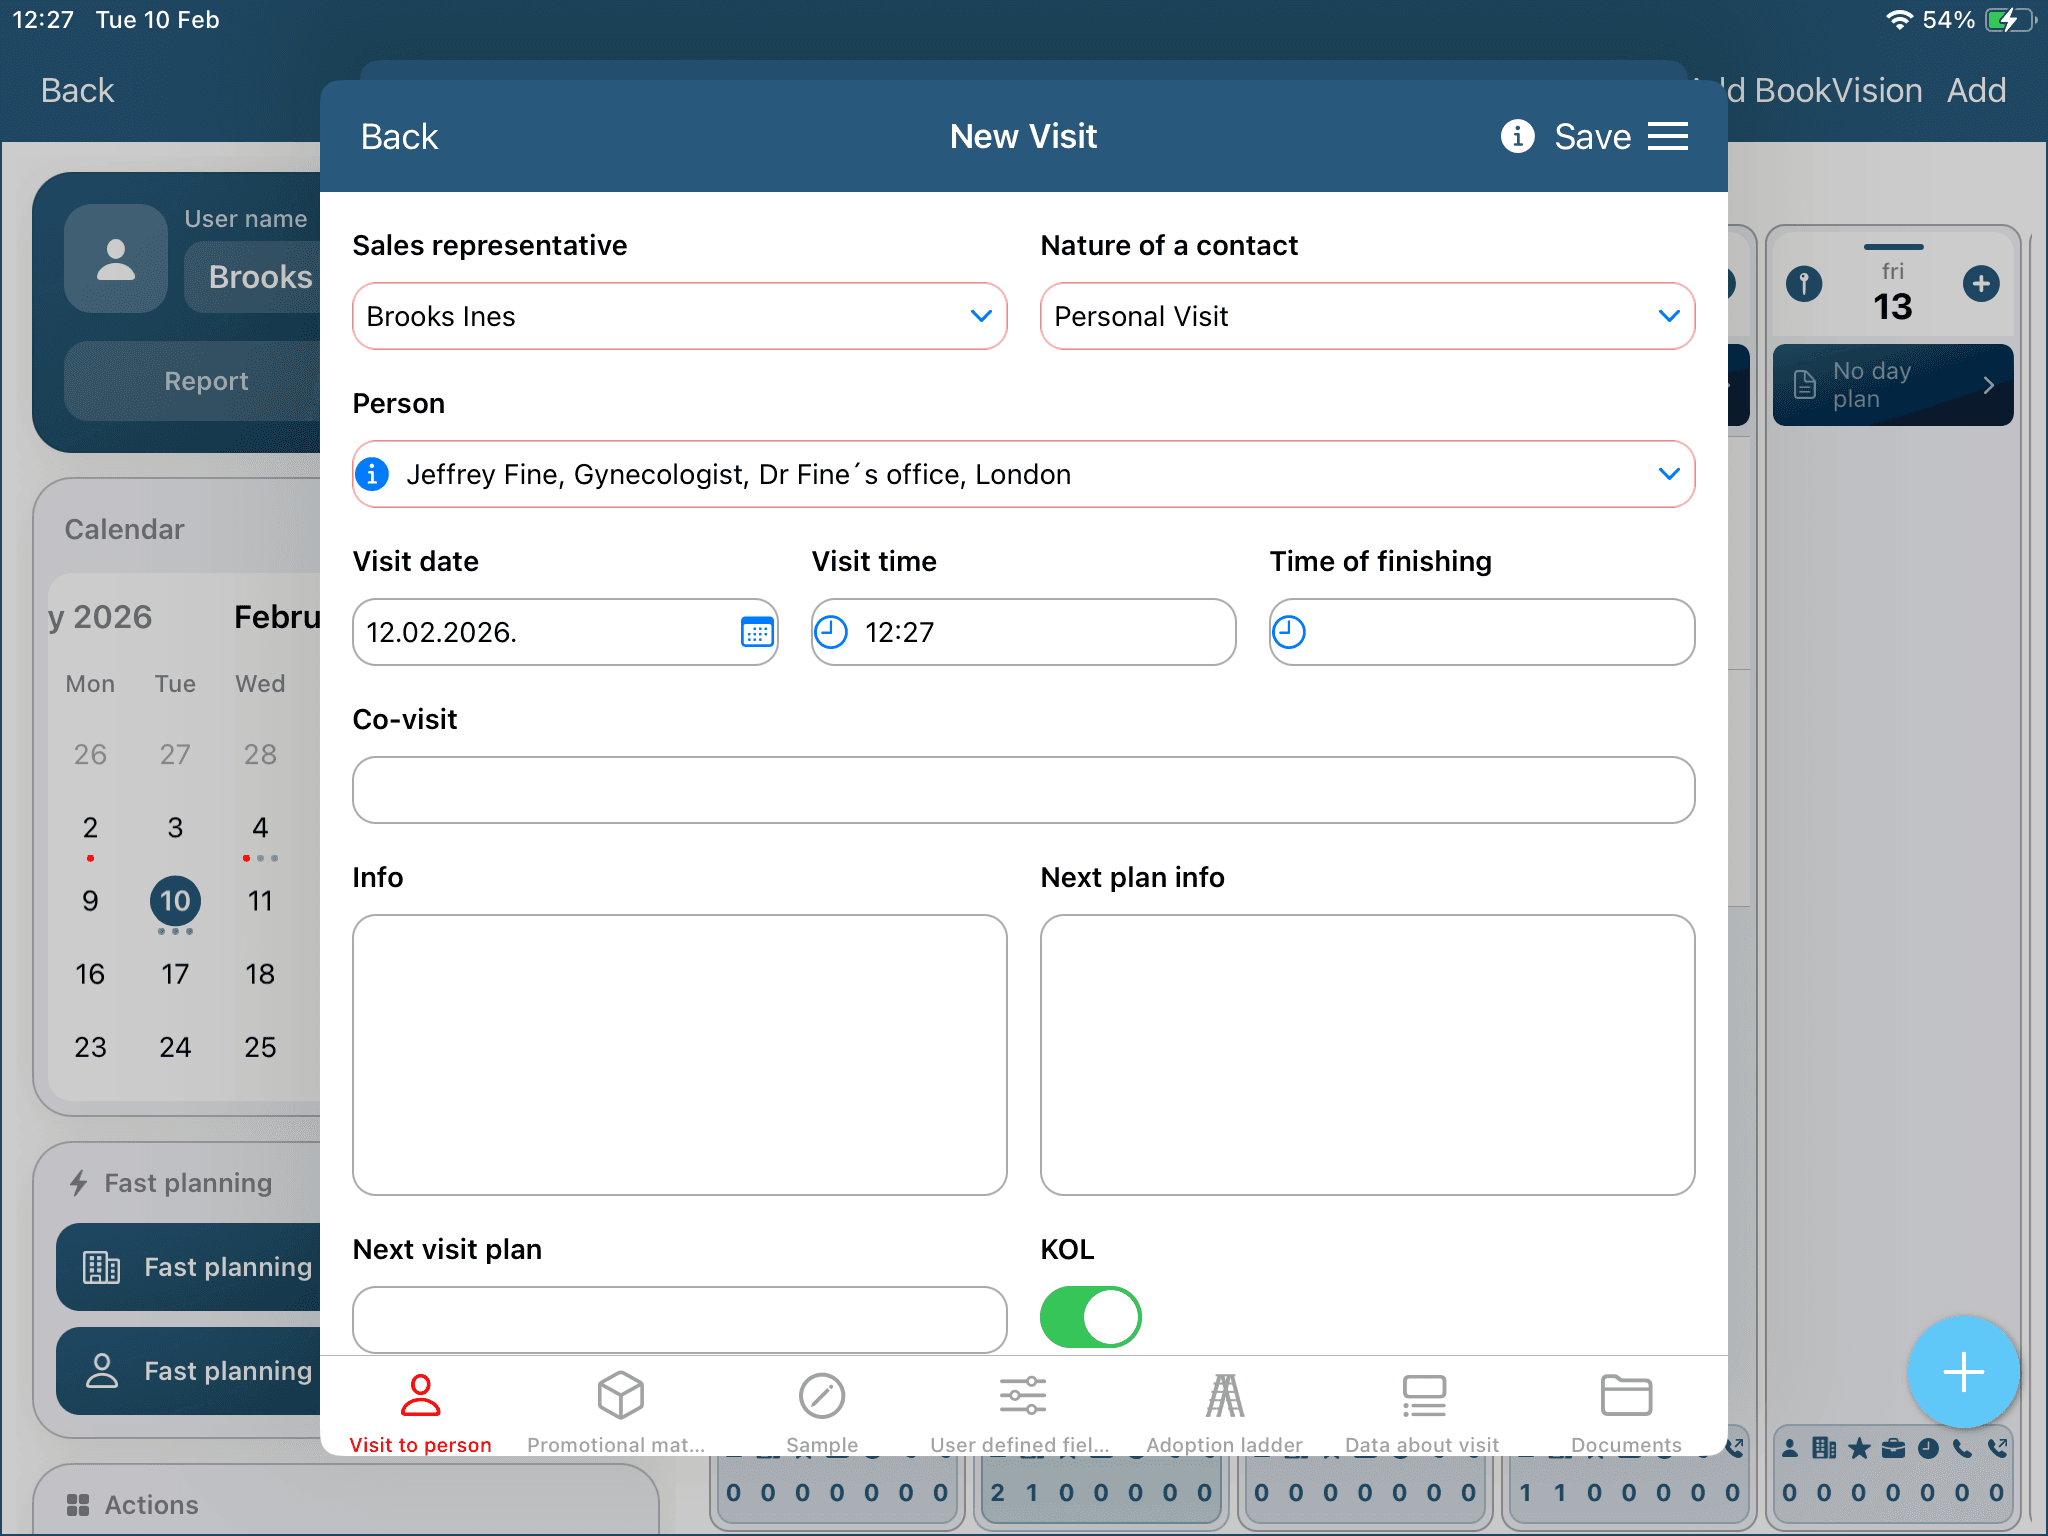
Adding visit for a person
Adding a new visit for person is very similar to previously described adding a New visit for institution. Press New person visit report button.
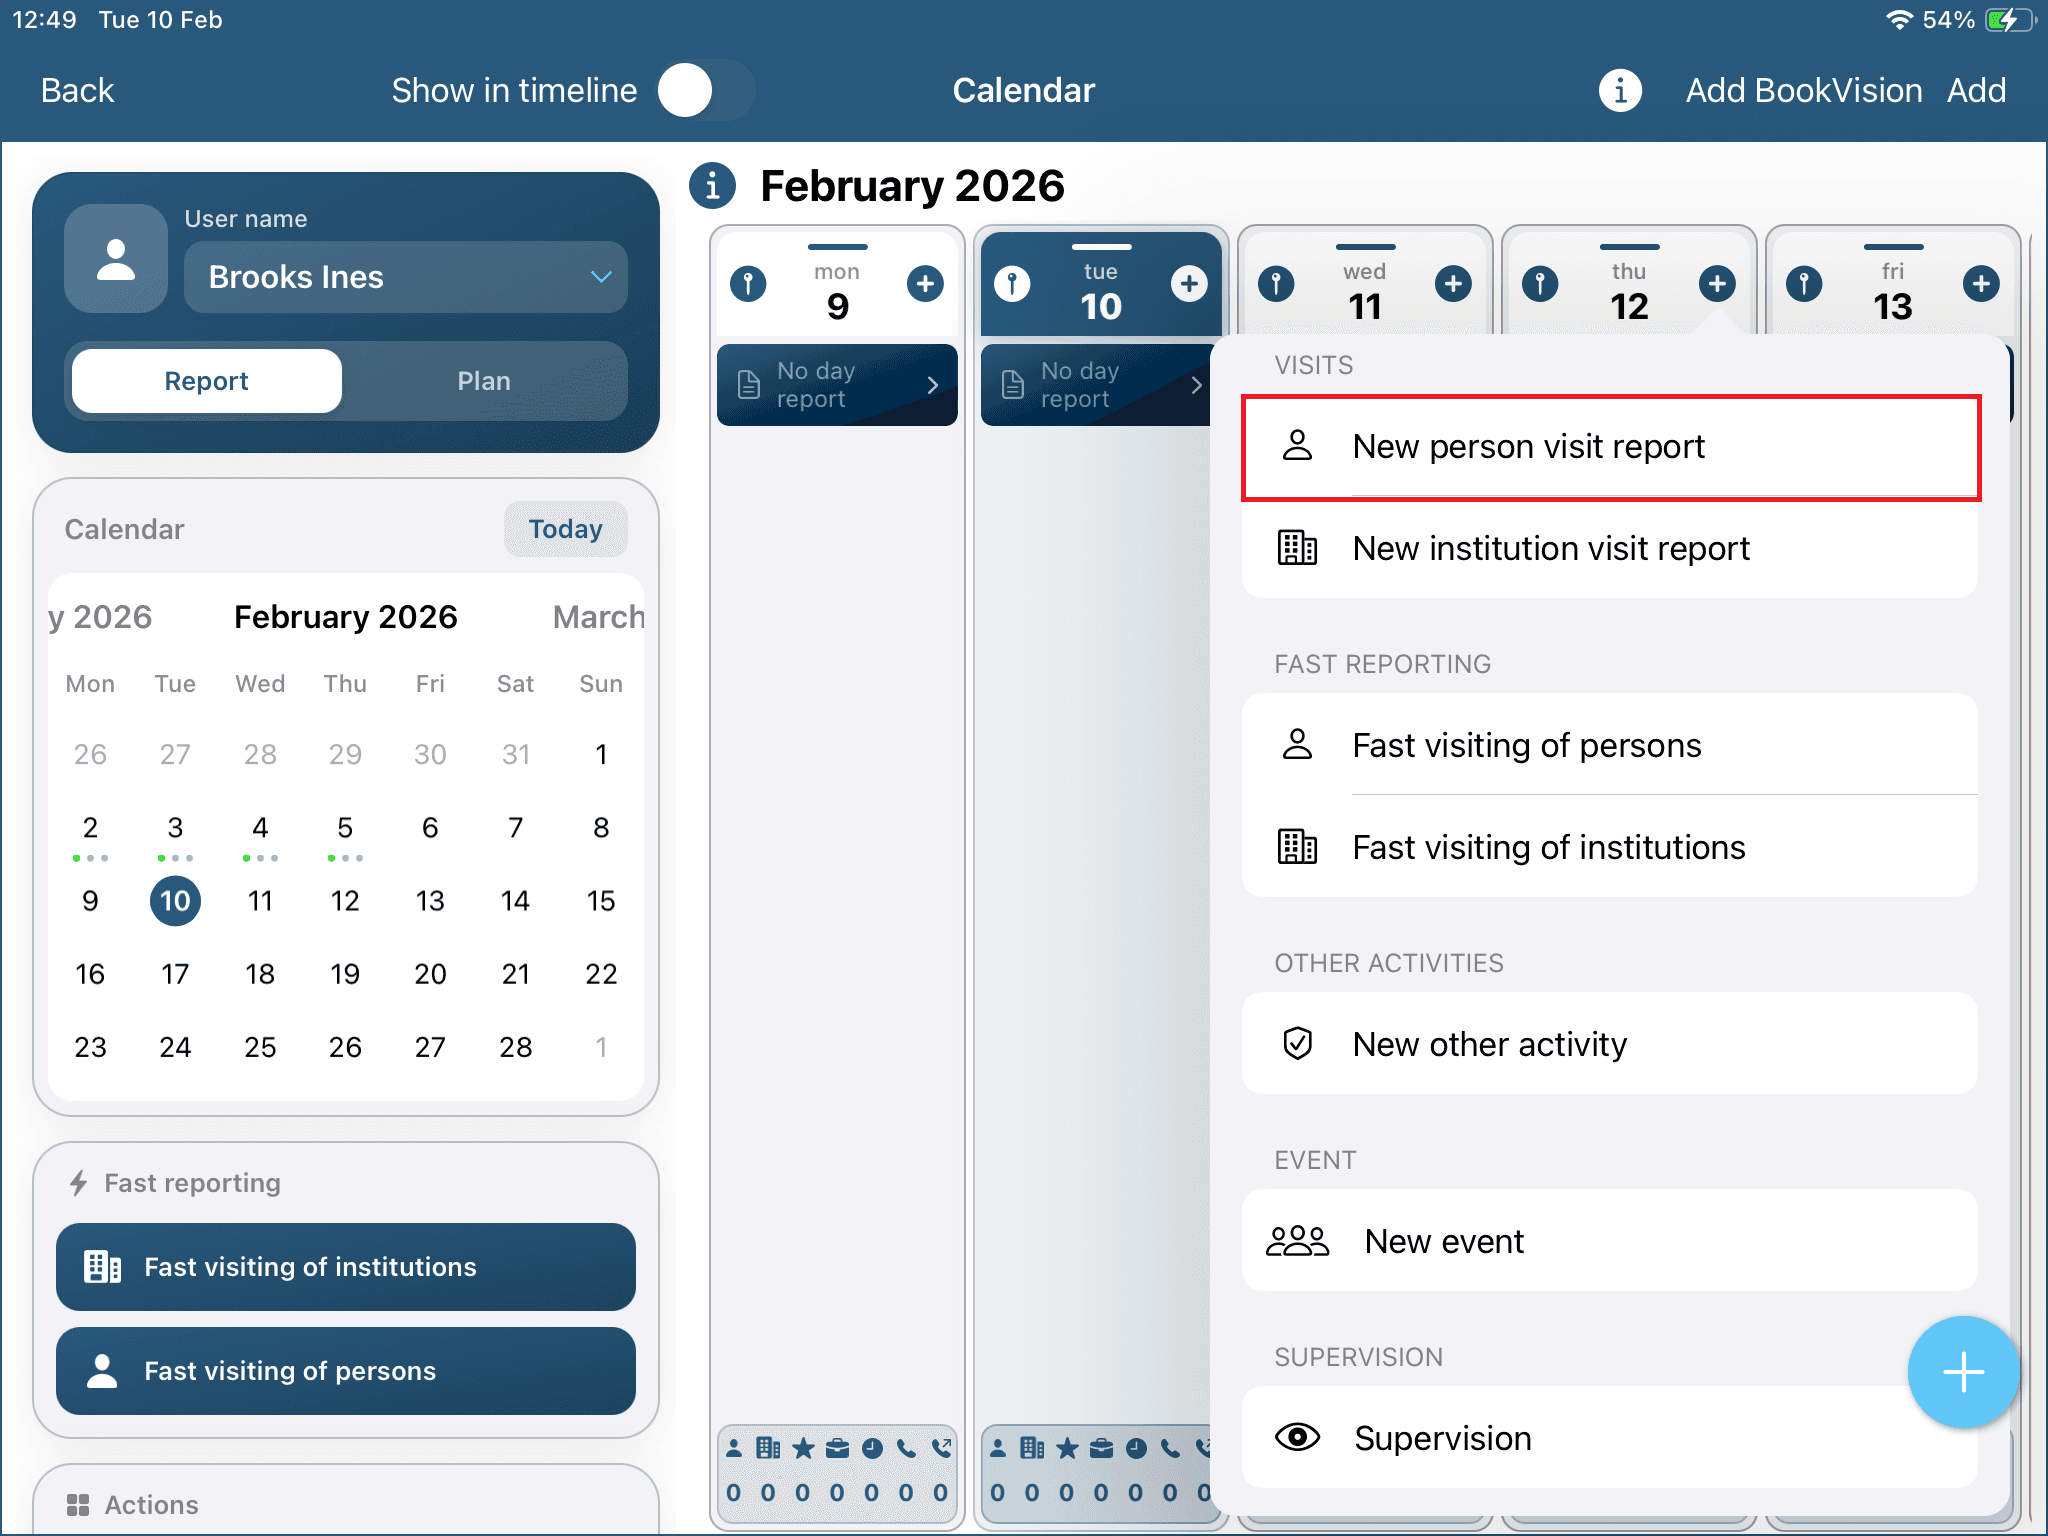
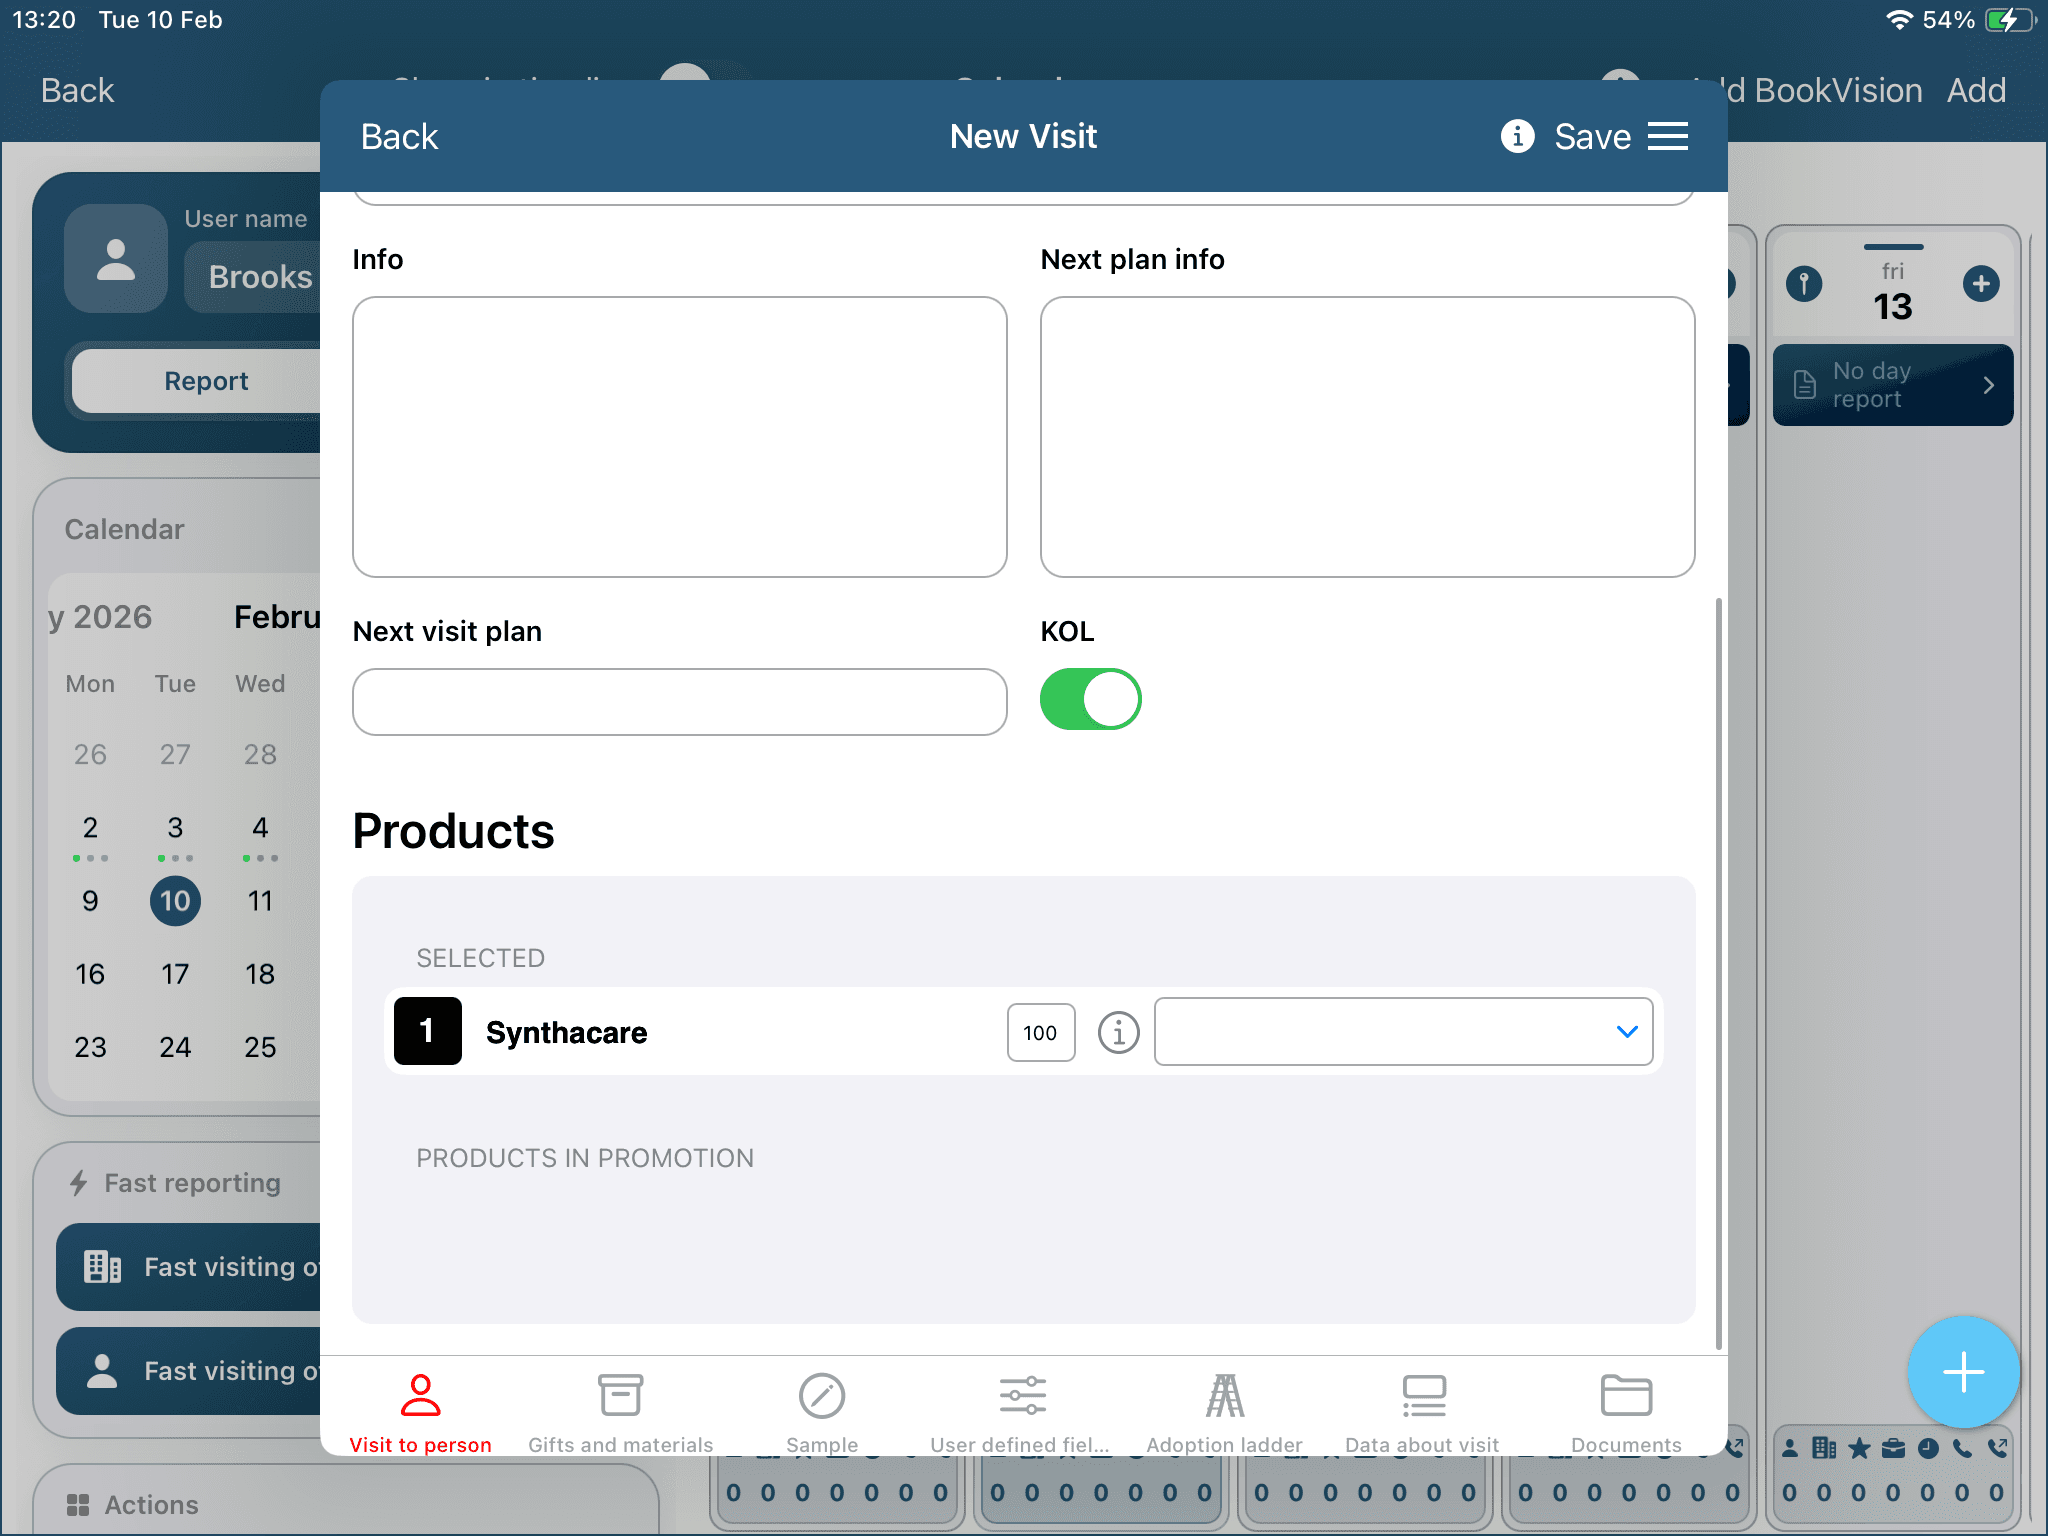
Here you can enter data like Person, Nature of a contact, Date (by default it is set for today but you can change it), Time and Info. Person is mandatory so we need to choose it. By pressing on an „i“ button next to the persons name, info for this person will be opened. Press on button in person field and list will be shown. Press on the name of person you want to add to your visit and swipe left on it, then press Choose. Also, there is a Filter button which is the same as in Person module.
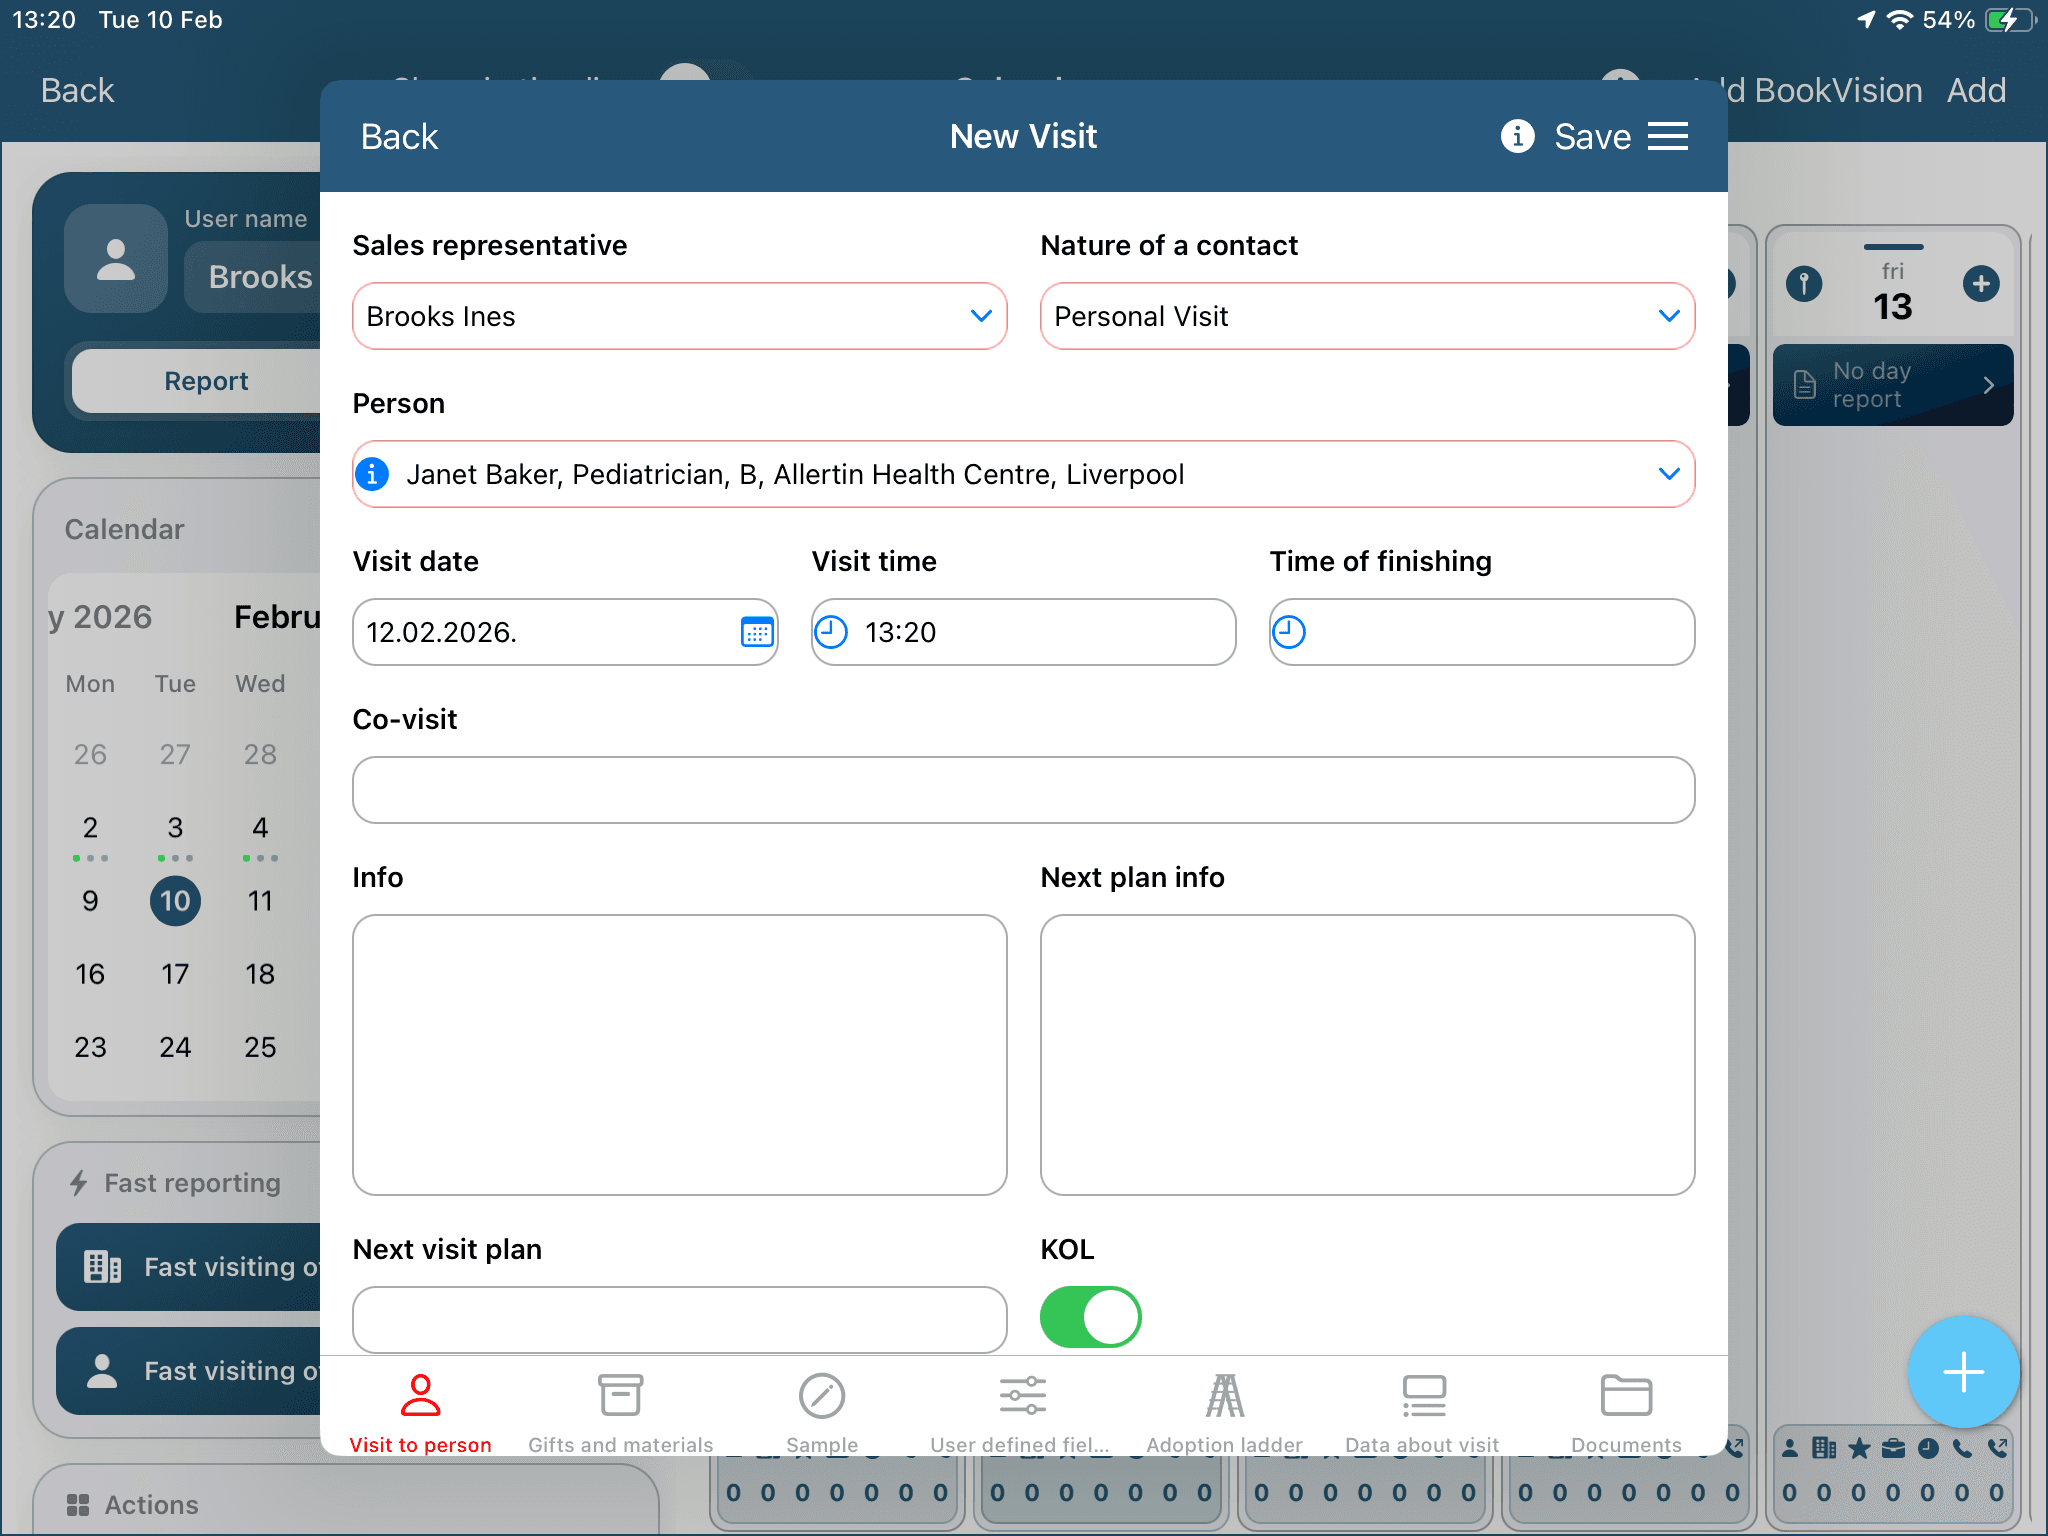
When you are making visit to person there is a more options which are not in plans. They can be found in „≡“ button. First is Save and new which is used for making fast visit. When you click this option, it will automatically save current visit and open a new clear window. Another one is New plan which is making a plan from this report (adding a plan was described in previous chapter).
Additionaly, except all options in „≡" button, we can see four tabs at bottom of window. Visit tab is shown by default and it is main part.
Second tab is Product where you can select products. Mark products and materials that you have talked about during the visit. Choose one or more products from the drop down list. When product is selected, percentage will be shown. This percentage represents the % of total visit time in which you have spoken about some product. Values are set by default but you can change them manually by pressing on value and entering a new one. When all data is entered press Save button. If you do not select products total sum of 100% and you try to save entry, you will get info message.
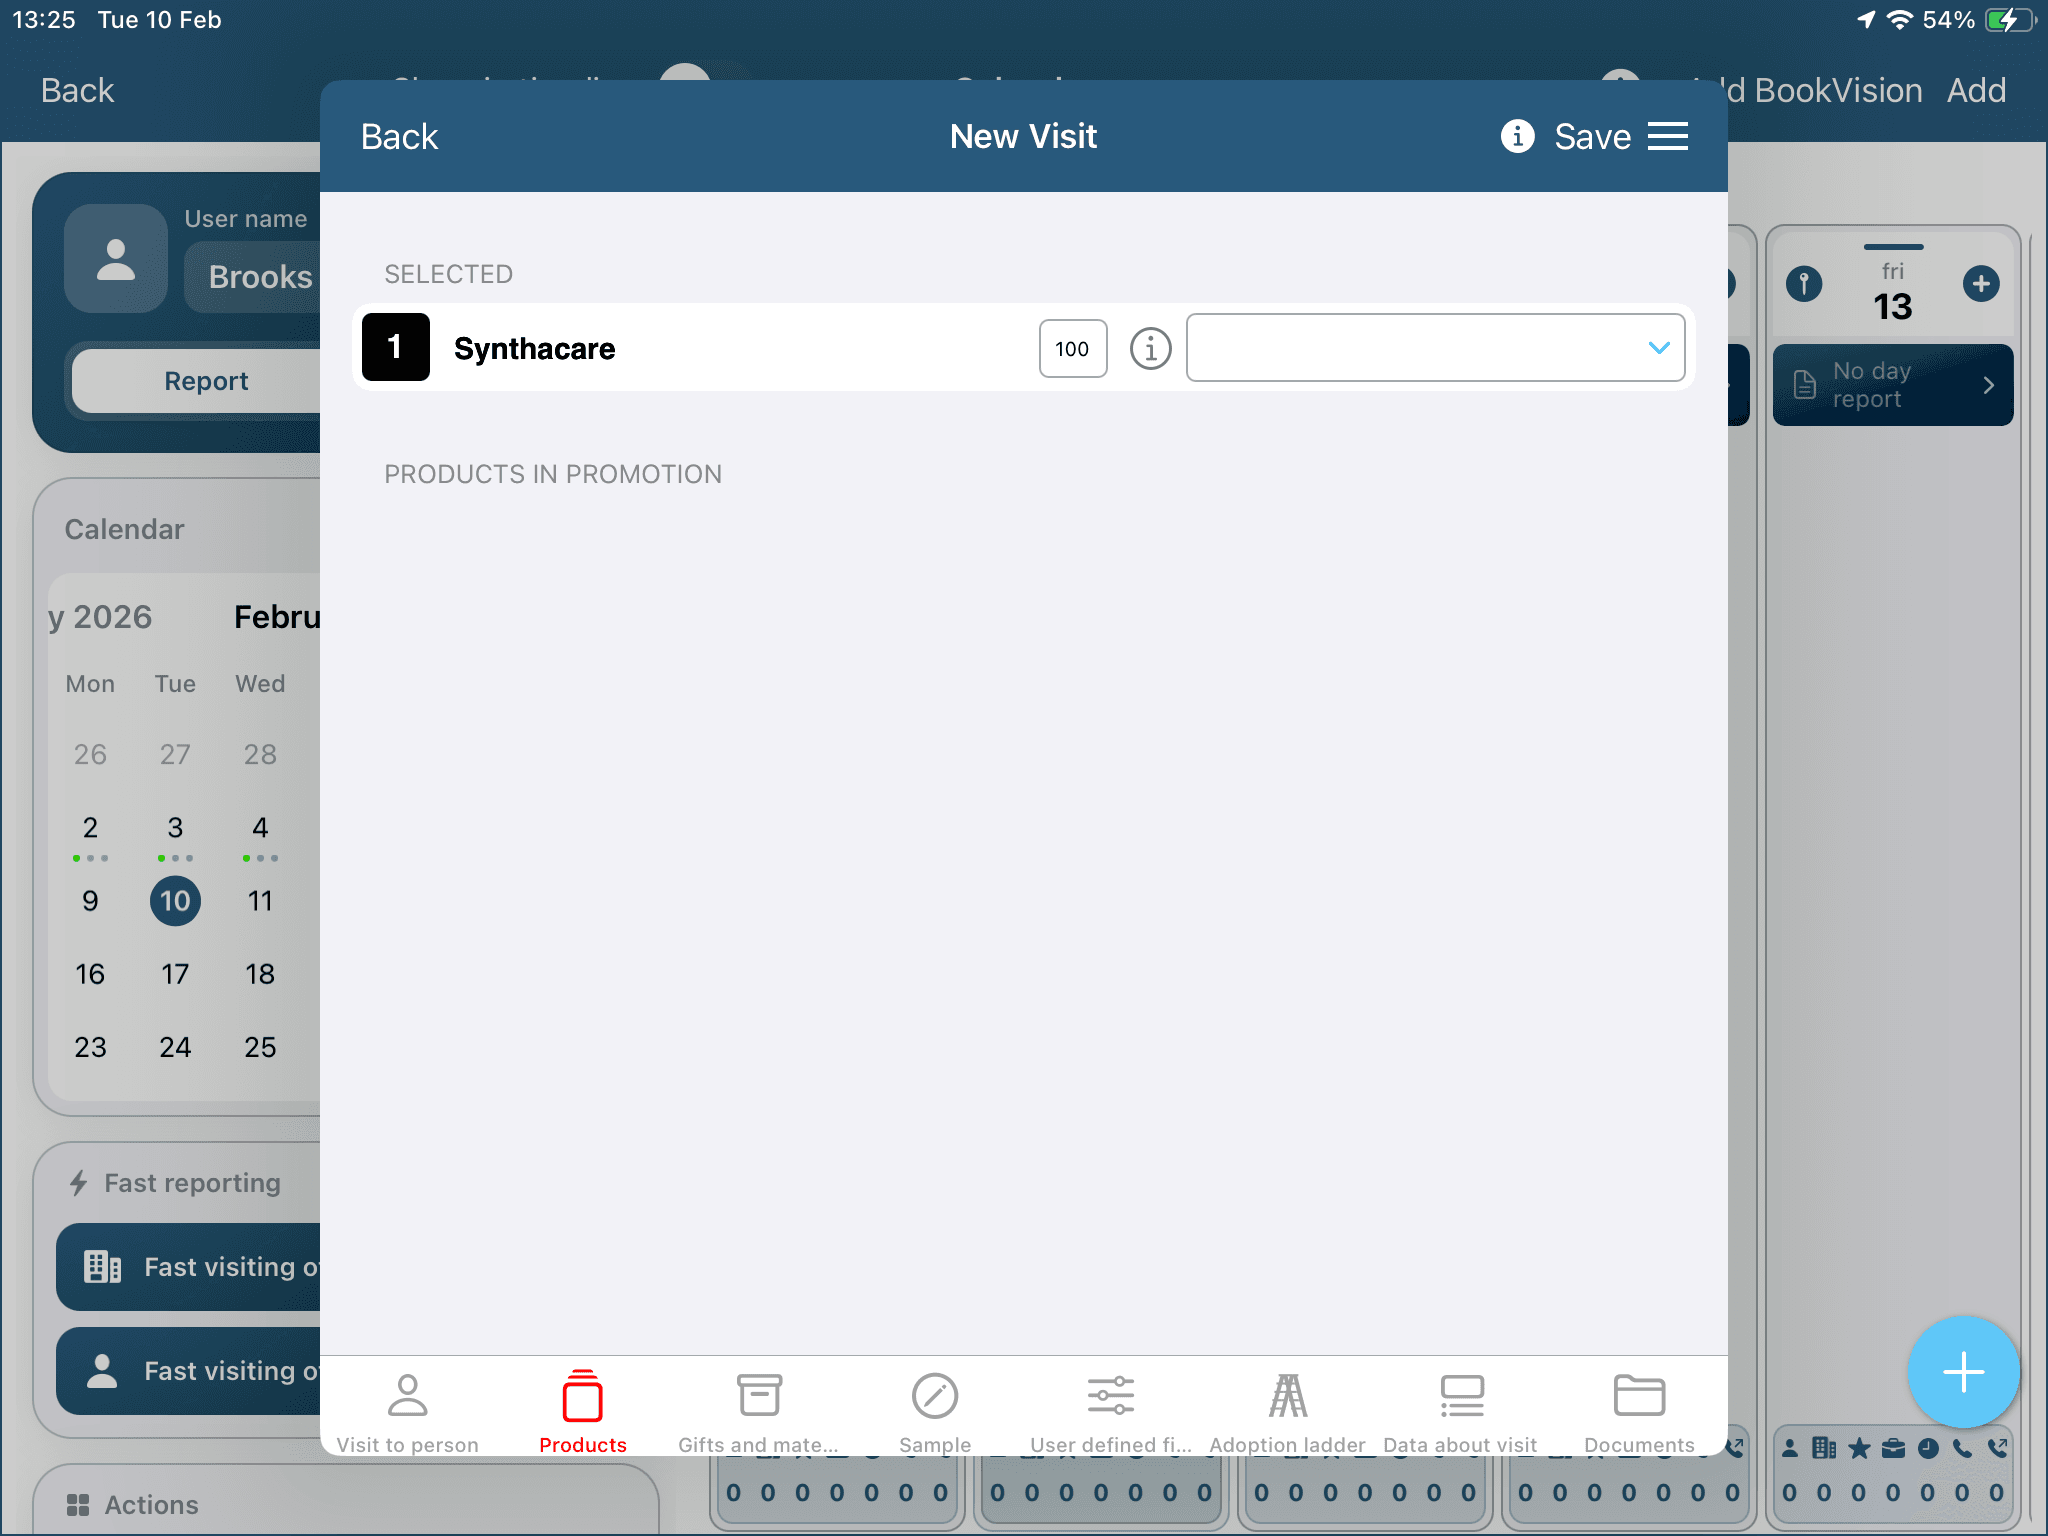
Products can also be shown on the first tab “Visit to institution” by enabling option 839 in the admin application.
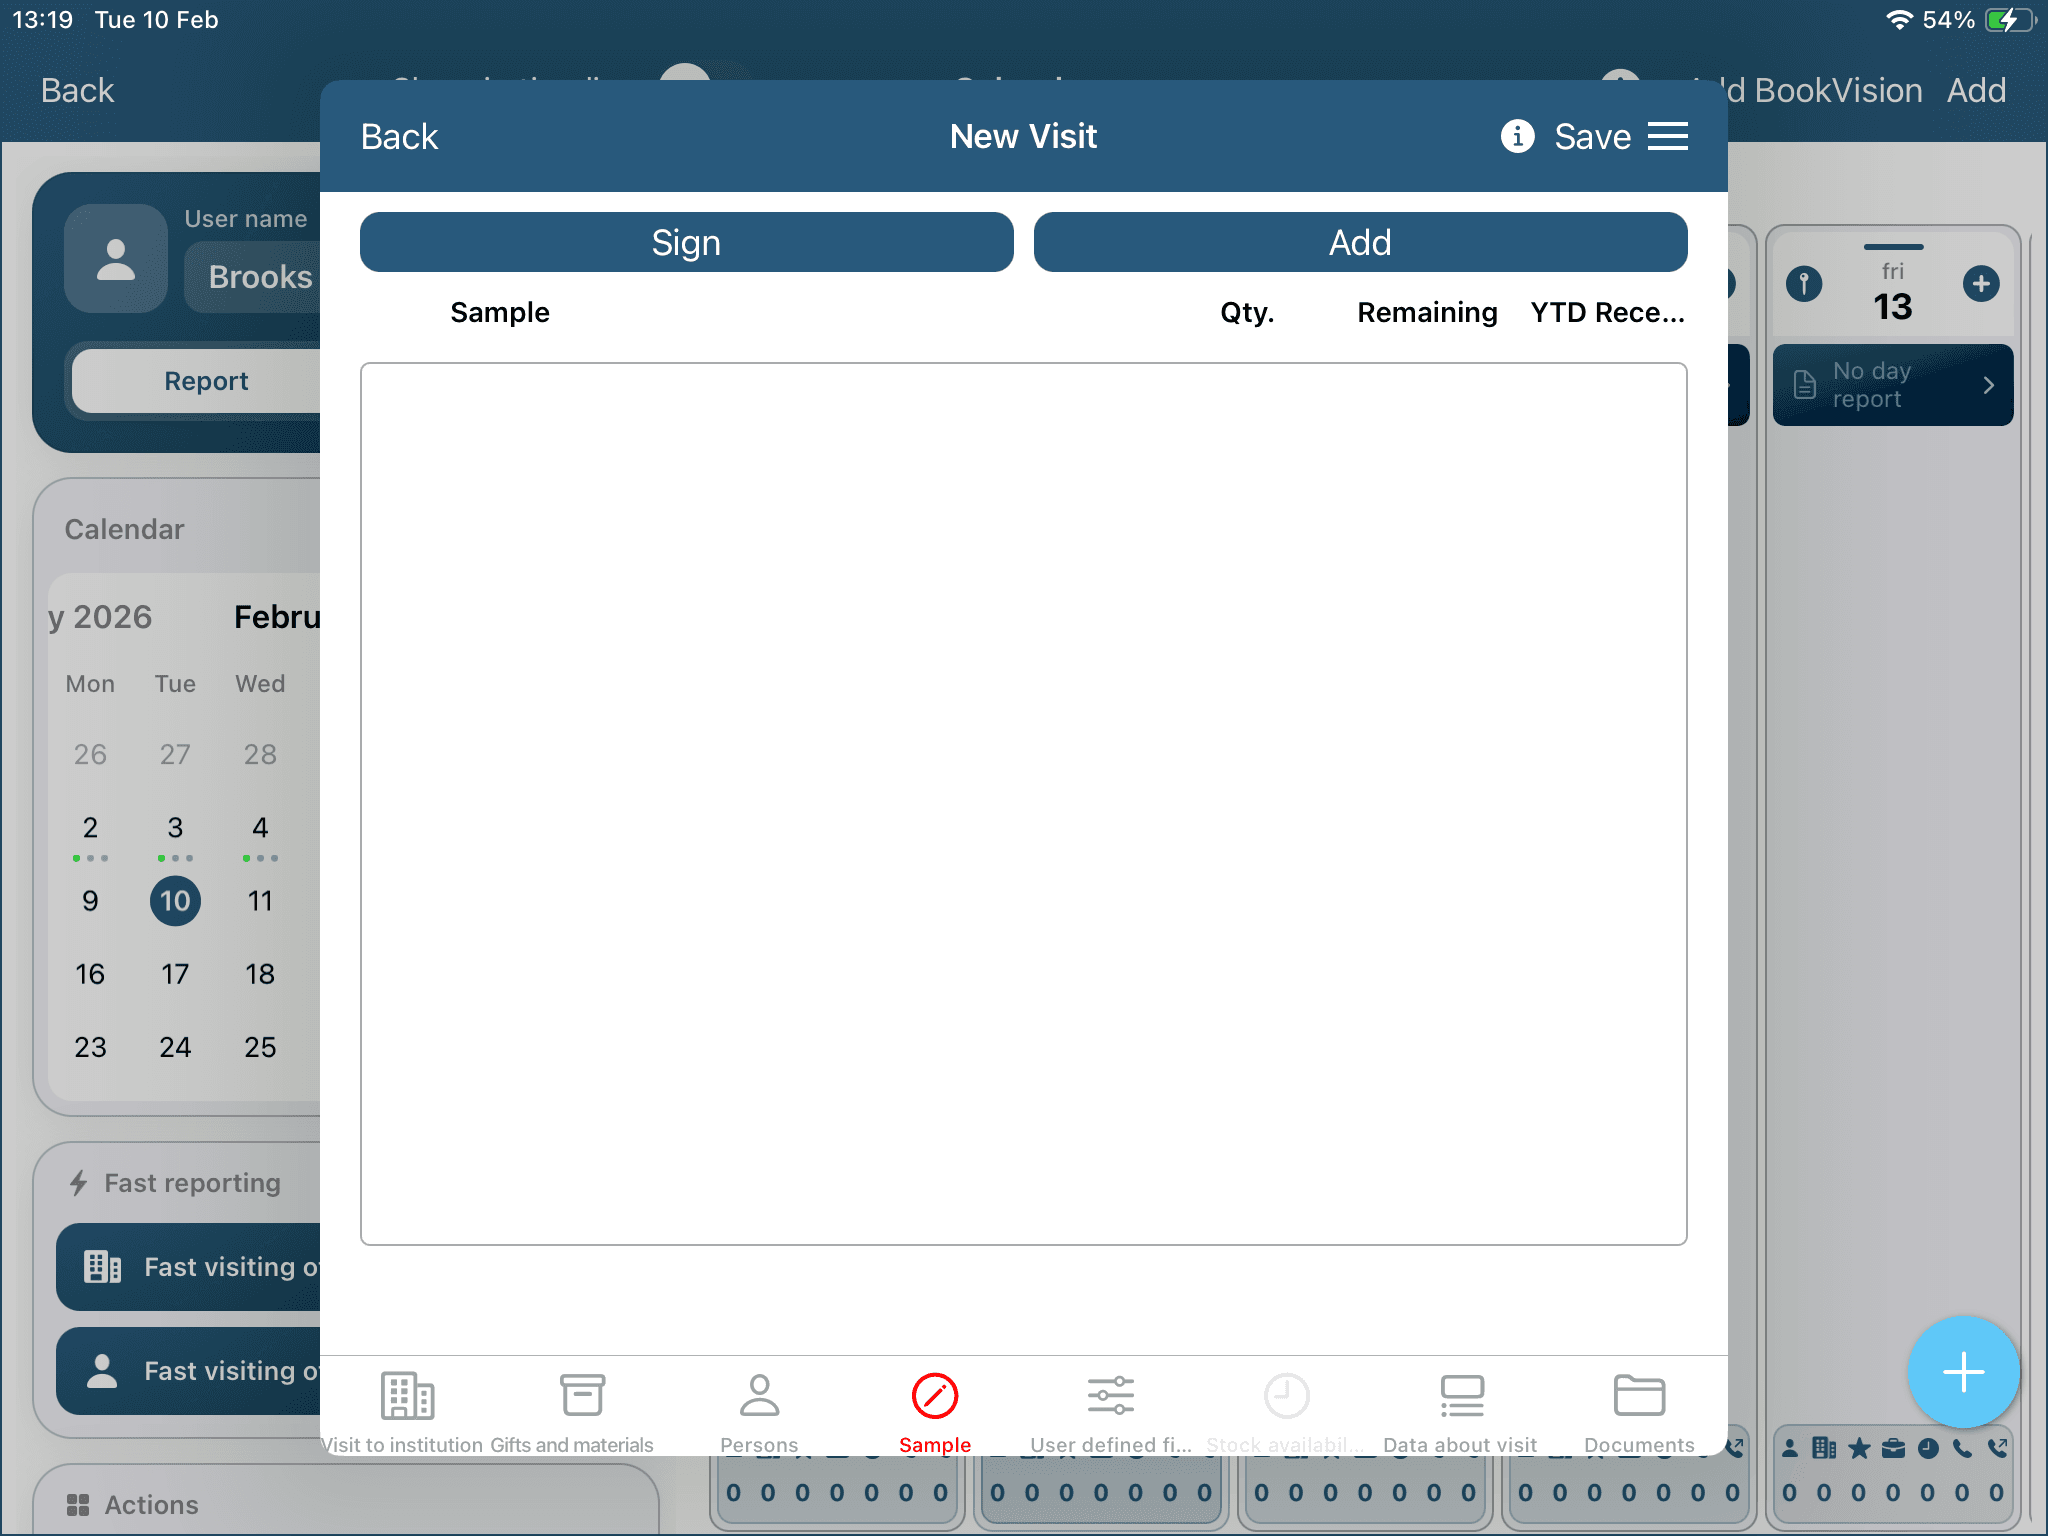
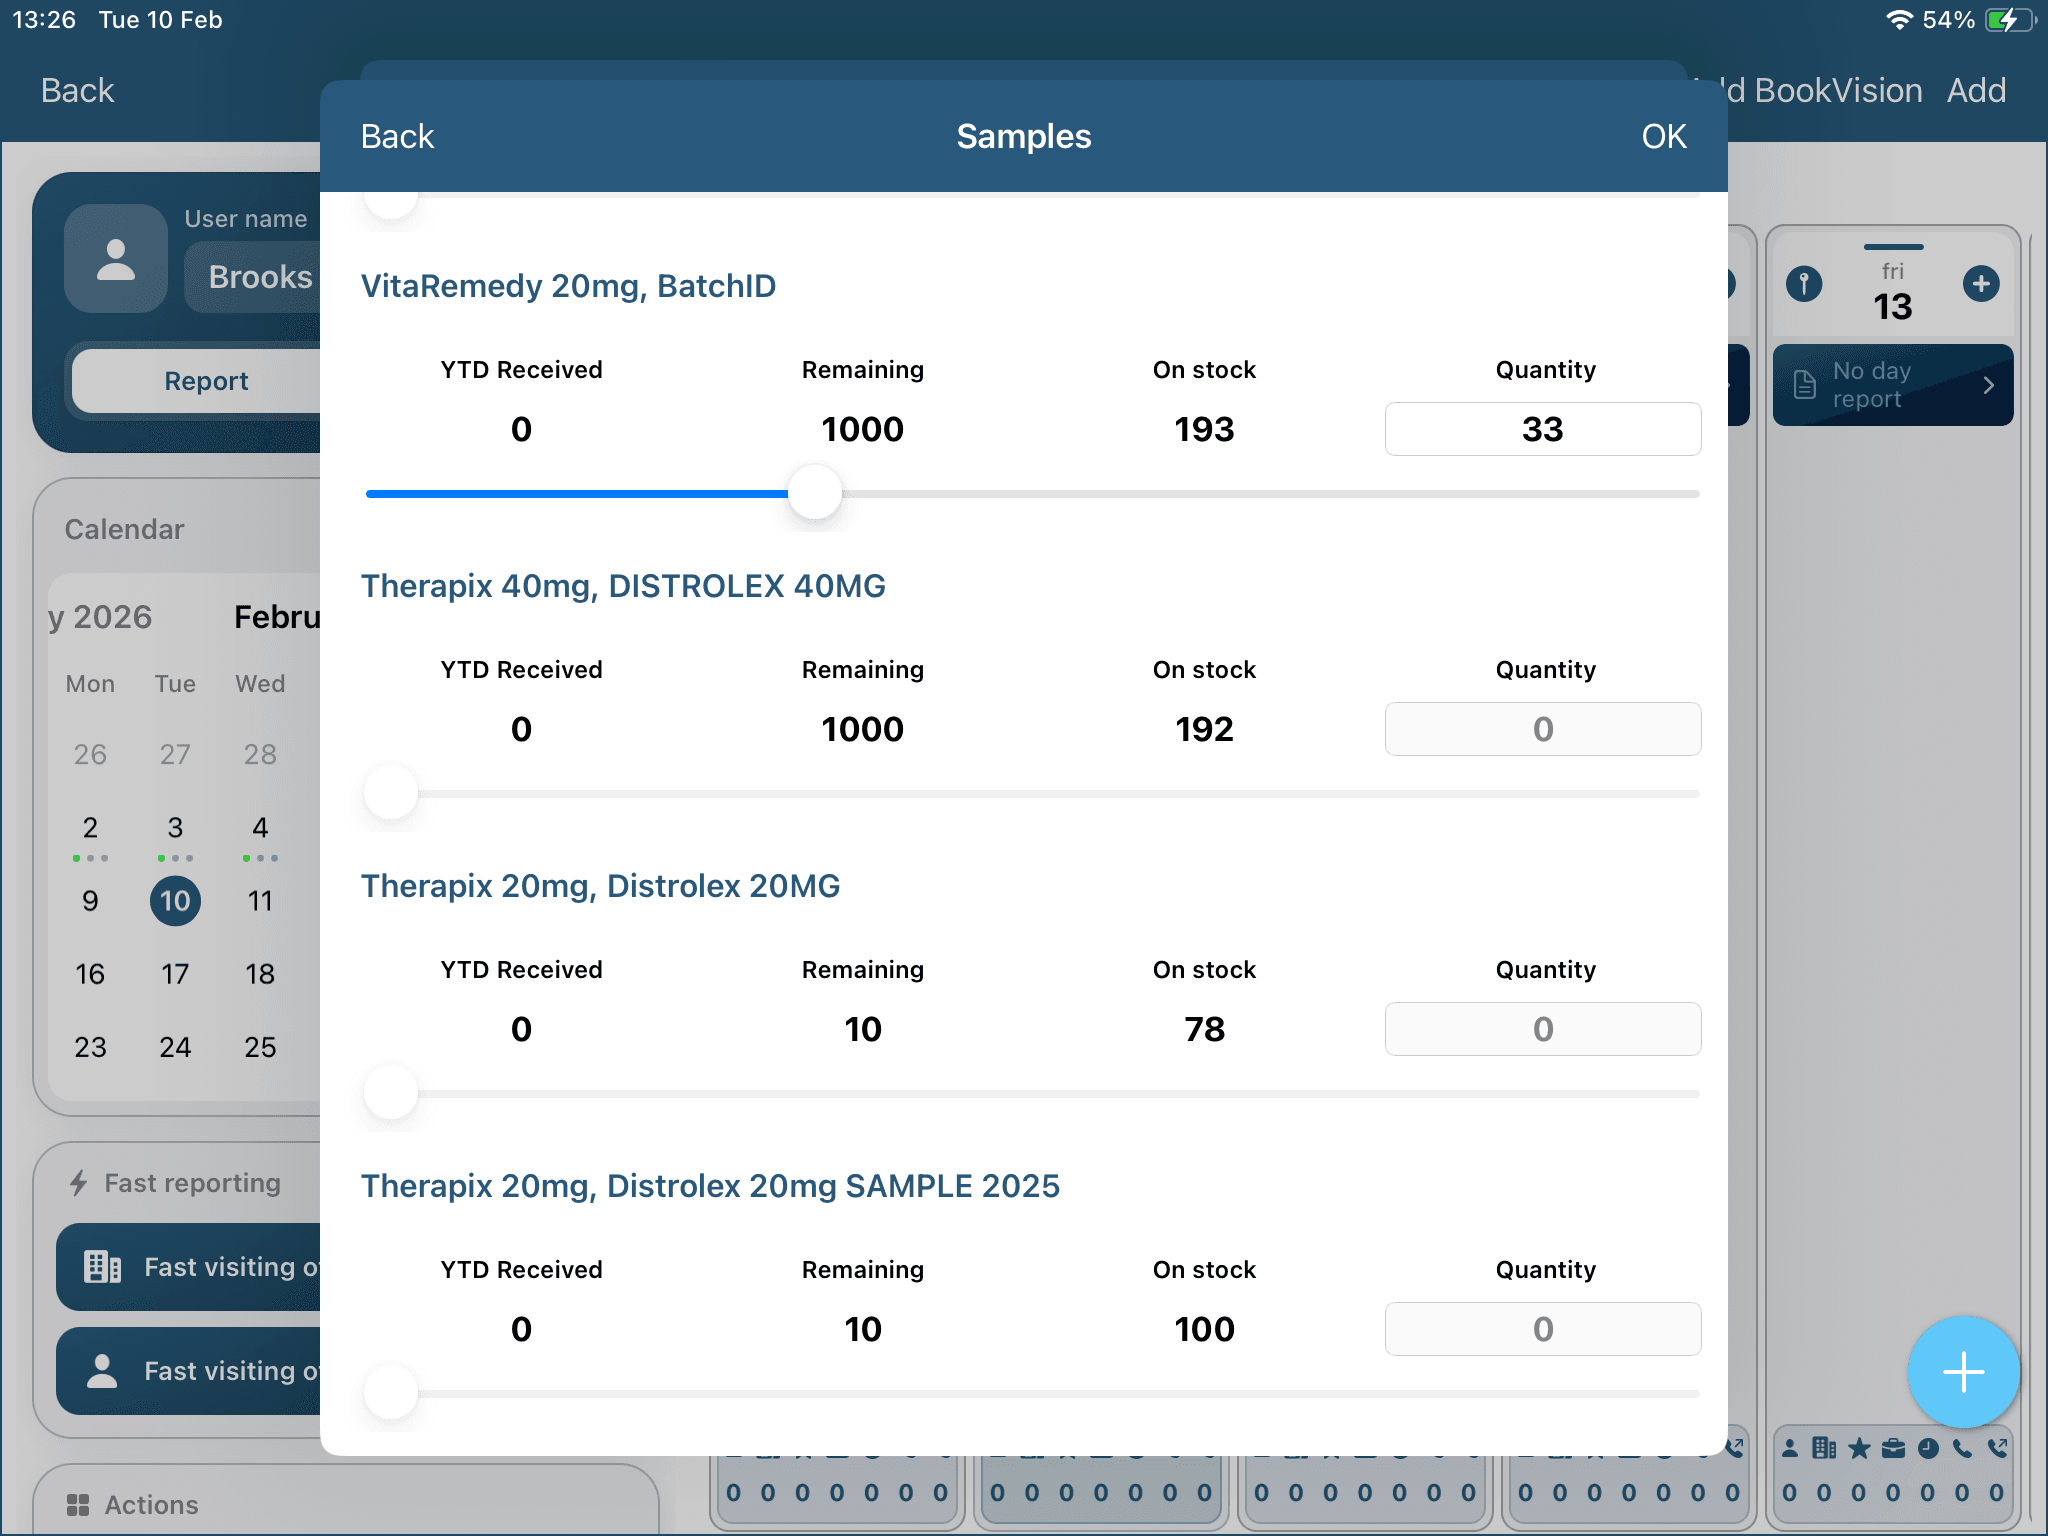
Third tab is Samples where we can add info about samples which are given to the person. Window for adding will open by pressing on Add button.
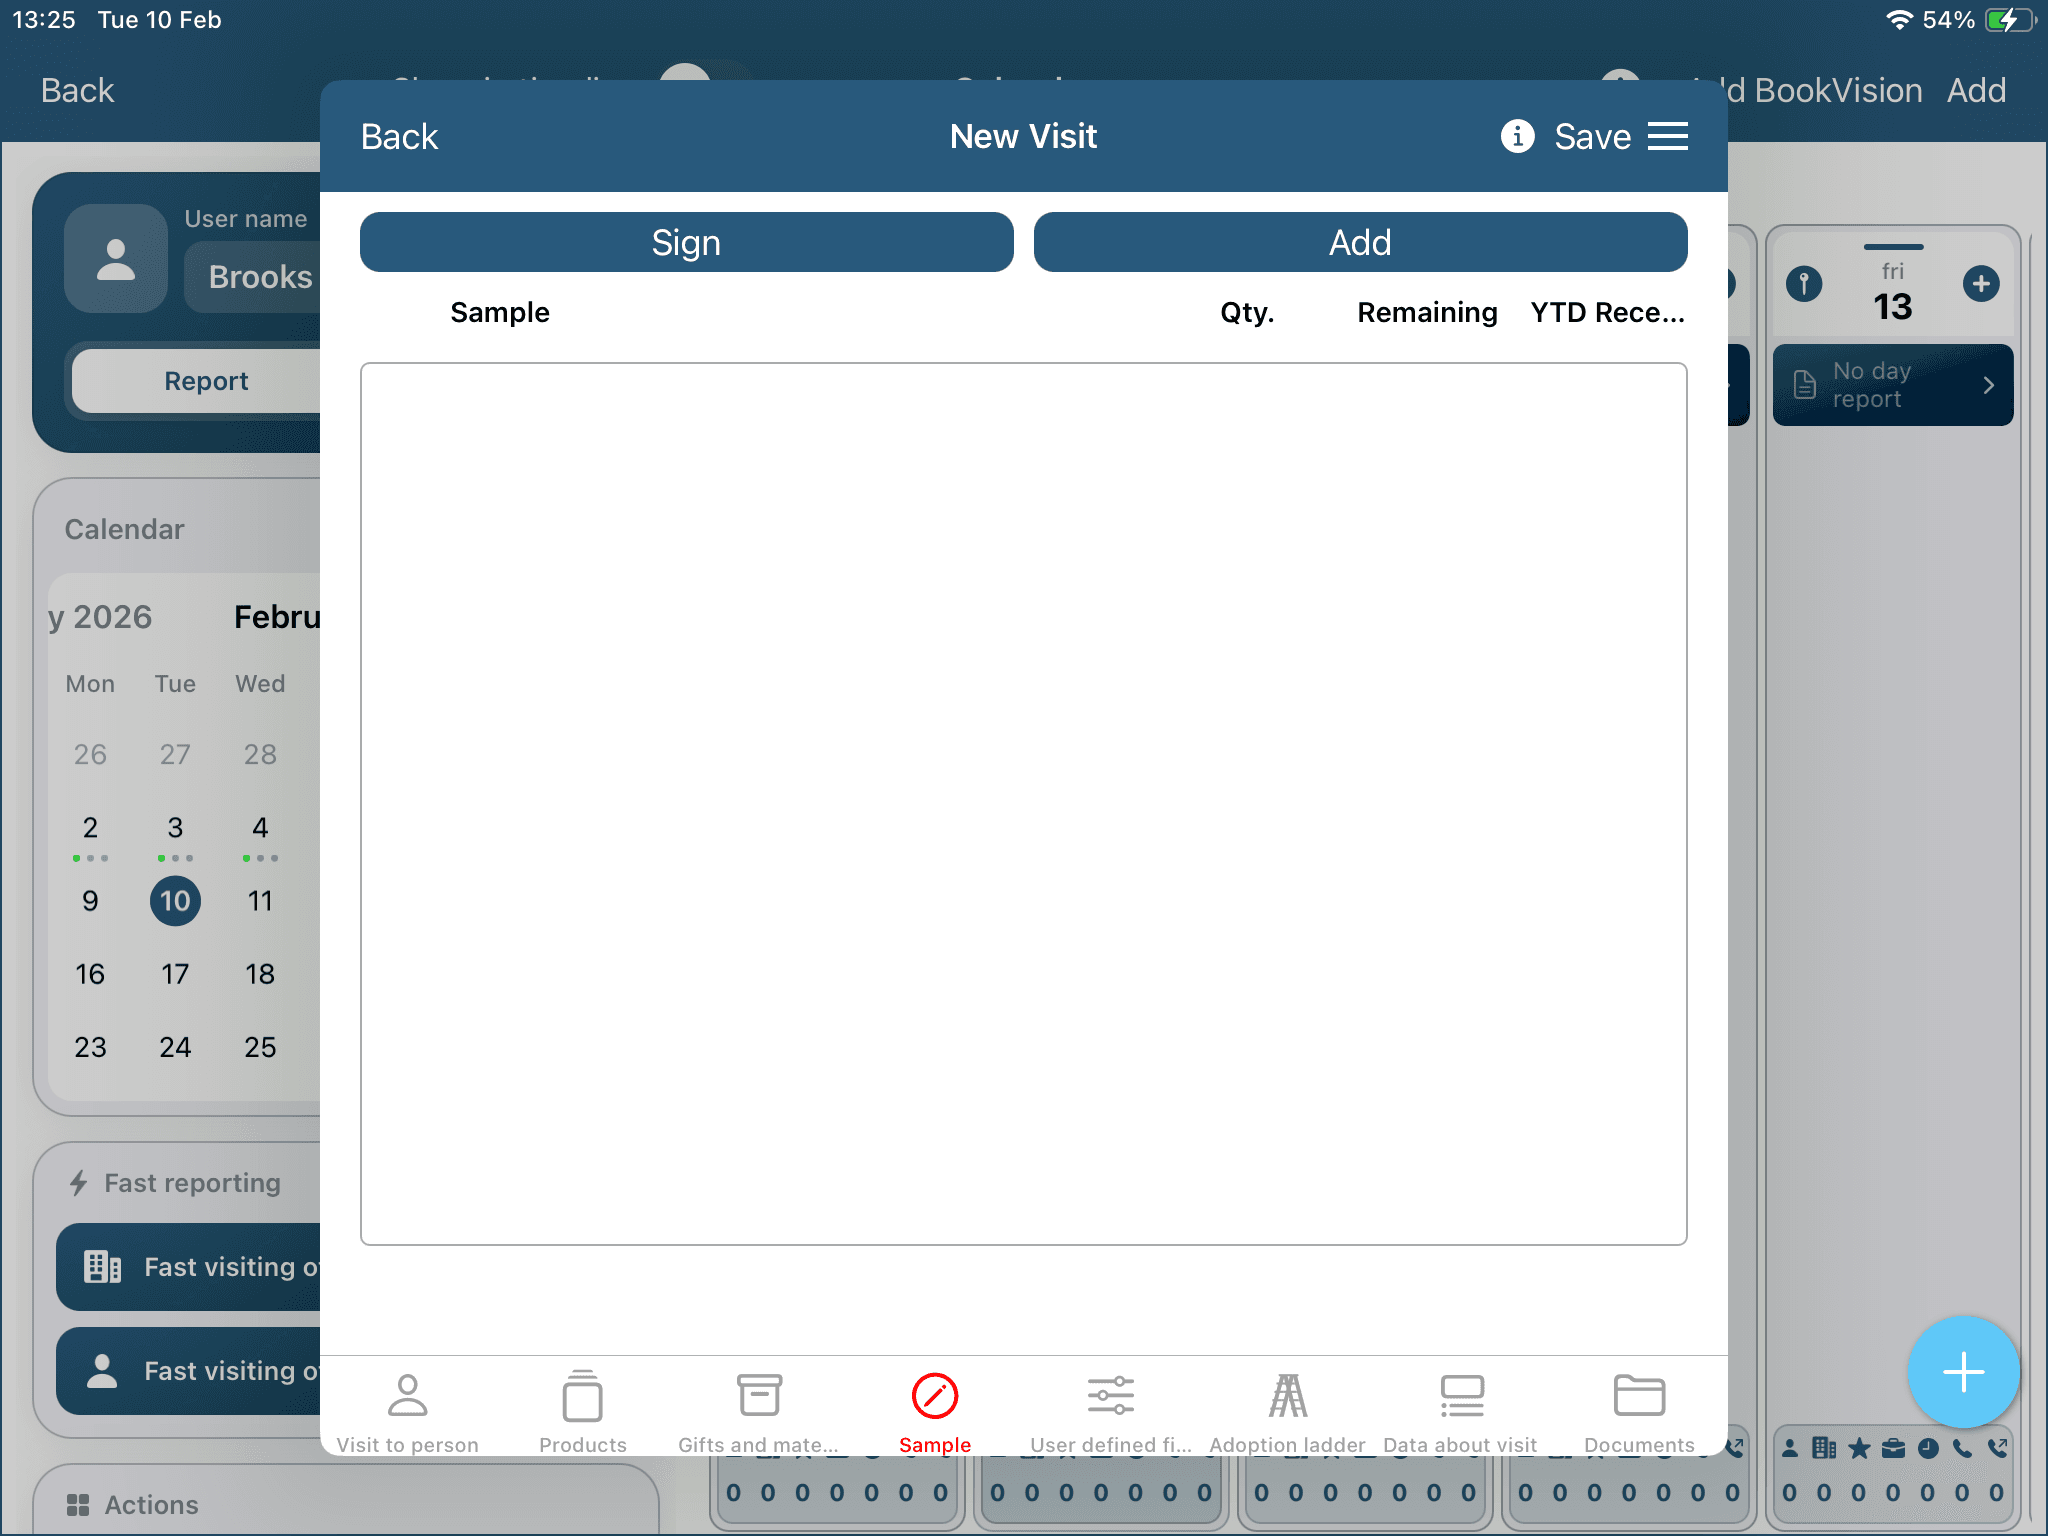
Samples can be given by dragging slider to desired value. If slider is not visible, it means that we already gave all samples and we do not have them on stock. The amount of samples by a user is determined by the Administrator.
After adding quantities of samples, by pressing Close button these samples will be added.
Person which received samples can add a signature by pressing Sign and drawing a signature.
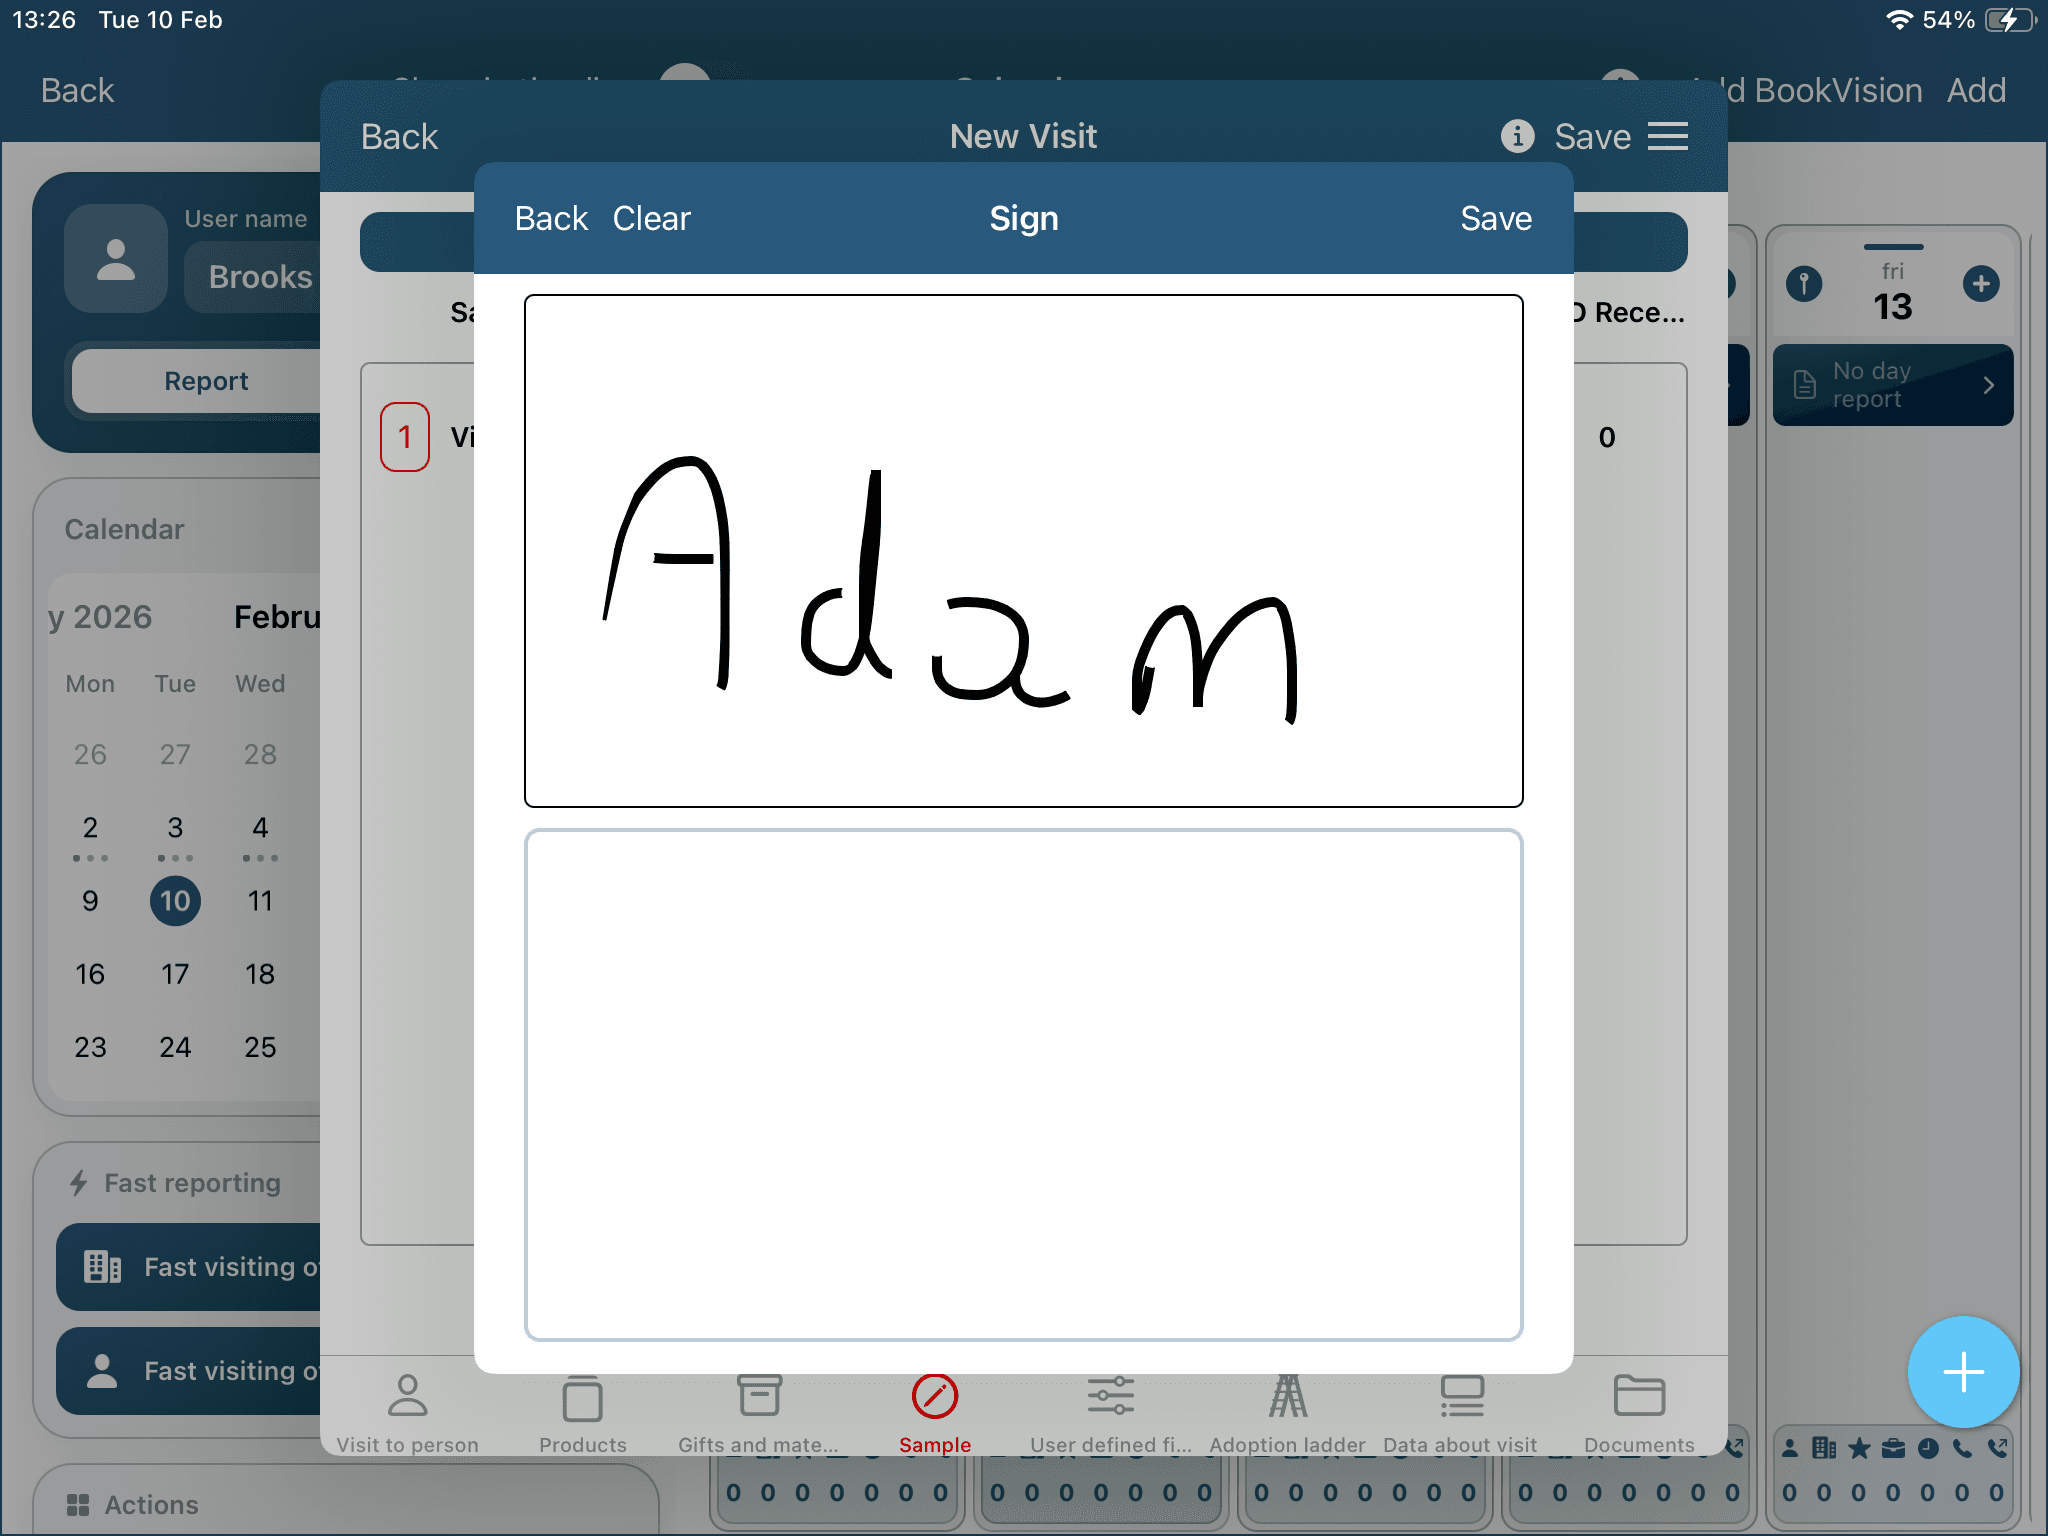
After you click the button Save, signature will be saved.
If option for fast signing is turned on, by double clicking on saved visit on calendar, window for adding signature will open. Users are given two possibilities:
After person has signed given samples, visit window will be closed.
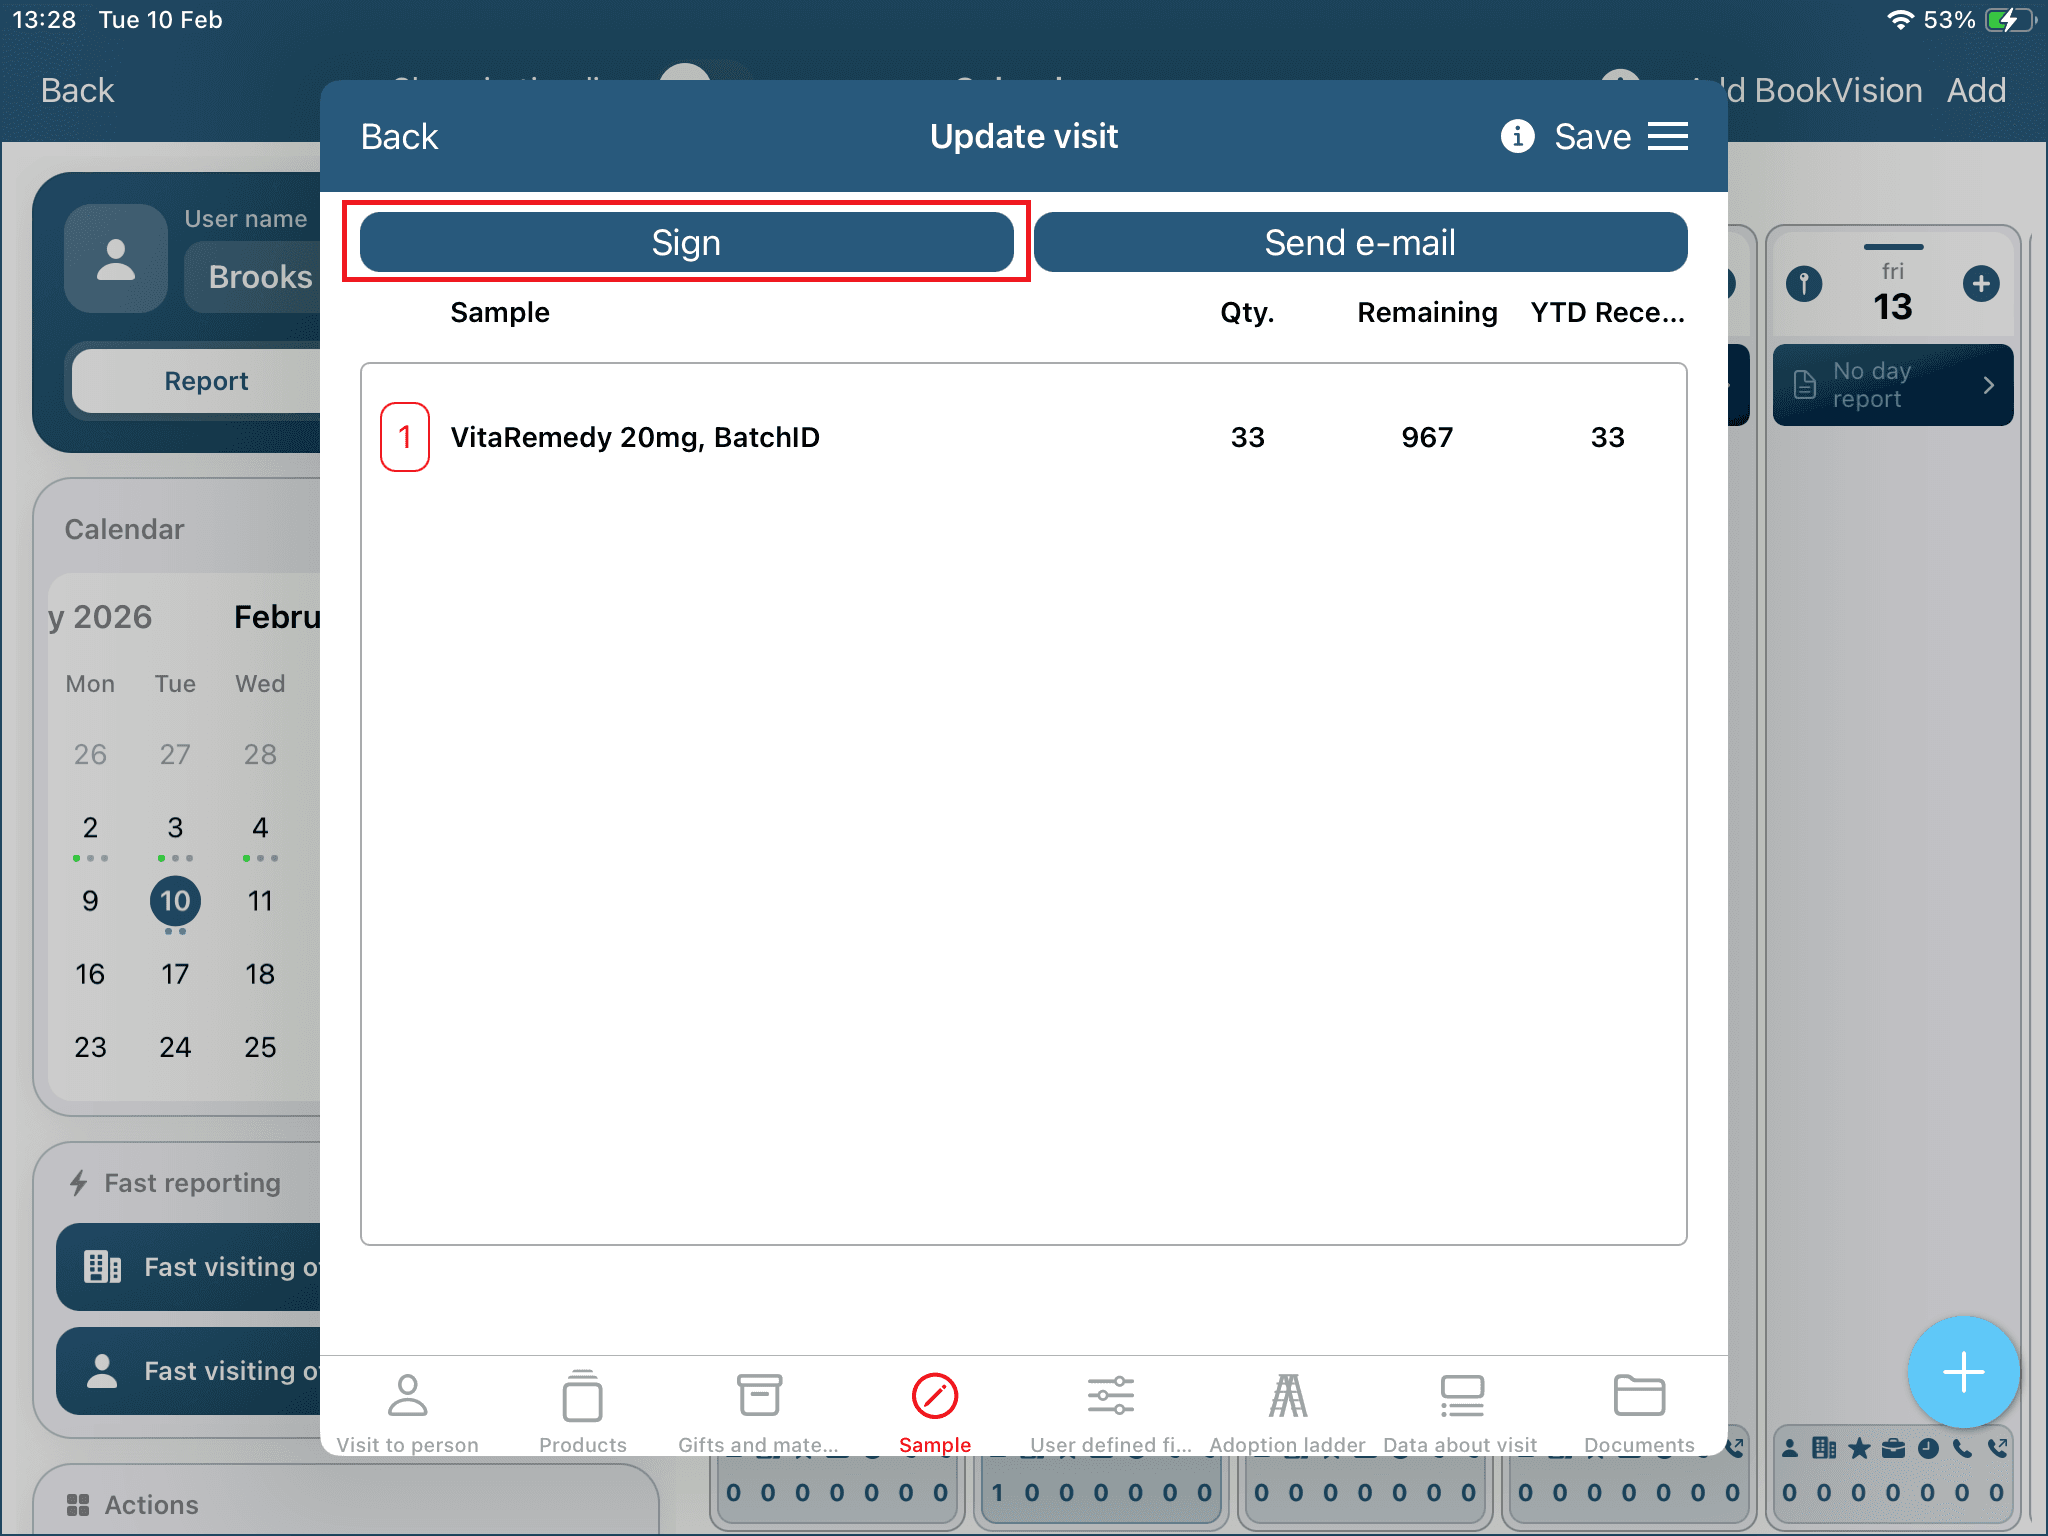
Or by using Back button, list of given samples will be show.
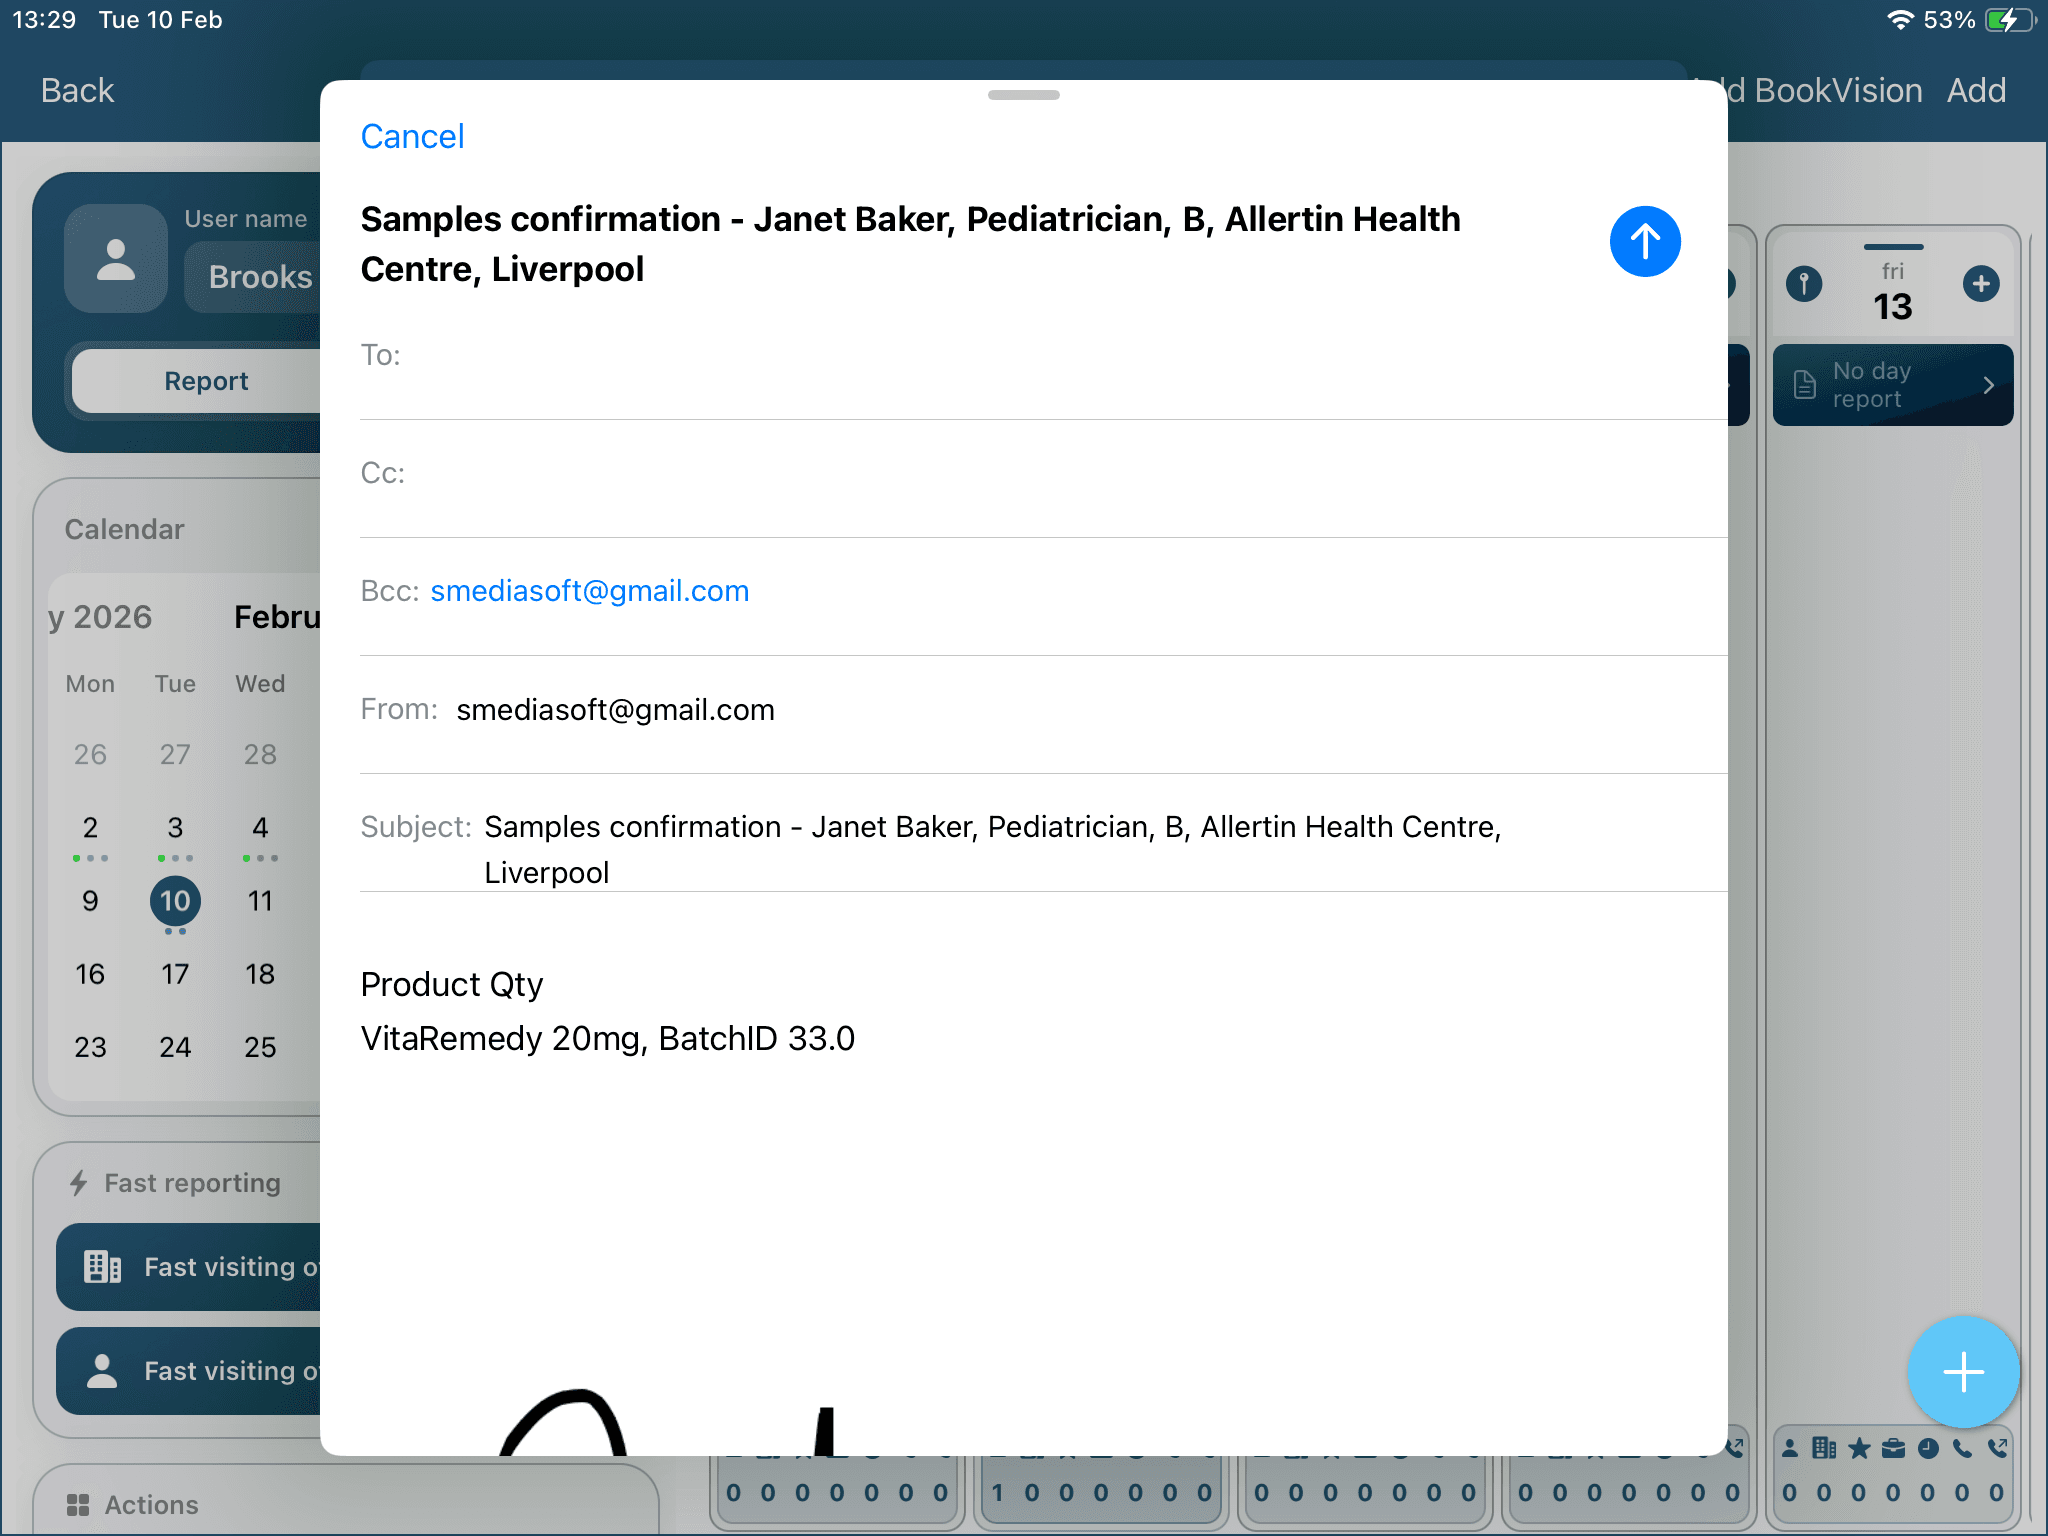
To send an e-mail on given samples click on Send e-mail button. It opens a new message to send e-mail. New e-mail contains information about the given samples. The user has to enter the recipient's e-mail address and can add additional information. After clicking the button Send a message will be sent to the recipient.
After entering all data, press Save button to save that visit. Visit has been added to the list. If you click Back, data will not be saved. You can not add a visit for a person for future. If you select any day in future and try to add a new visit you will get an info message.

Fourth tab Custom fields will be described later. Sixth tab is Tasks where you can see tasks that are connected to this PersonGlobal search - adding visit for a person
Global search – adding visit for a person
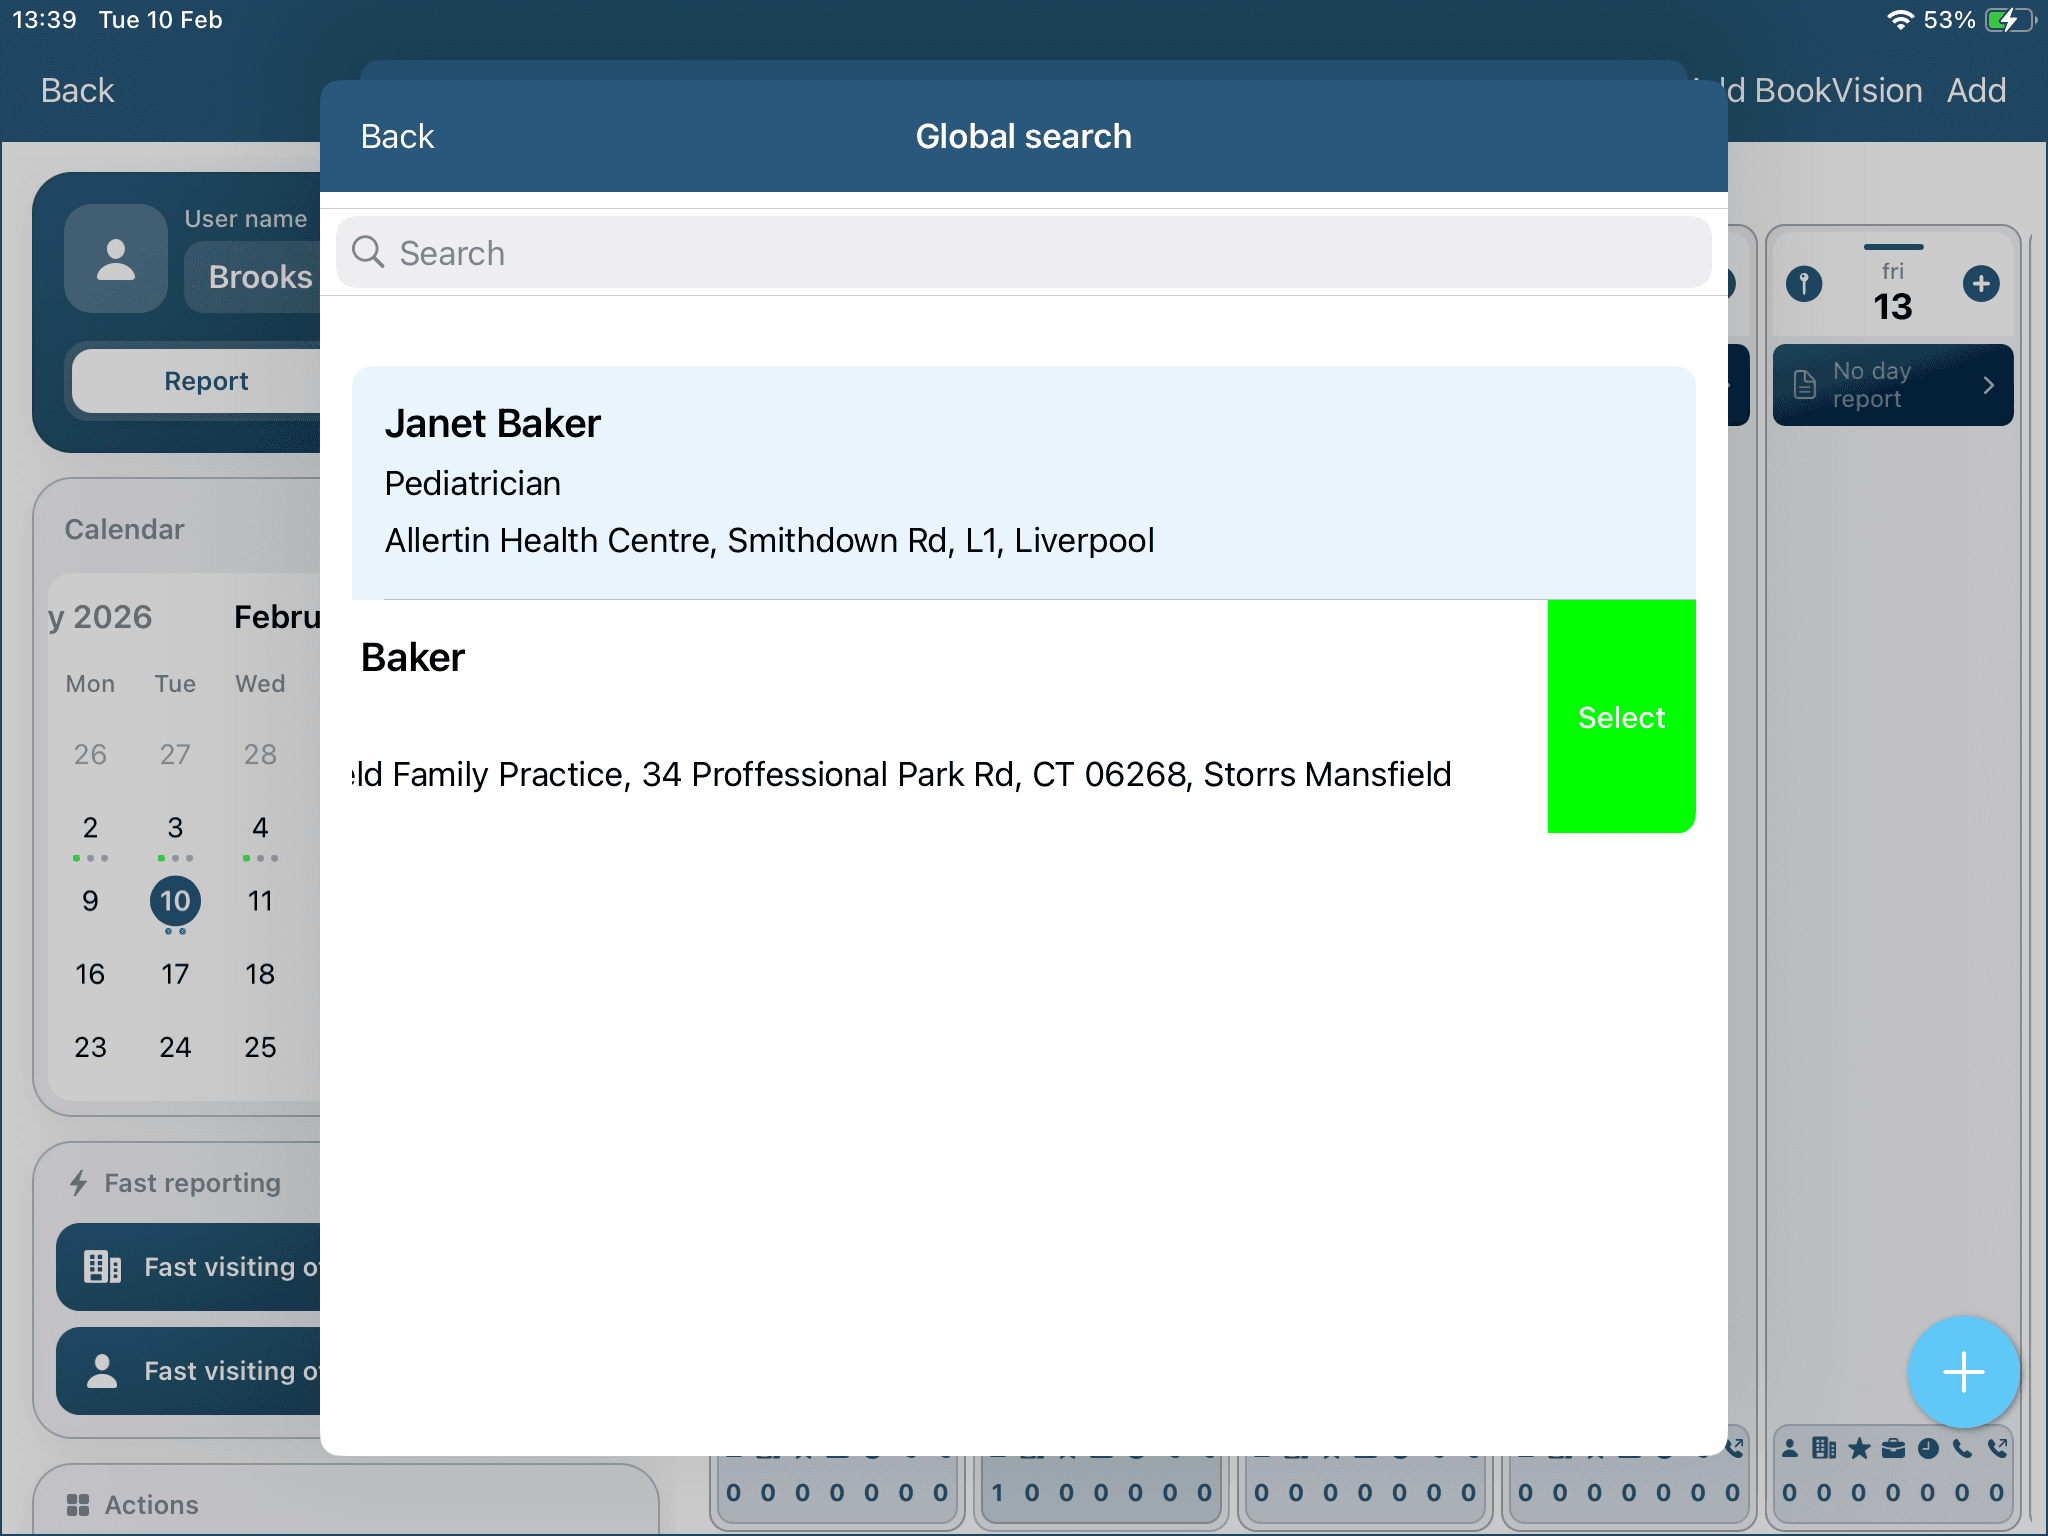
If you want to create a visit on a person which is not on your territory and database. If global search is active than is possible.
On person list window is a visible button “Global search”.
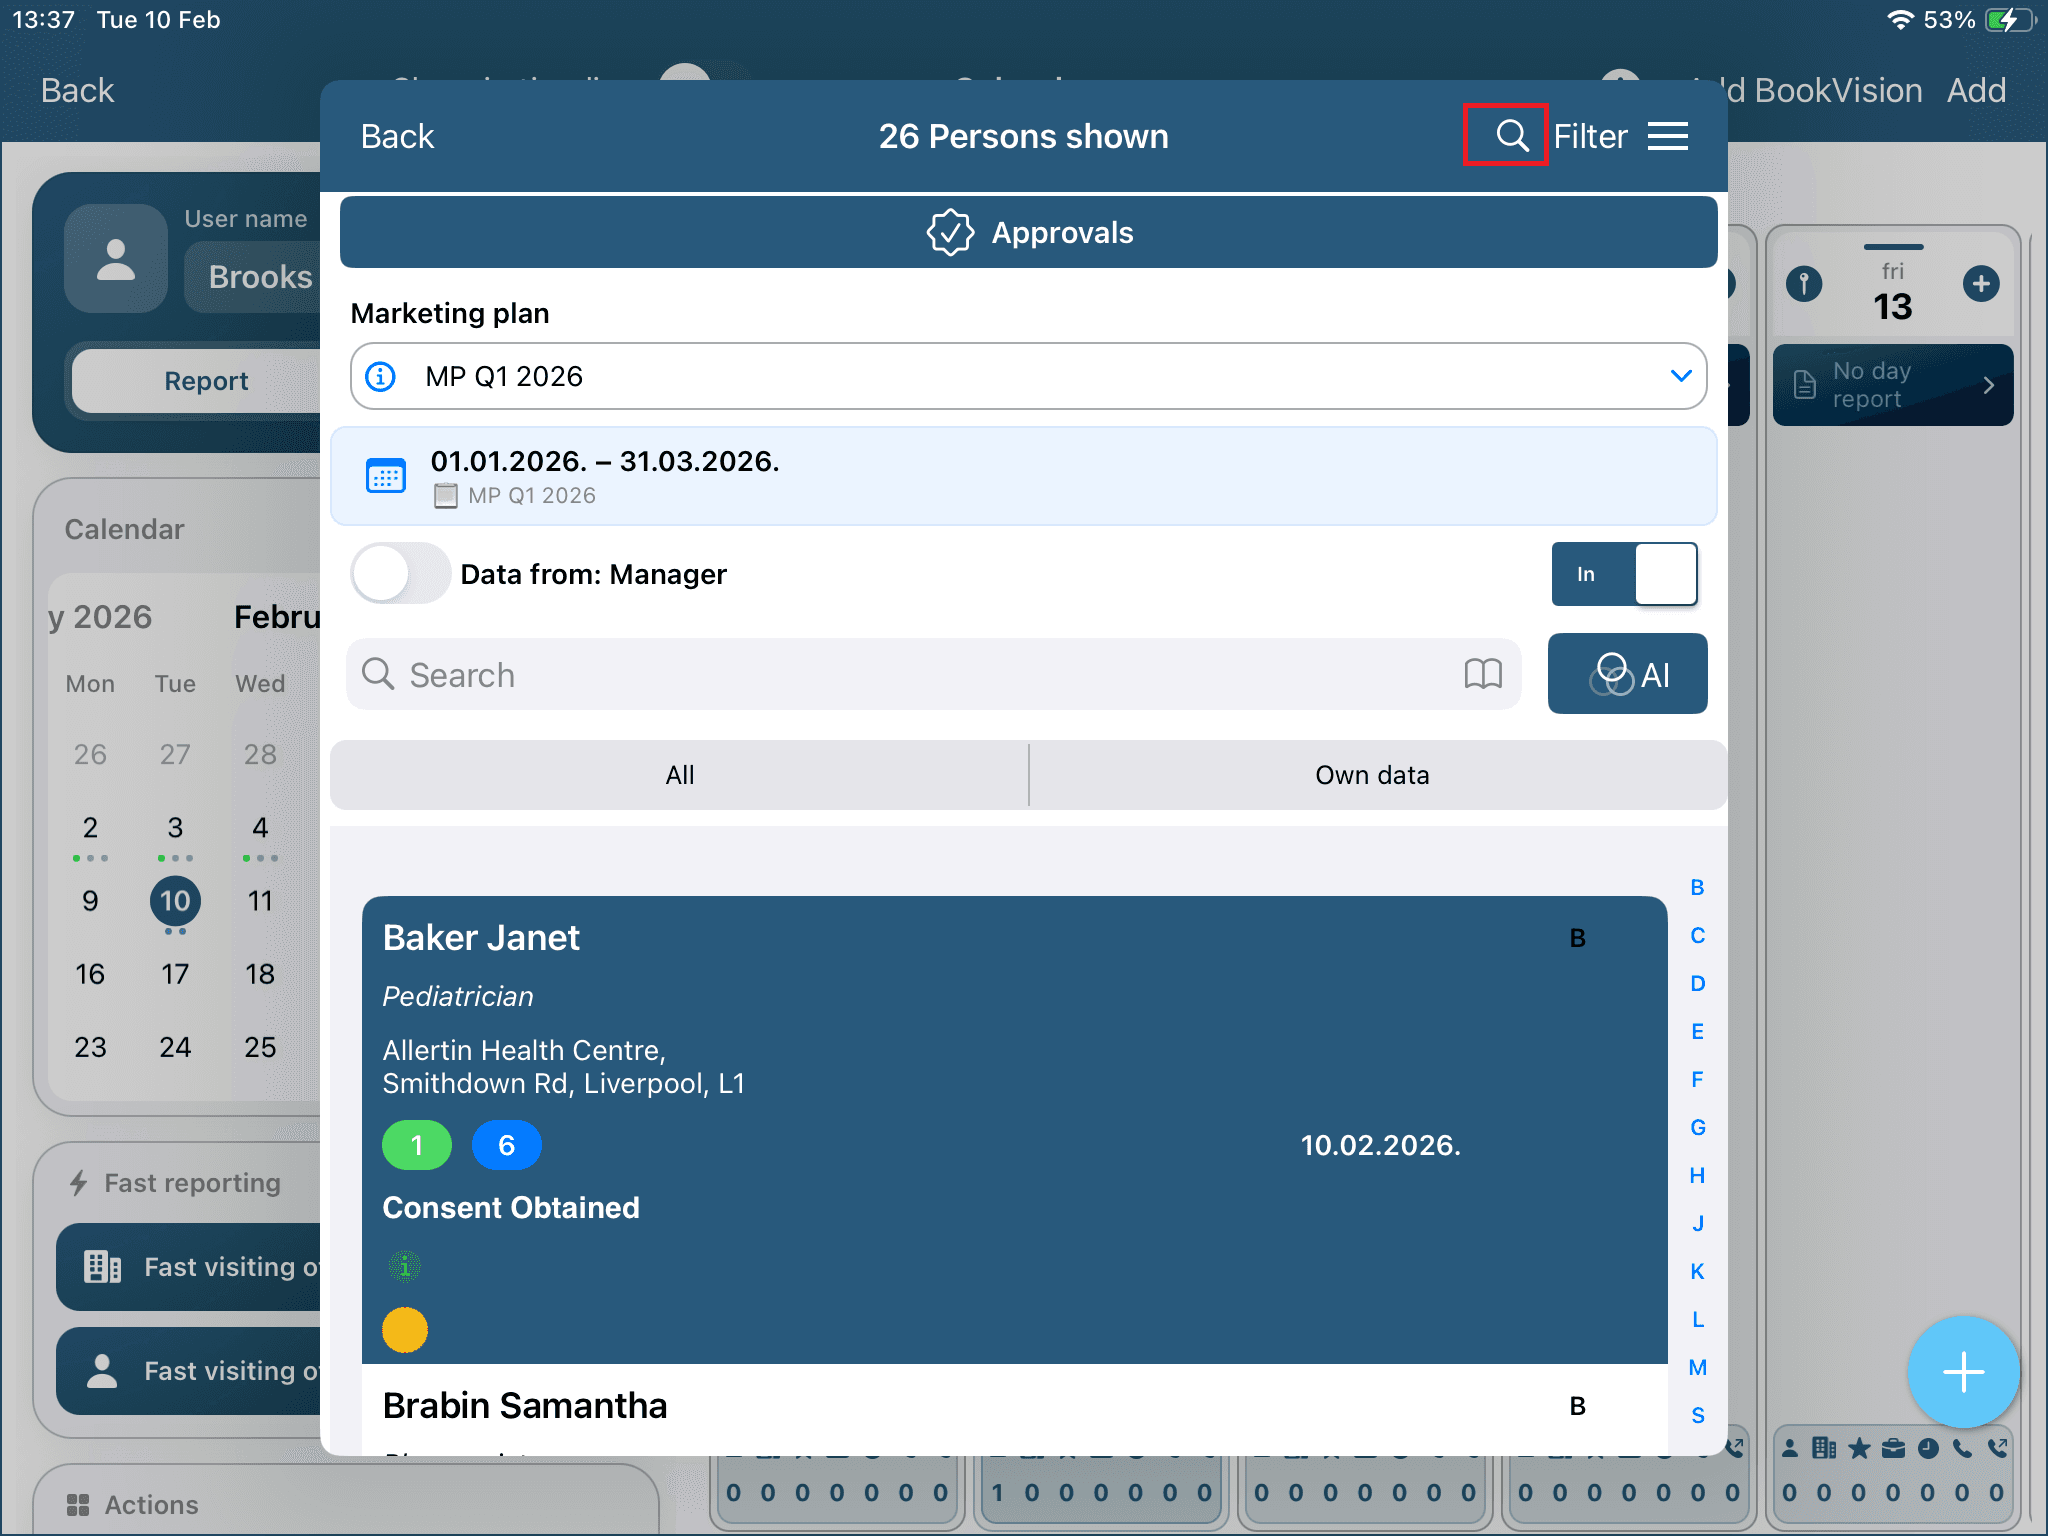
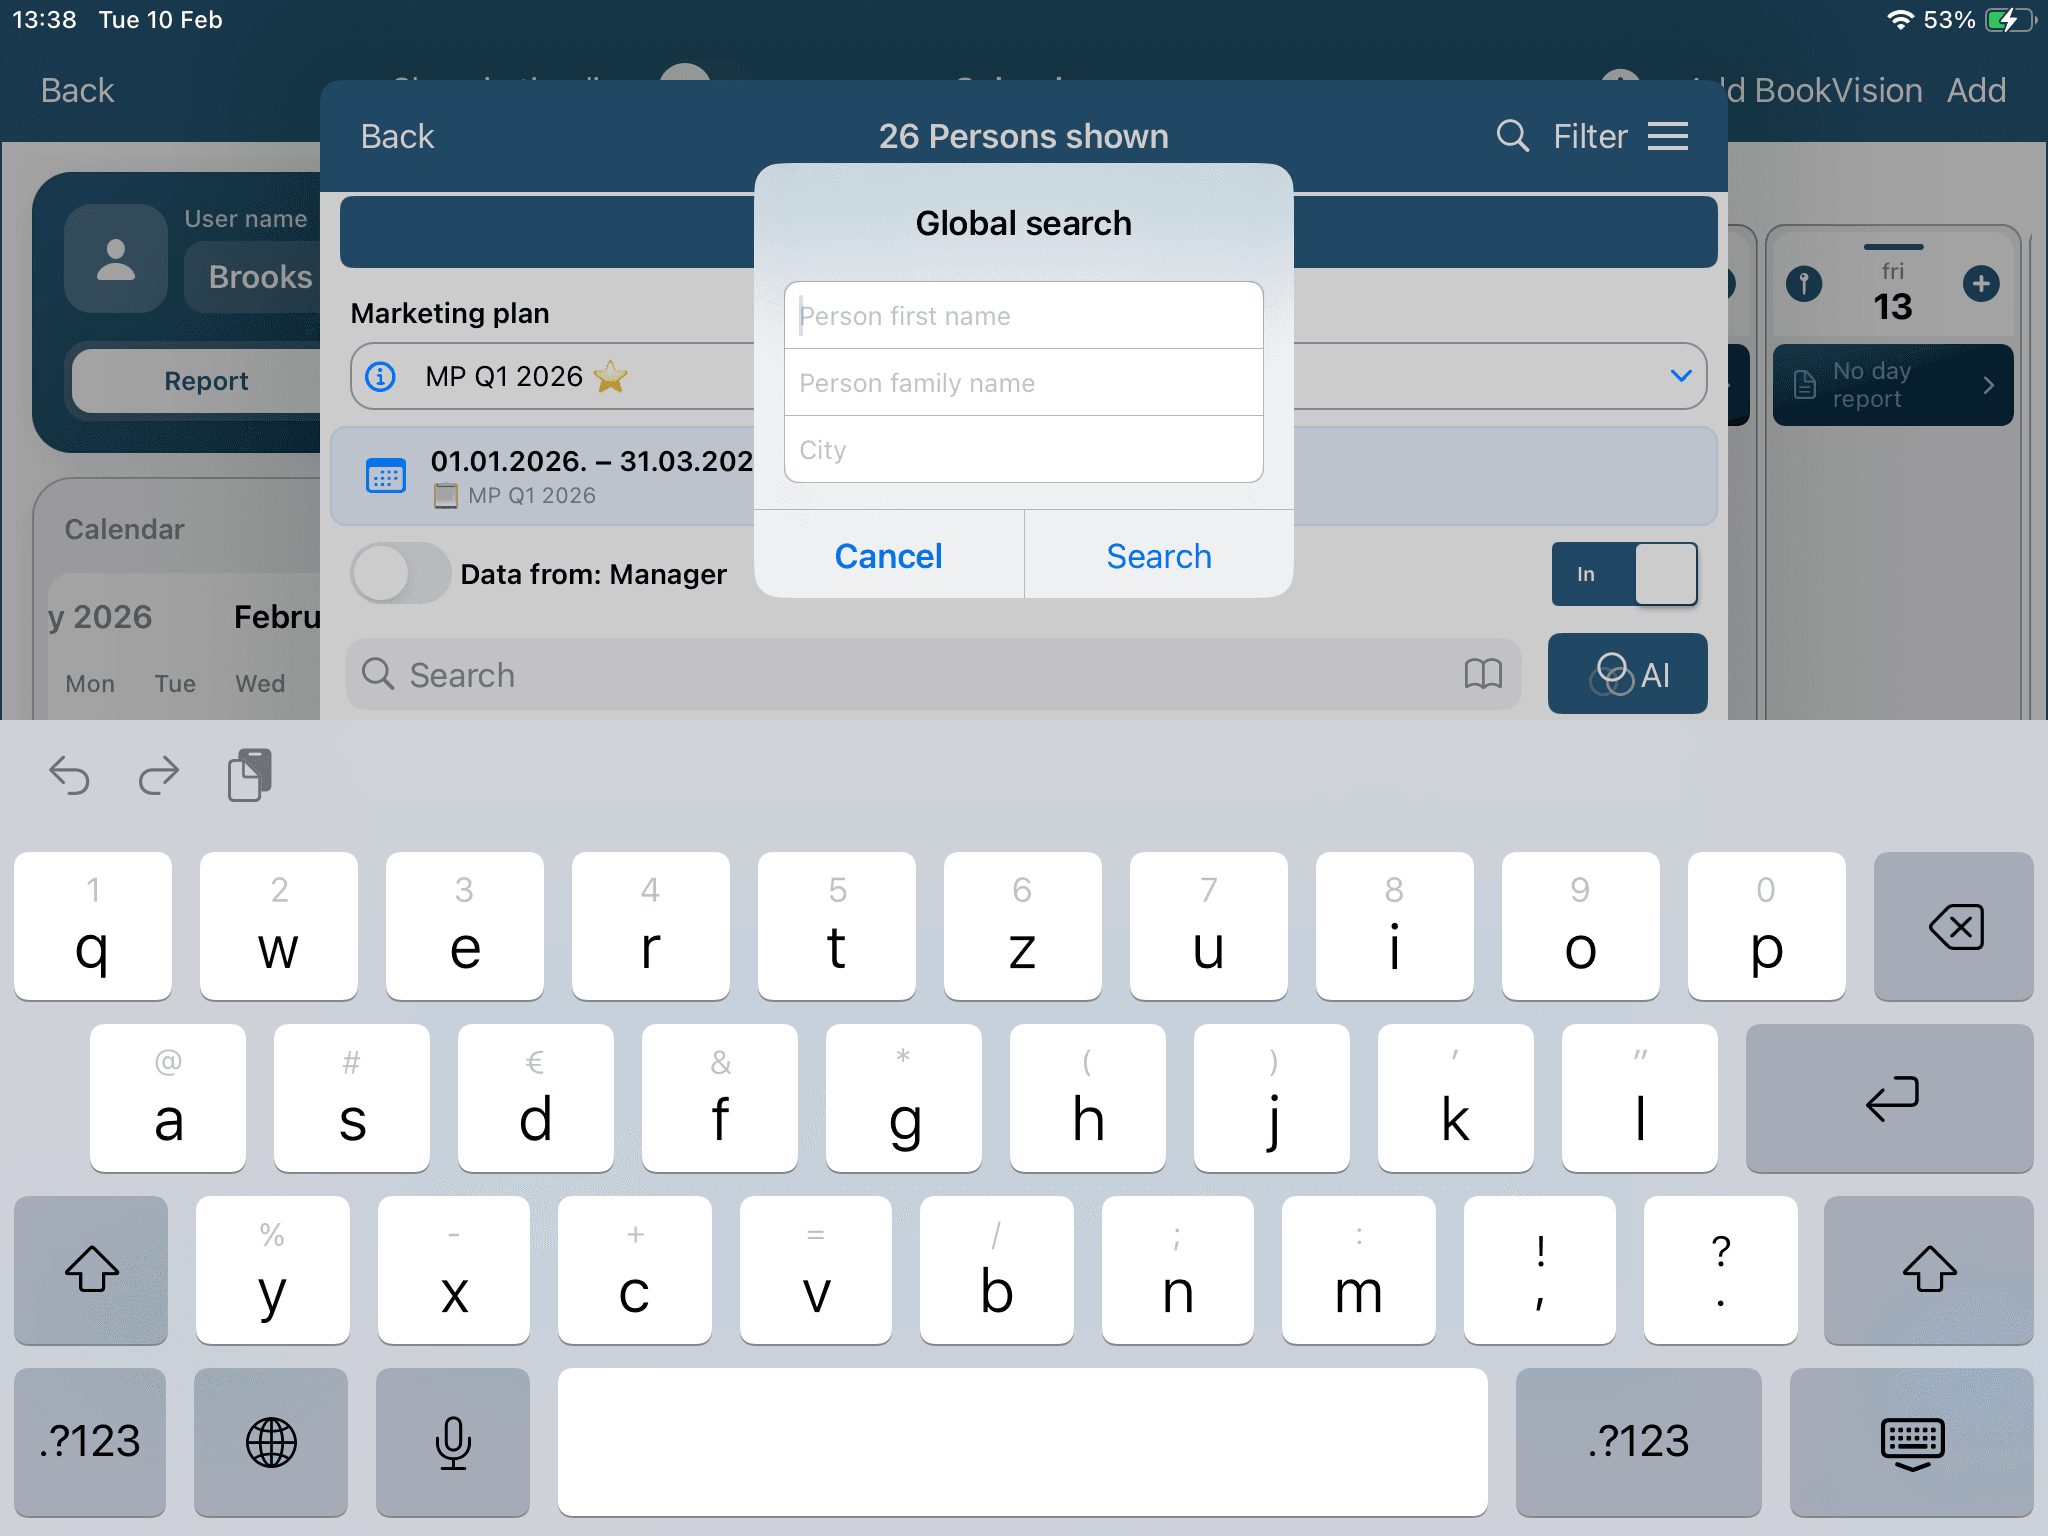
After you click on it, new window will open where you enter required data to make a global search (person first name, family name and city). Example is on the following figure.
If search was successful person/persons will be listed and you can select it.
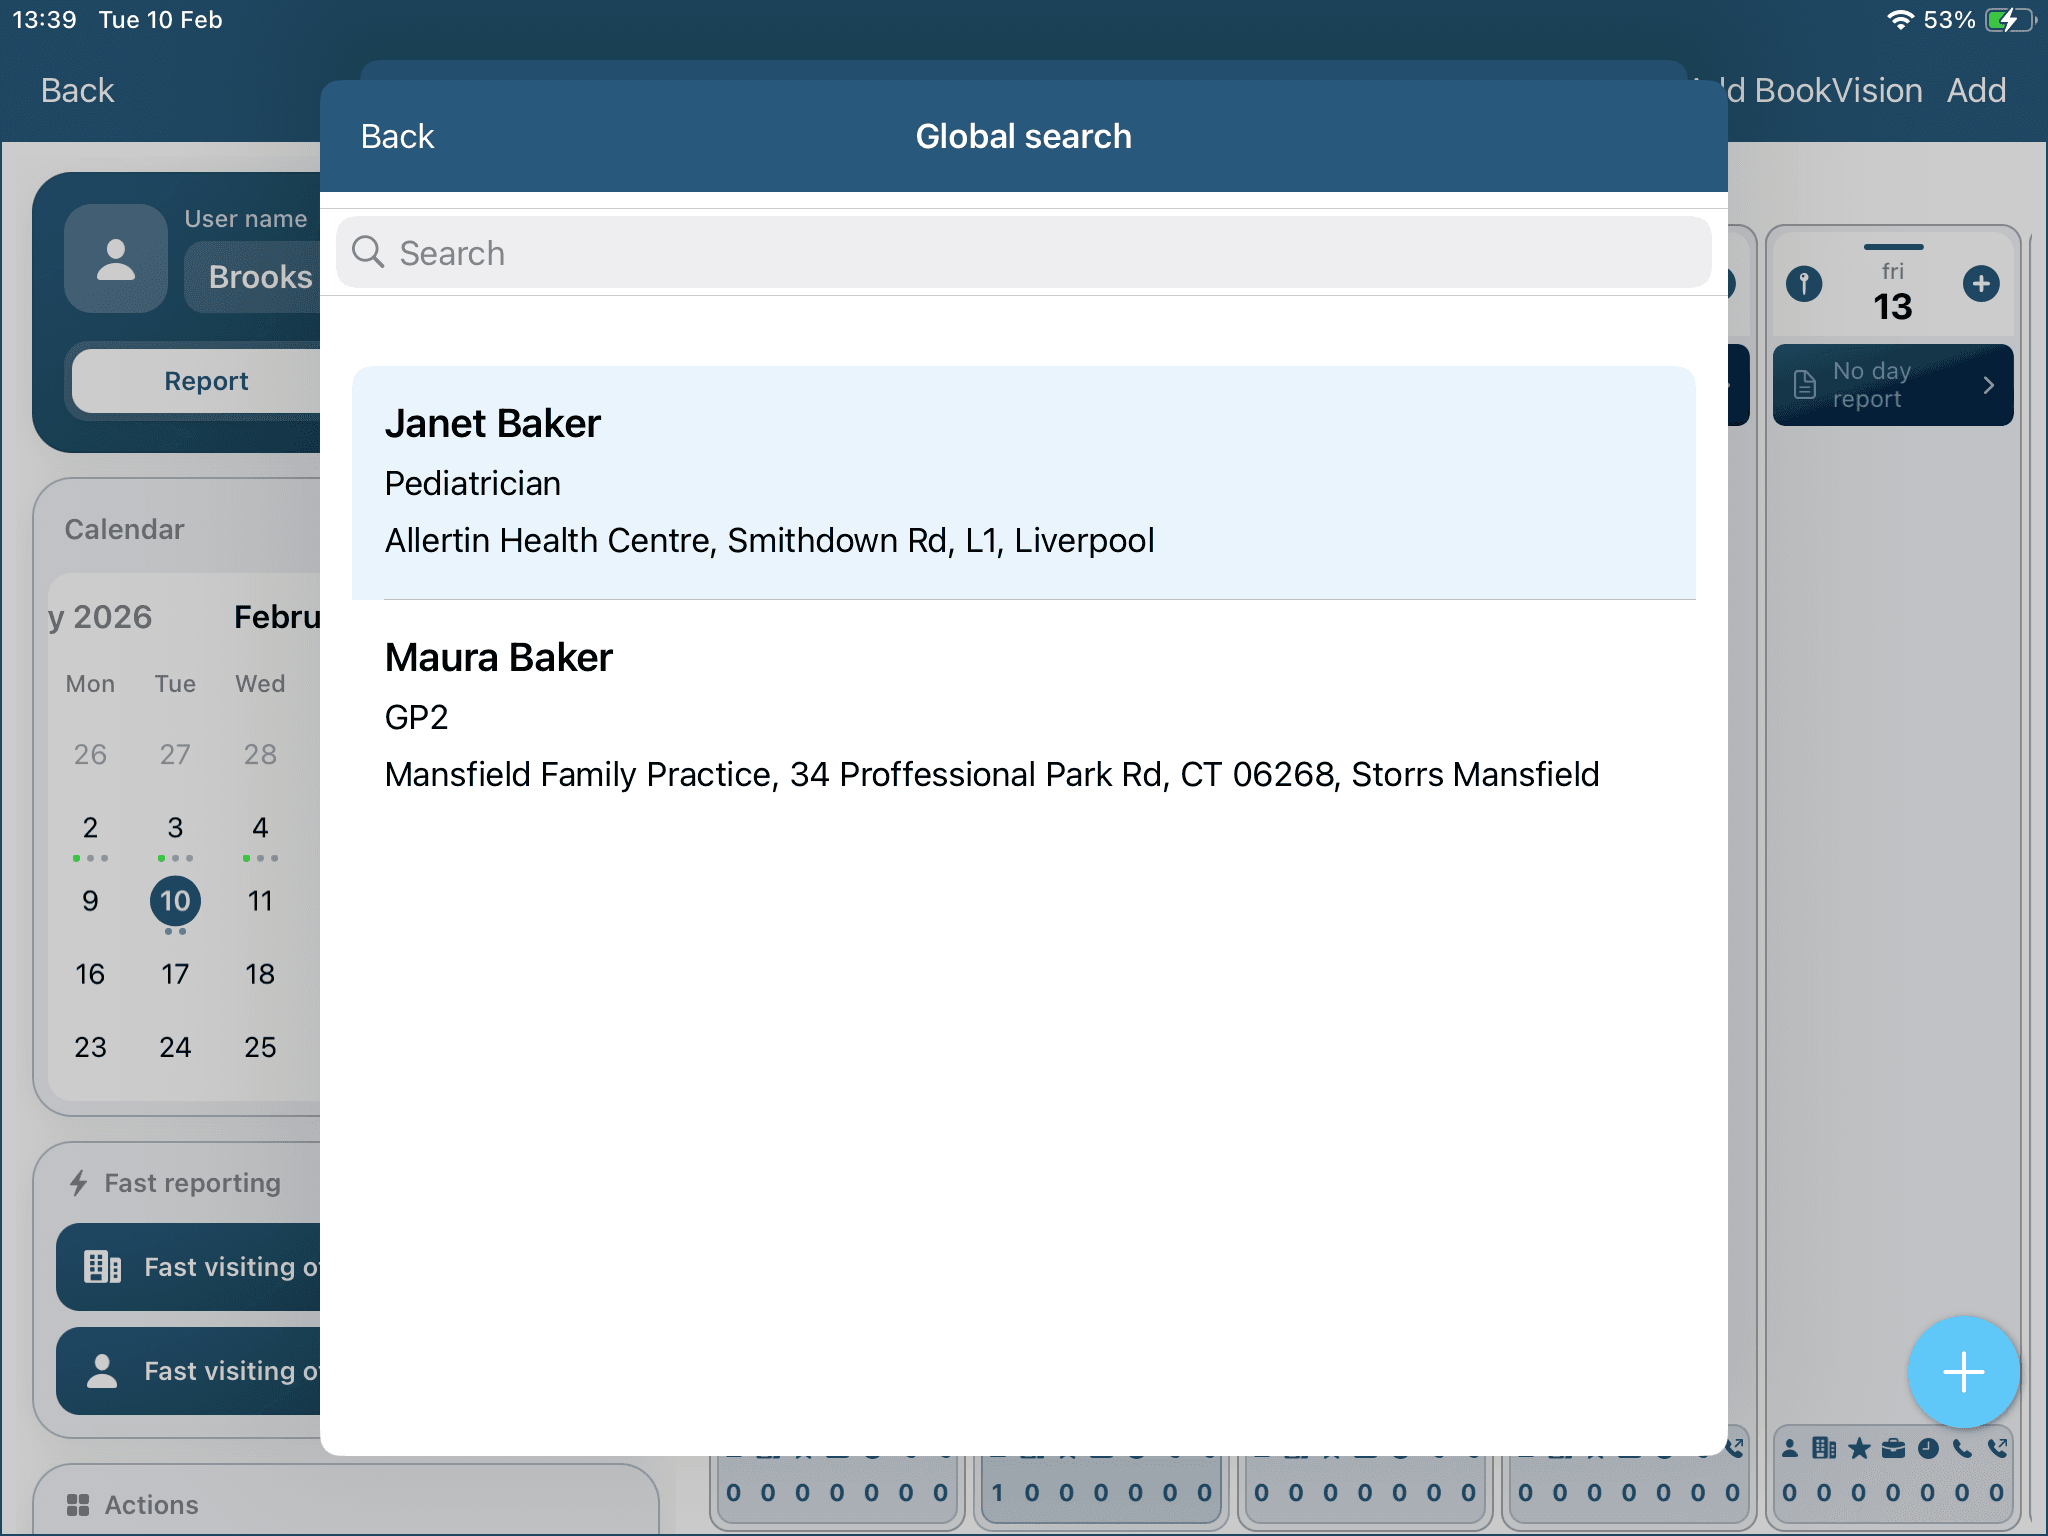
Select it by sliding from right to left and click on select button:
After person was selected it will be added to your territory and after that automatically synced to your device.
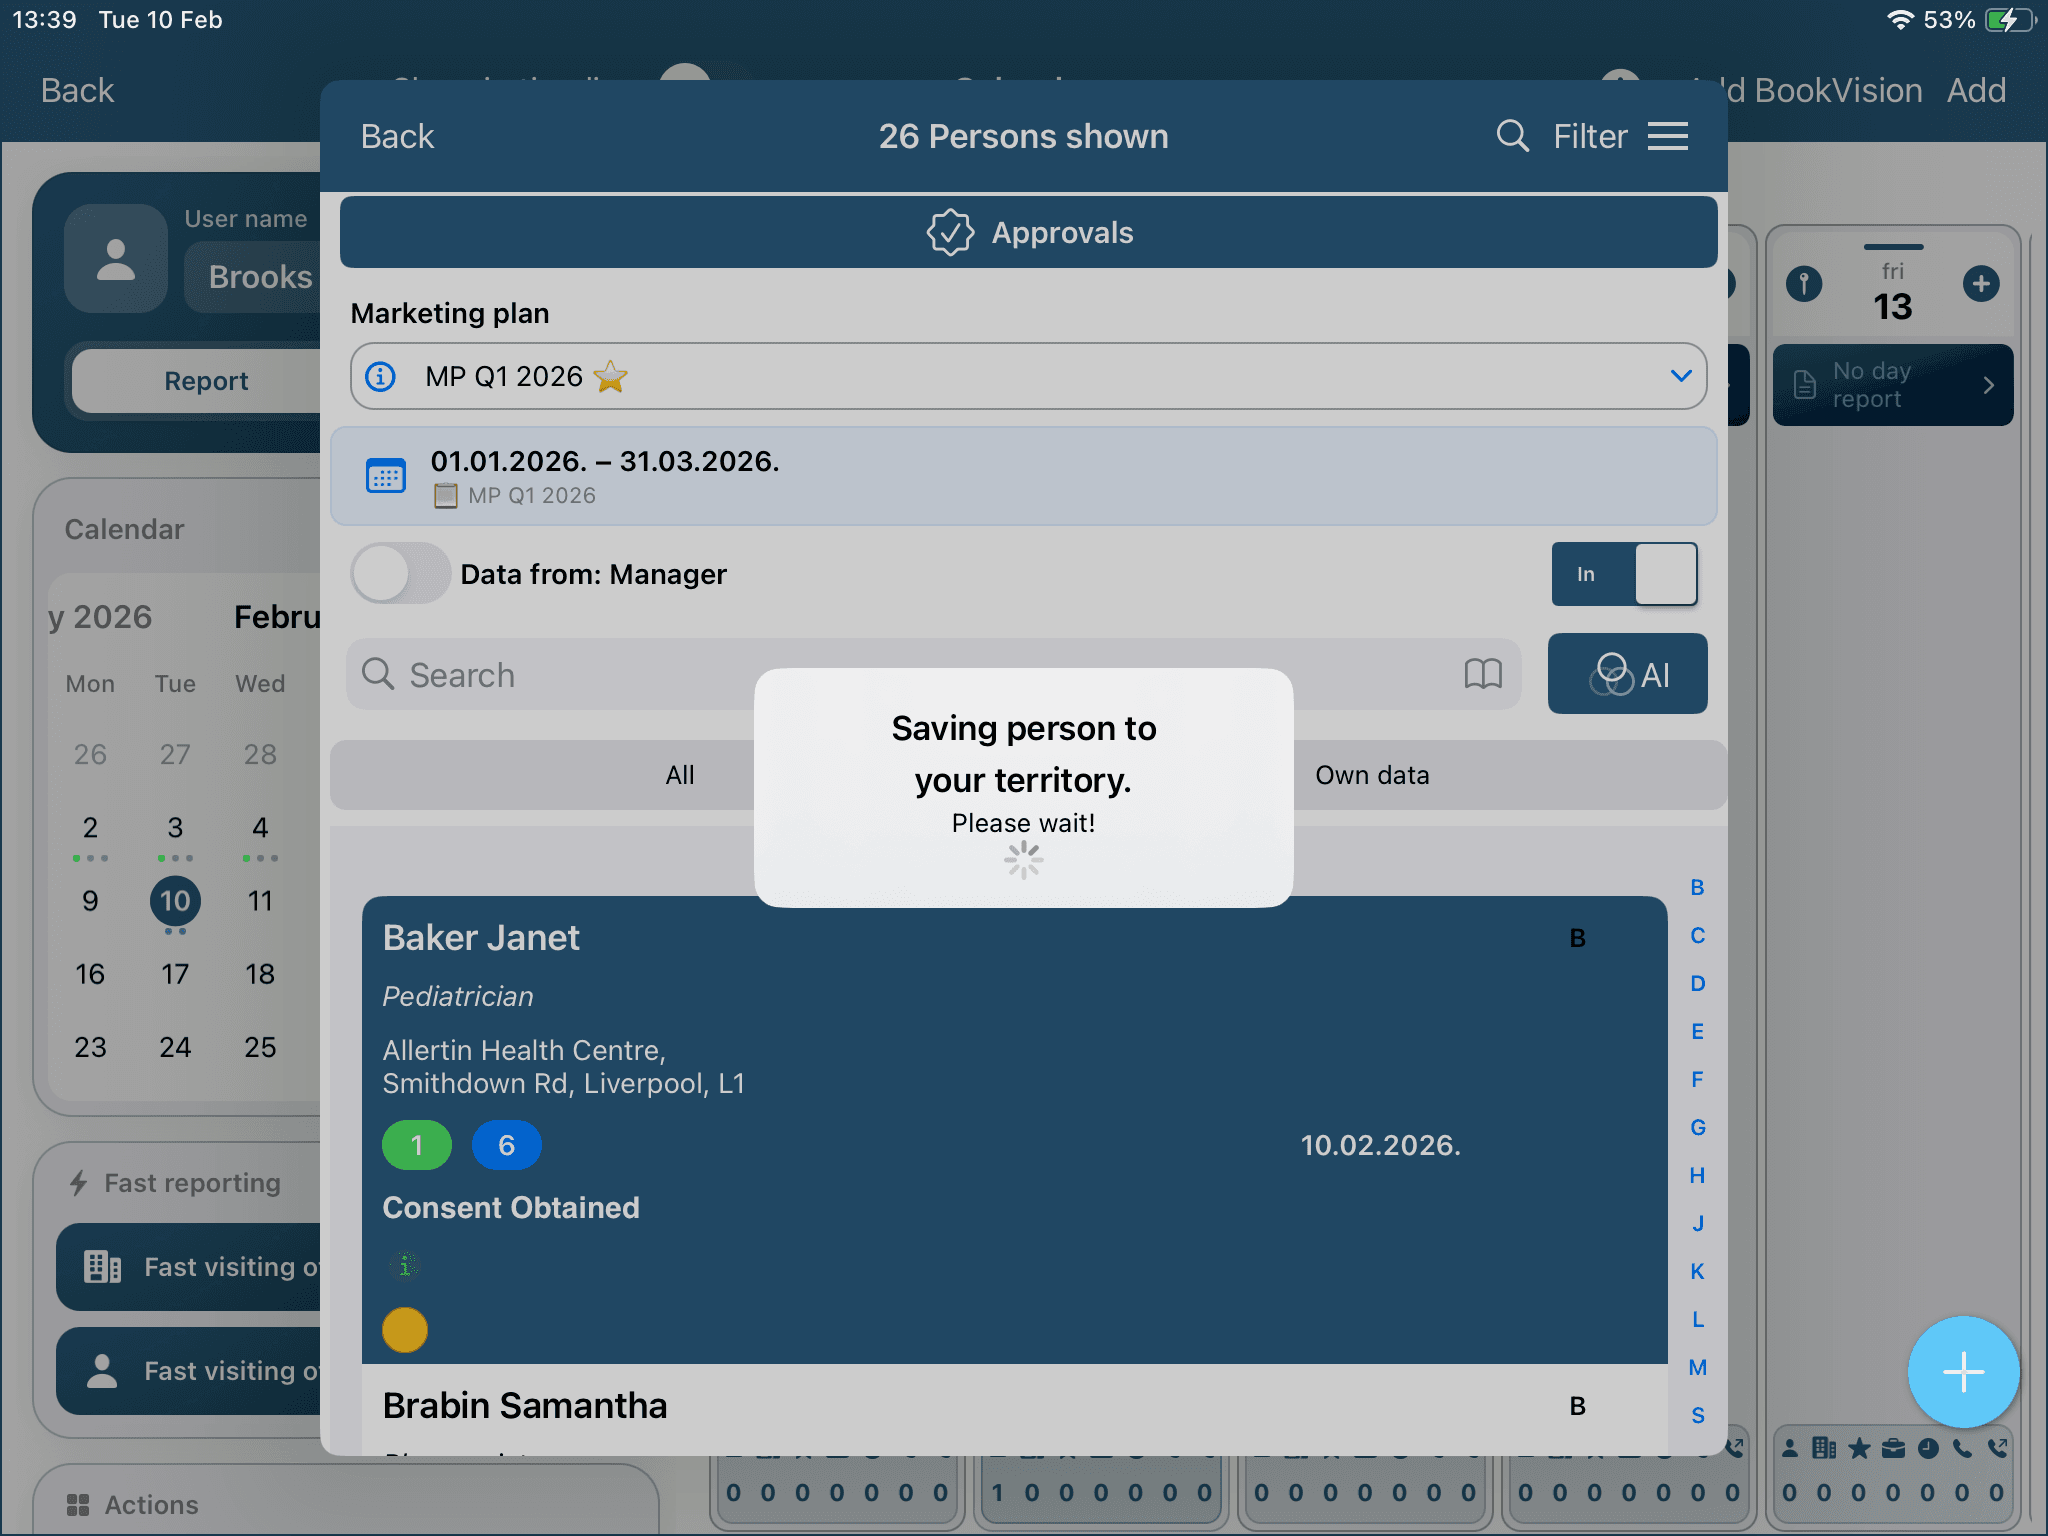
After everything is finished you will get a notification window:
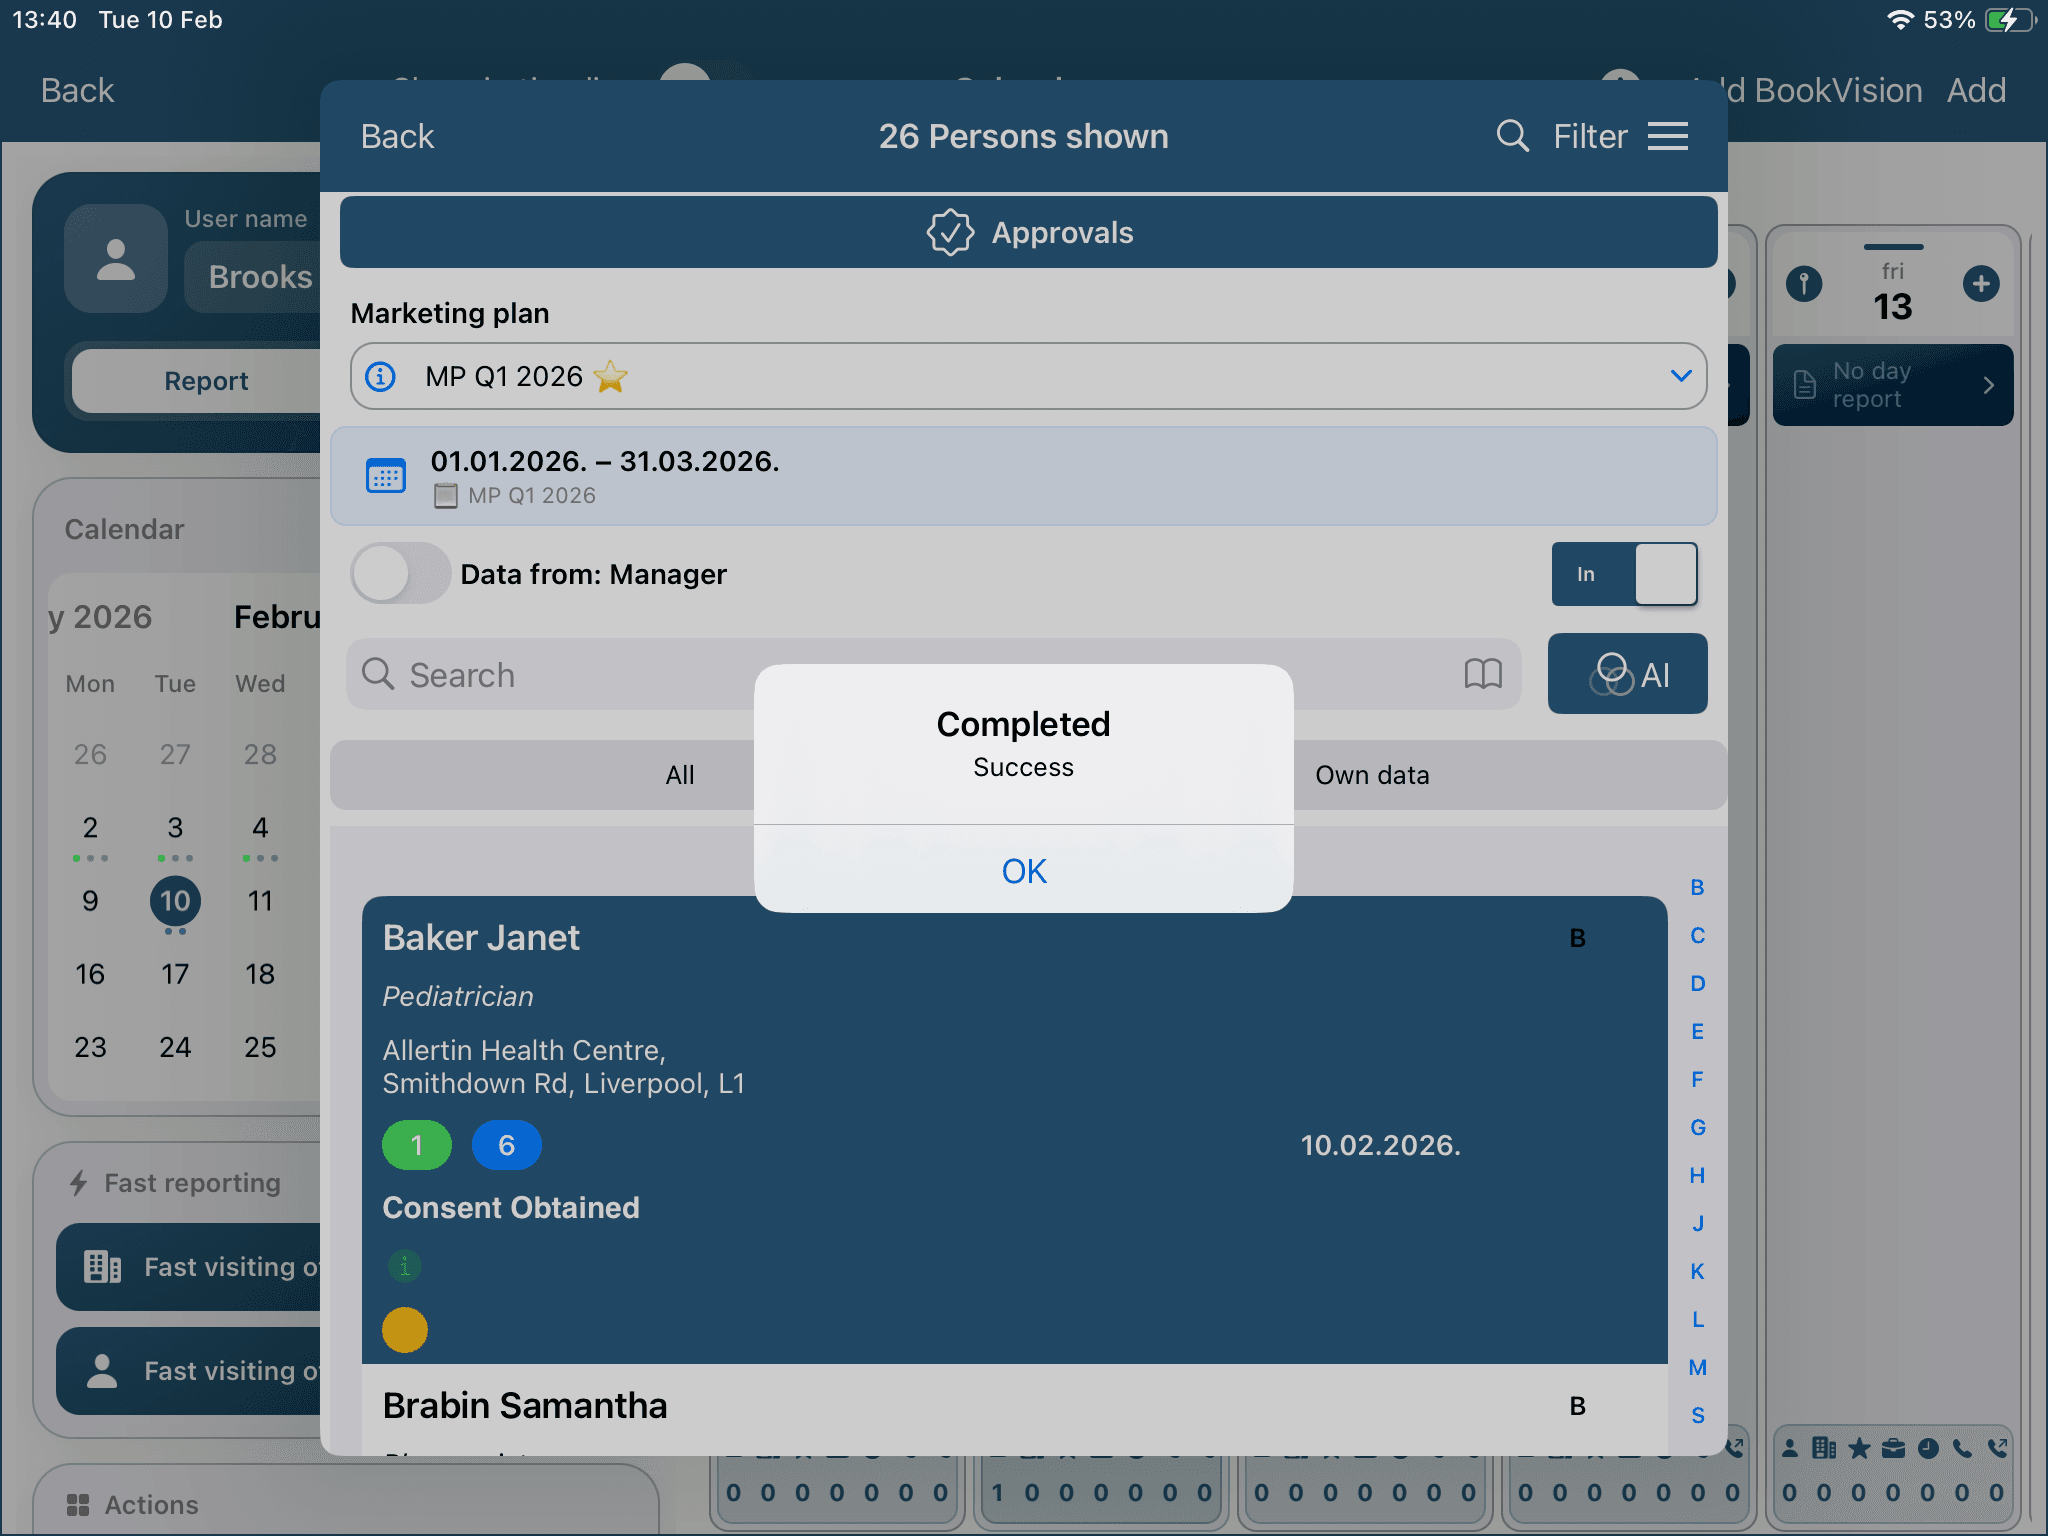
After you click “OK”, person list will show you person you added, so you can select it and create a visit.
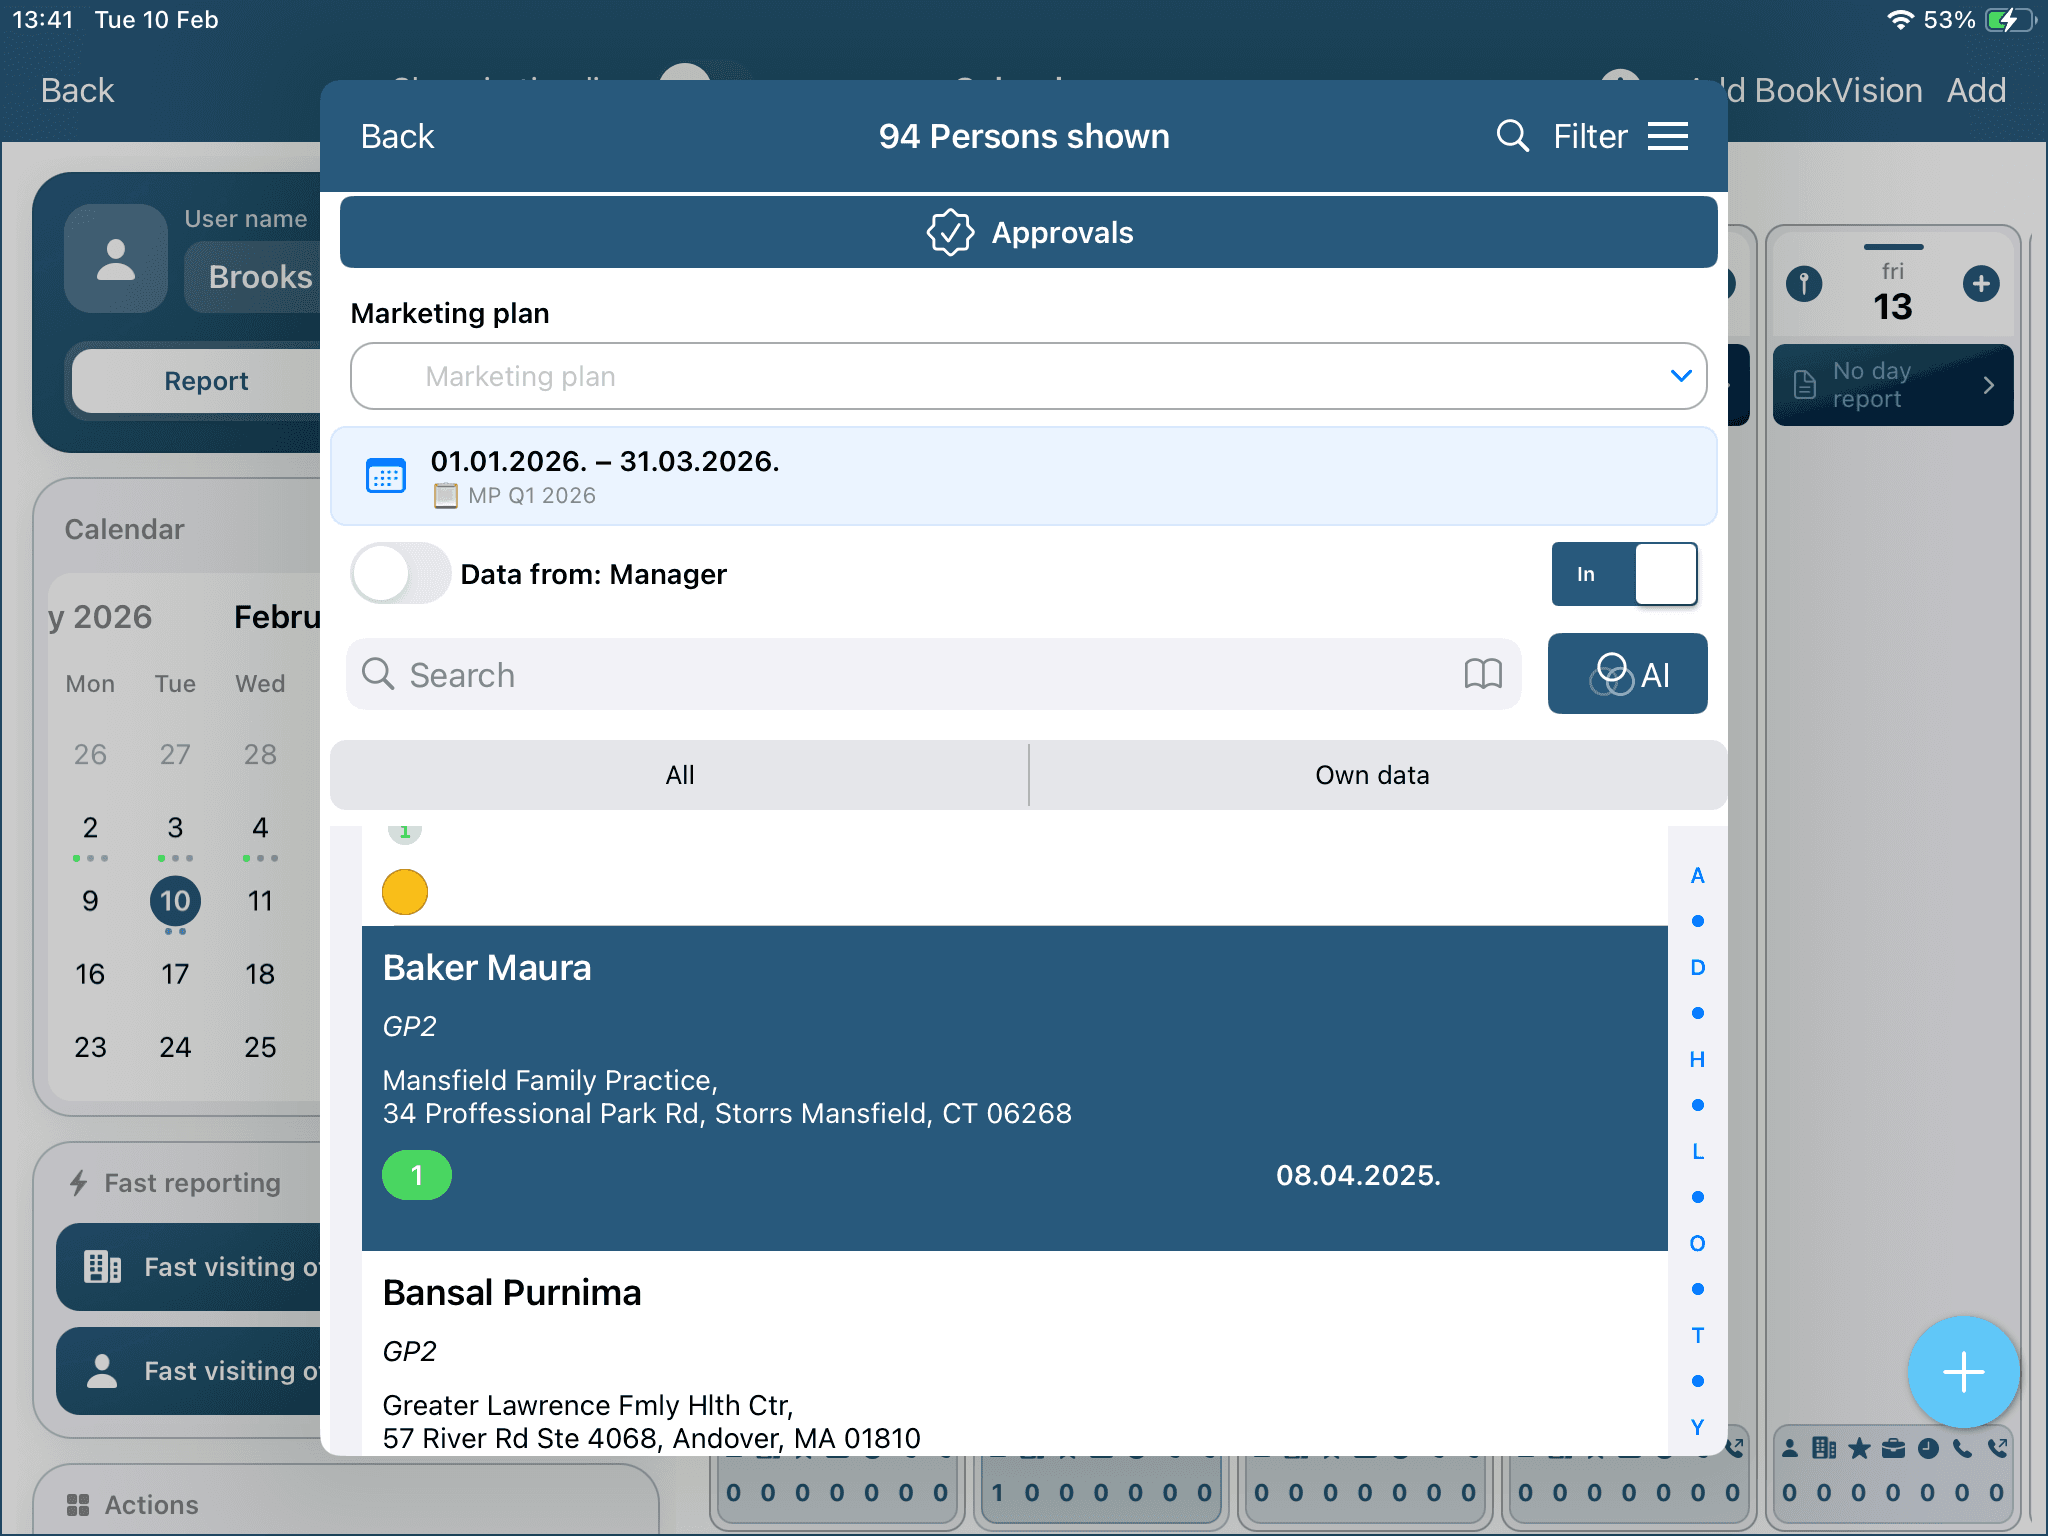
And on the following figure is the visit we created on added person through the global search:

Simple product selection
When adding a visit to a person or an institution who is included in Marketing plan, and option Simple product selection is turned on in MP, product selection view will be as shown on the picture below.
User will get a list of all products defined by Marketing plan and by clicking on the name of the products , products will be selected.
To deselect product, simply click on the name of the product.
Regular product selection - To add new Product, click on the field shown on the picture below.
To add Gifts and materials, click on button, than you can choose something from the list.
After you click on this button, the following window will open where you select reaction.
Blinking visits
This is a feature that shows the visits that are created through the CLM and they are blinking as a warning indicating the visit is not fully reported. That means the mandatory products, samples etc. On the left the day is marked square in which the number of the day is blinking.
When you try to synchronize, the system displays an error message indicating that the visit cannot be synchronized until the visit has been fully reported.
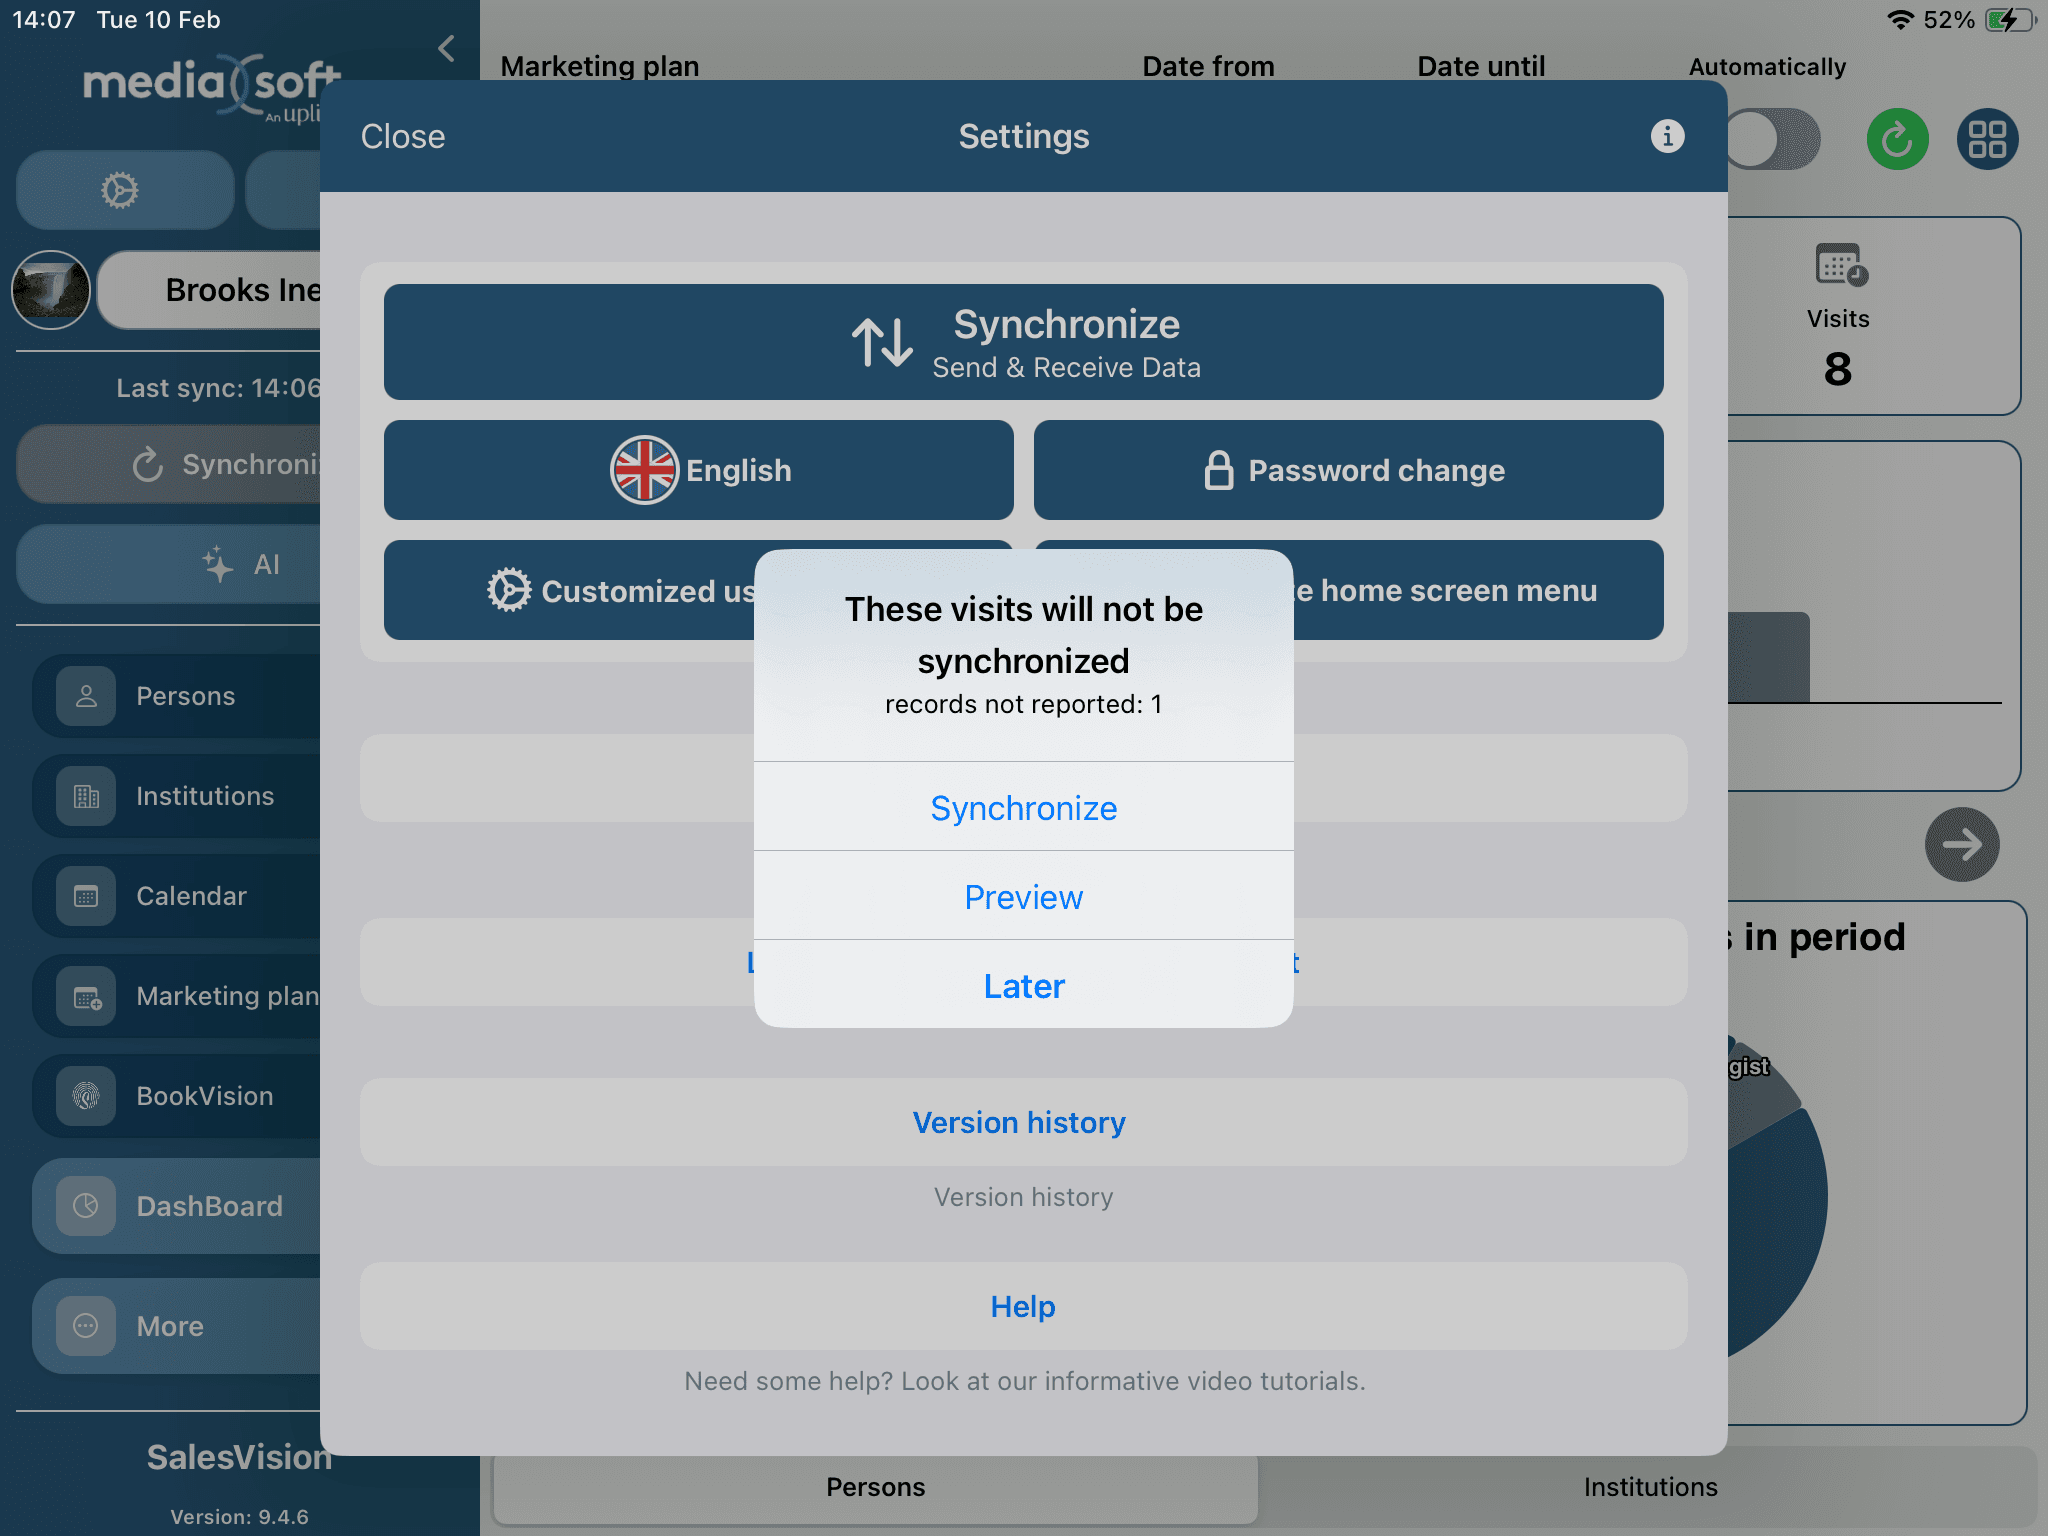
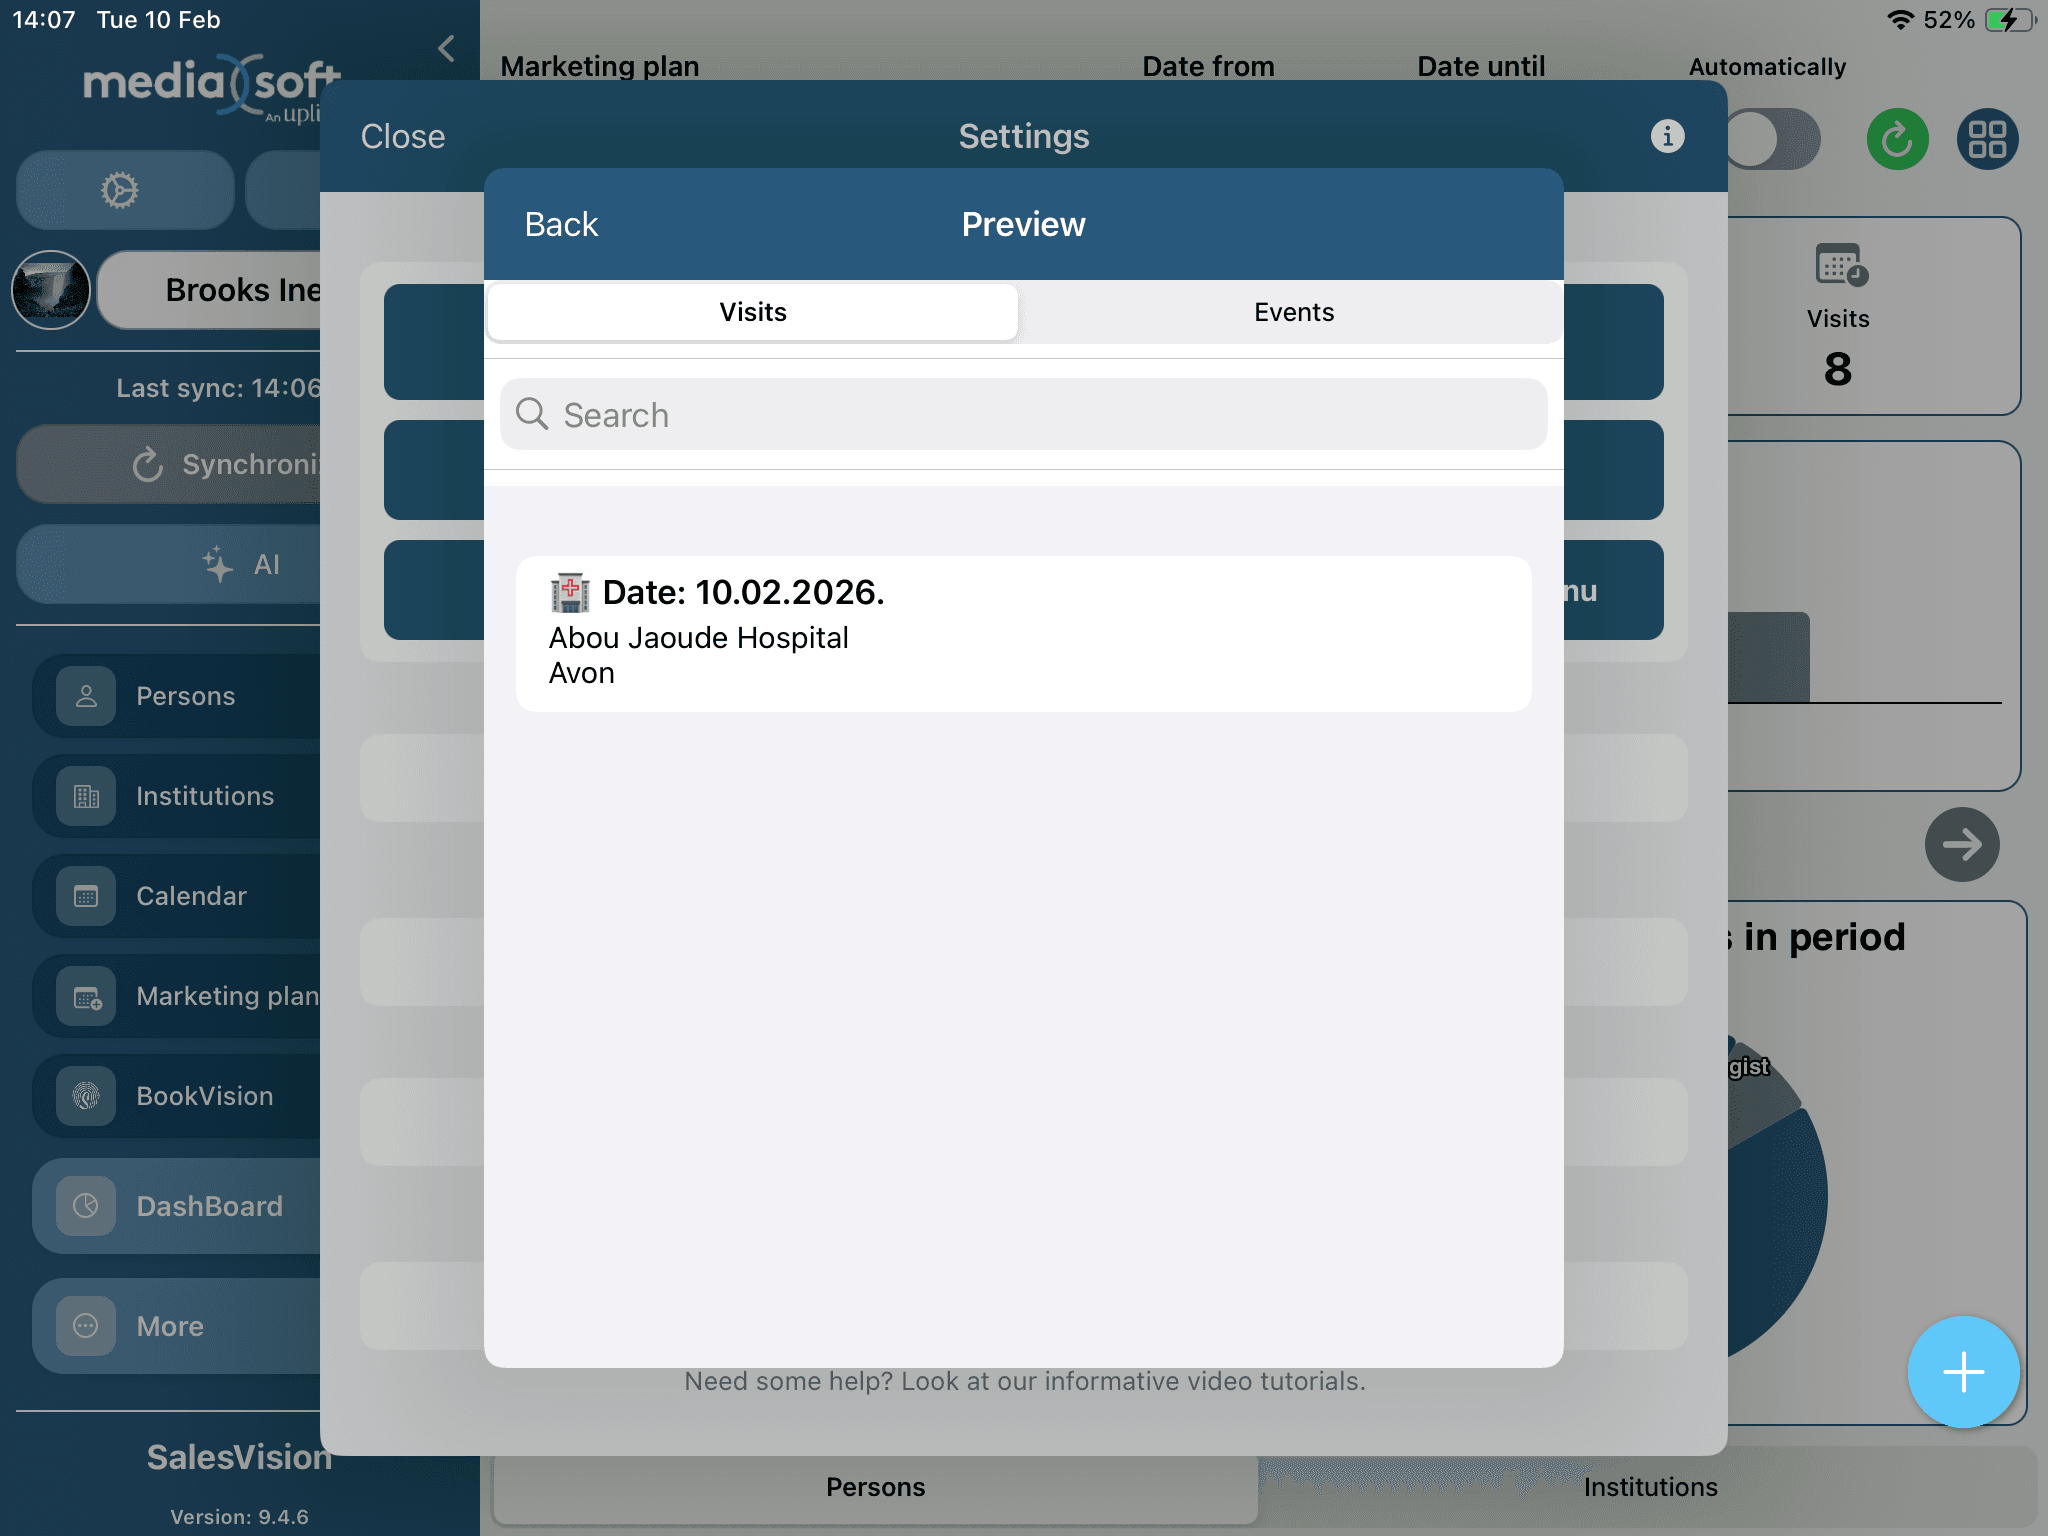
We can also preview which visit needs to be fully reported before synchronizing.
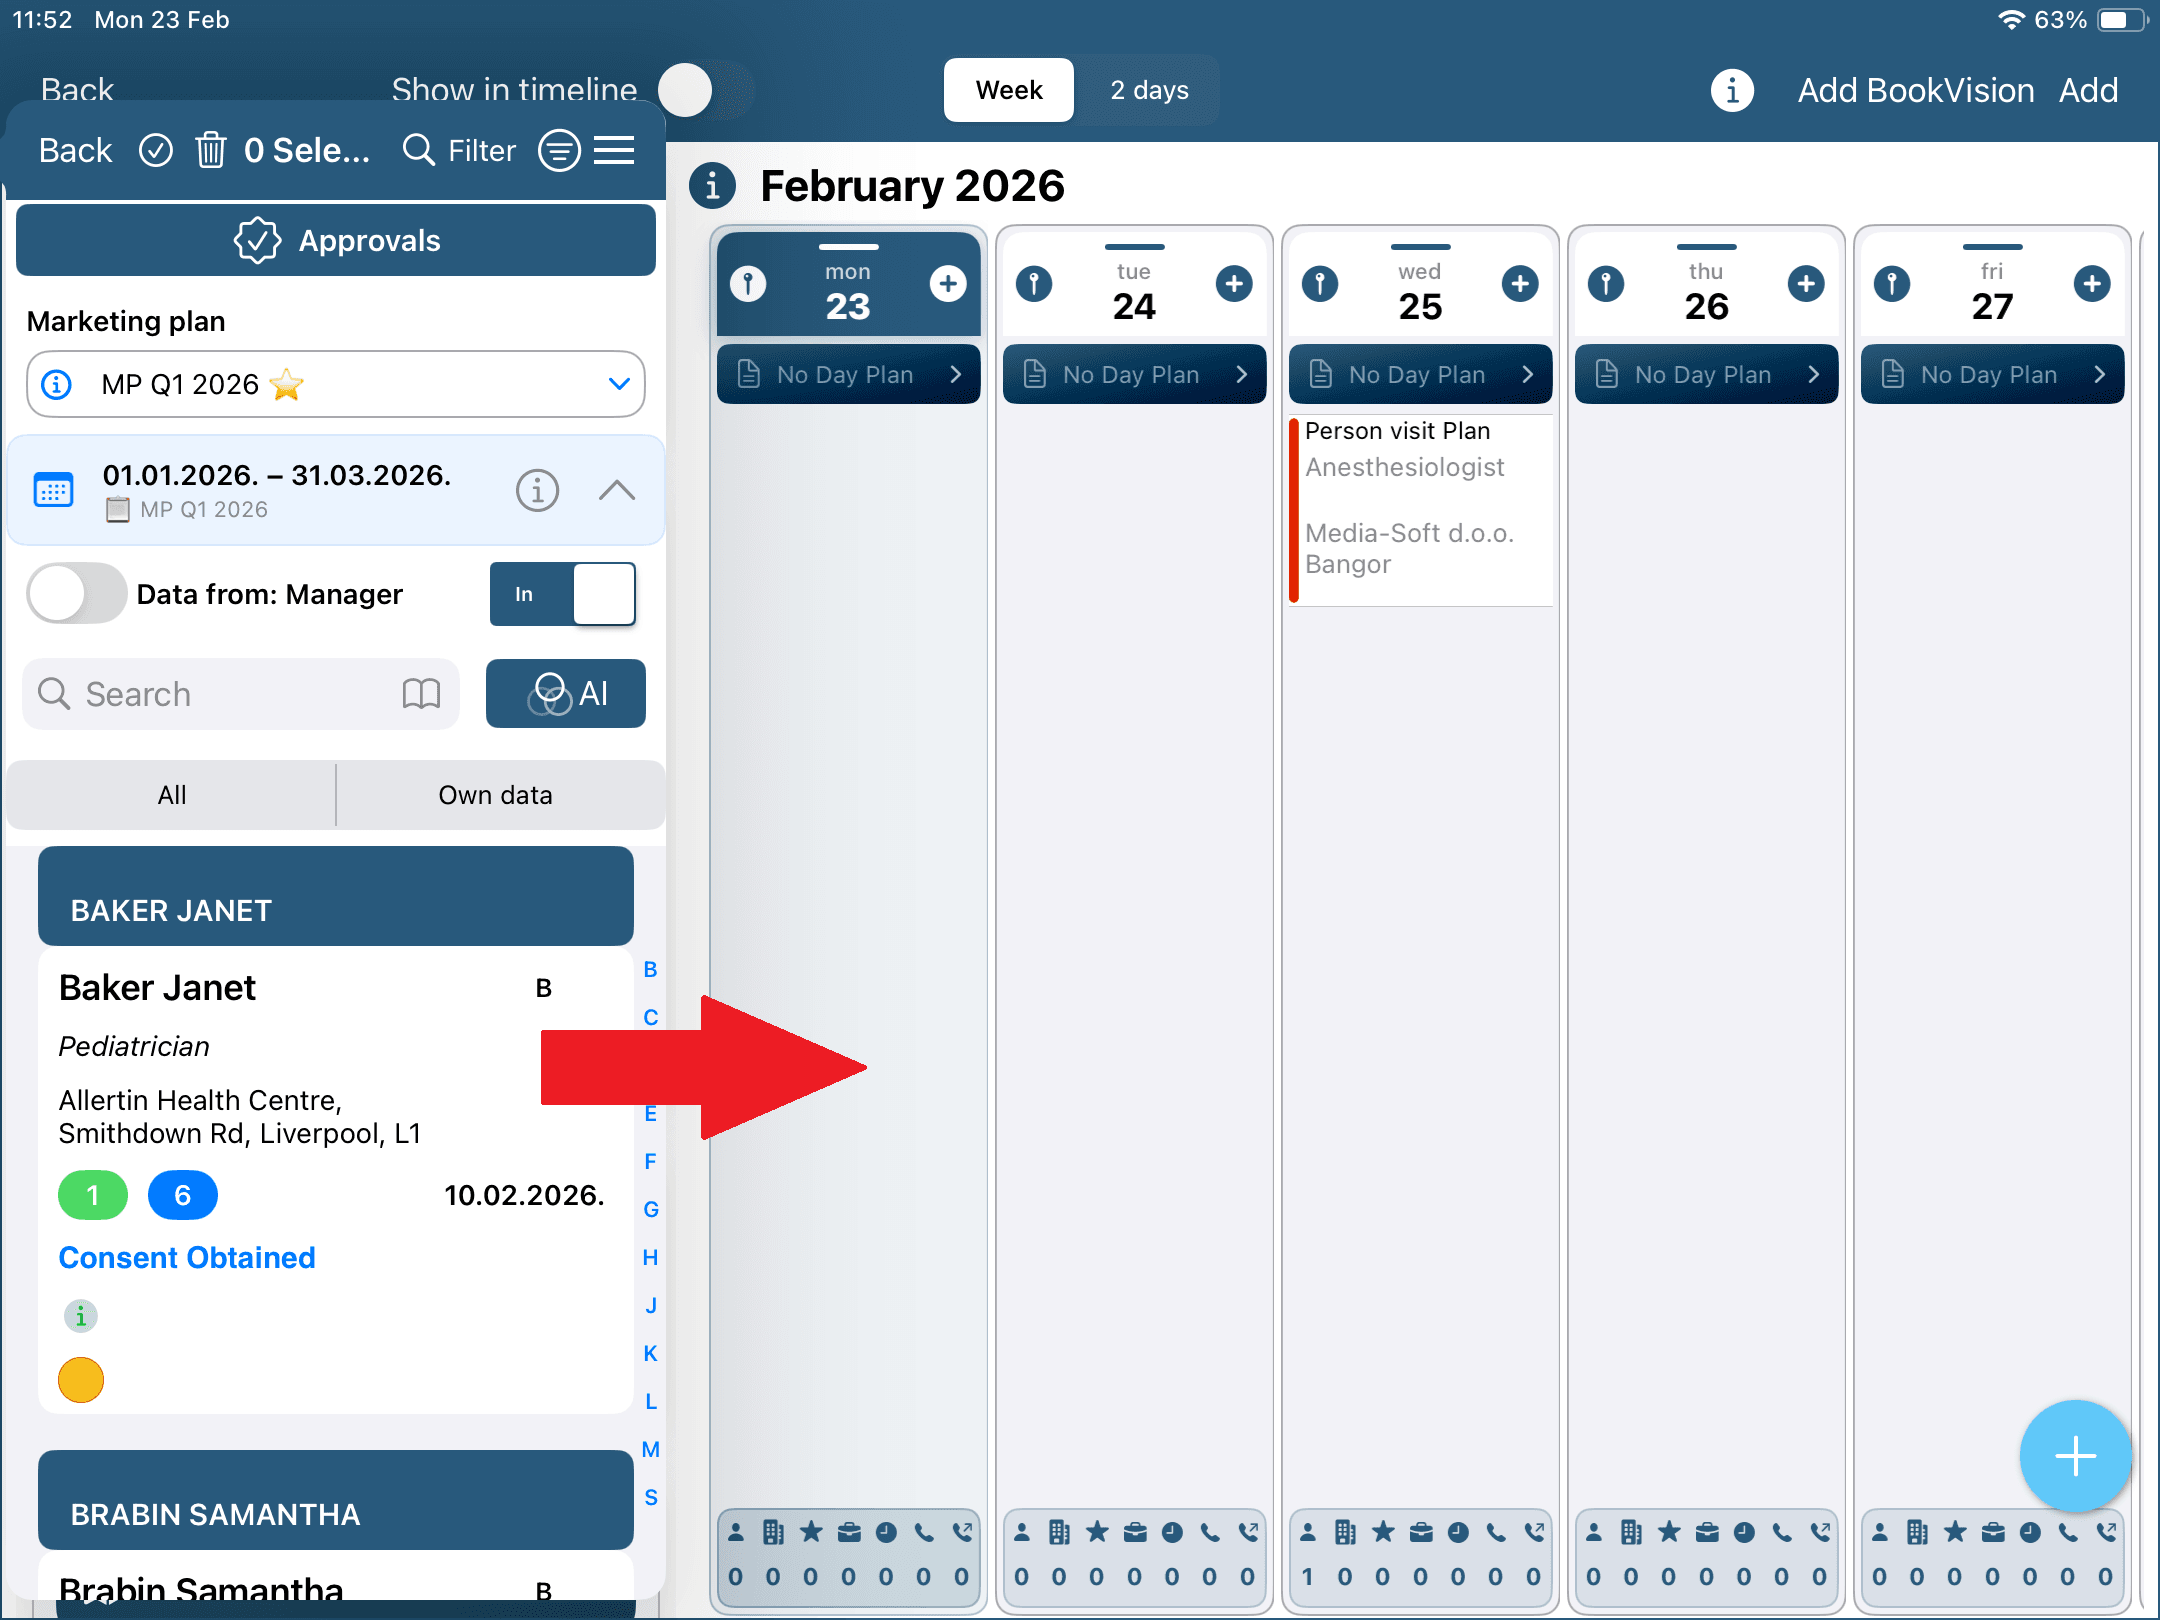
Editing and deleting plans and visits
If you want to edit plan or visit you need to press on existing record, change desired data and press the Save button. Window for editing is the same as for adding.
To delete plans or reports click on existing data and in opened window press on „≡“ button and then Delete. Be careful with deleting because you can not return back.
Fast planning and reporting
Along with standard procedure for adding new plans and visits to persons and institutions while using calendar module, you can create visits and plans using Fast planning and Fast reporting option. For adding plans you have to be on plan tab on calendar and for visits you have to use visits tab. The same as for standard plans and visits. But then click on tab representing institutions or person. List of institutions in your database will appear.,

Select an institution you wish to add plan/visit for, hold it for two-three seconds and simply drag it to day of the week you want (see page 171, section Drag and Drop for more information).
Form for adding new plan/visit will appear with selected institution and date. After that, you can carry on with adding rest of the required info. Same process is when adding person's plan/visit, but use blue button for the list of persons to appear.
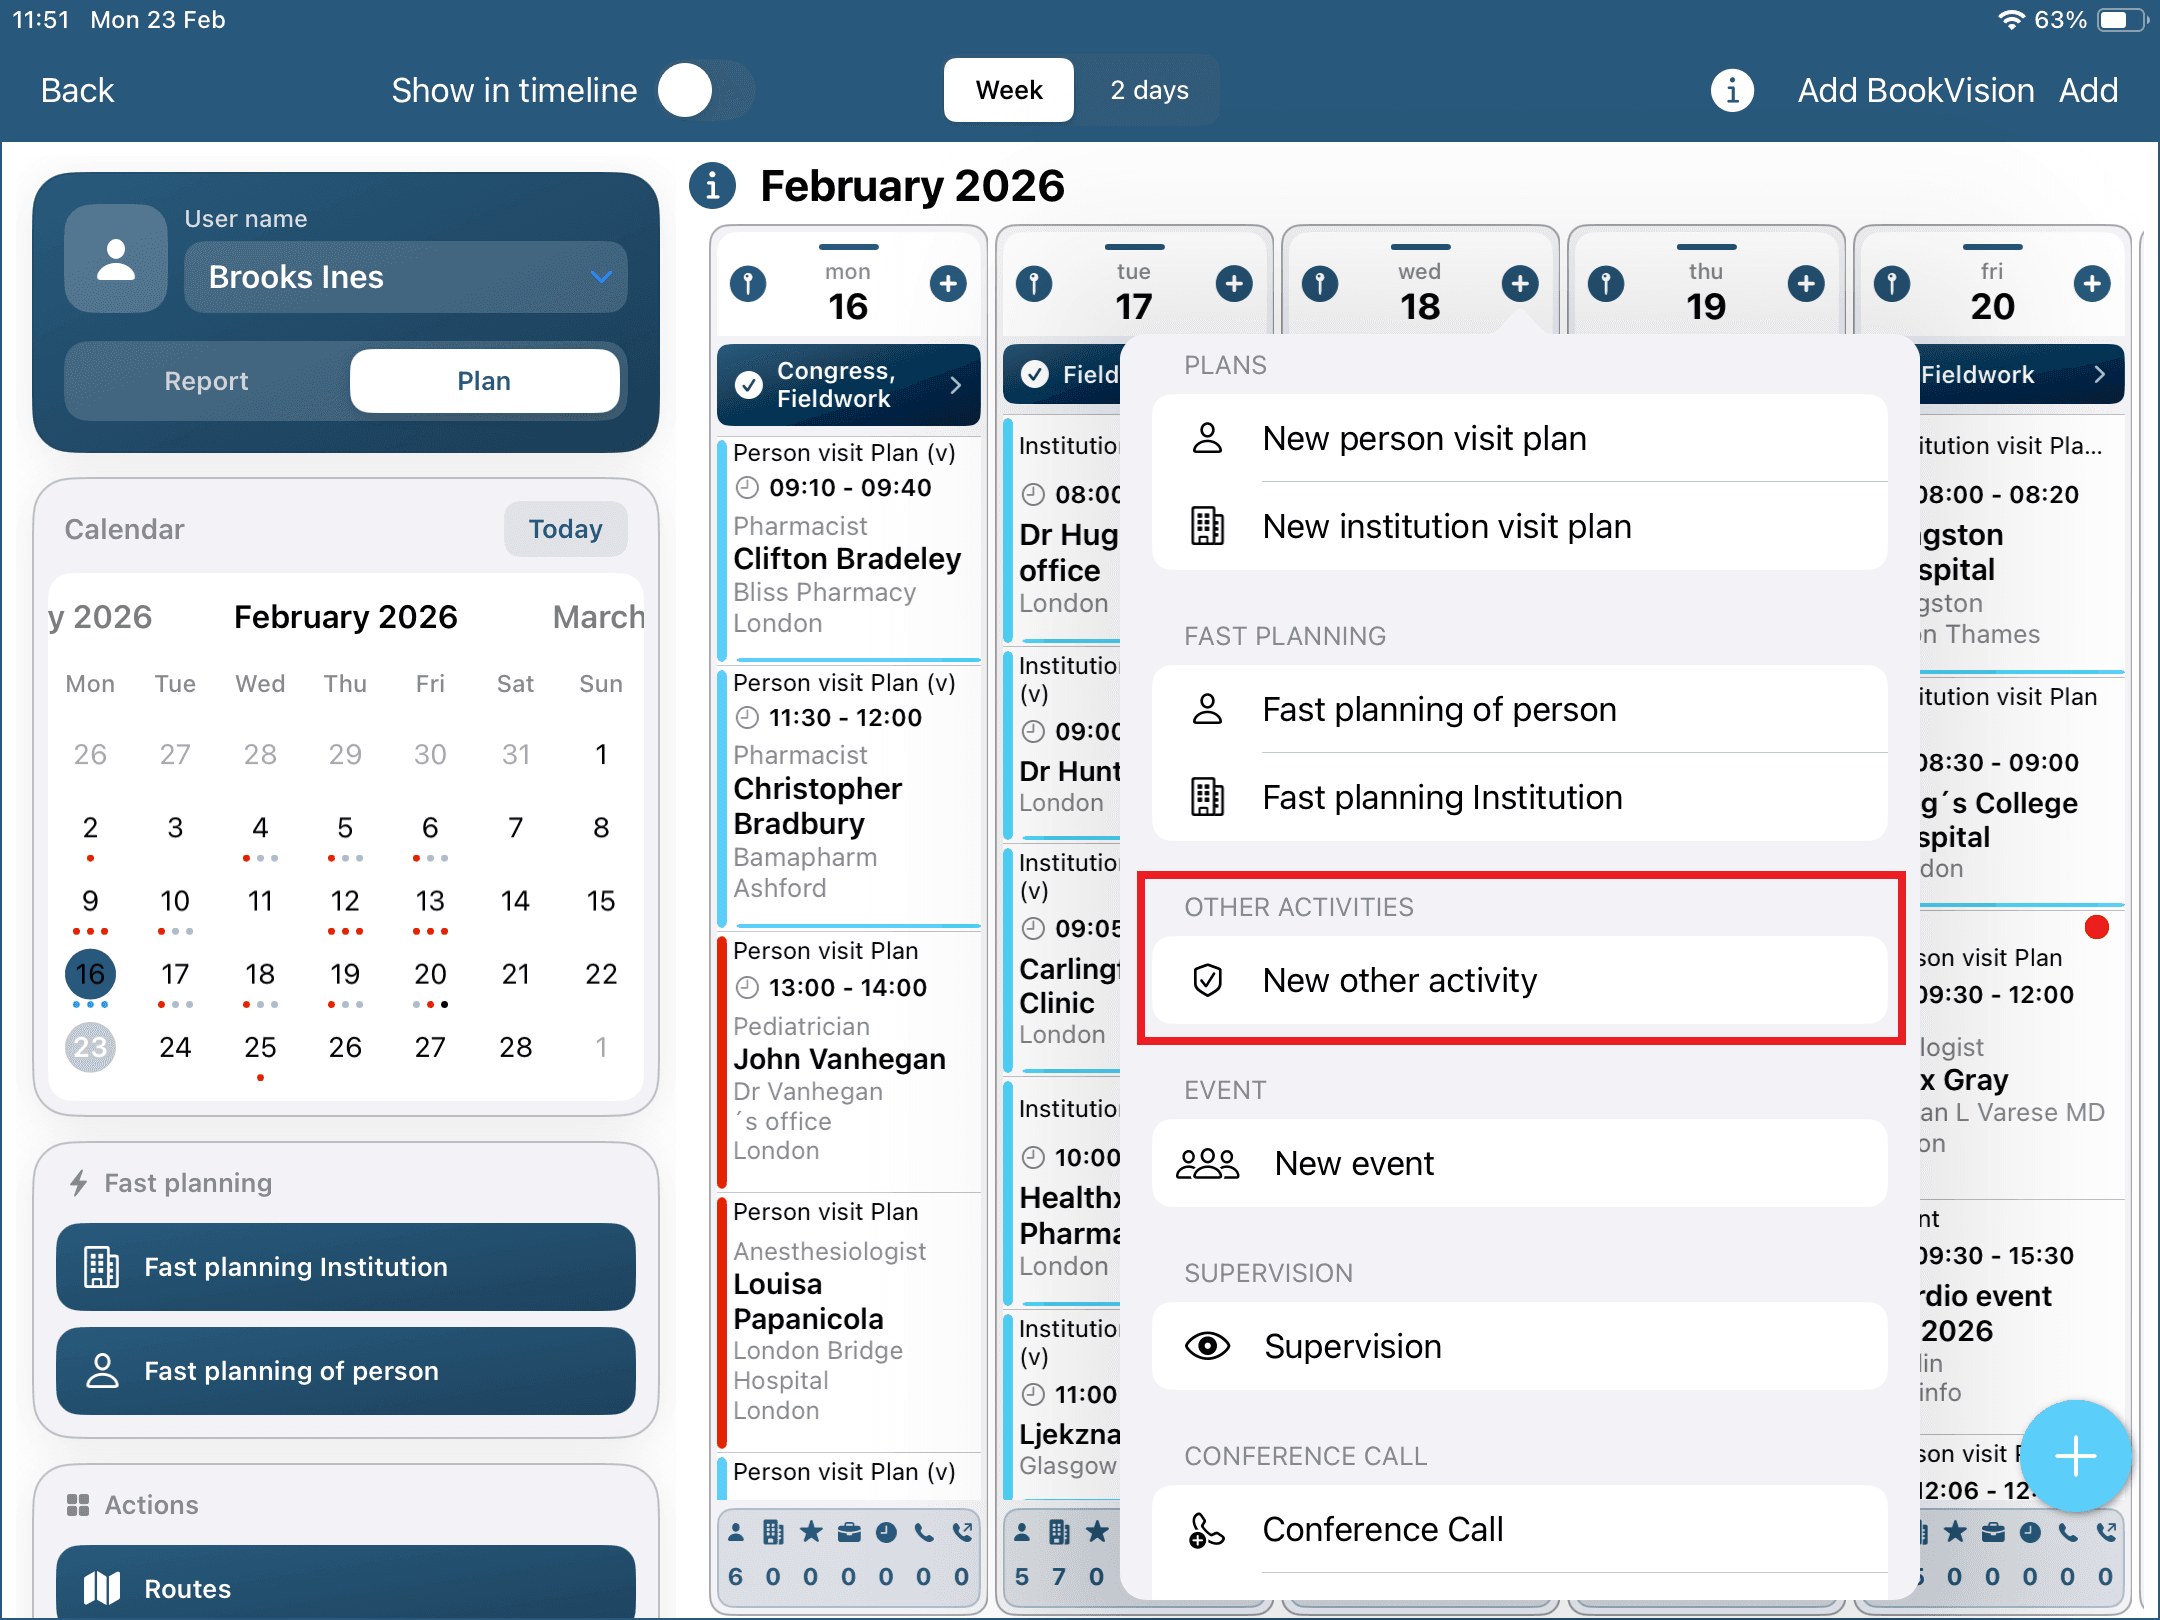
Other activities and options
Event
To add event press on New event button.

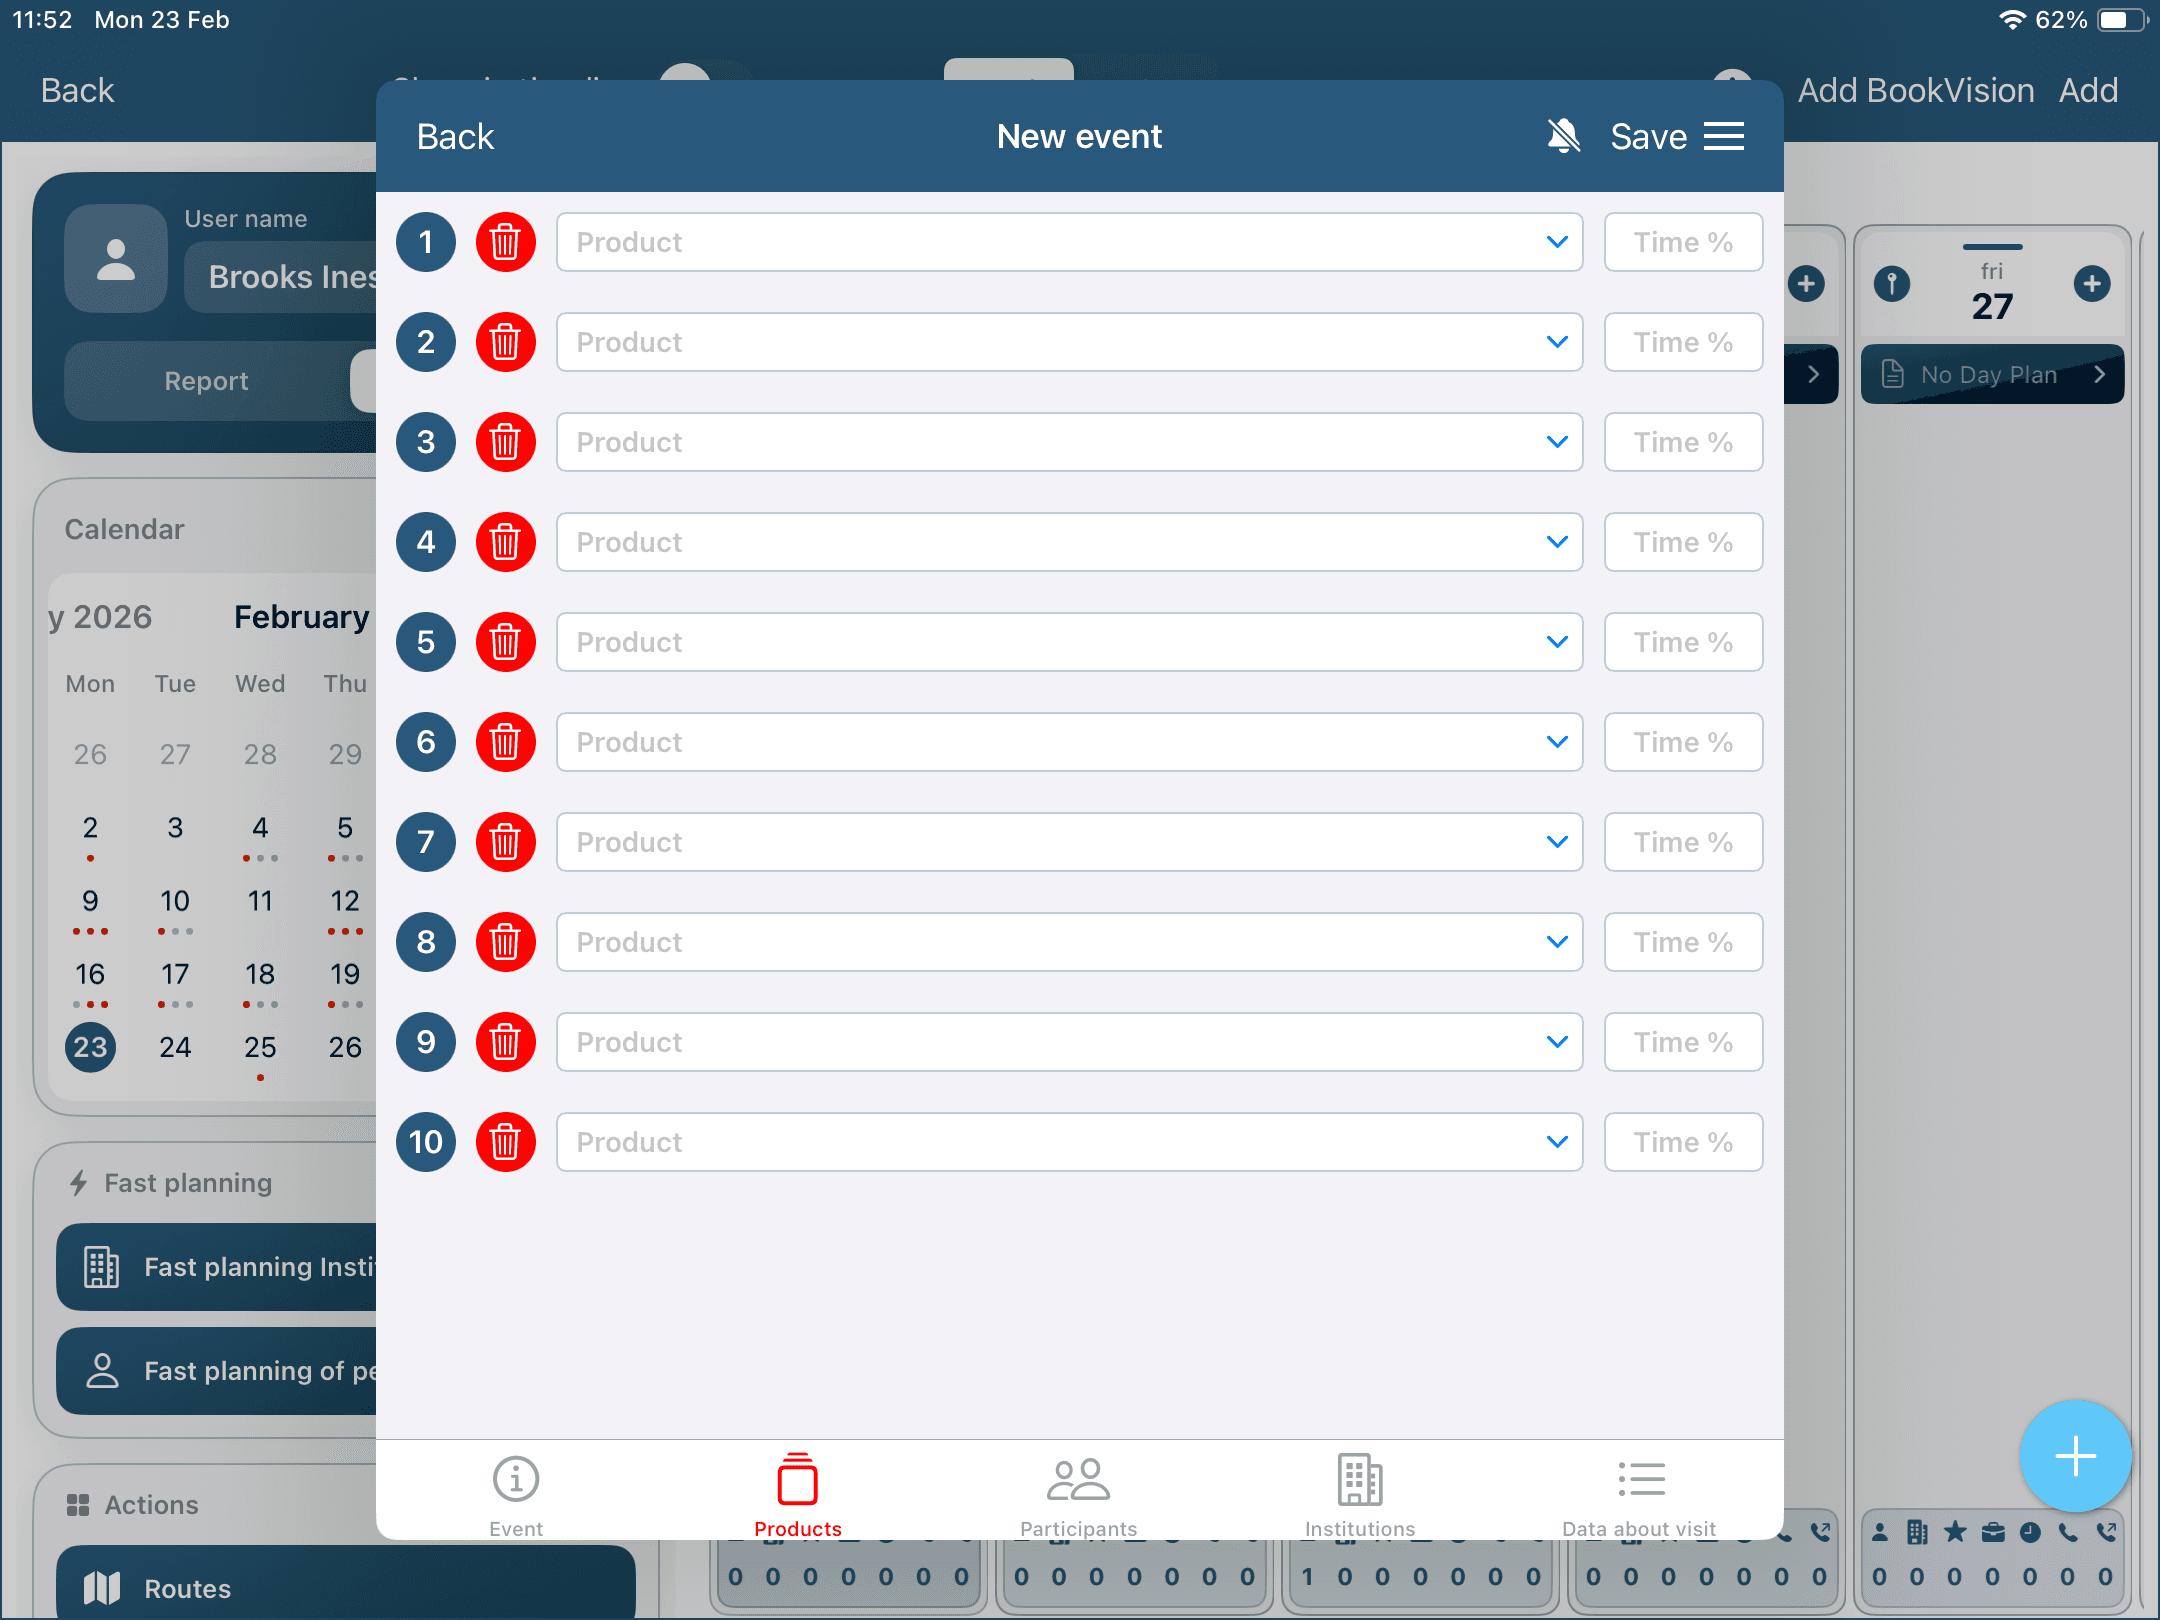
In the main part of the screen, by default it is set to show basic view of event, but by pressing on buttons in the lower part of the screen, you can switch to Products and Visited persons.
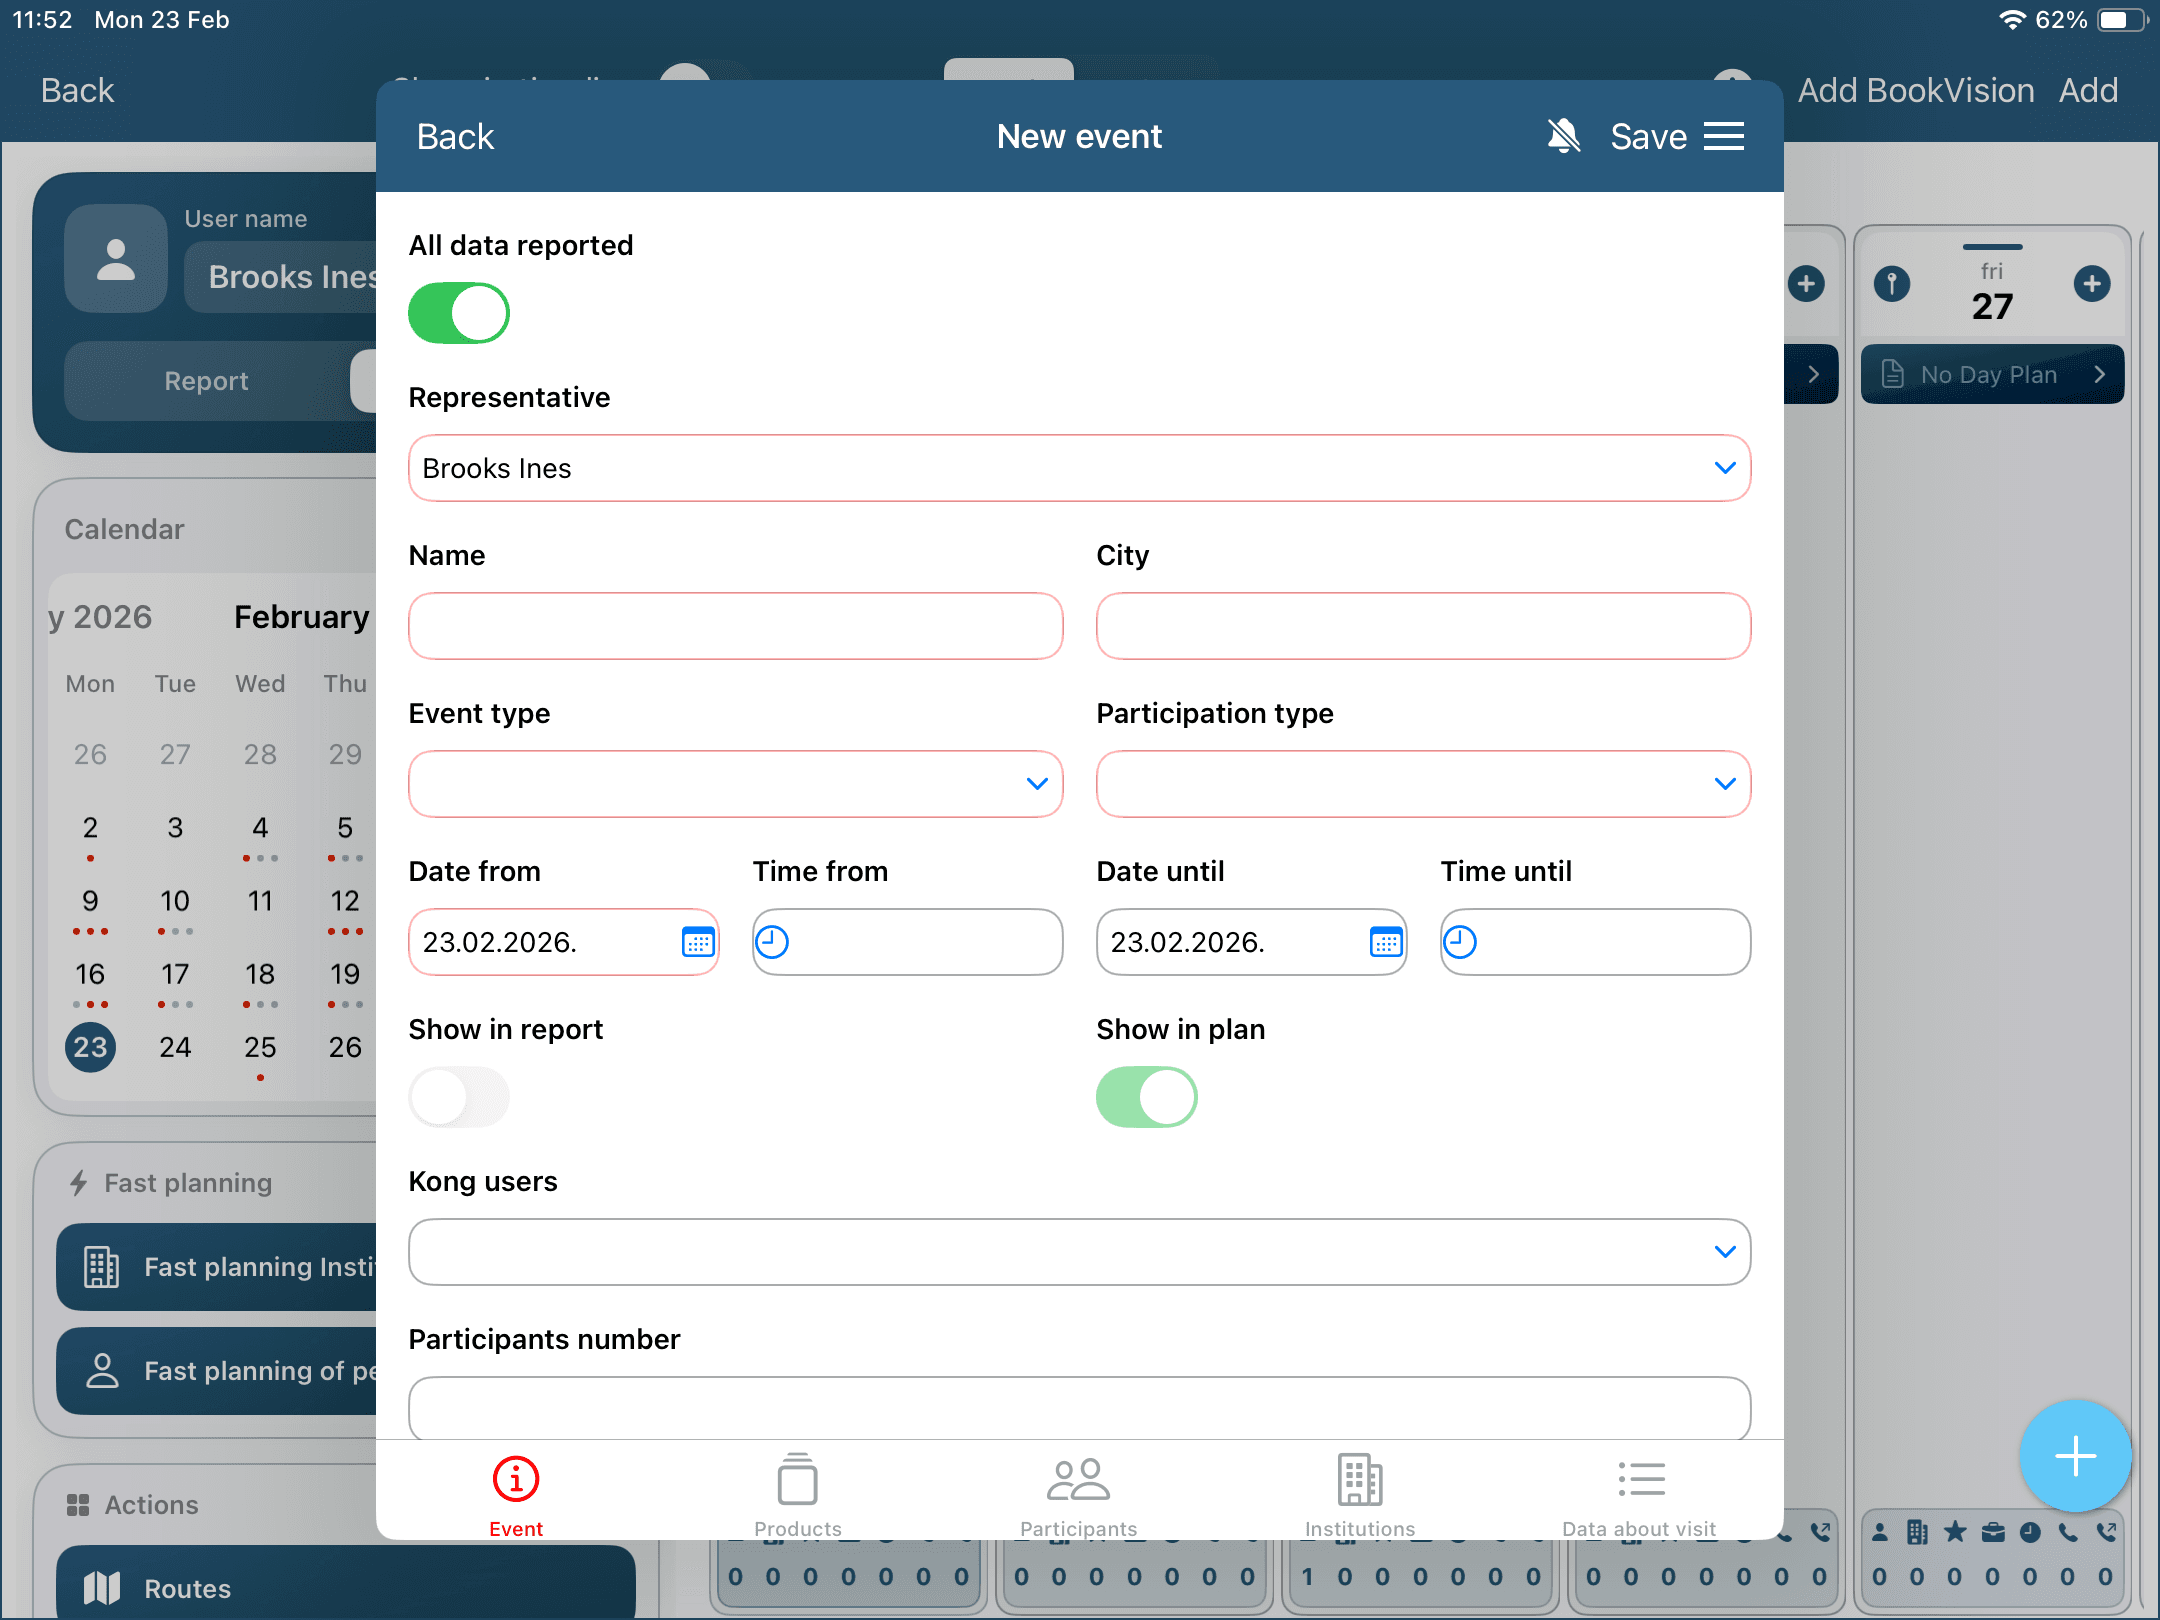
In event view enter all basic data for the event you wish to add. Fields Name, City, Event type and Participation type are mandatory, when others are optional, like Speciality. For event you can choose to be visible in plan, report or both for the entered date.
After entering all data, switch to Products and select presented products and materials.
Here you can select product, Gifts and materials, Time, and on the right you can write notes.
To add a persons that will be present, press on Participants button in the lower part of the window and add them (use search toolbar or filter). To add them to list press on the name of the person and swipe left on that person, then press Choose. Message will appear with text „Person added“. By this method we can add any person.
You can also choose Participation type: not present, present, or signed in.
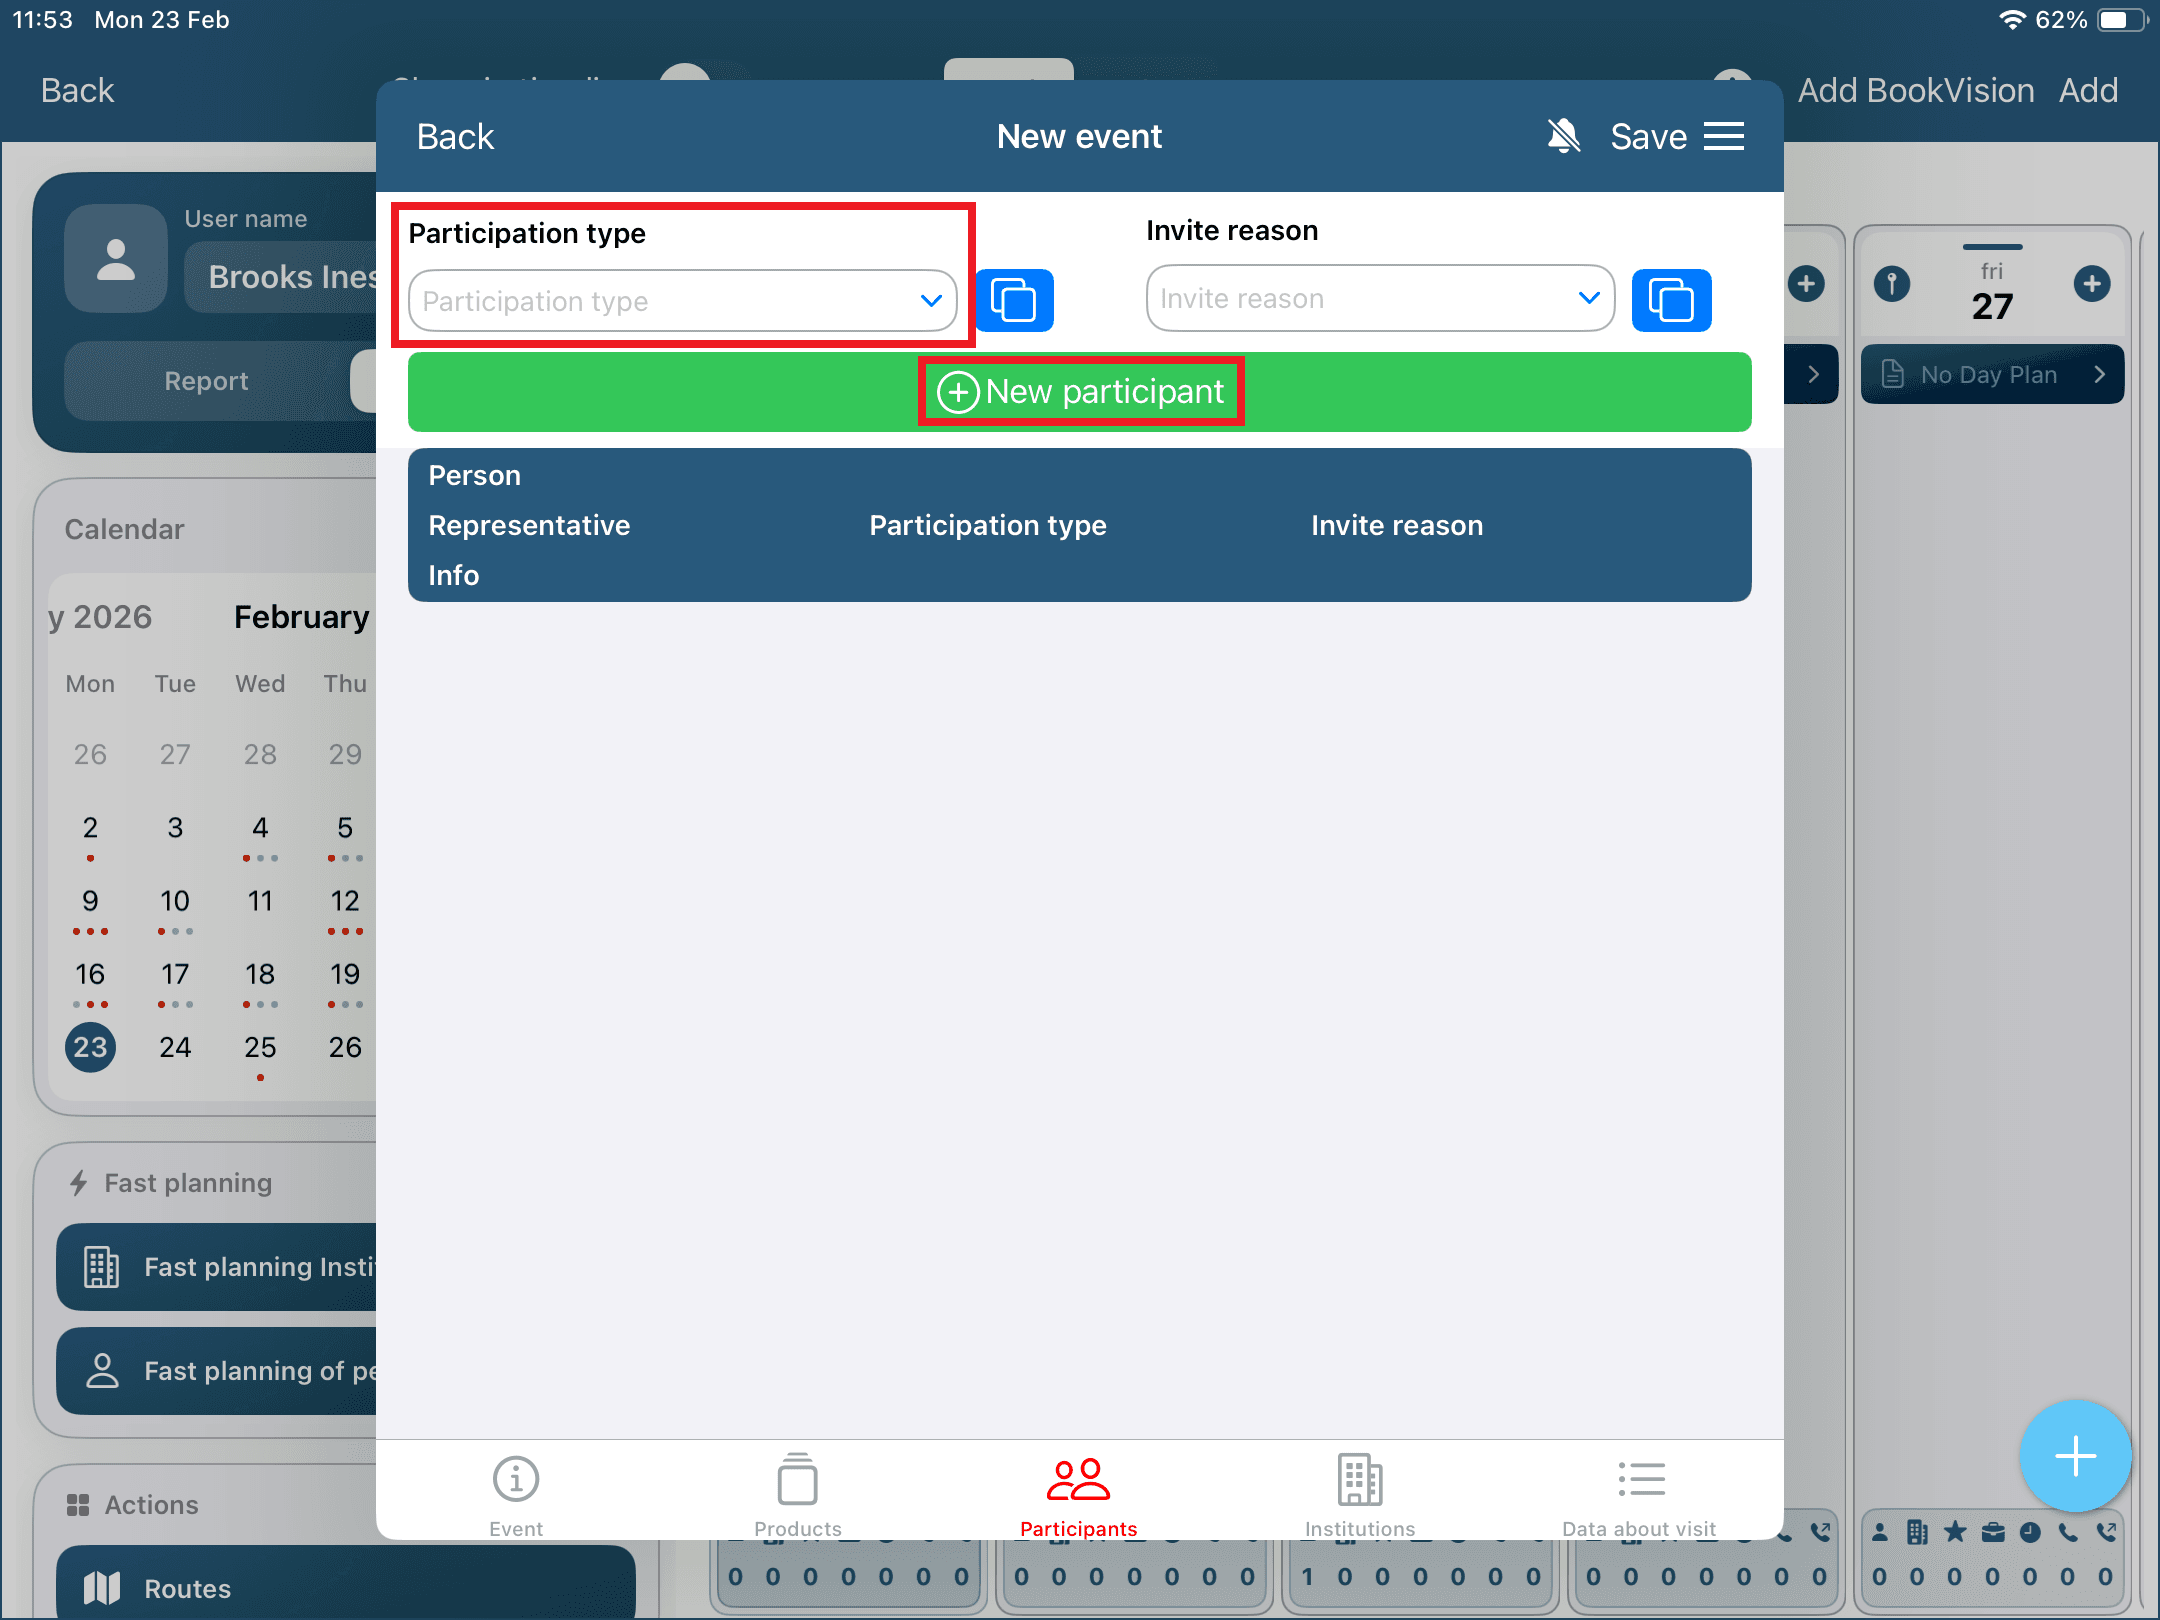
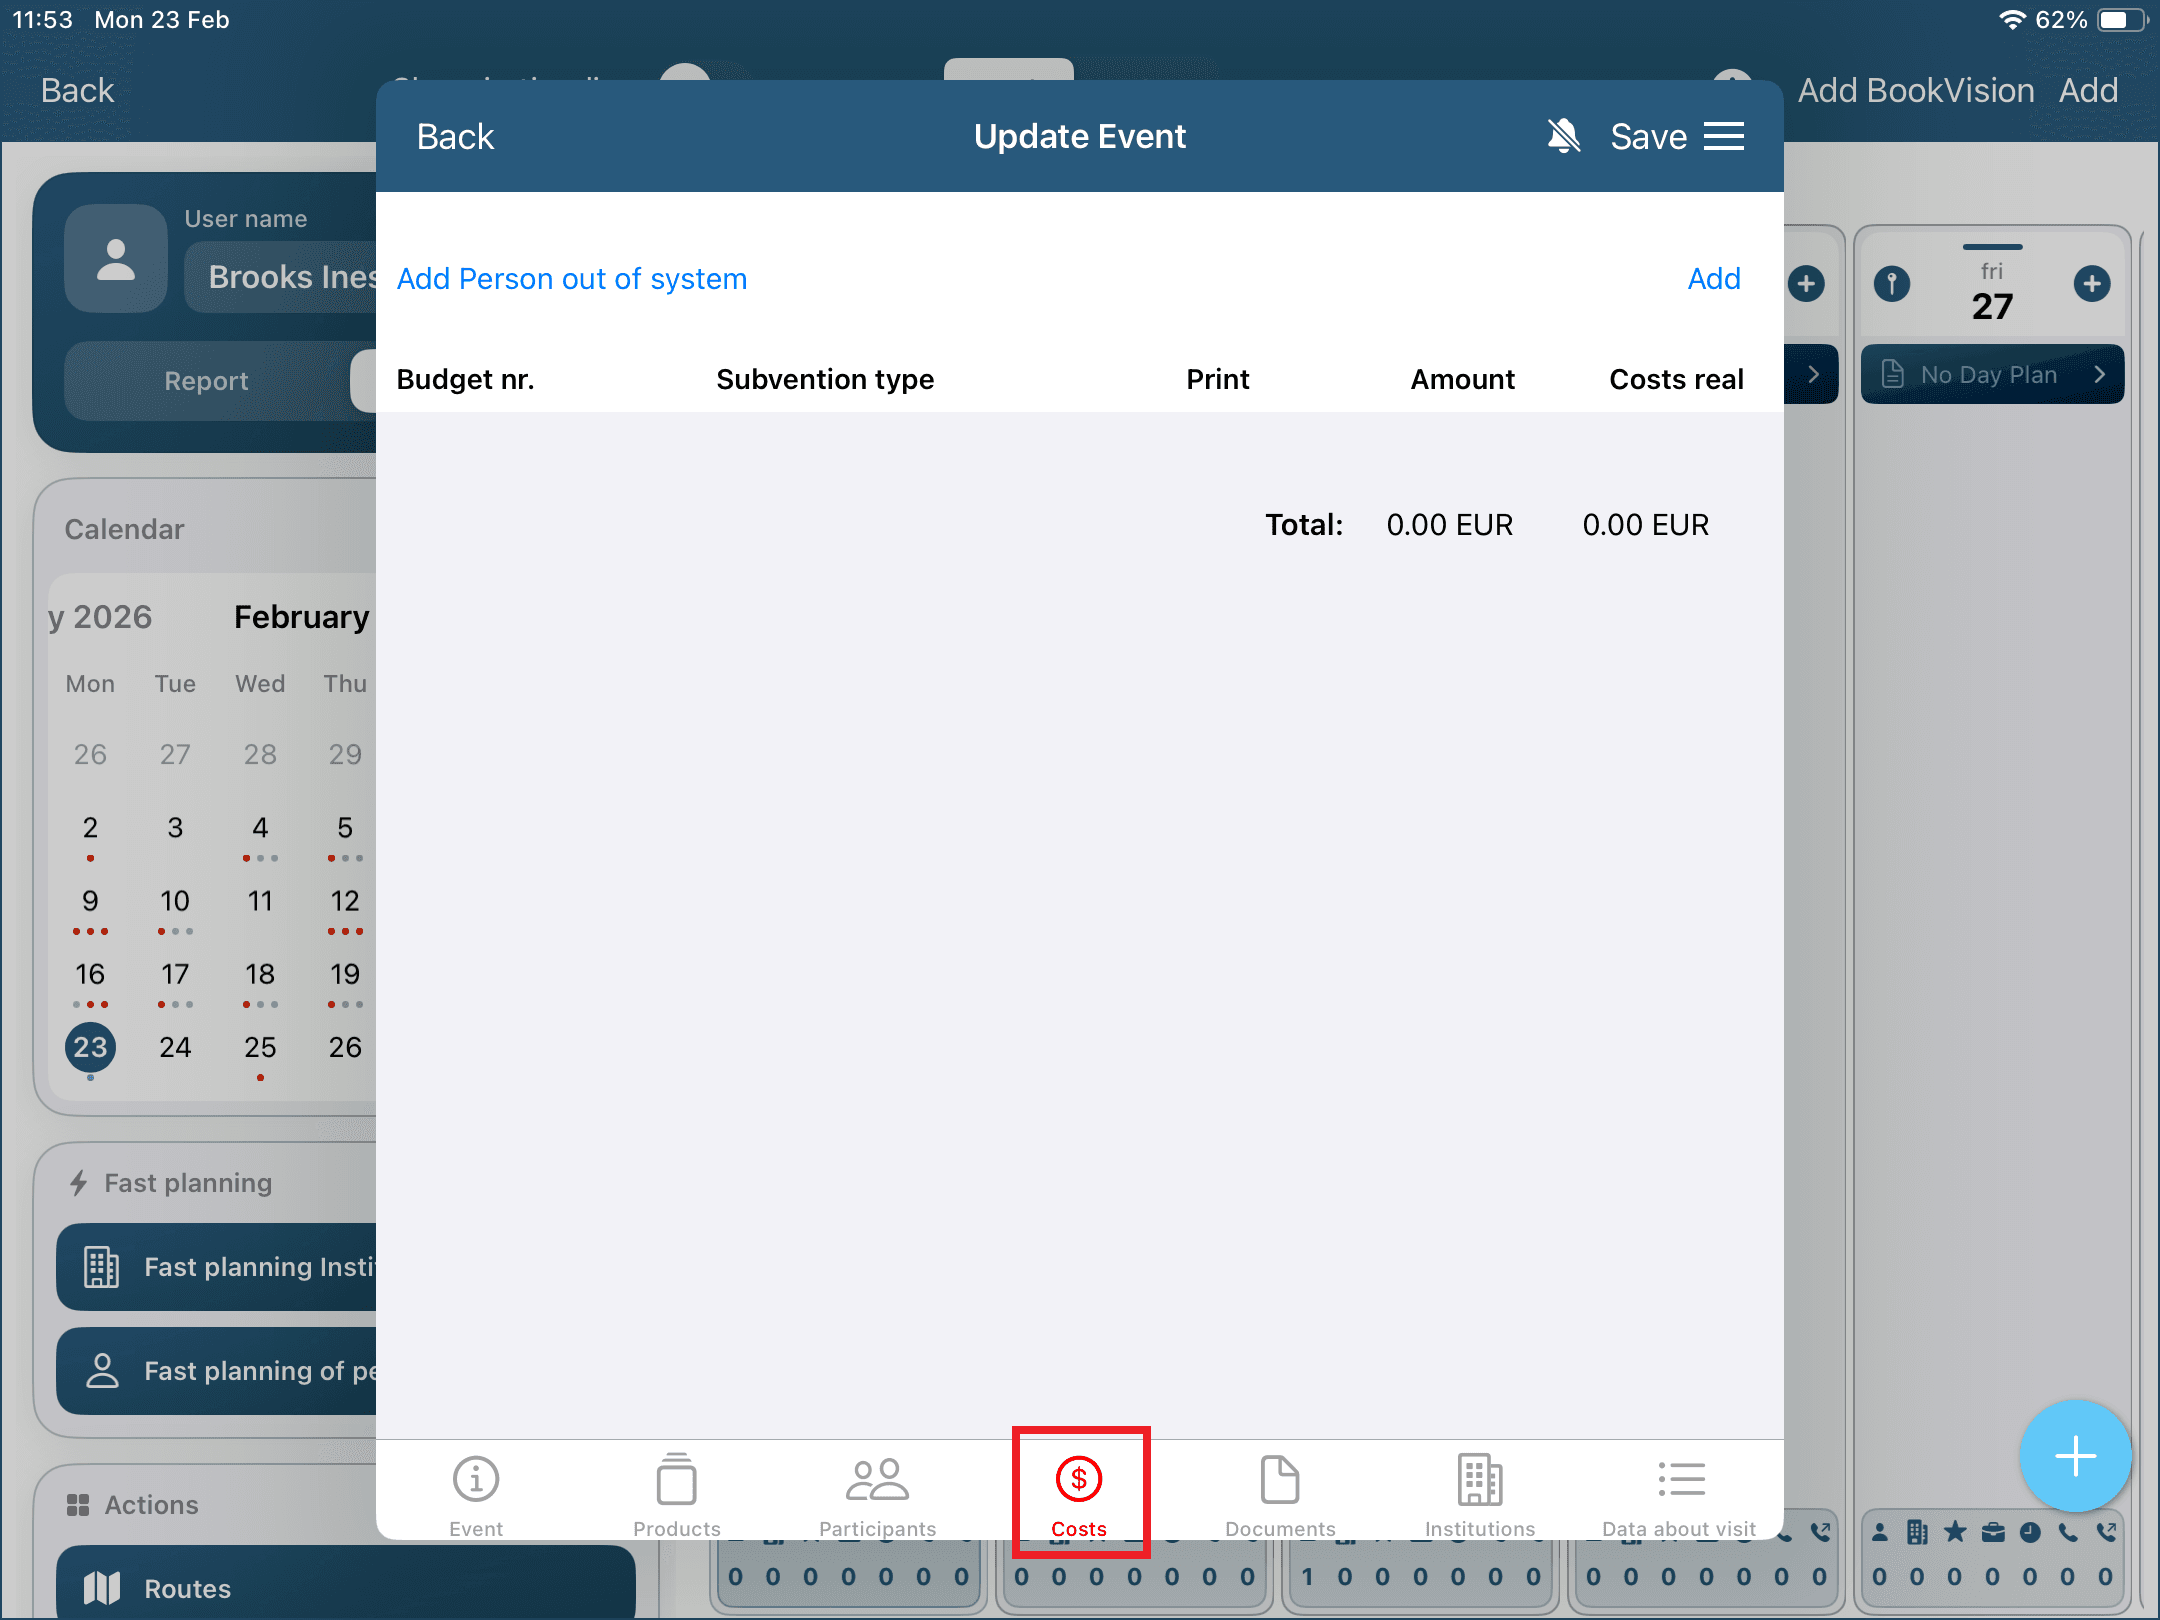
Just like on the web application, costs are available on the iPad while creating/editing the event.
After adding all information, press Save button and event will be visible in the calendar.
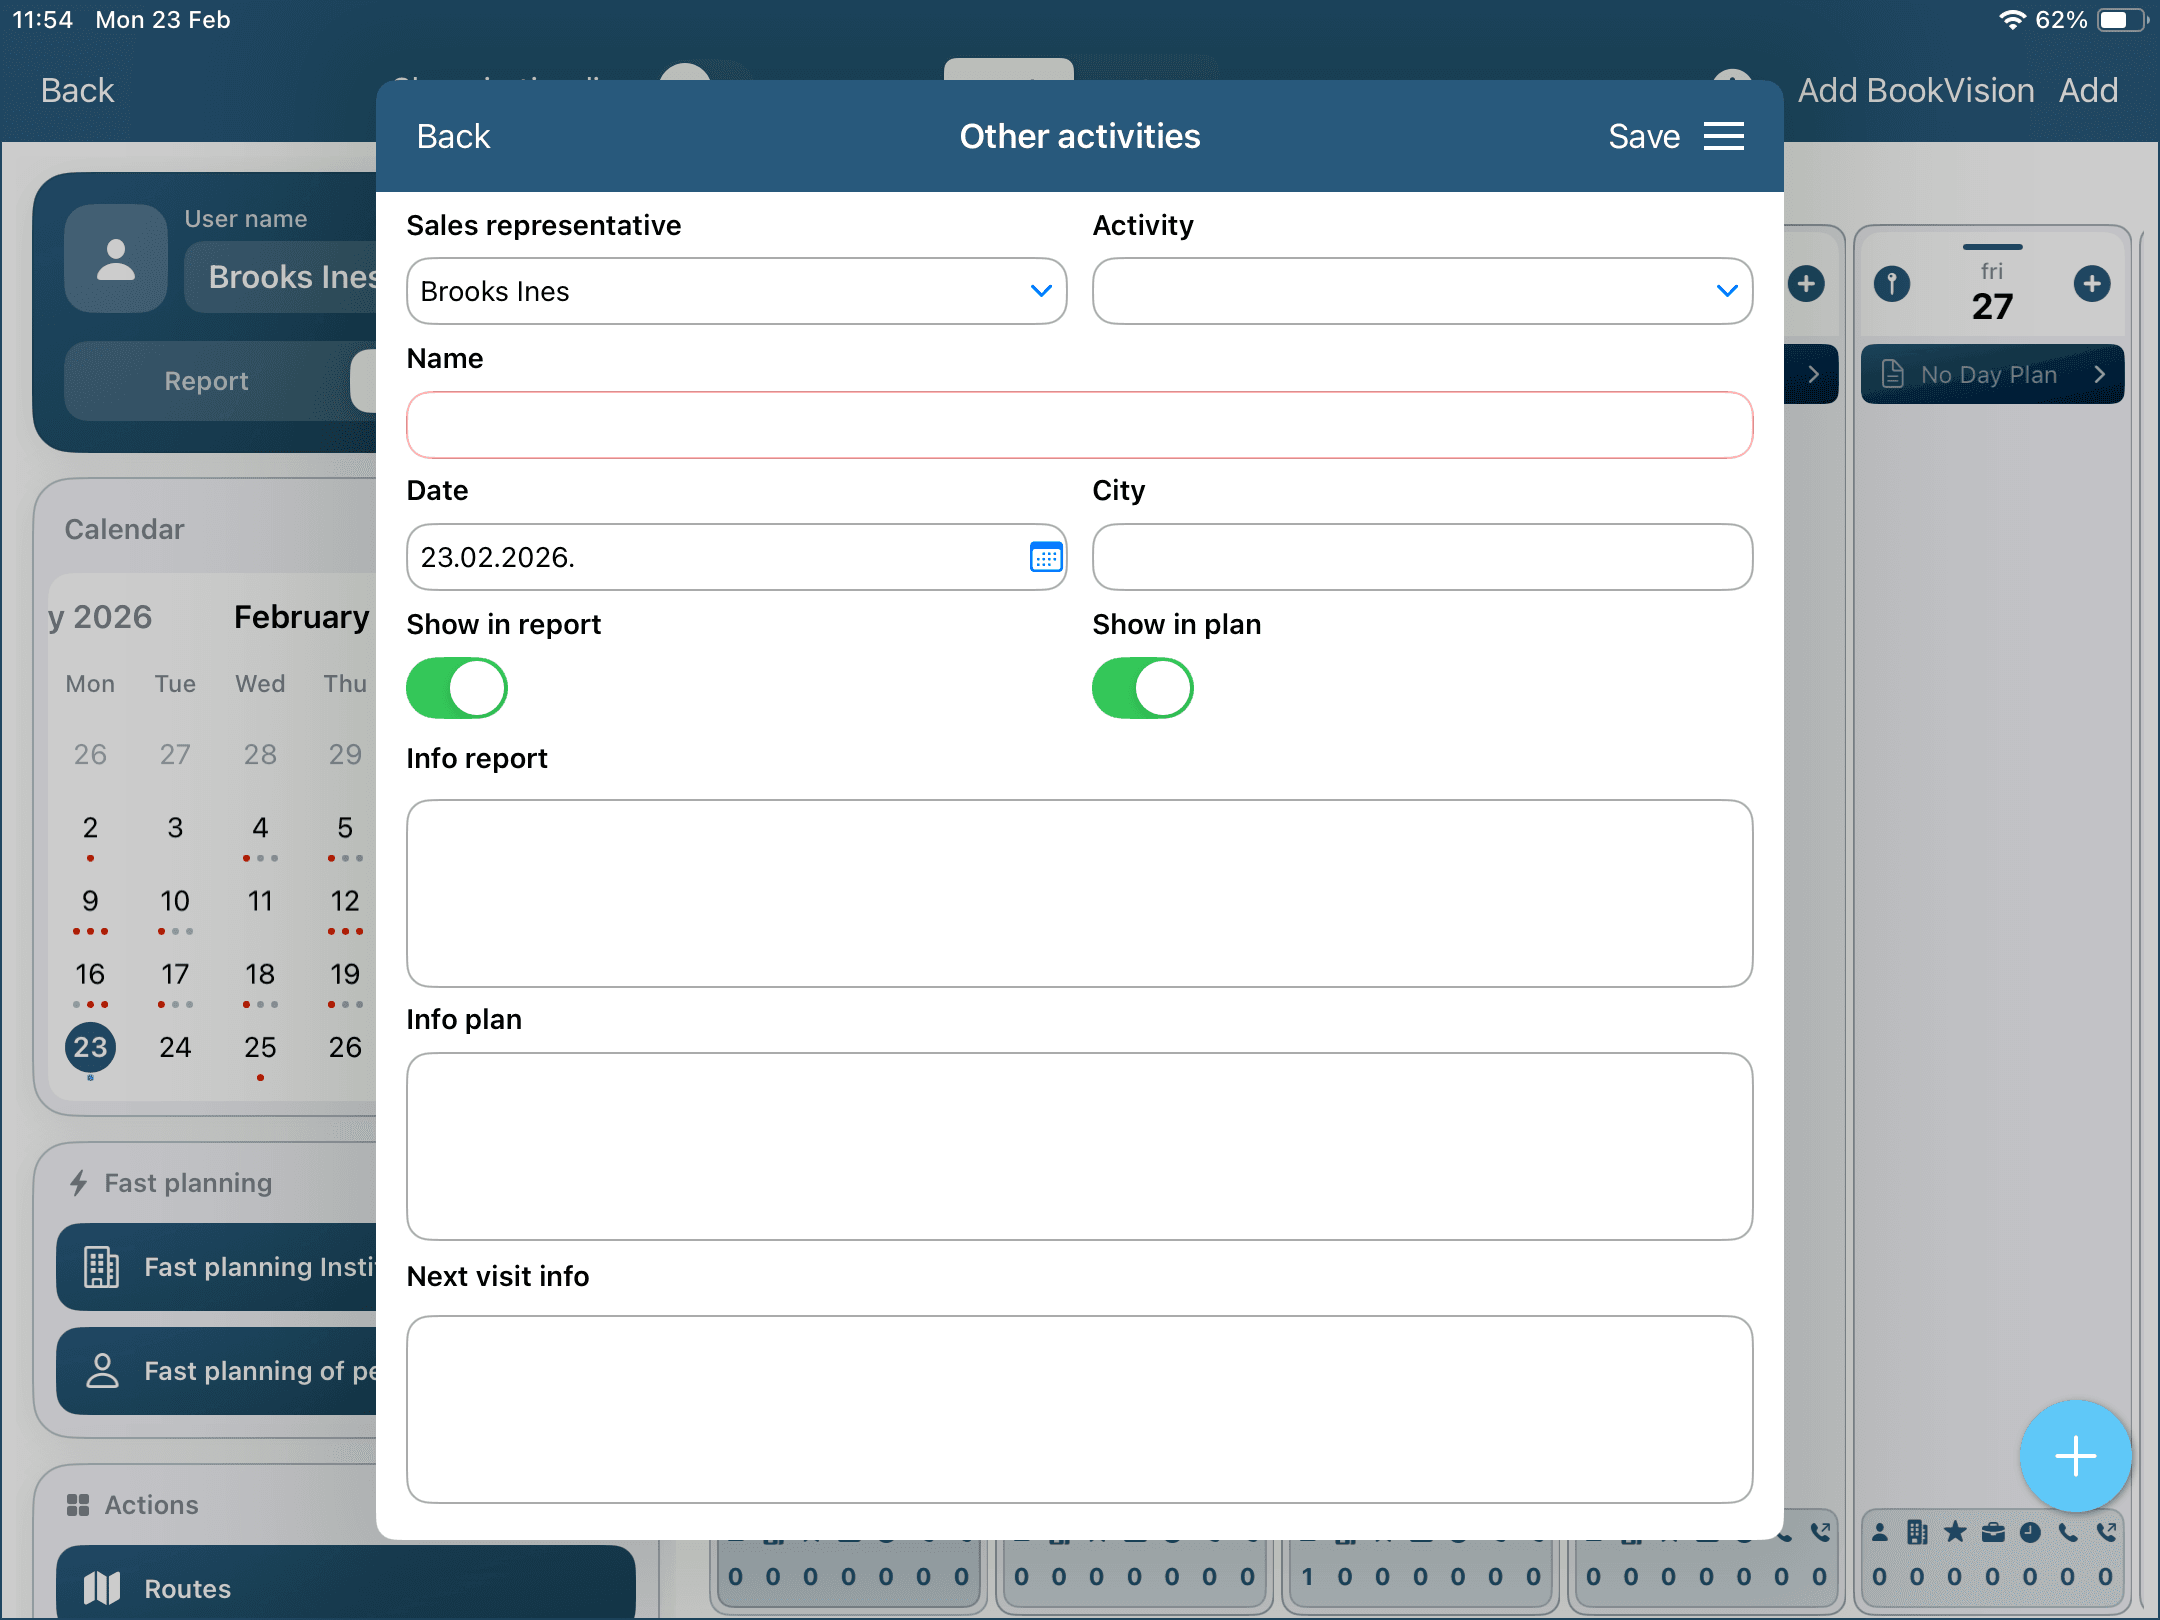
Other activities
To add another activity that could not be defined as visit or event, press New other activity button. A new window will open, after you fill in all the data, press Save button to save this new activity.
Field Name is mandatory and others are optional. Activity is very simple data where you can easily enter information and save it.
Supervision
To add a supervision click on Supervision button. This is only available for Regional managers.
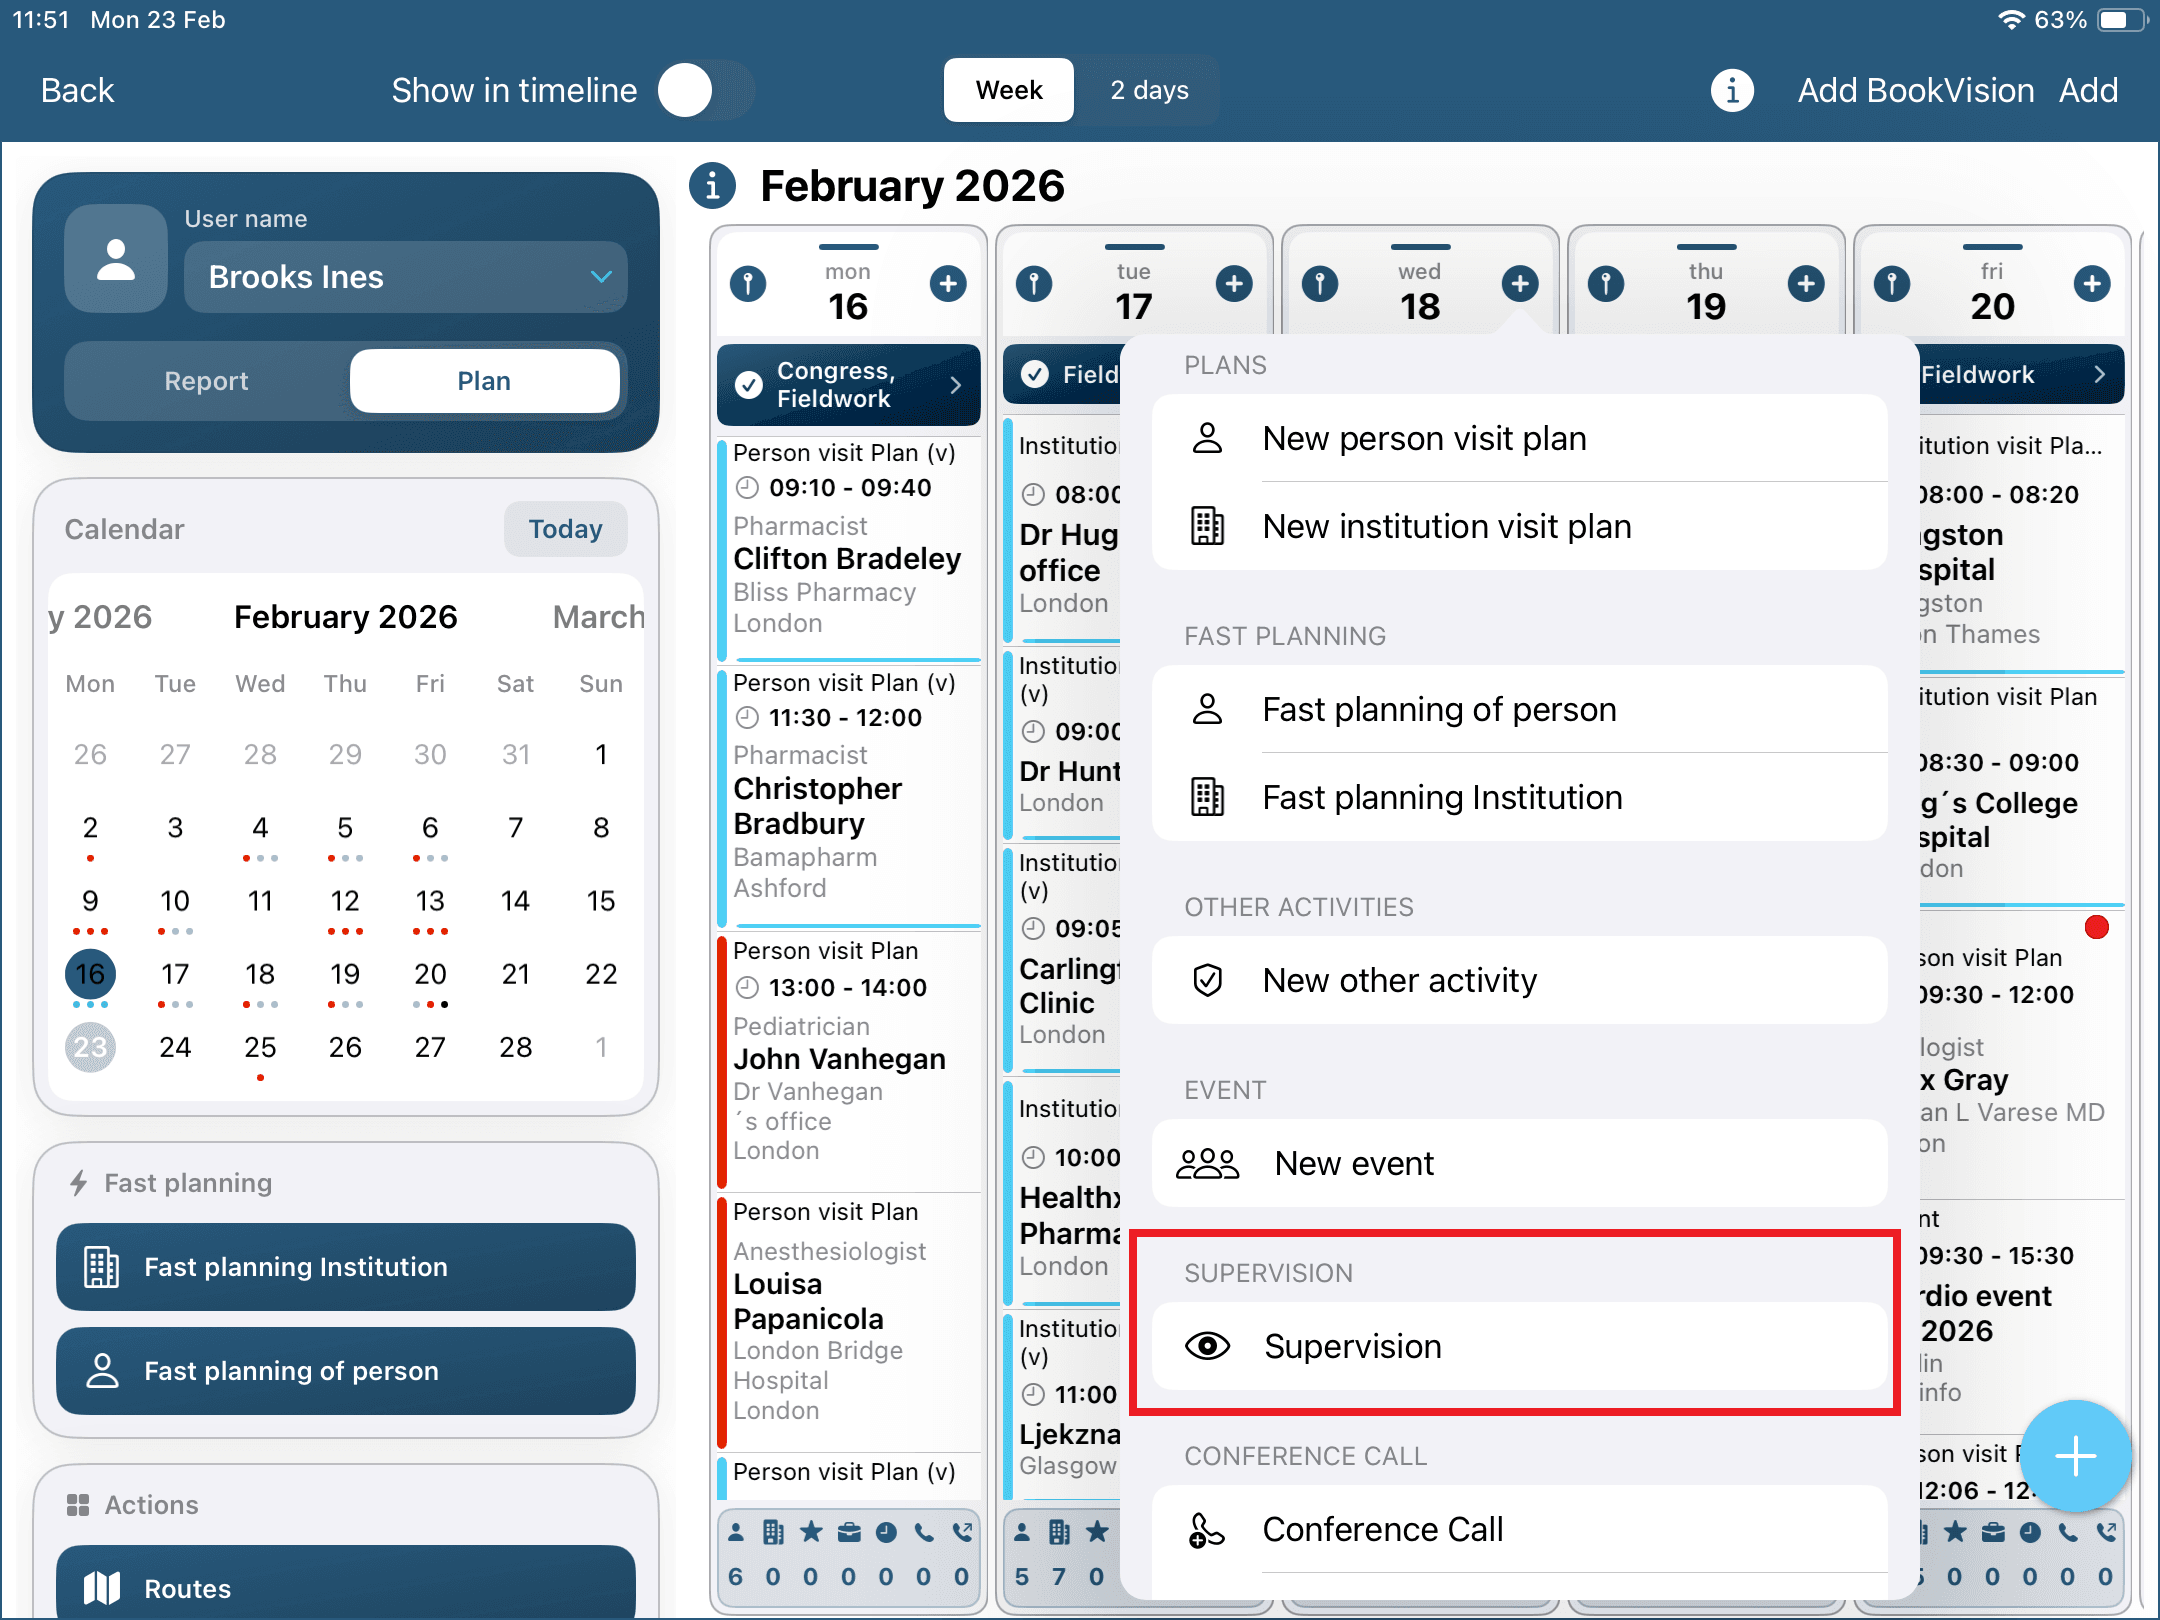
Window for adding a new supervision opens.
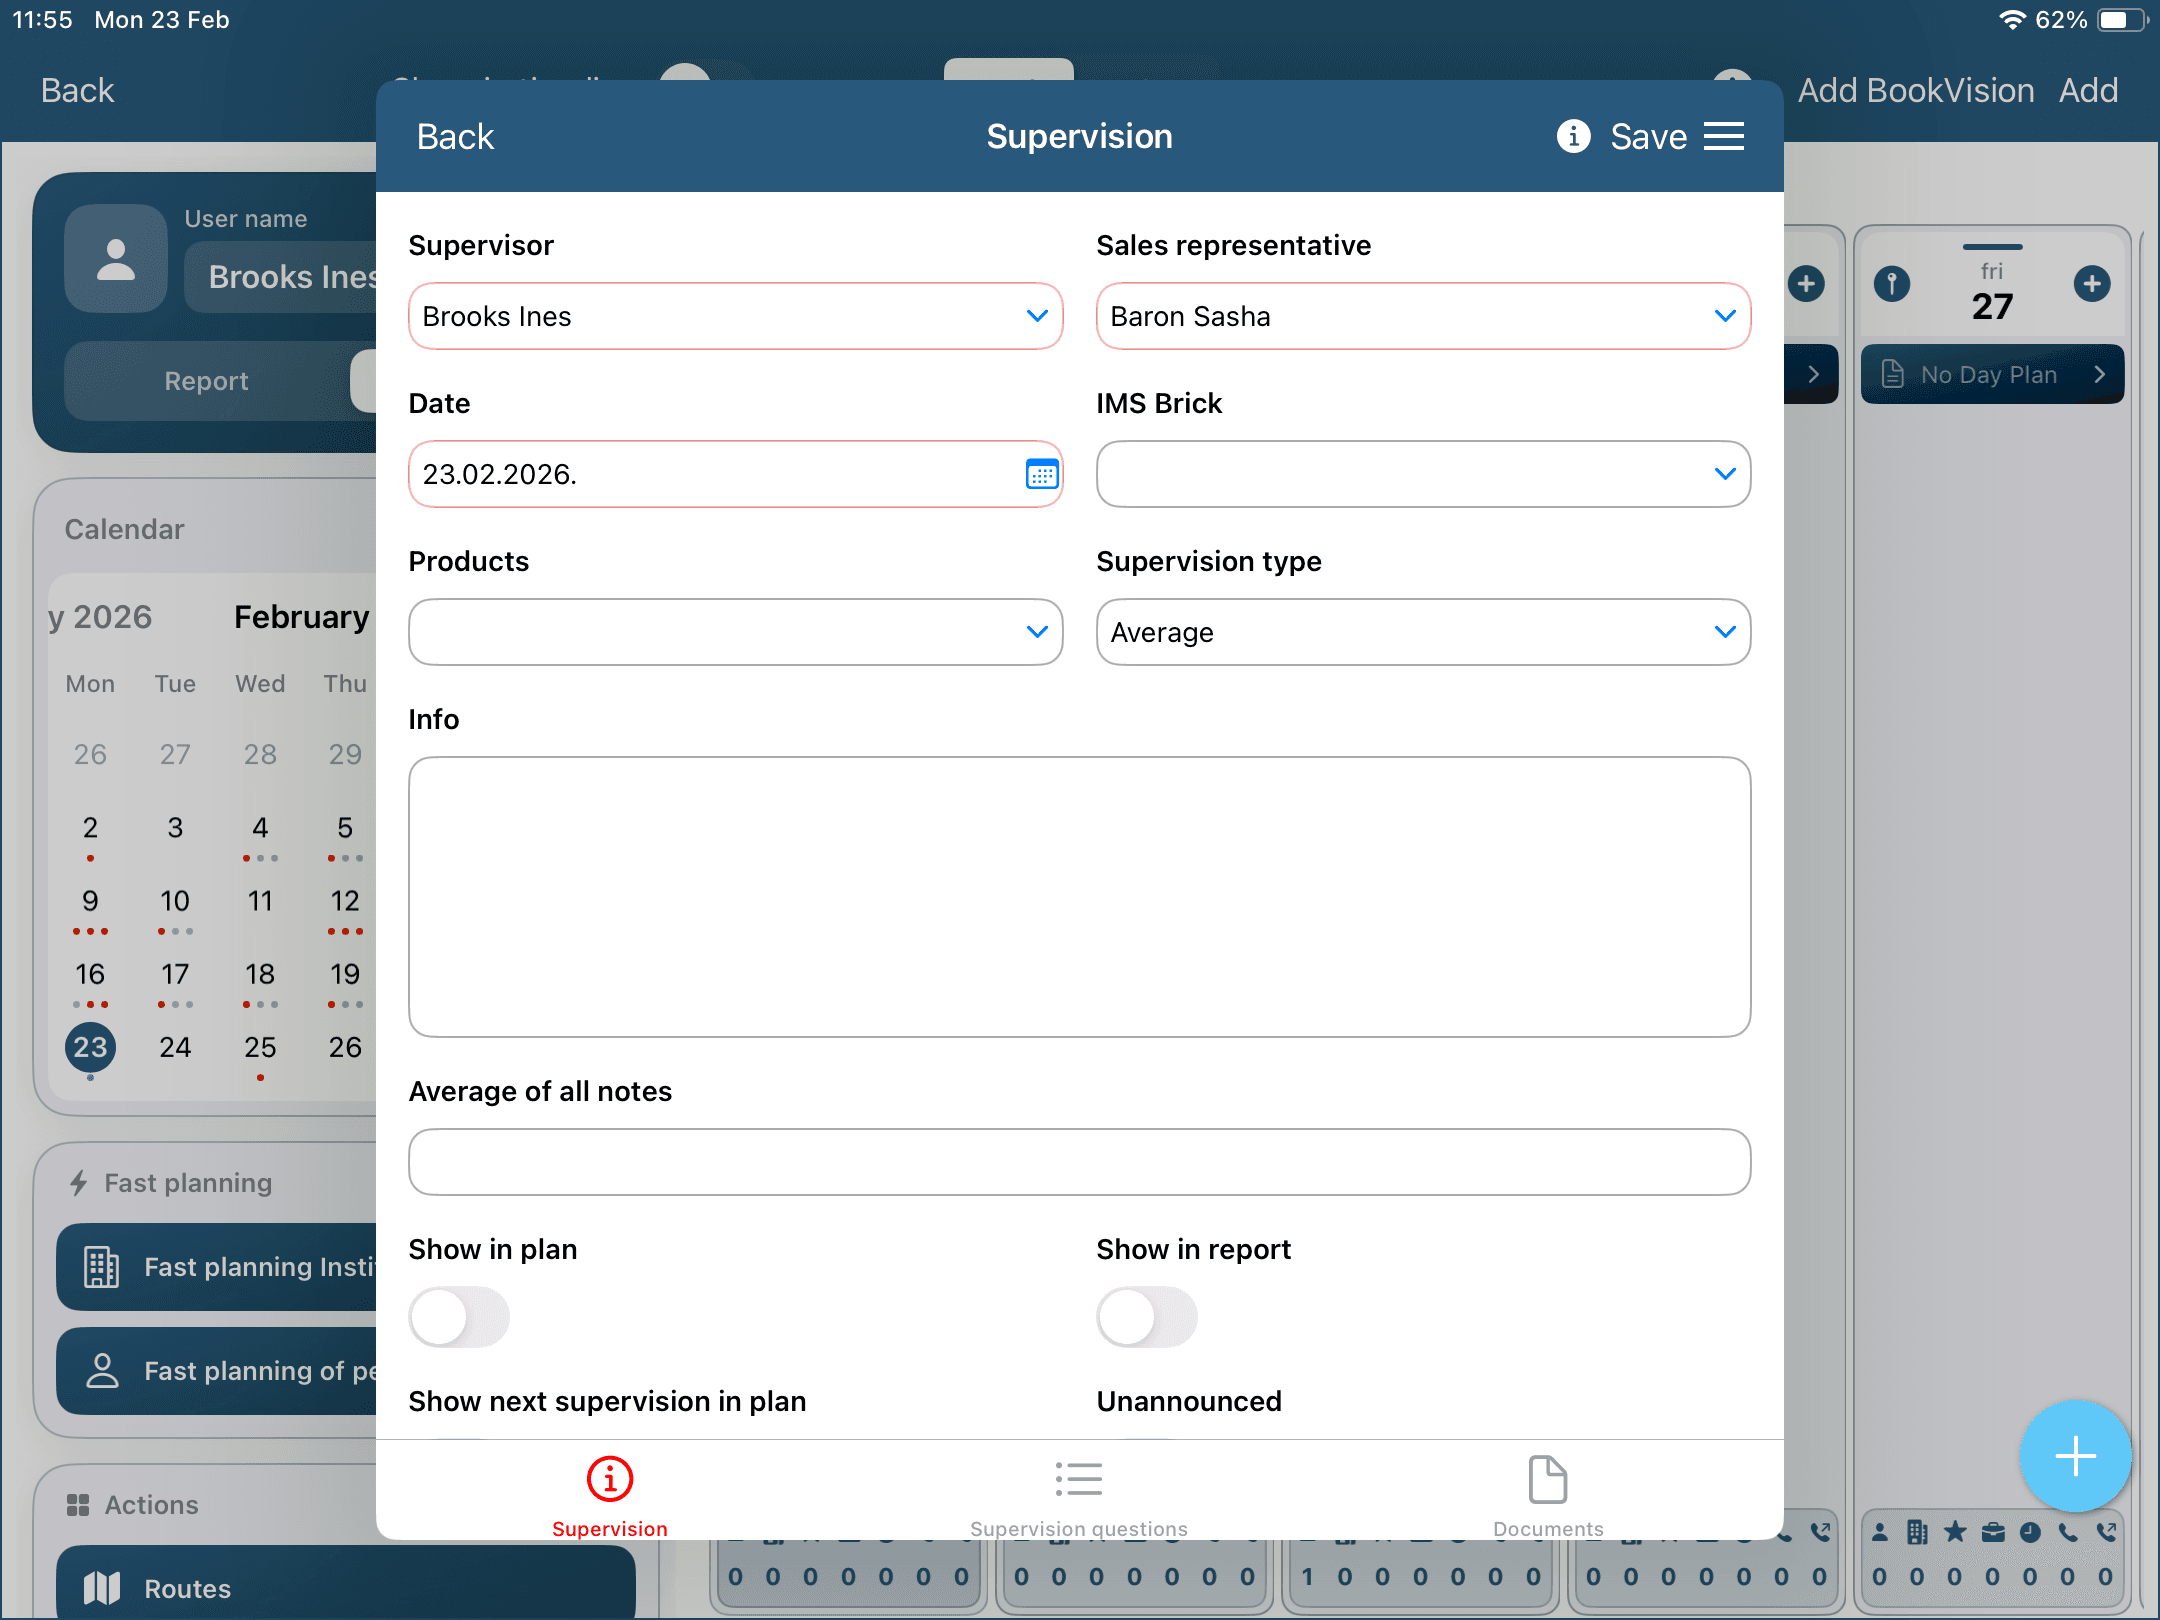
Mandatory fields like Supervisor and Sales Representative are marked with red text. Other information that you can enter is Date, IMS Brick, Product, Supervision type, Info and other. You can also check Show in report or Show in plan and the supervision will be visible there for a representative.
Questions and parameters for the supervision should be entered earlier by Administrator. To answer on questions go to Supervision questions tab and fill all fields.
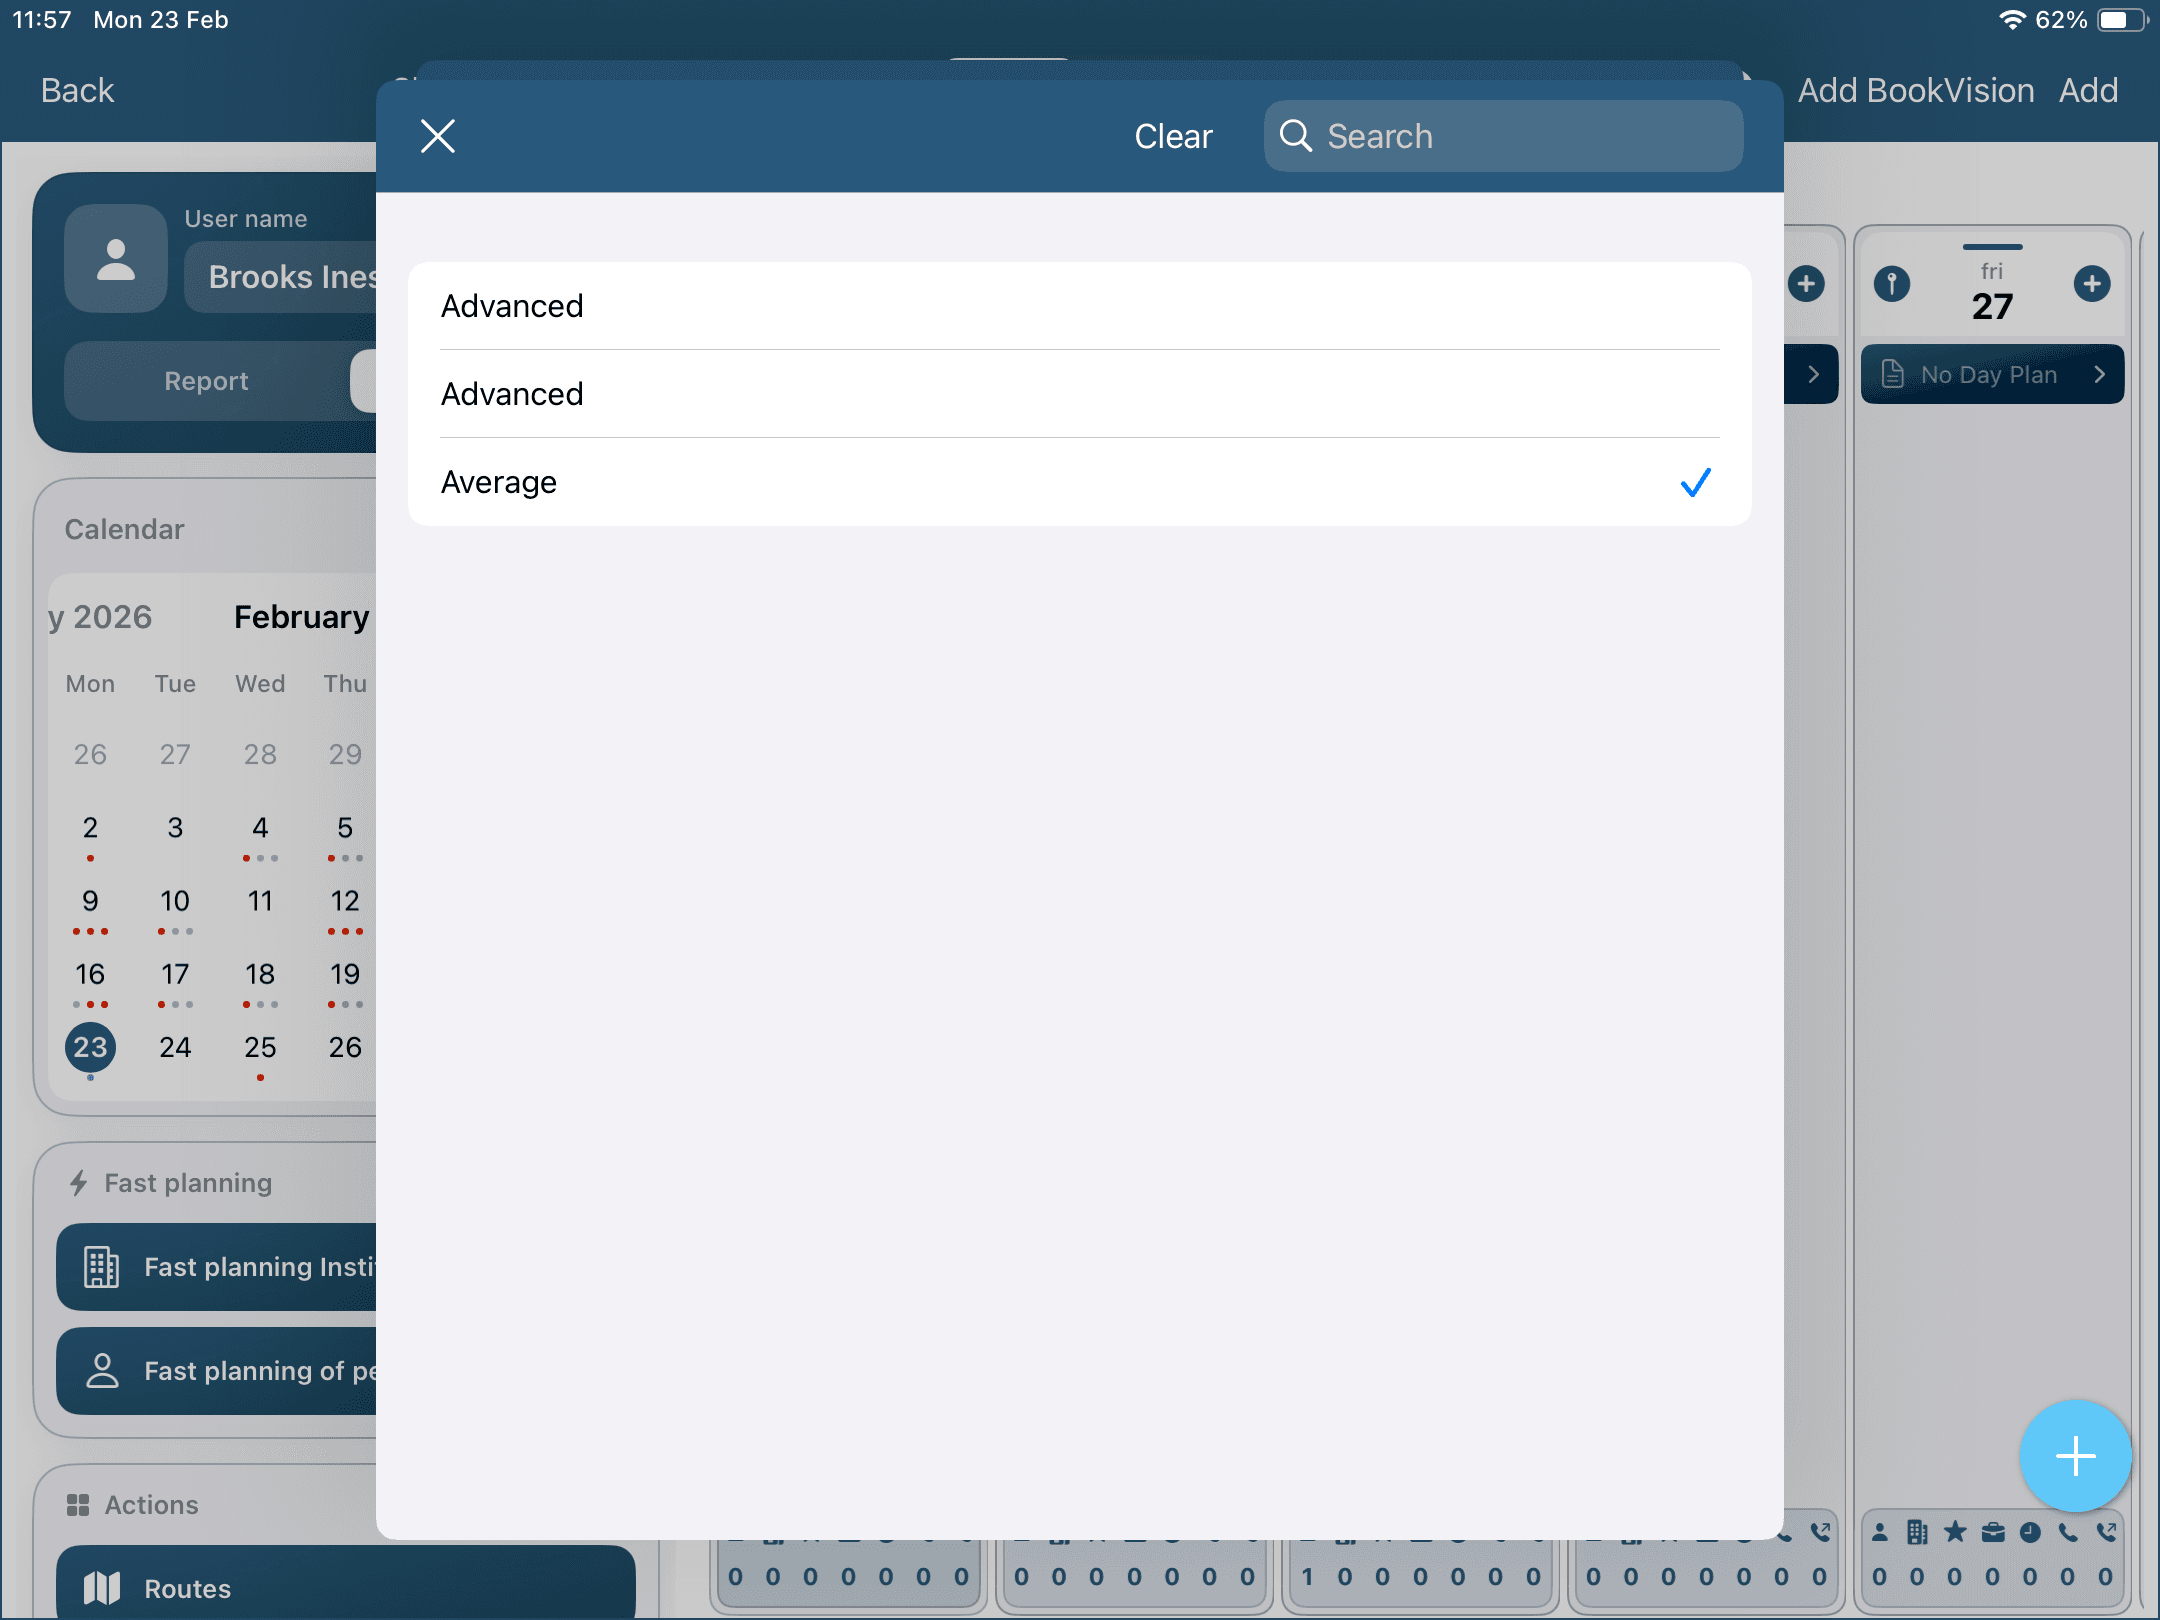
Group questions are underlayer of Supervision type. Each supervision type has its own group of questions. So after selecting a Supervision type (in previous figure example, Supervision type 2), loaded are questions from that type in the Supervision questions tab.
In the following figure is example preview after we open a Supervision questions tab.
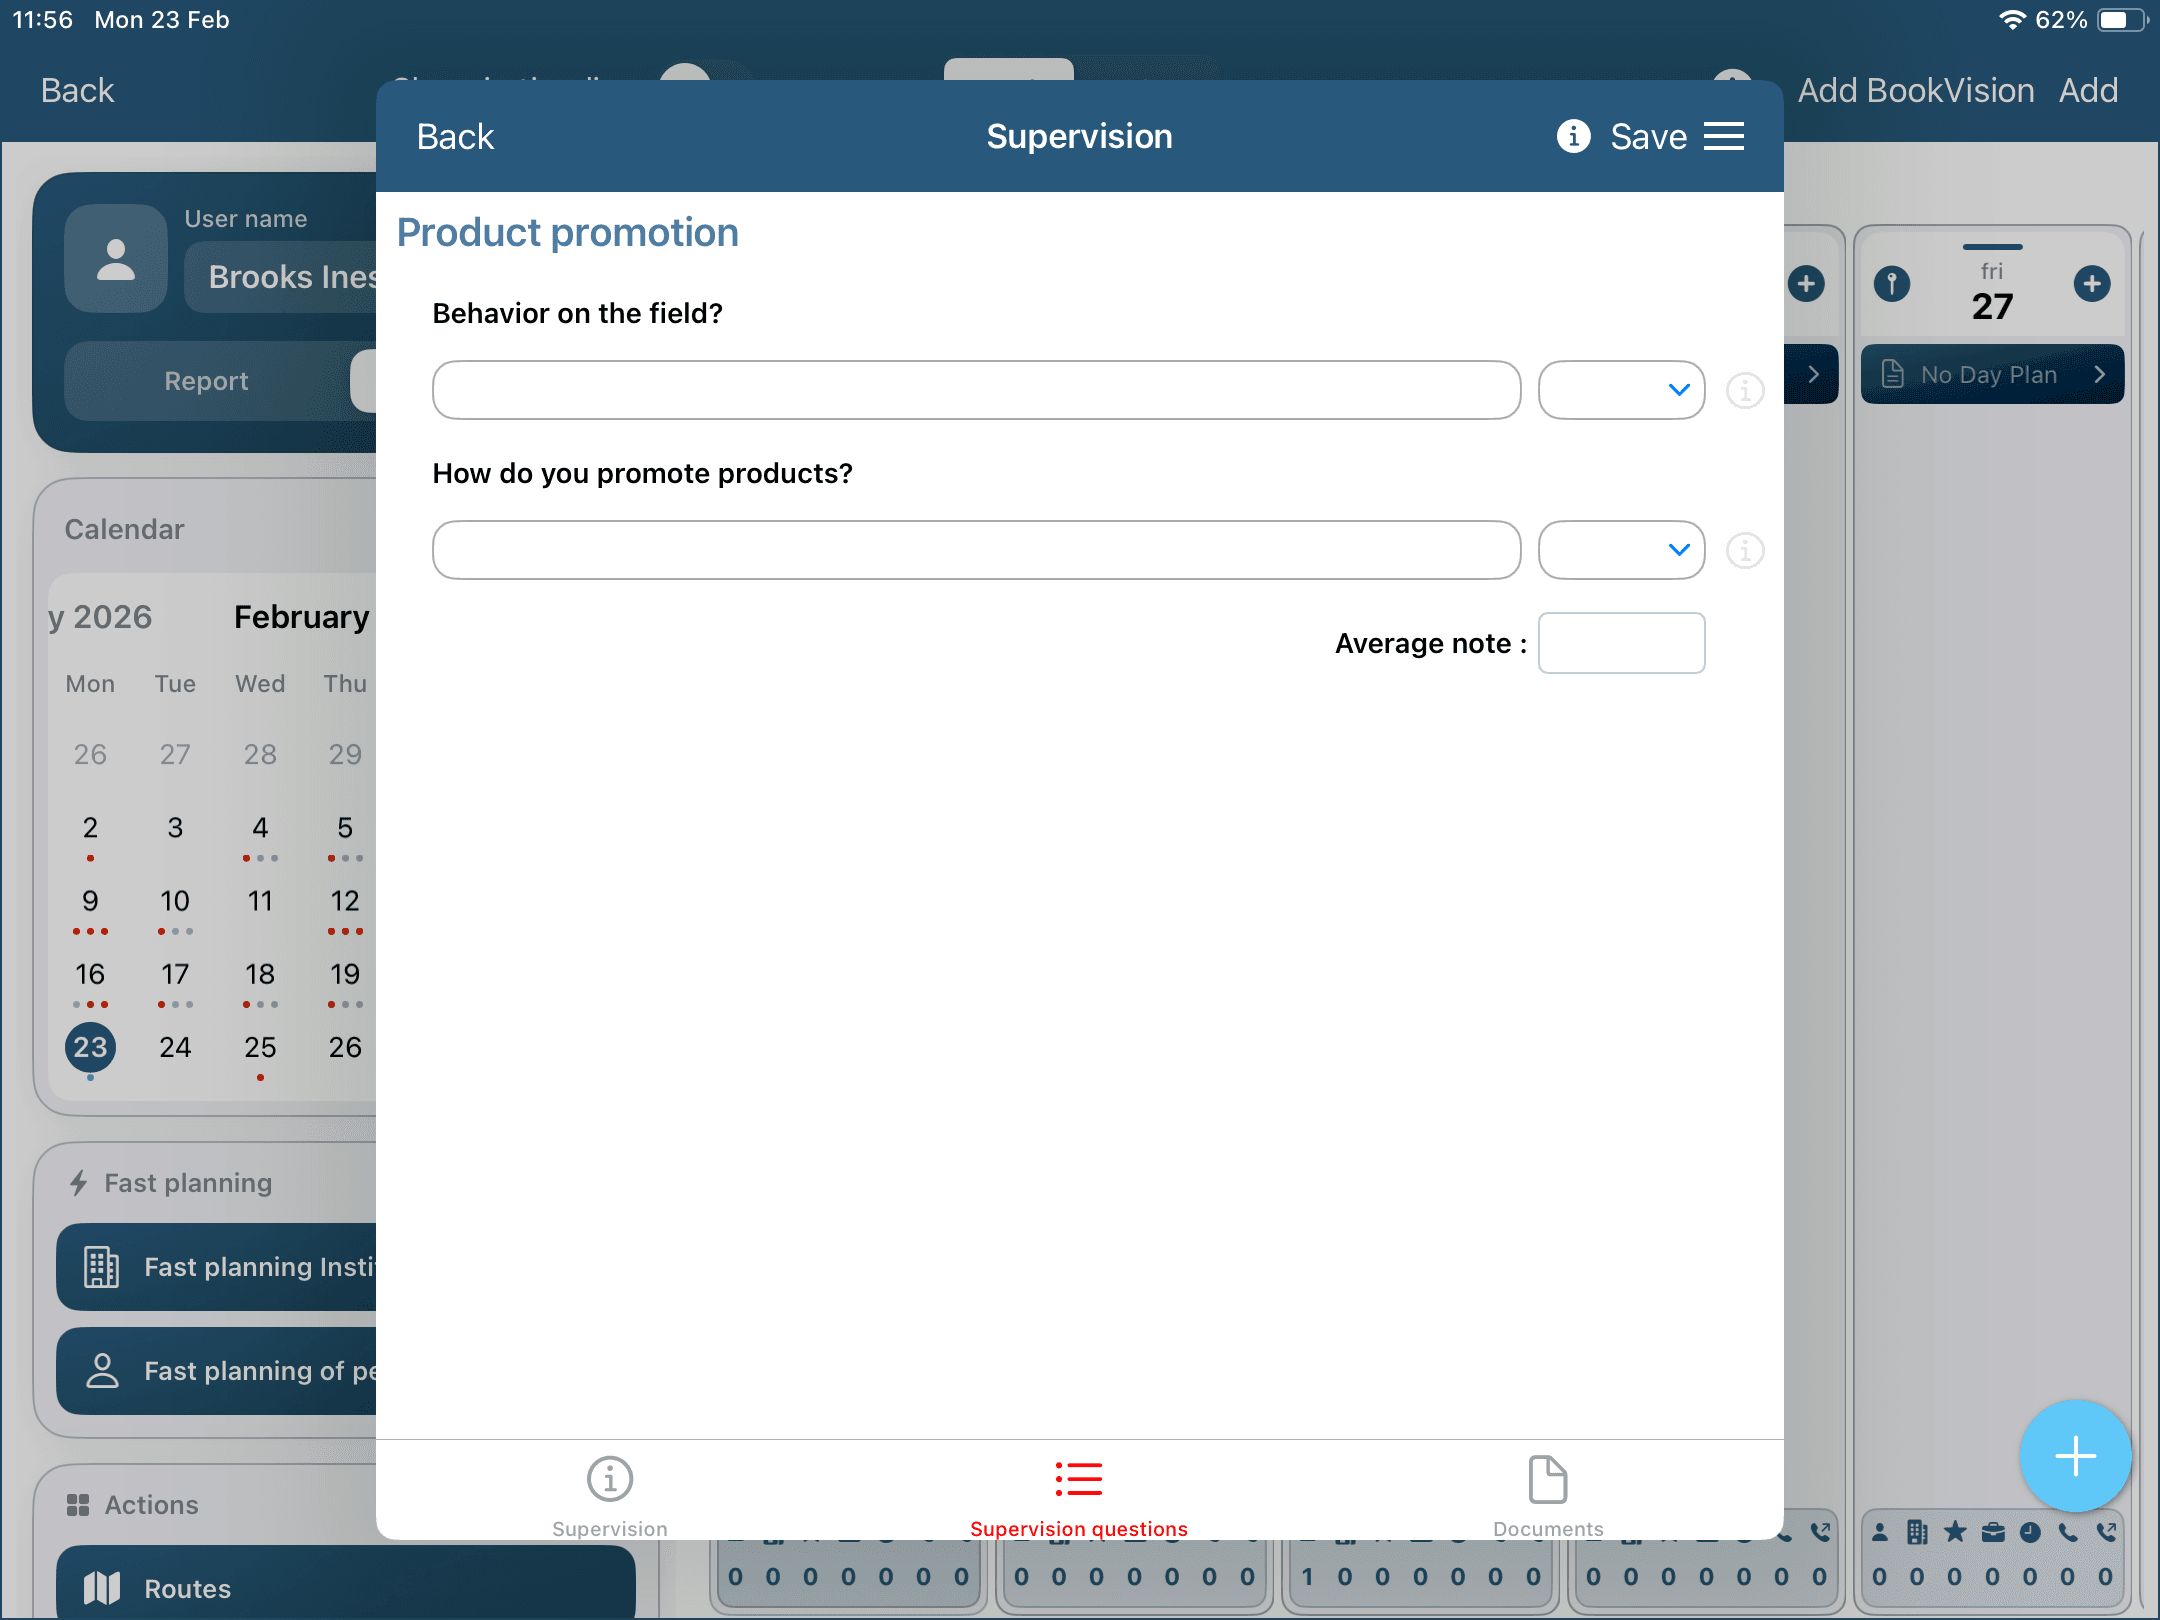
For each group of questions is calculated Average note. By pressing on the i button we can see info for each supervision question defined by Administrator.
Right next to the note is the empty text field where we can enter info (for example the reason why we have given this note.)
When all data is entered, we can see complete Average note on Supervision tab. After you fill all the data for the supervision, click Save.
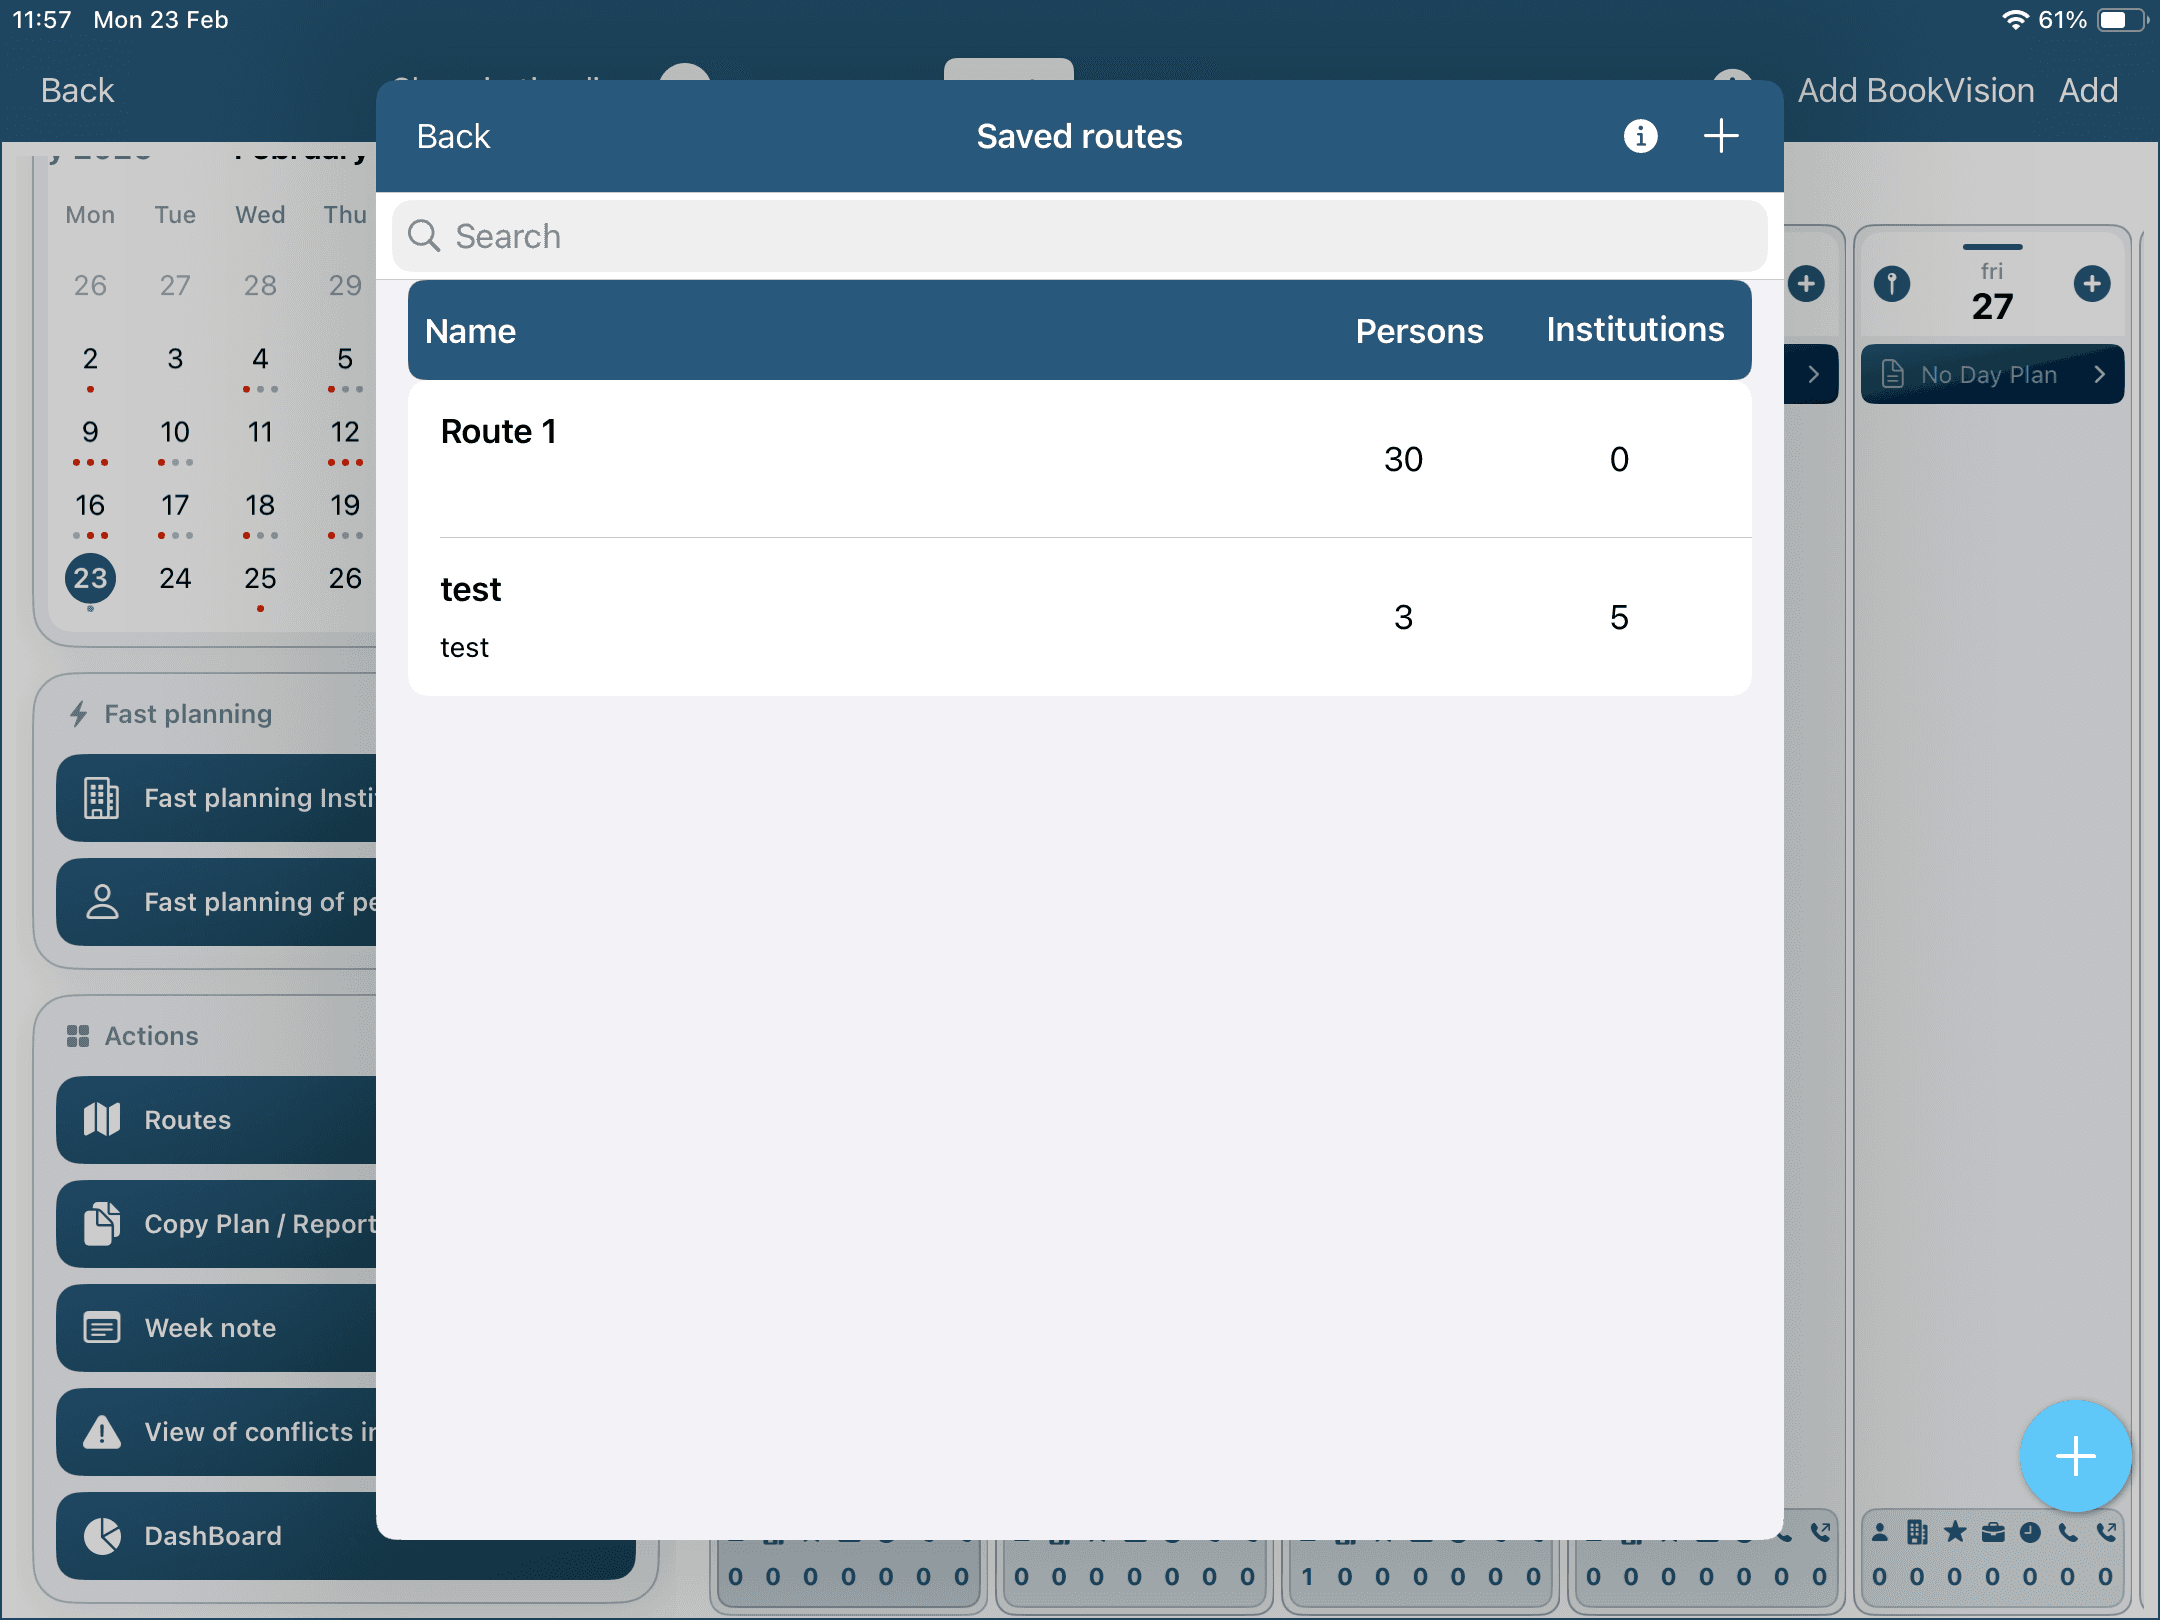
Route
There is also an option to copy plan using Route. With this option you can very easily copy visit or plan from some period to one desired date, and you do not have to enter it manually.
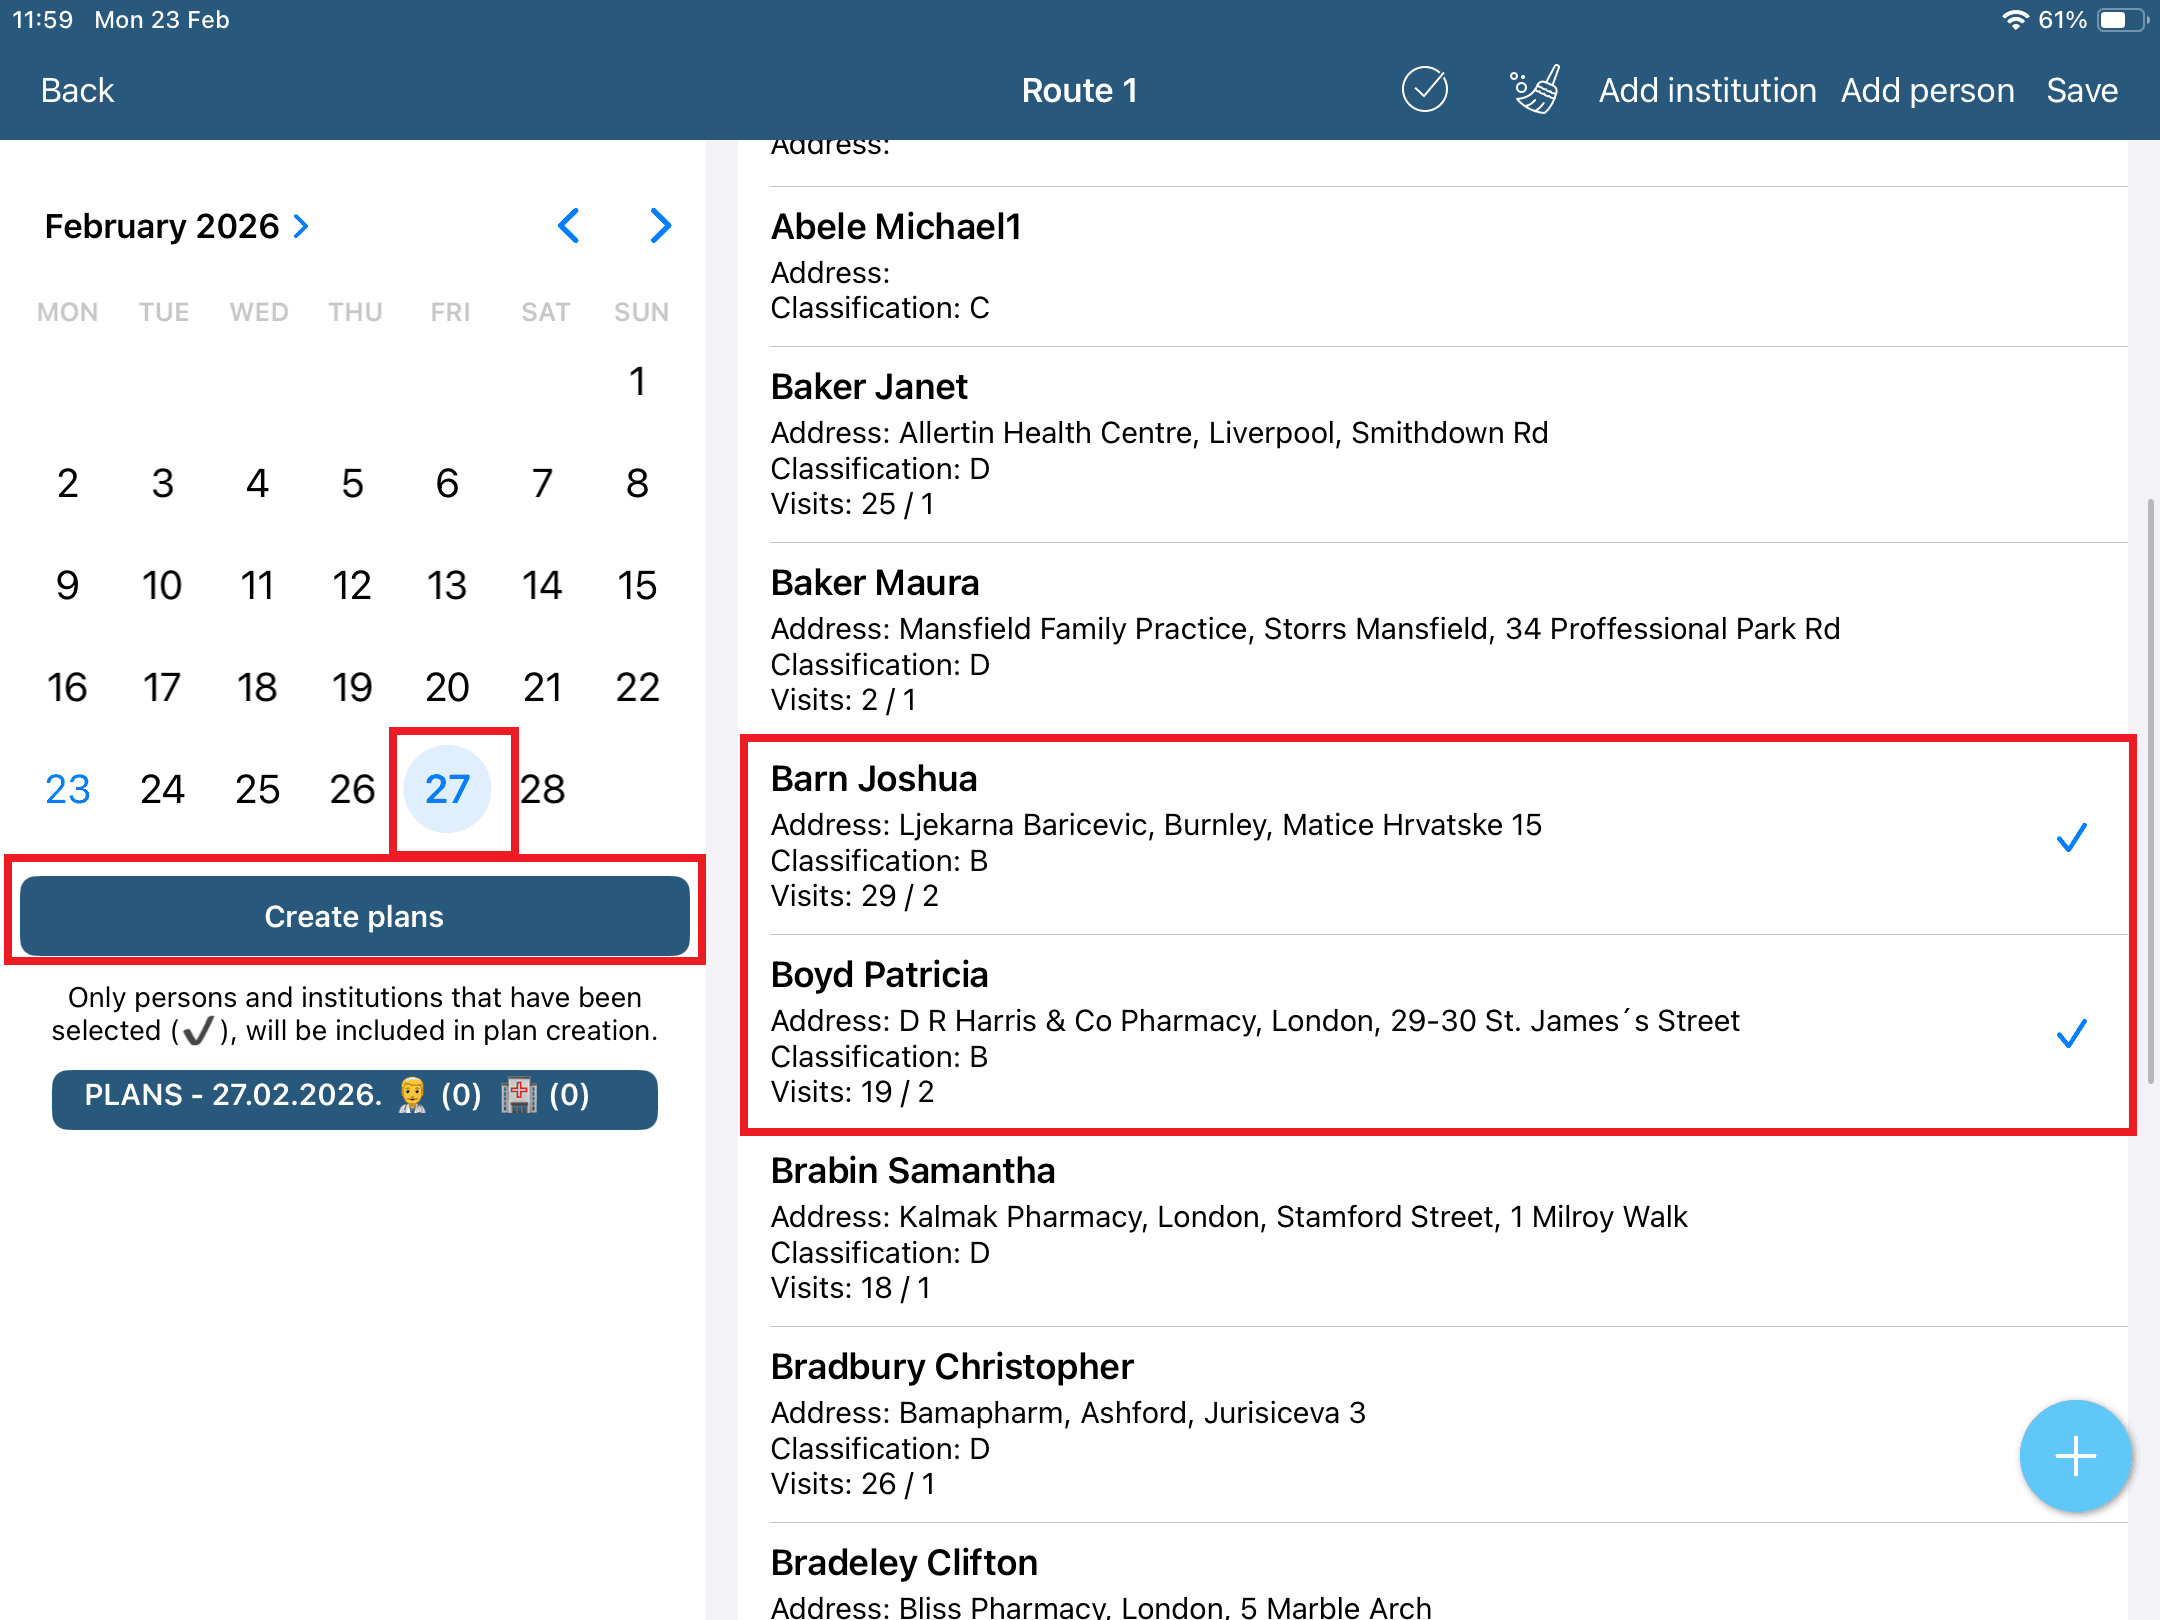
In the Calendar module choose Route.
You can create a route and name it however you like. By tapping on it, you wil be able to add persons and institutions to created route.
Click on Add institution/Add person to add clients to the route.
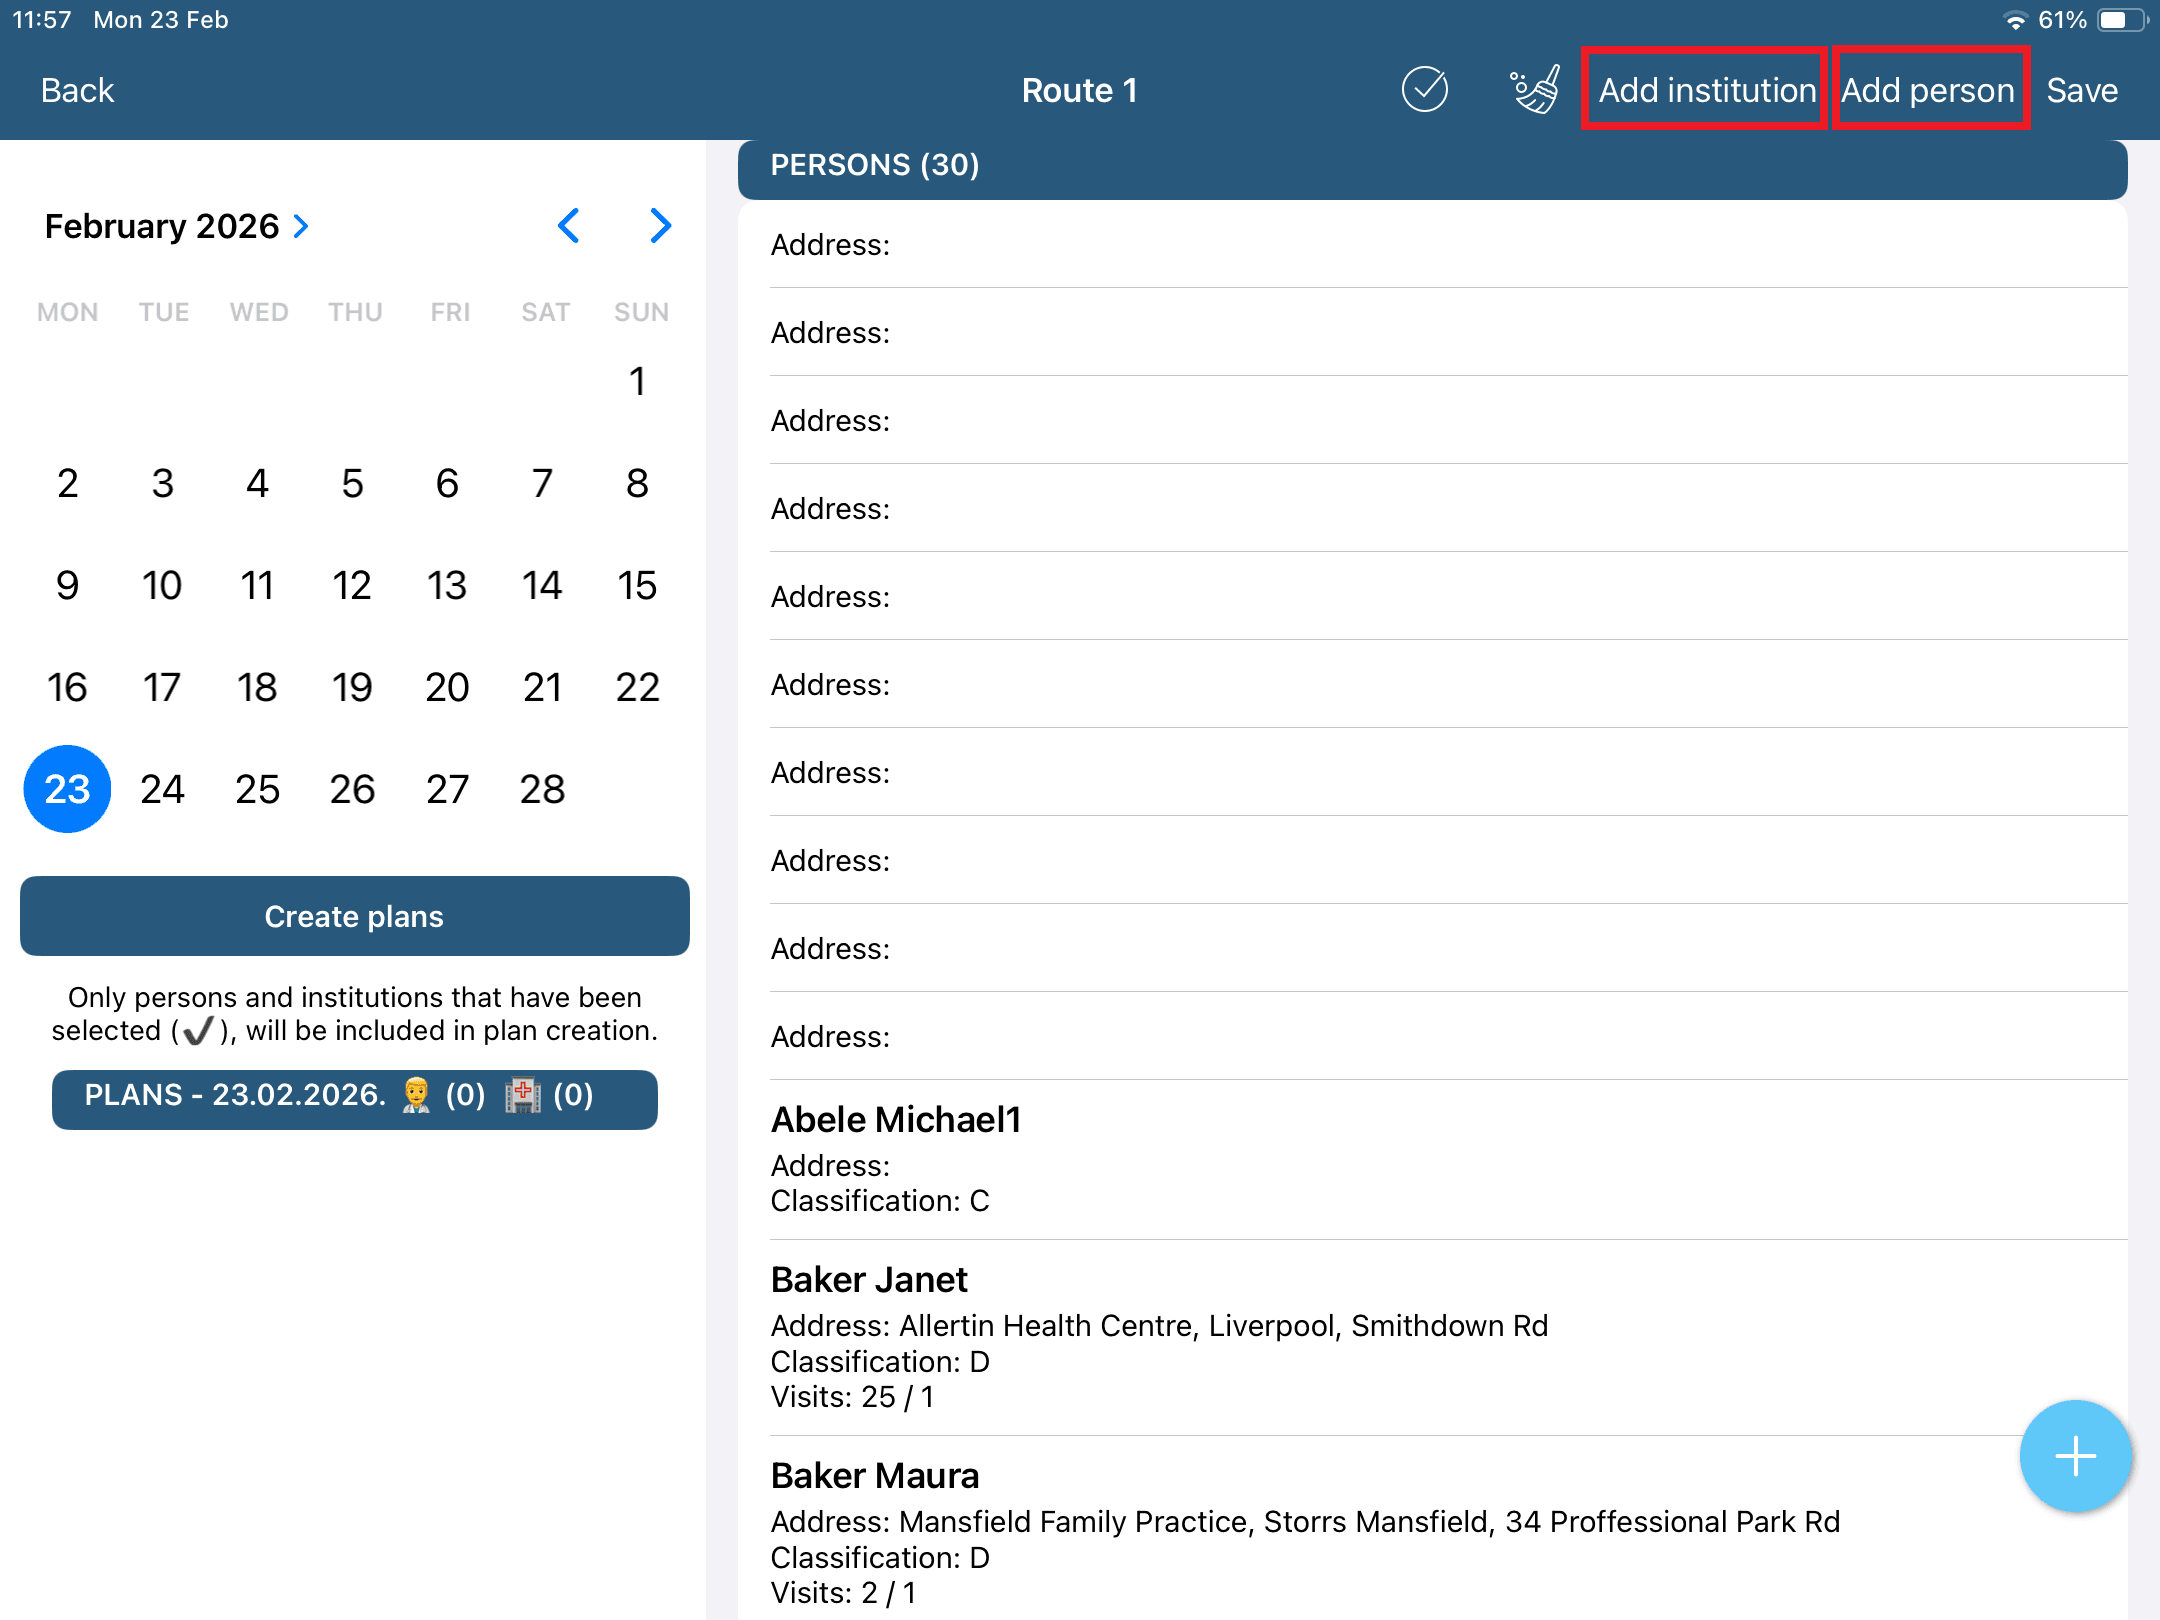
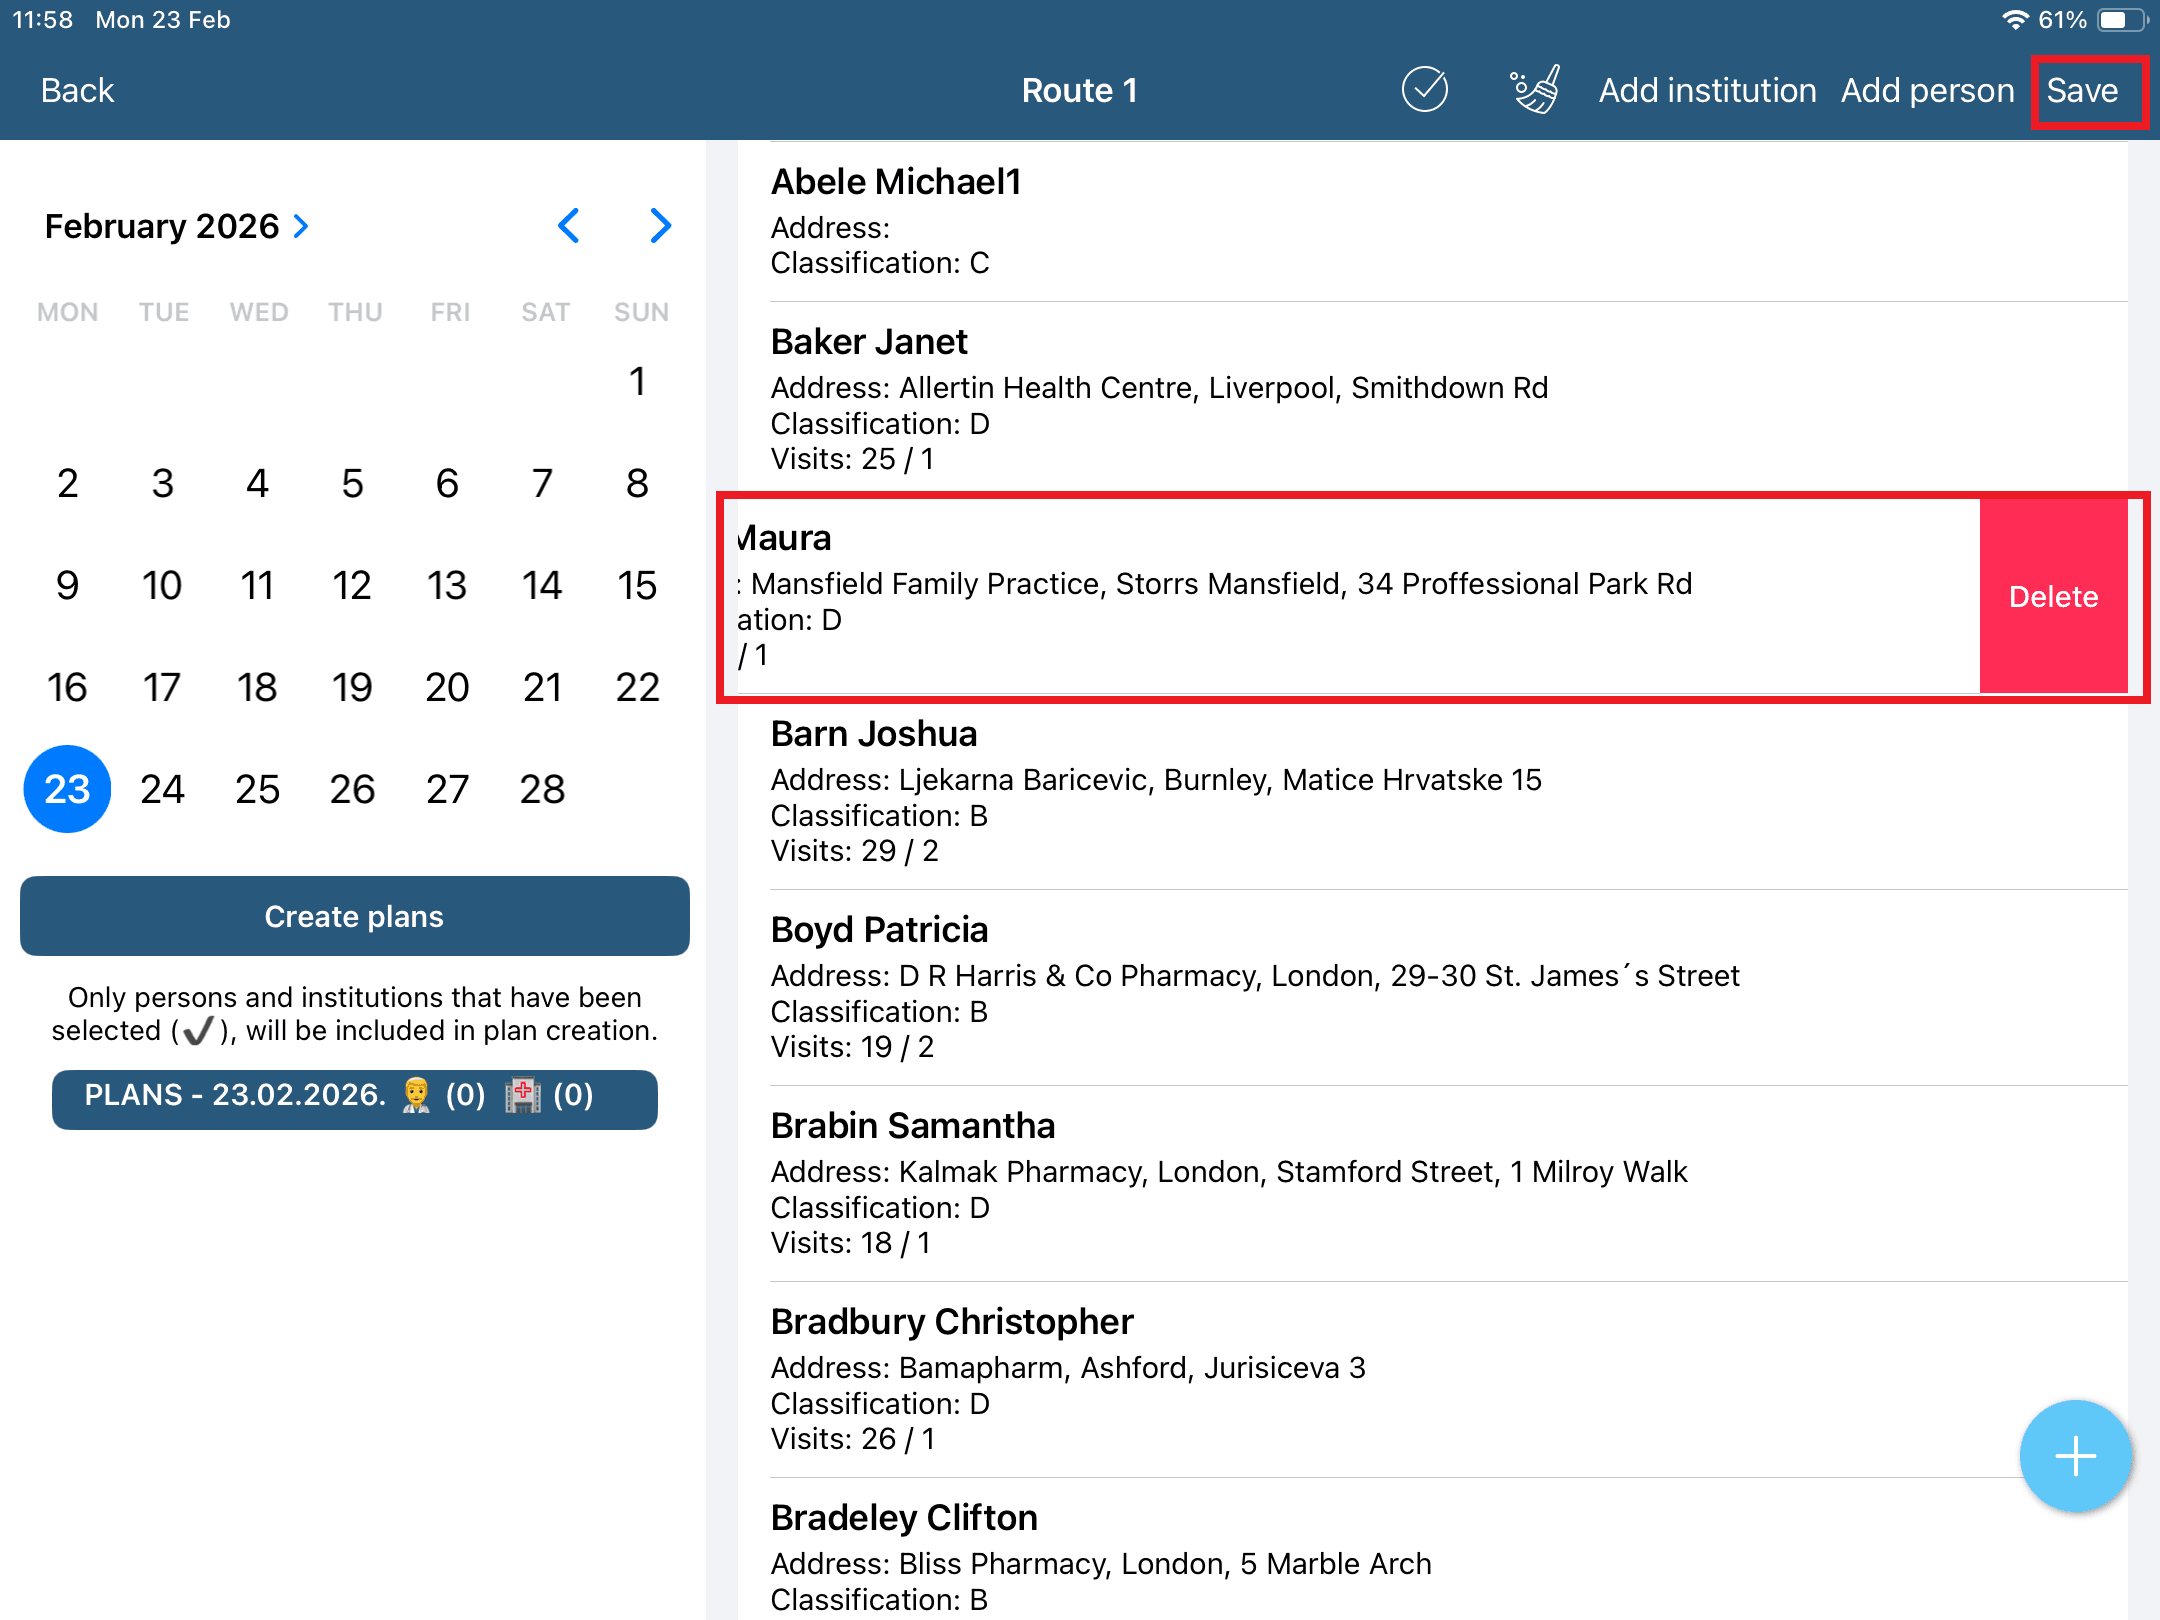
You can edit the list by swiping on Institutions/Persons. After you are done, click on Save.
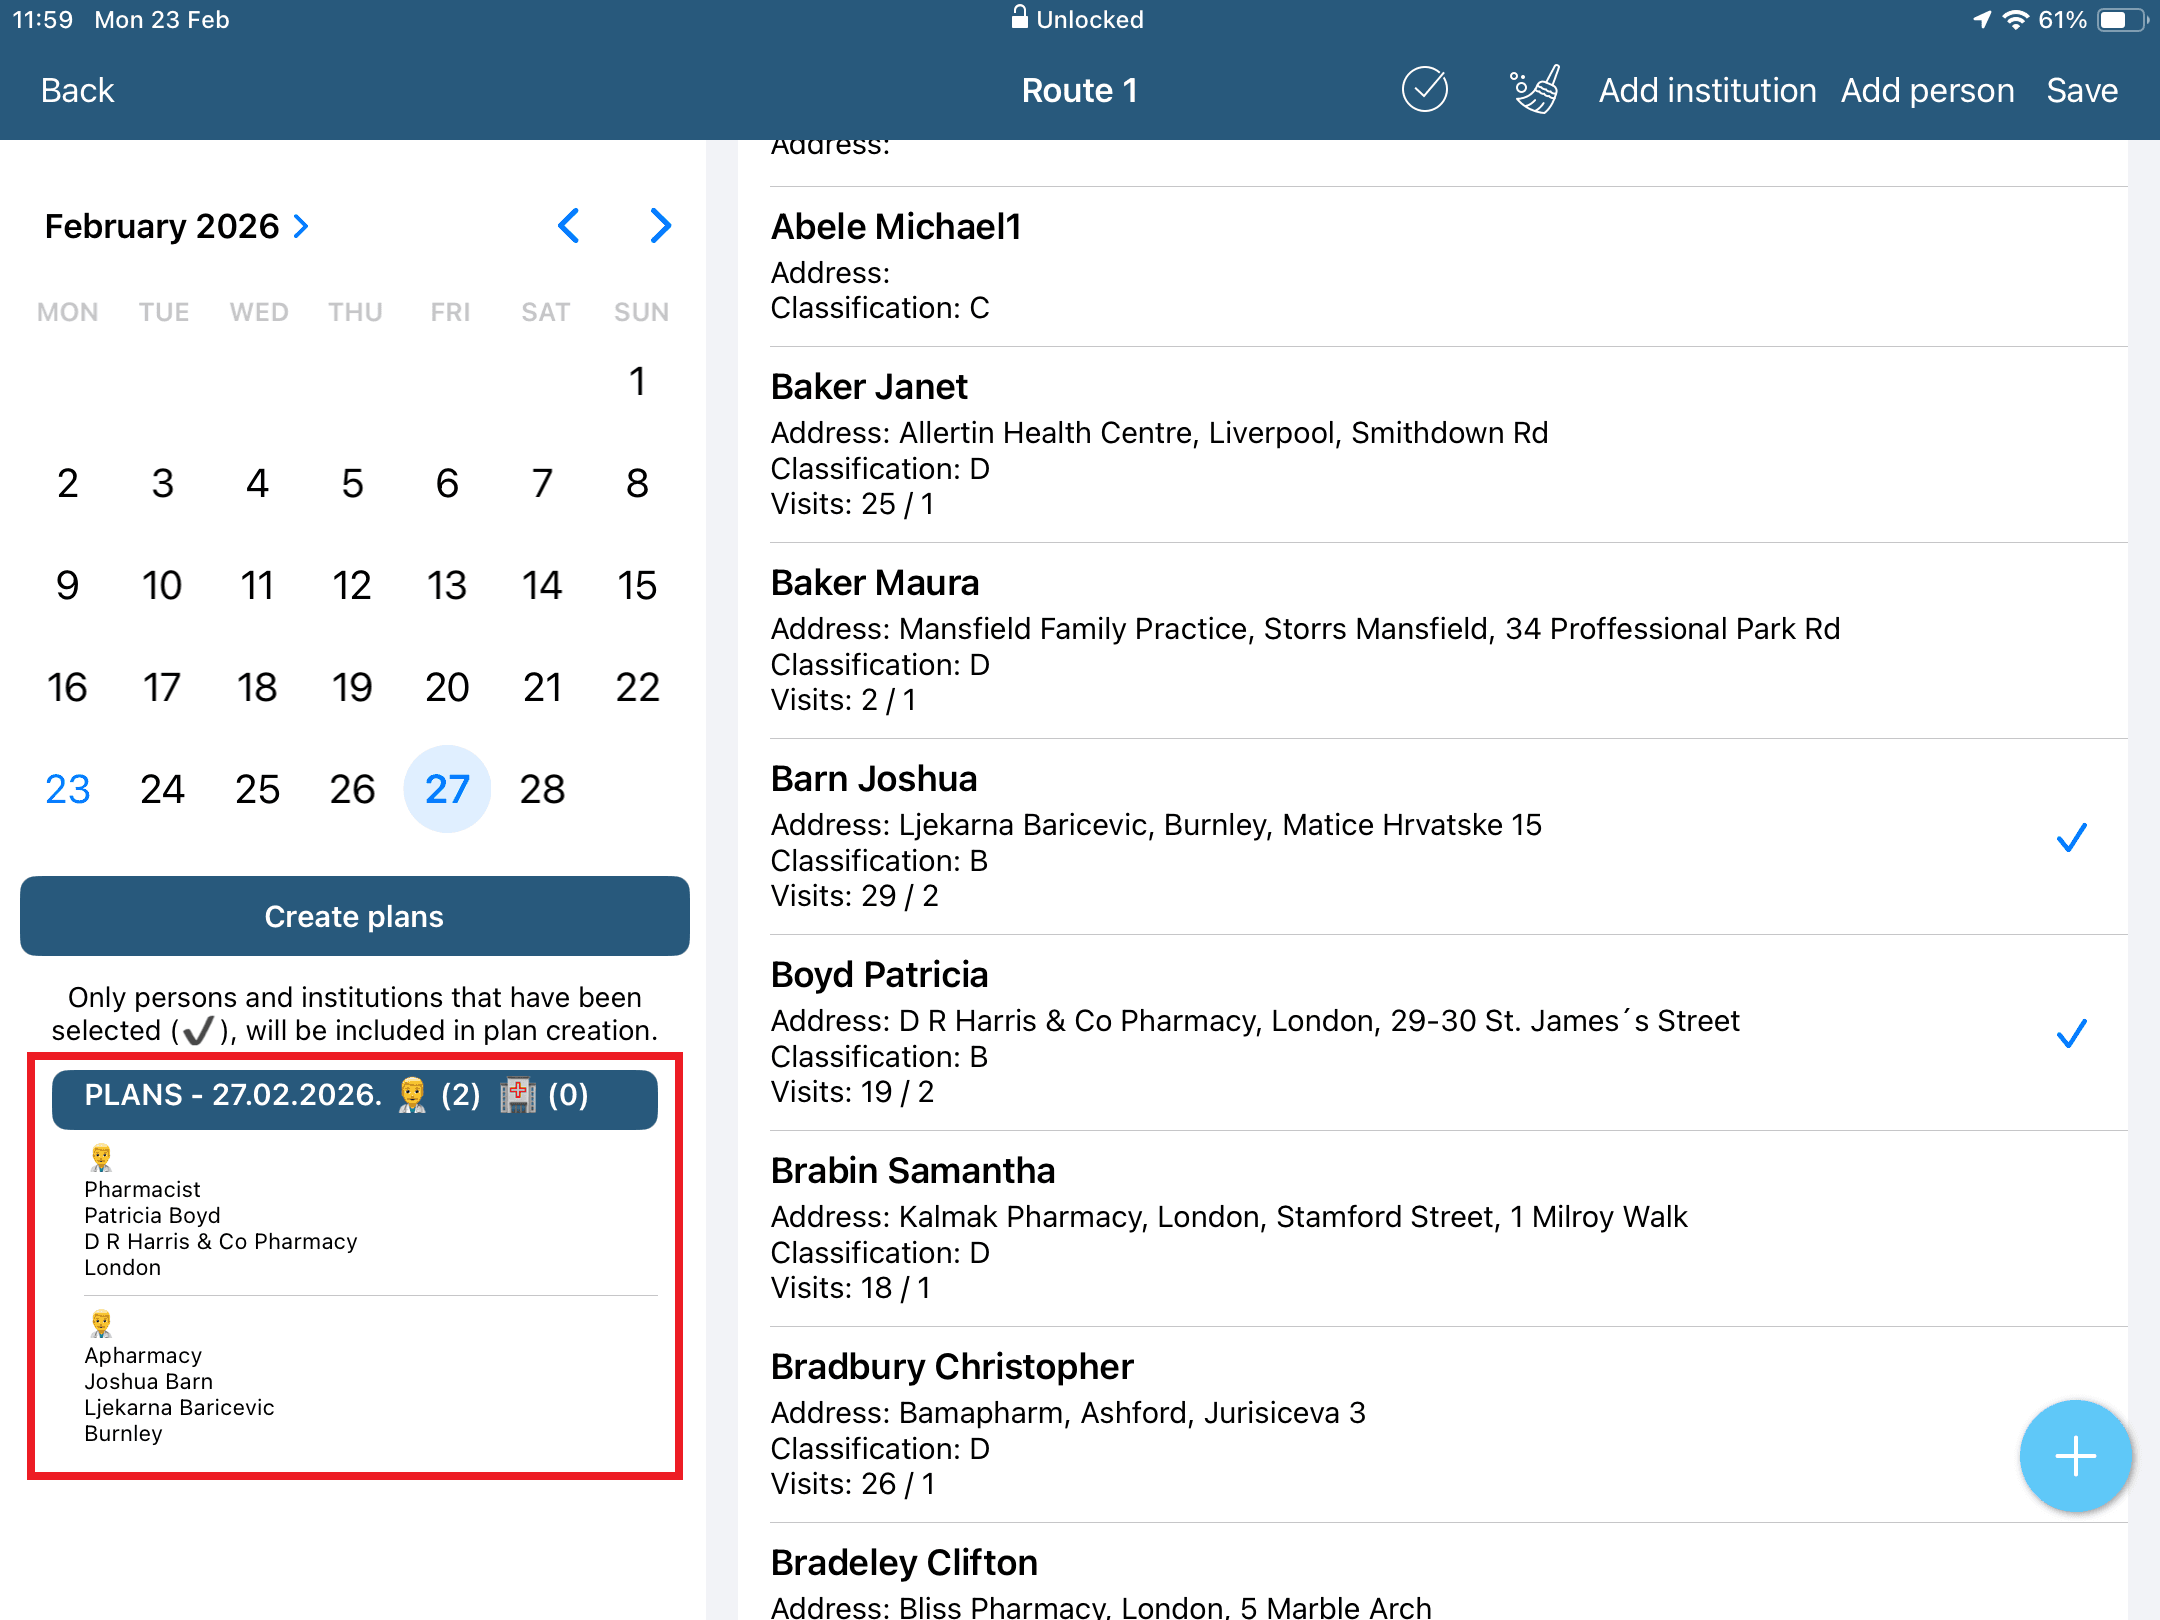
To create plans using the routes, tap on desired persons/institutions and select a date in the calendar. Click Create plans.
After saving, the plans will be visible on the screen like it is shown below.
Copy plan
For the desired date you can also save route or load route from another day. Click on the Route button to switch from Plan to Route button.
You can enter different criteria for copying: “Planned visit from” and “to”. Click “Load” button to refresh your list of plans. You can also copy the entire plan by clicking on “Show all”, “Only unvisited” or “Only visited” persons/institutions. Under “Copy” set “Target date” and click “Copy” button in the lower right corner. Your plans are copied.
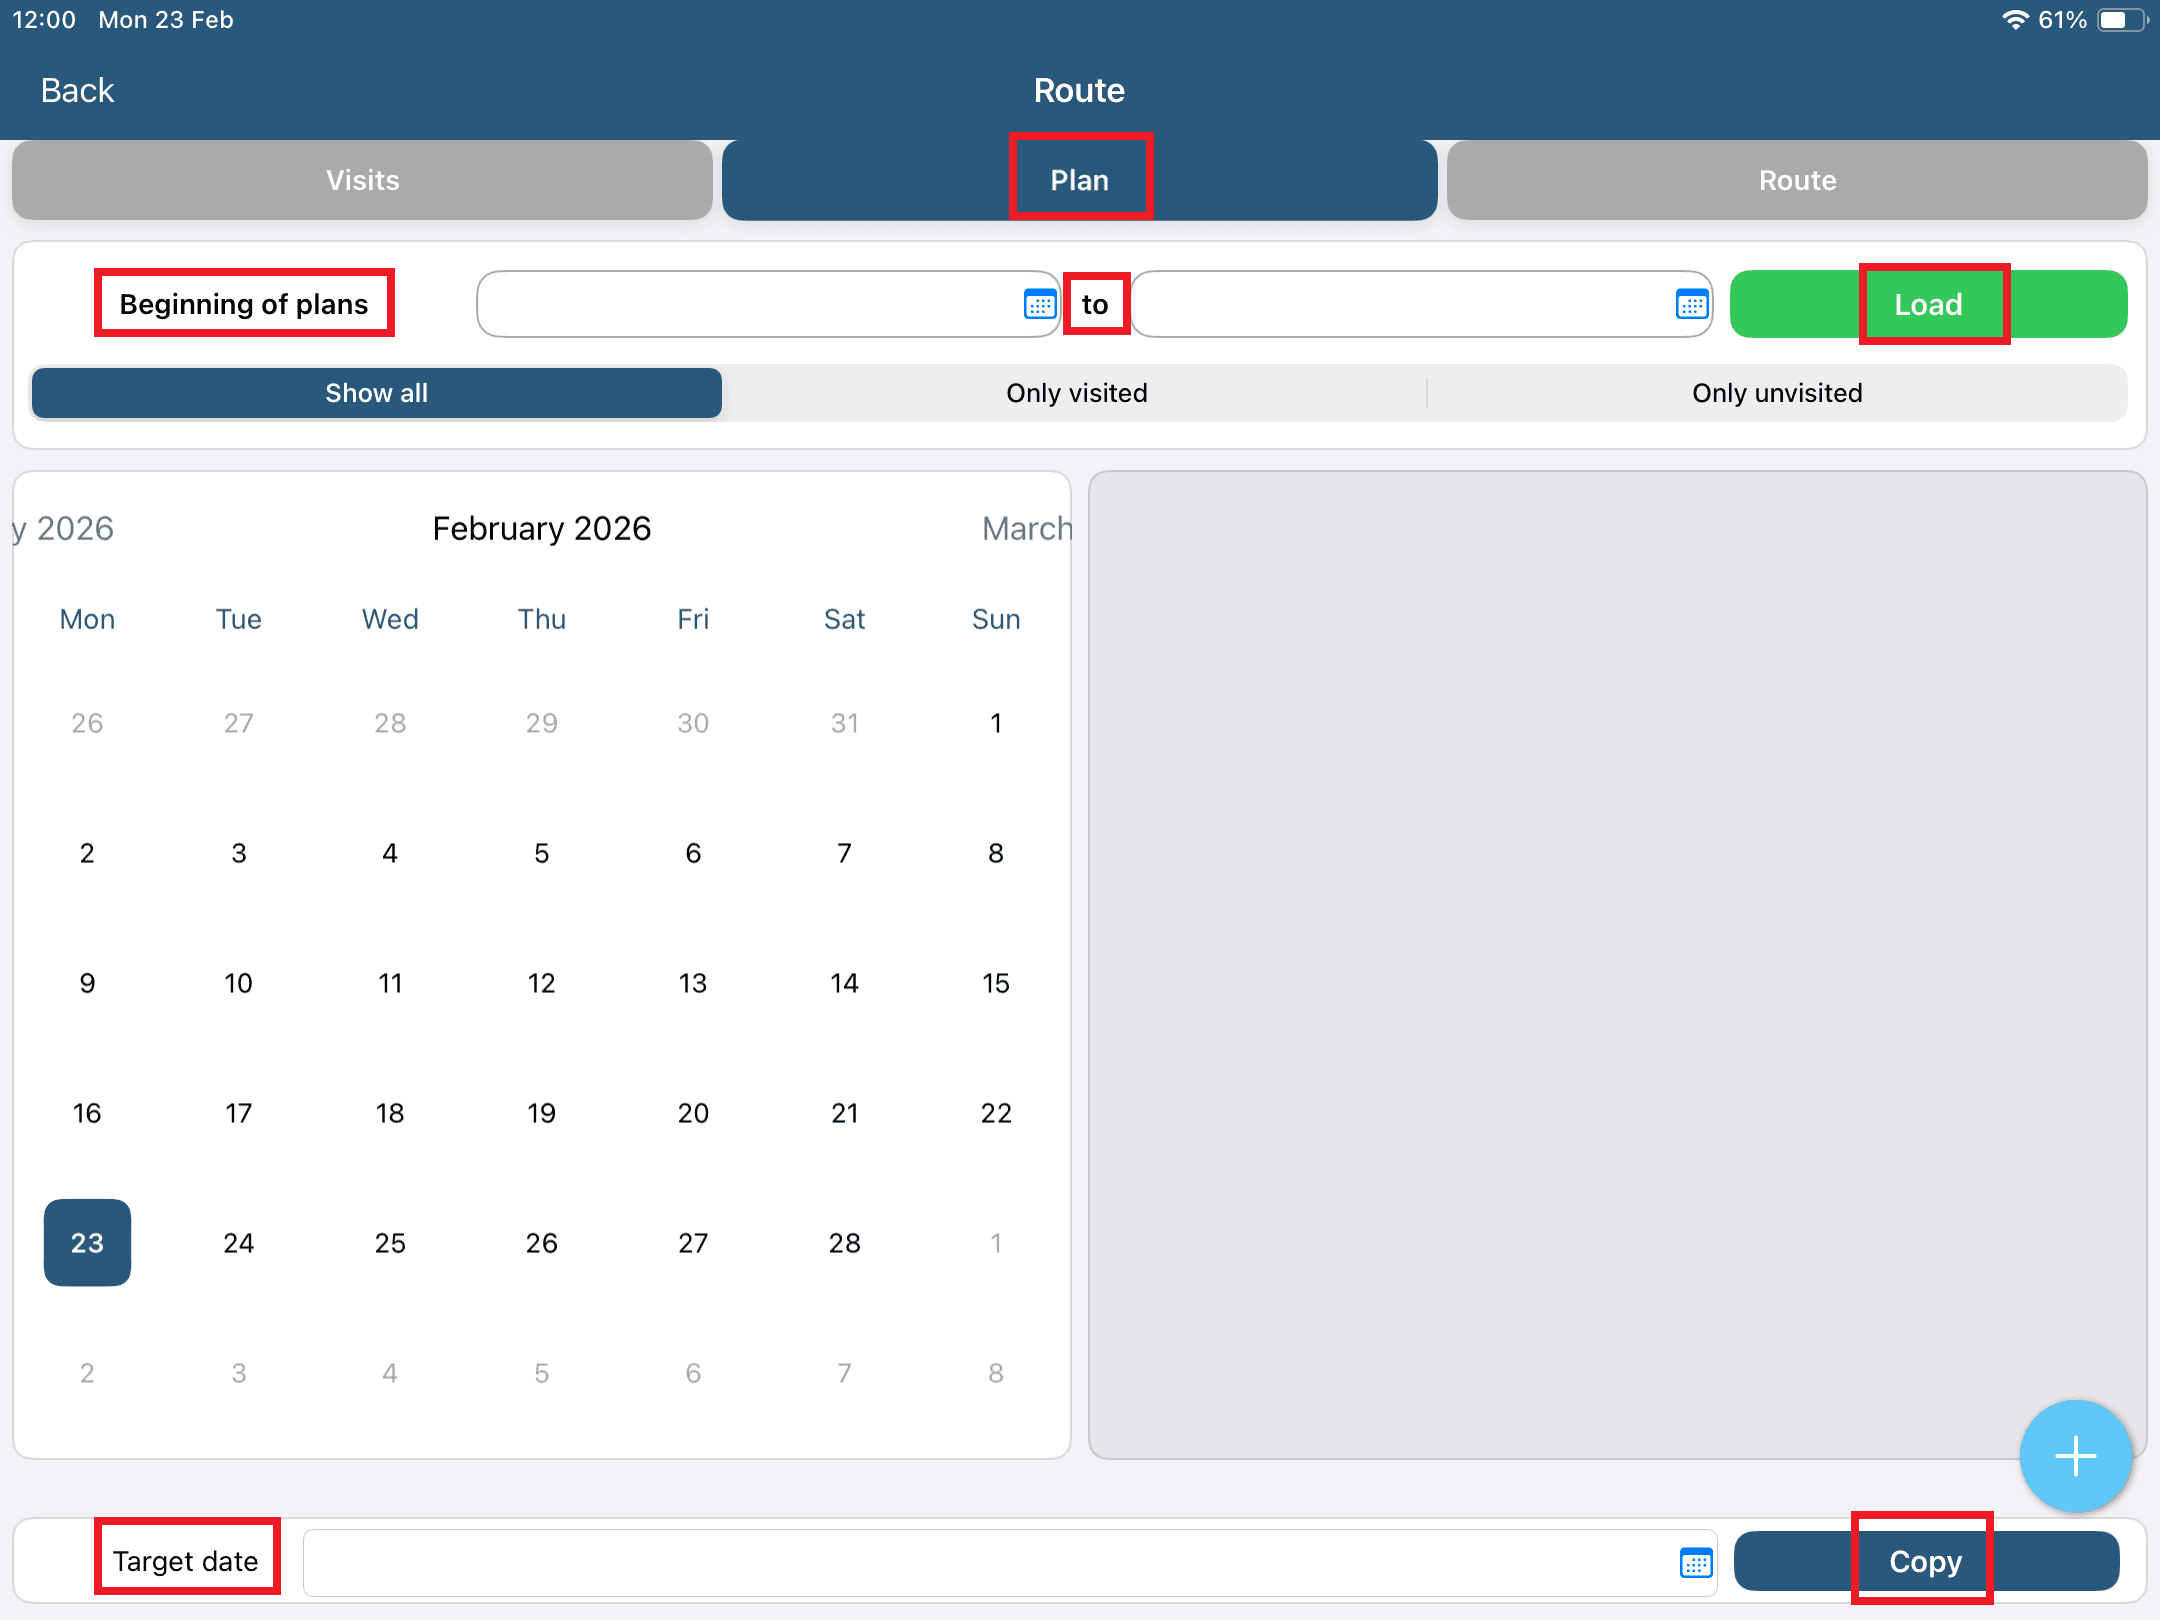
To save new route click on the Save route button. New window will open as shown on the picture below.
To load an existing route click on “Load route” button and choose from the drop down list a route you want to load and plans for save route will be shown.
Also, you can delete routes by clicking on “Delete” button.
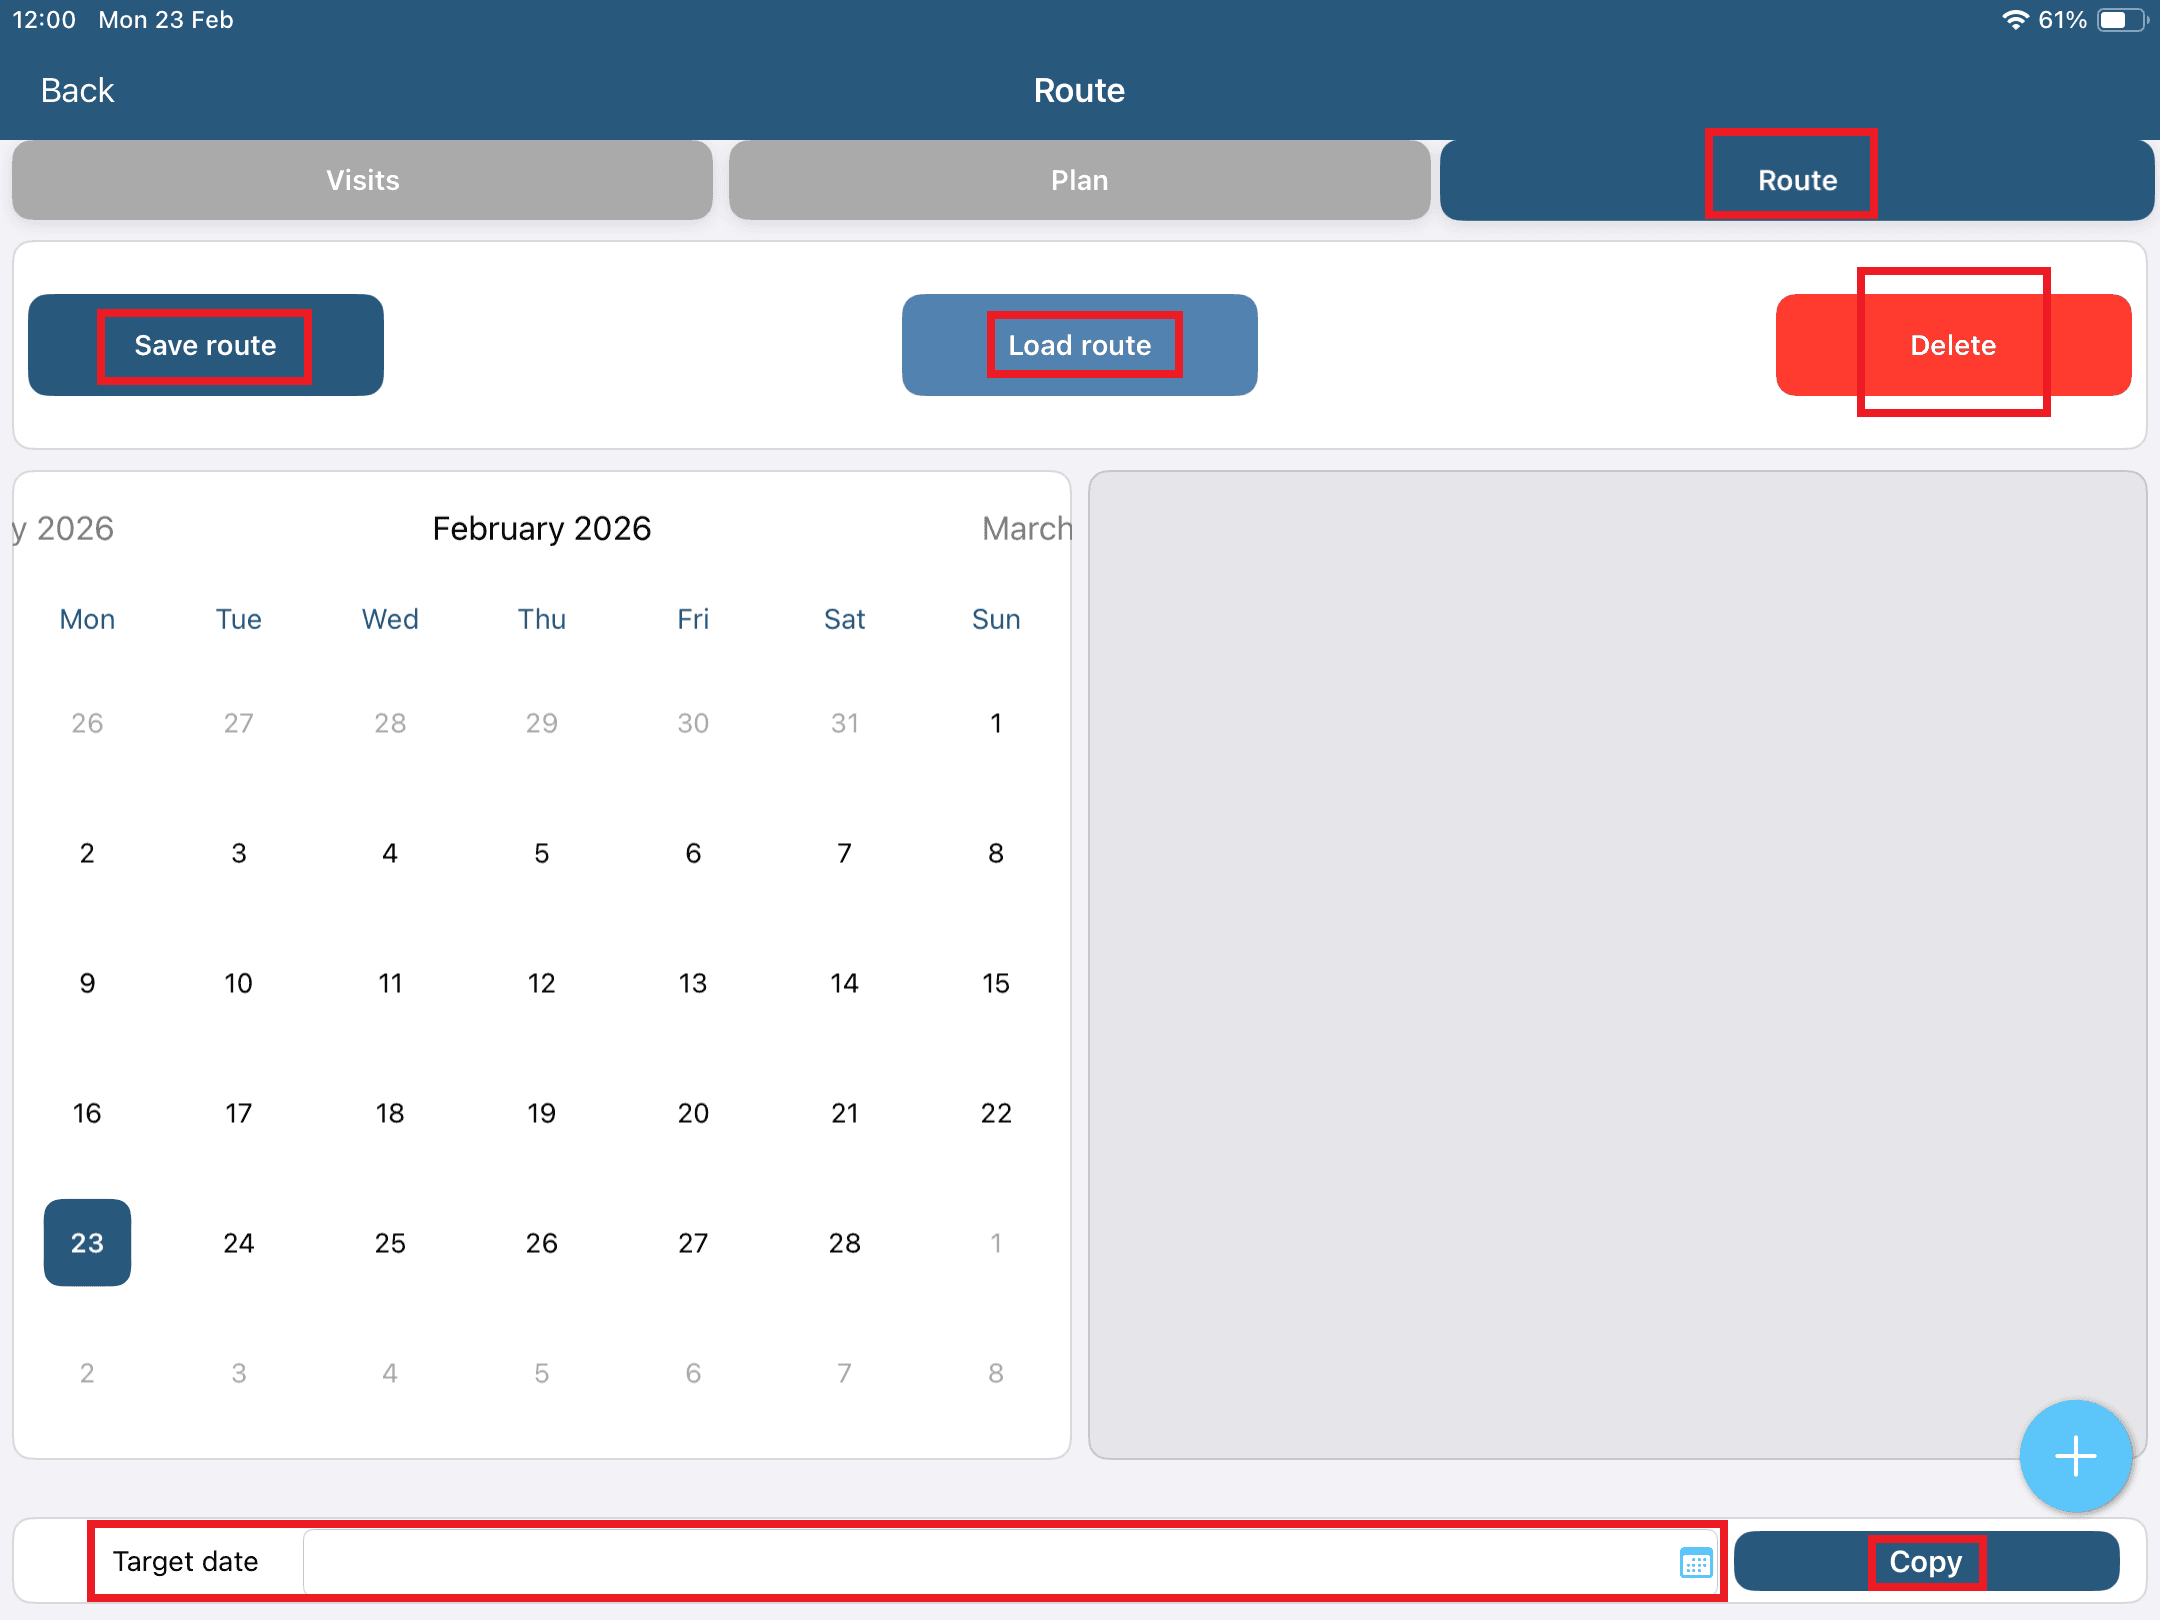
For copying route, you must choose date of route, than in “Target date” choose date, than click on “Copy”.
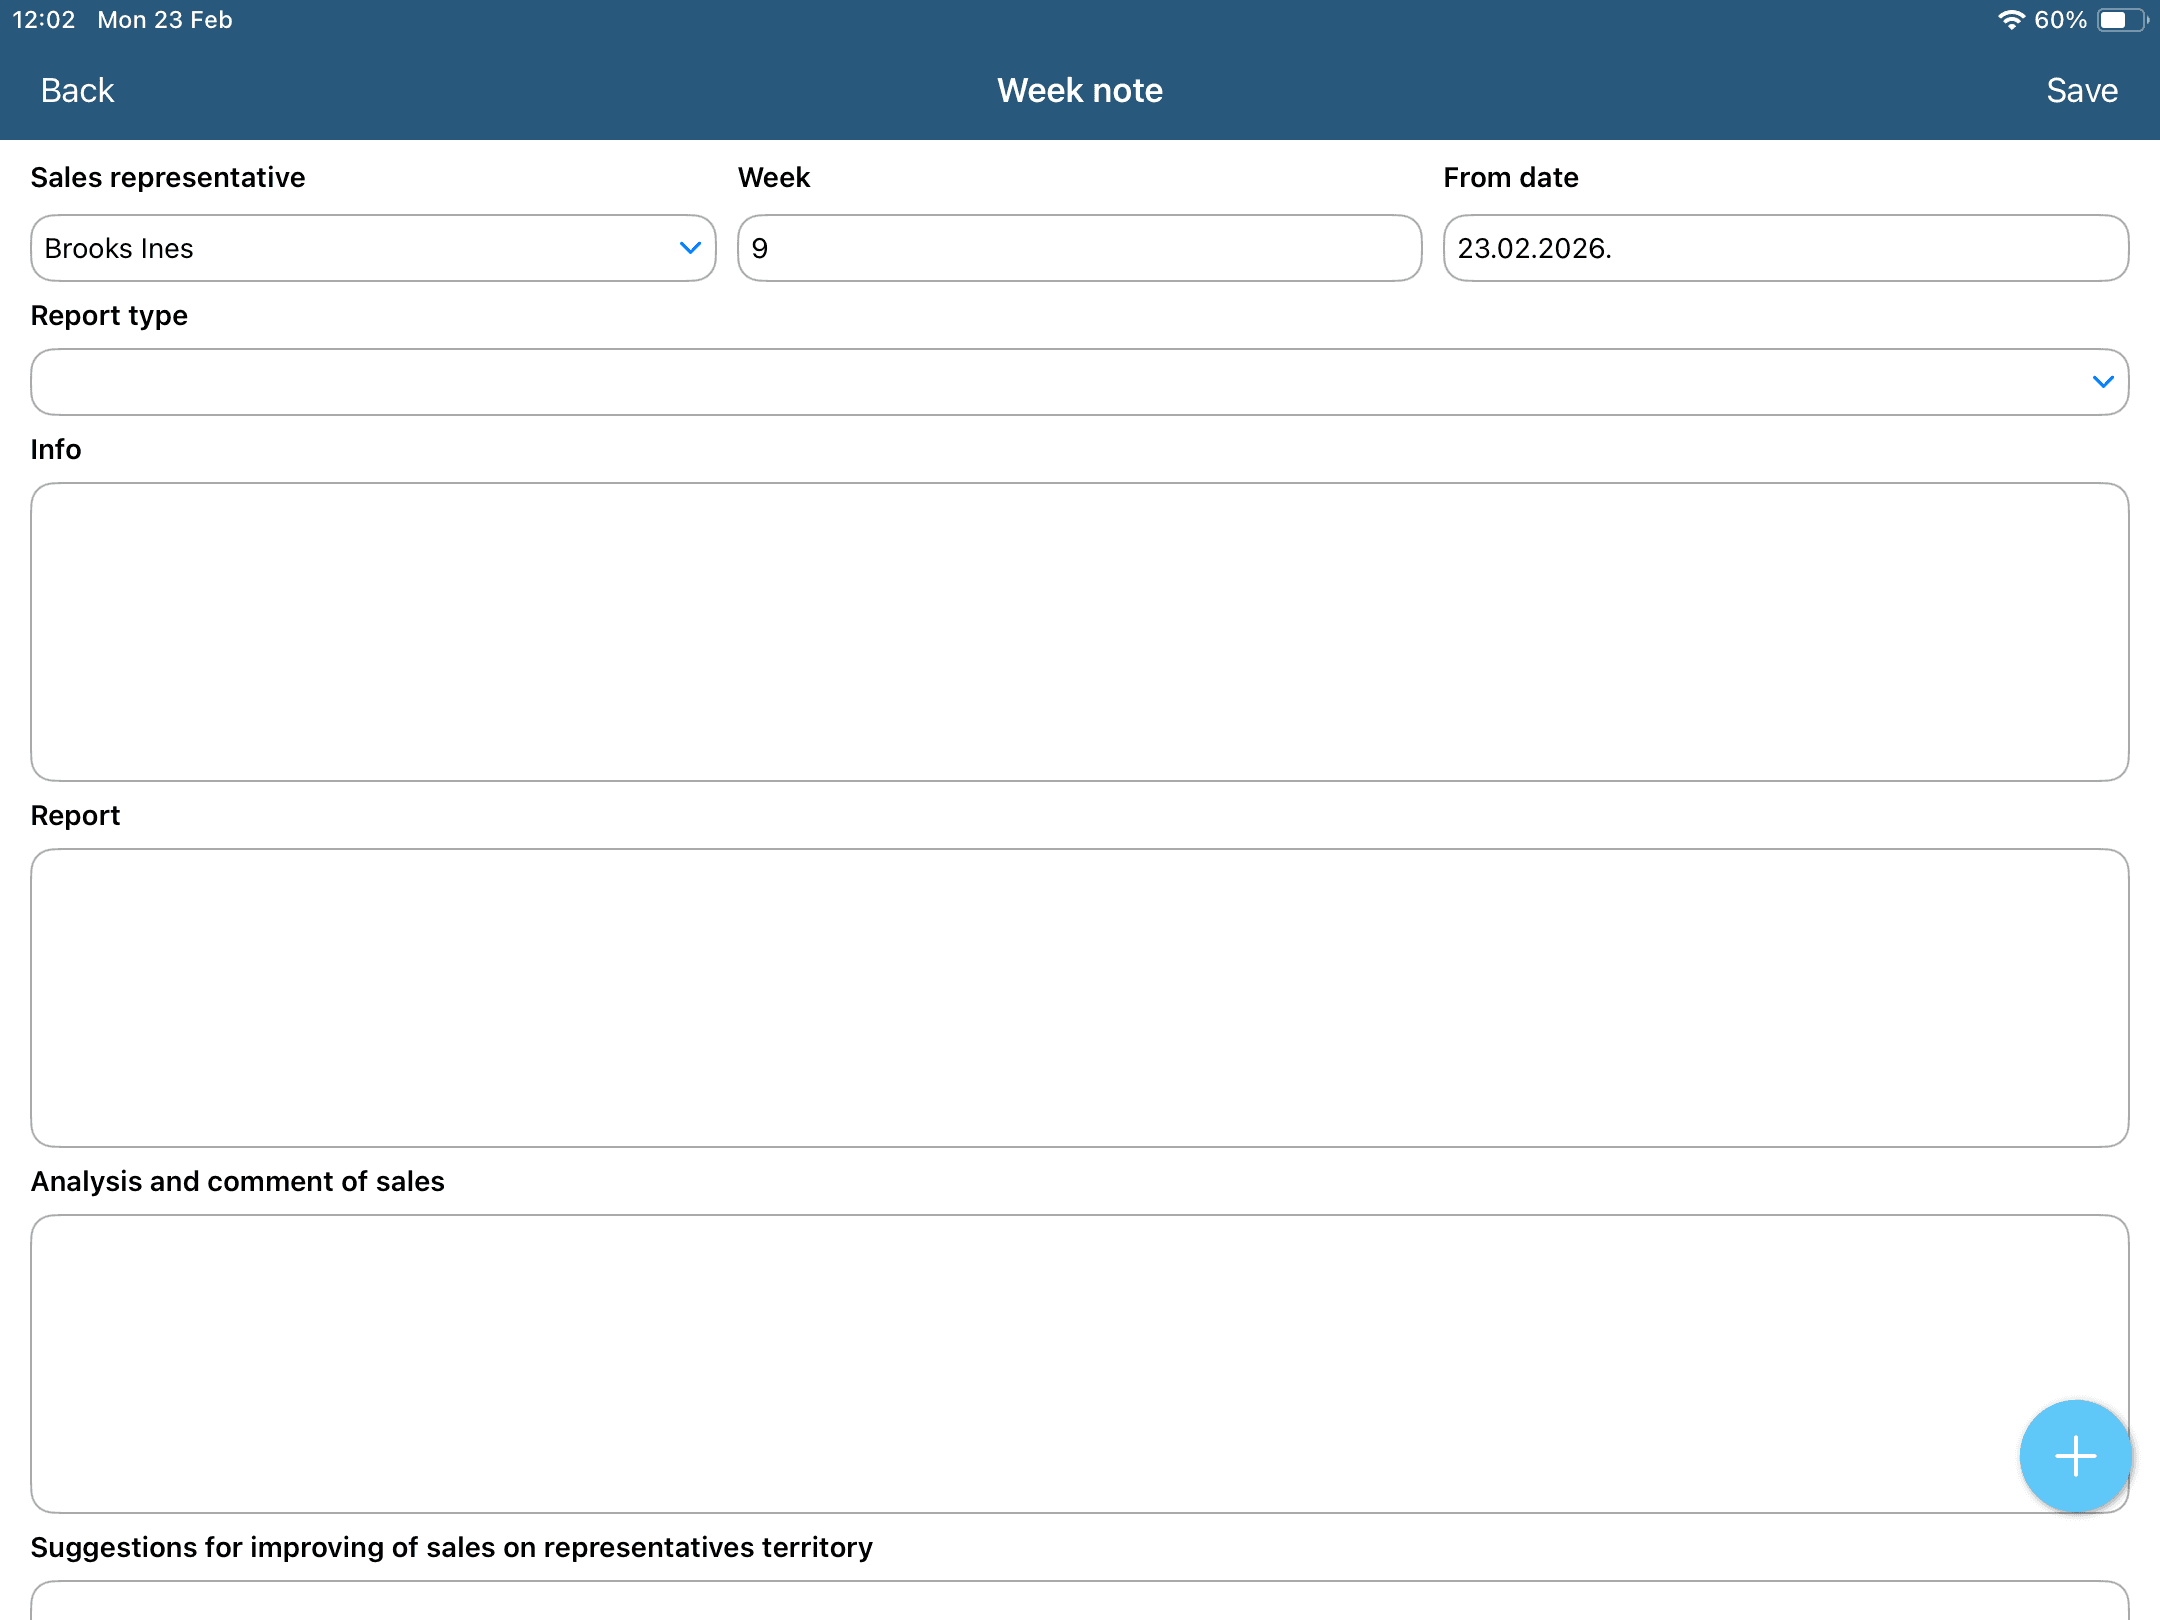
Week note
A Week note is a module where representatives can write different week notes and info. To access it, press “Week note button” on Calendar.
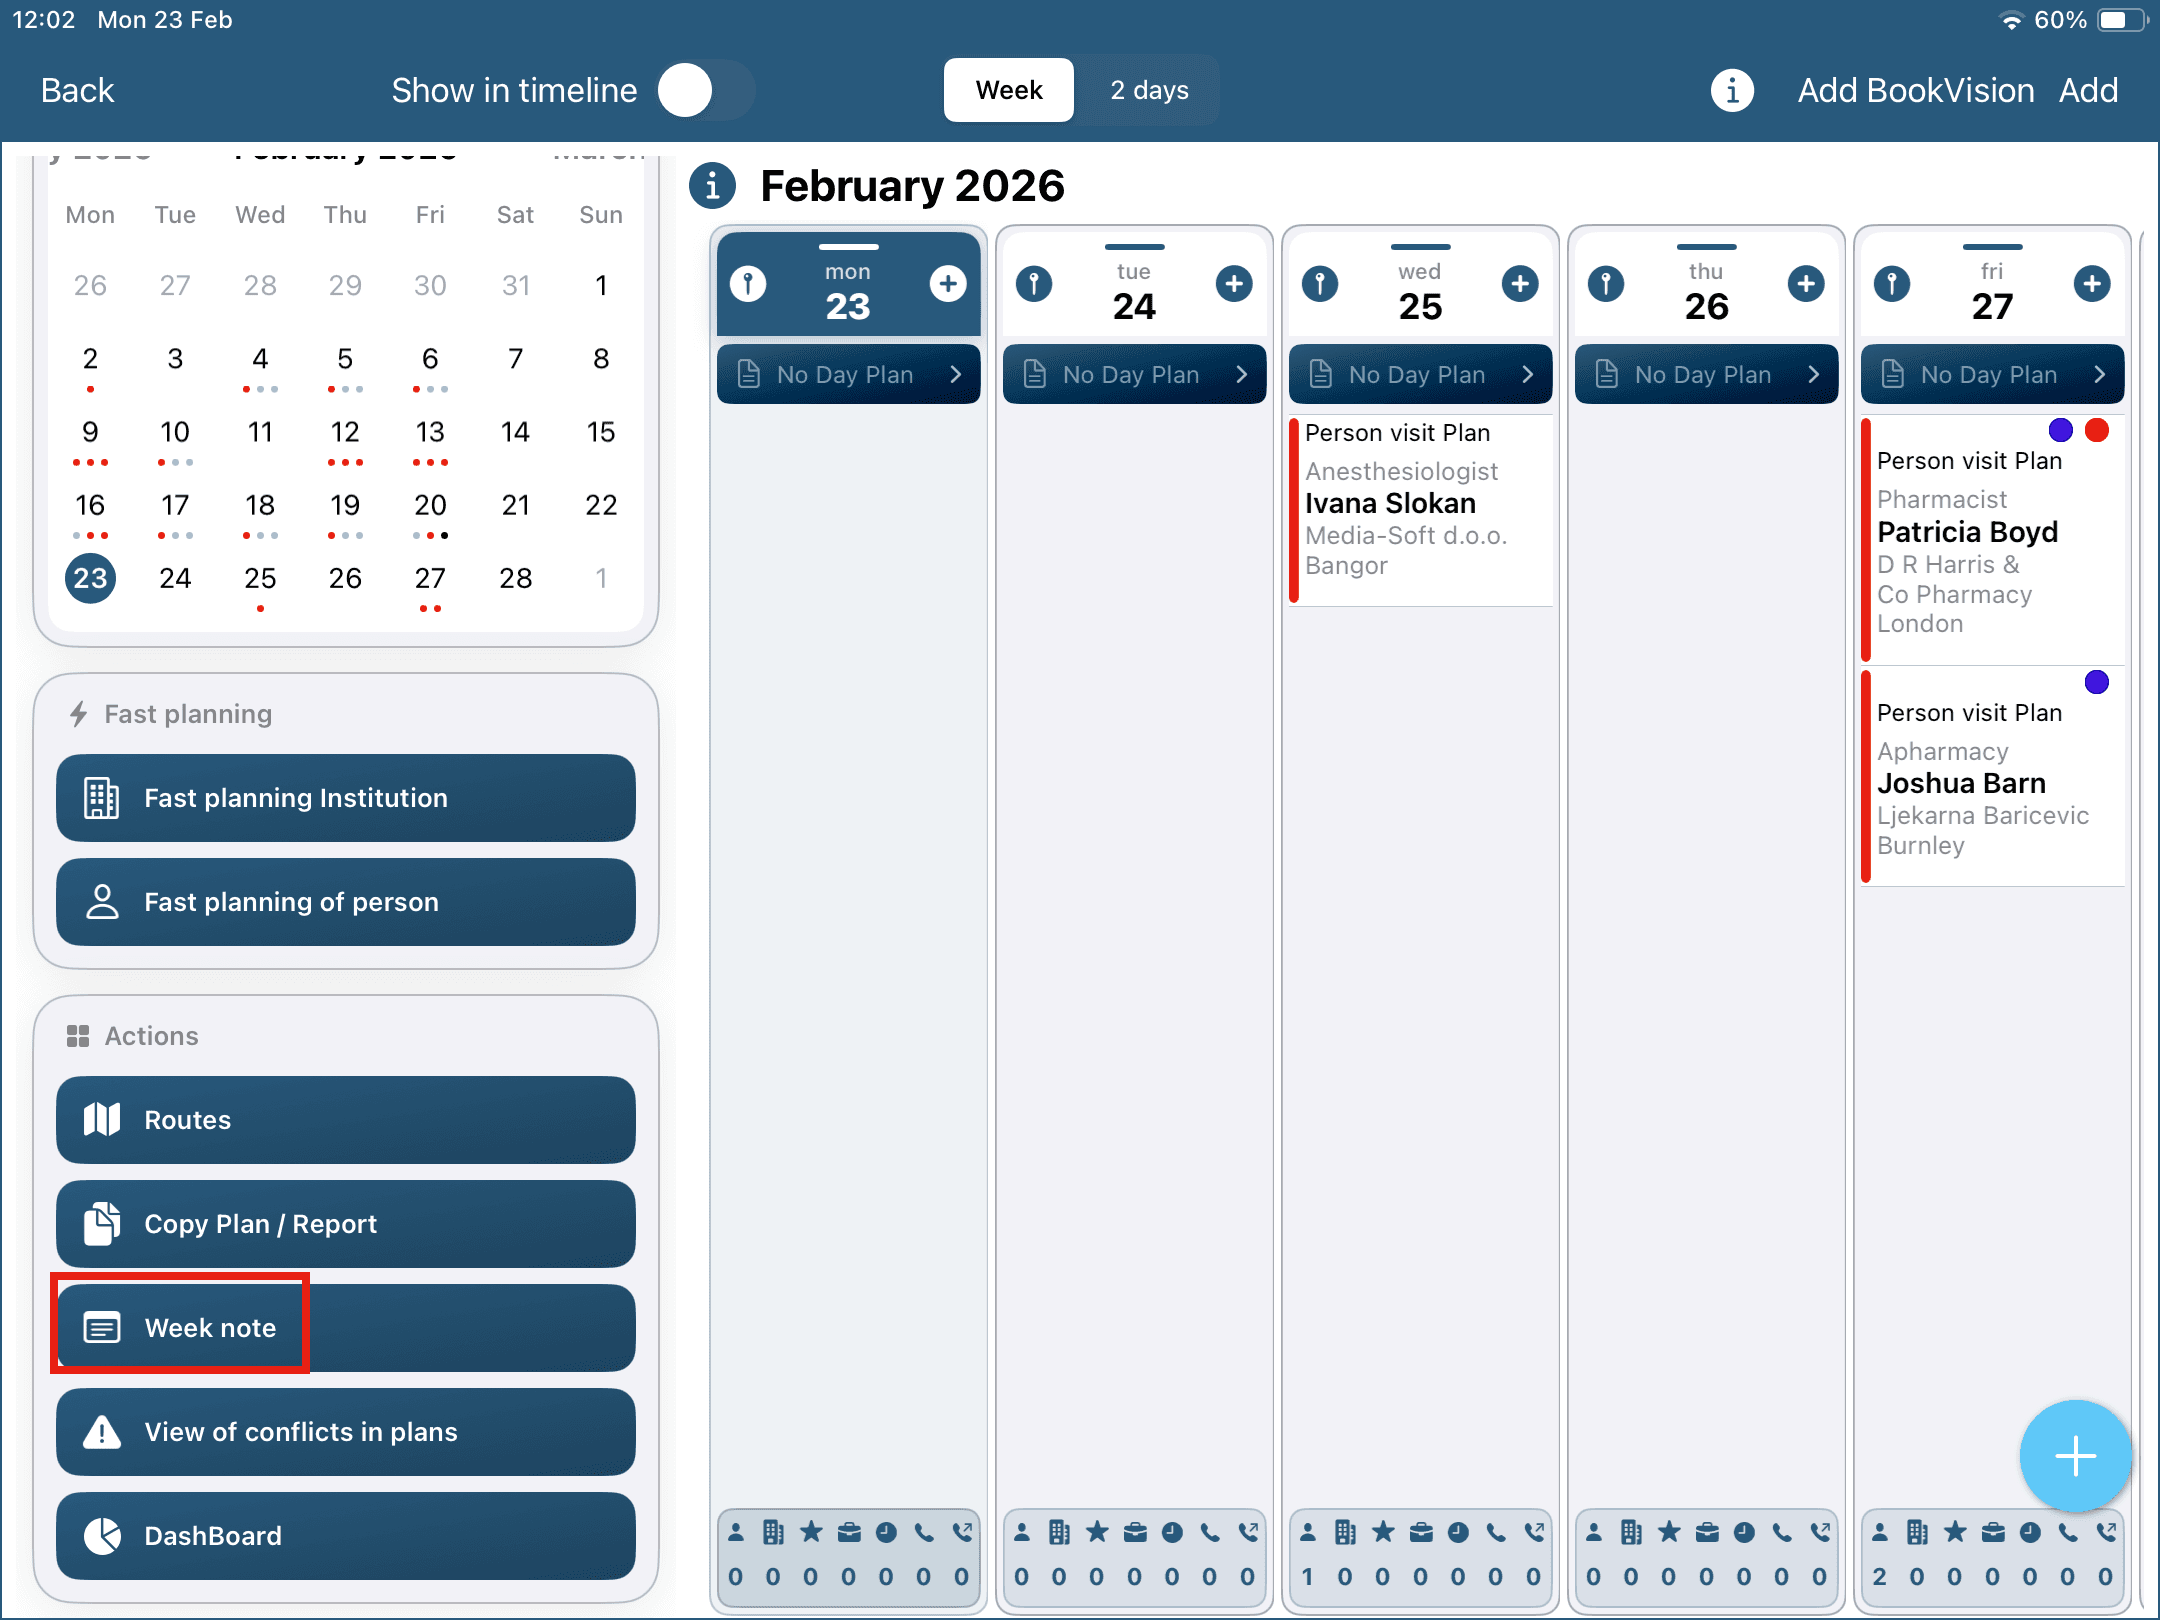
Week note is very simple data where you can easily enter information about week tasks and „to do“ things and save it.
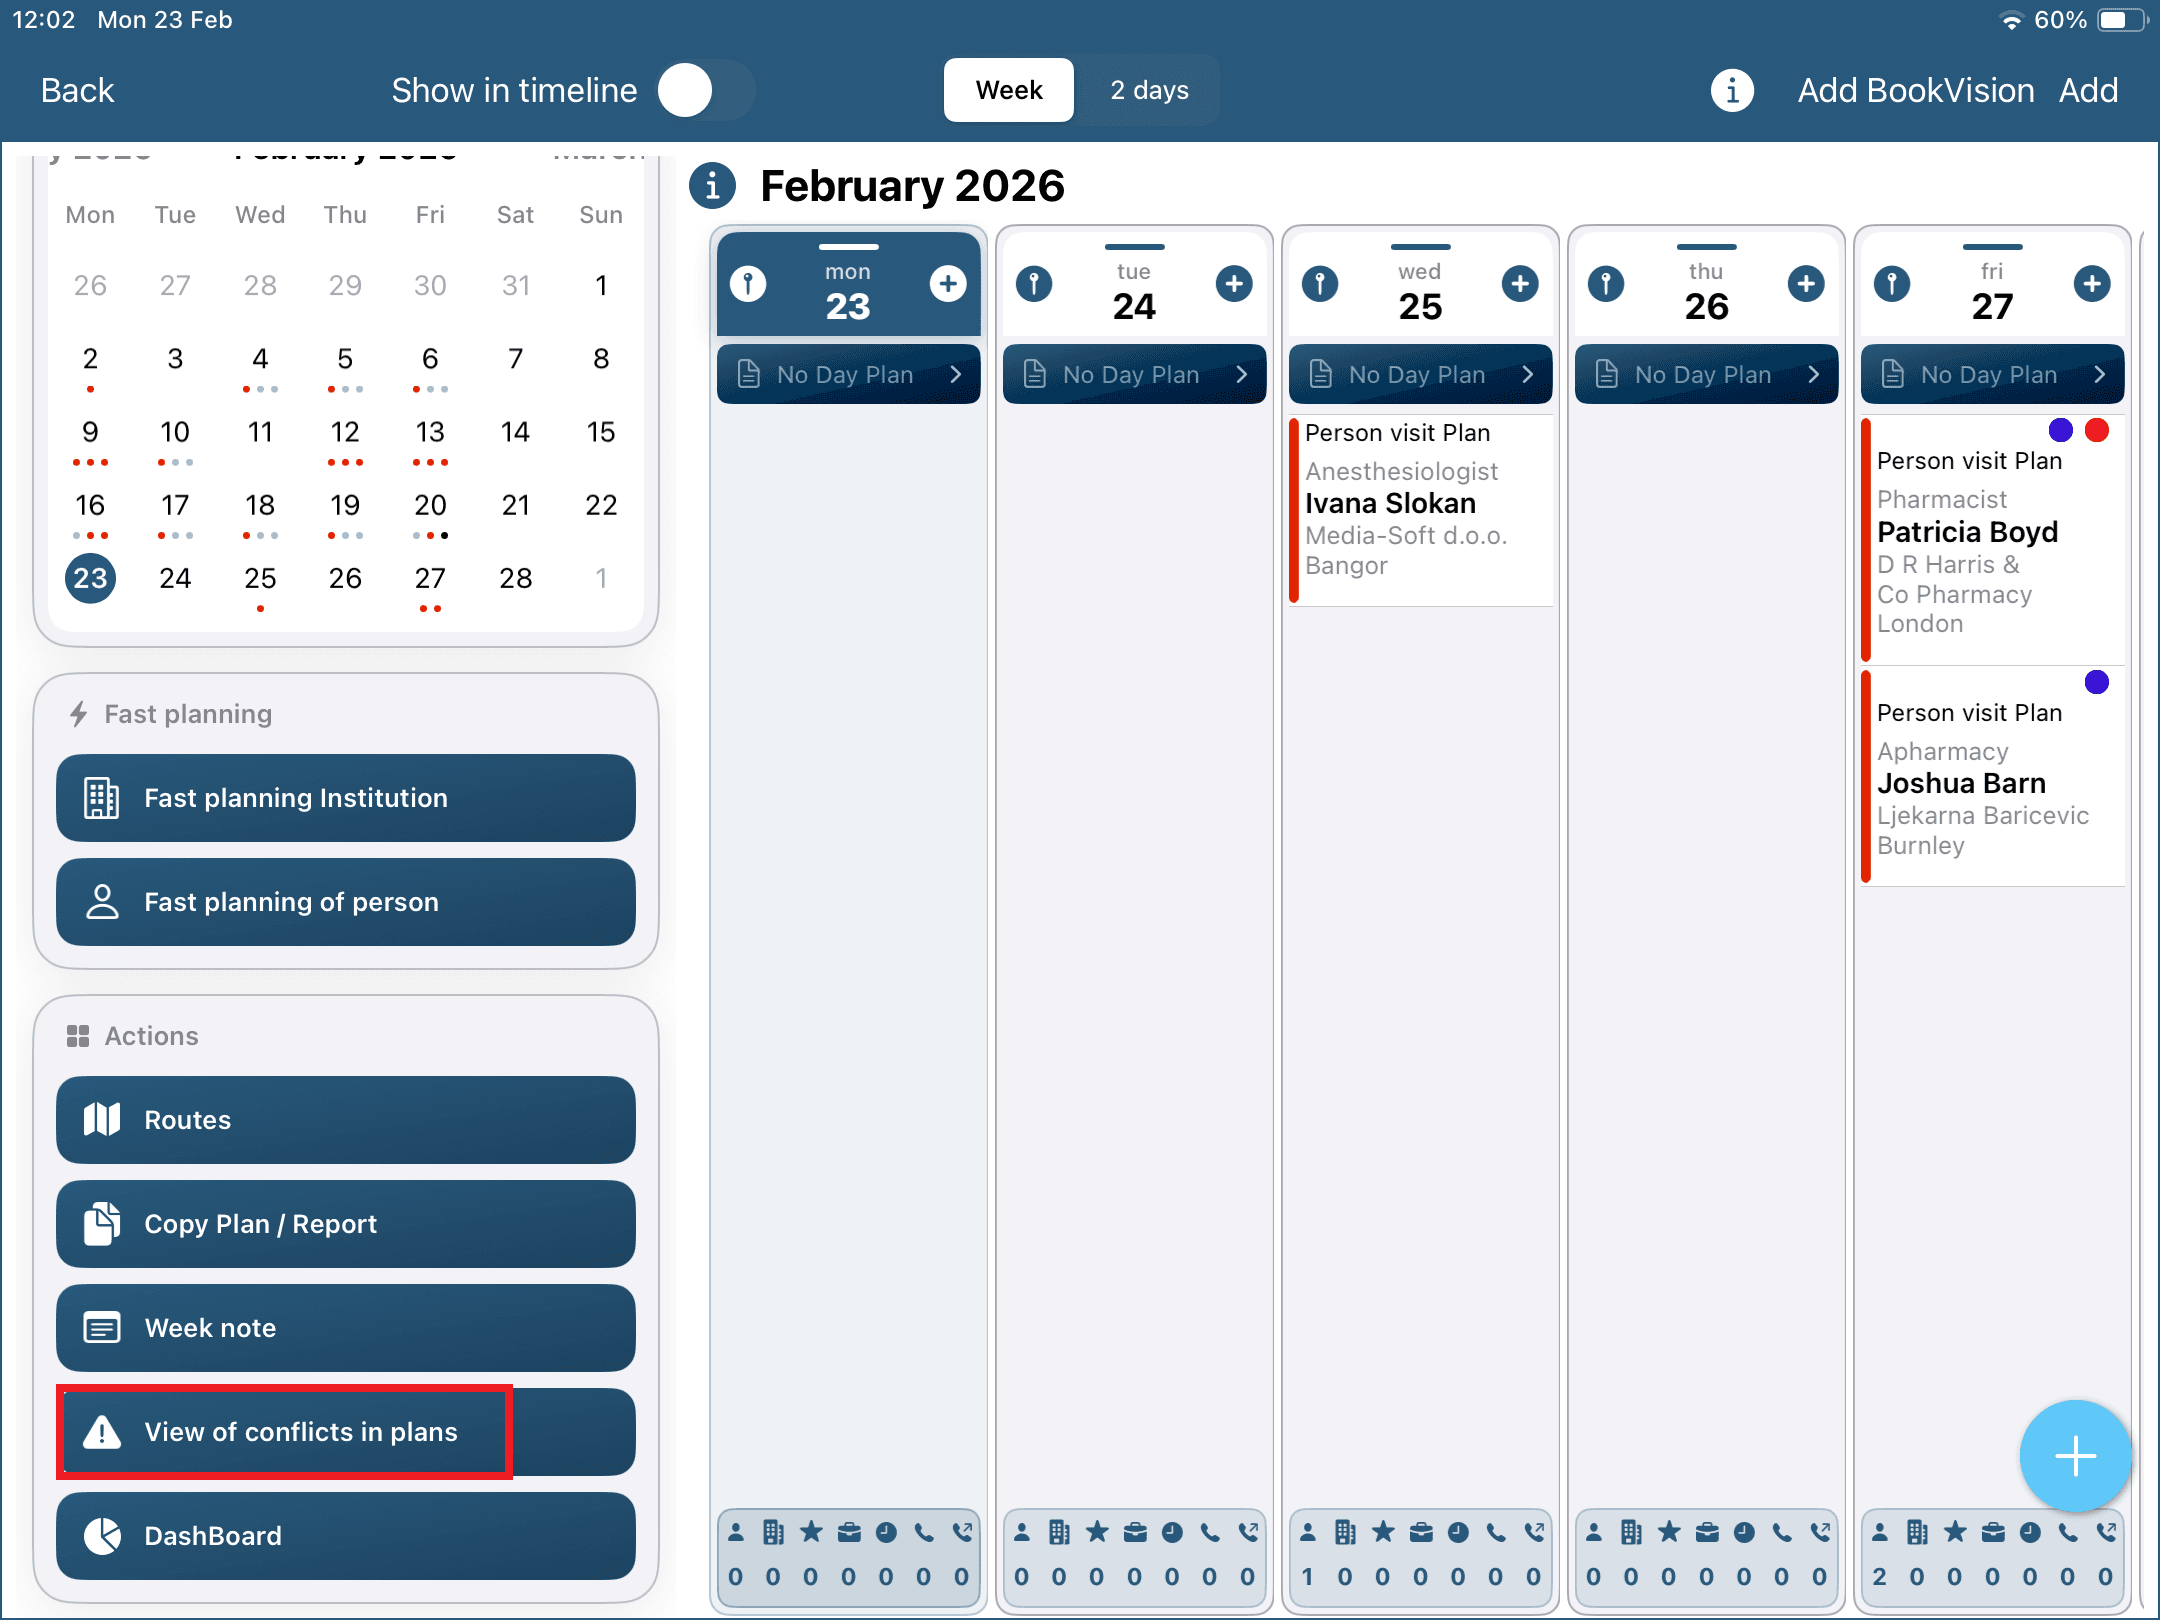
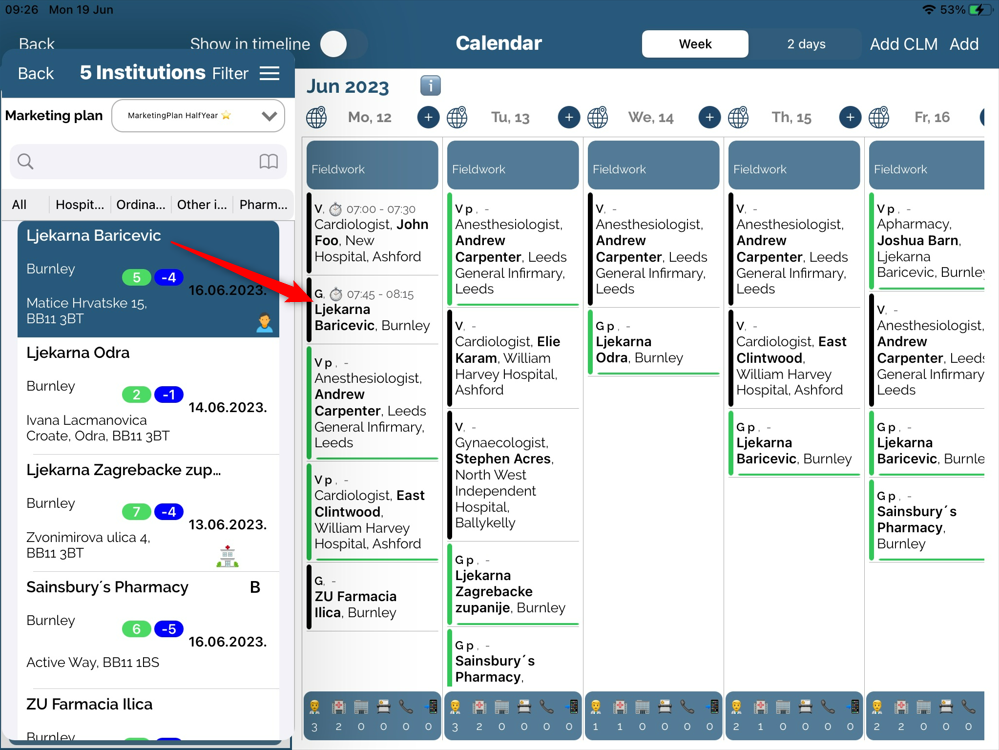
Plan conflict
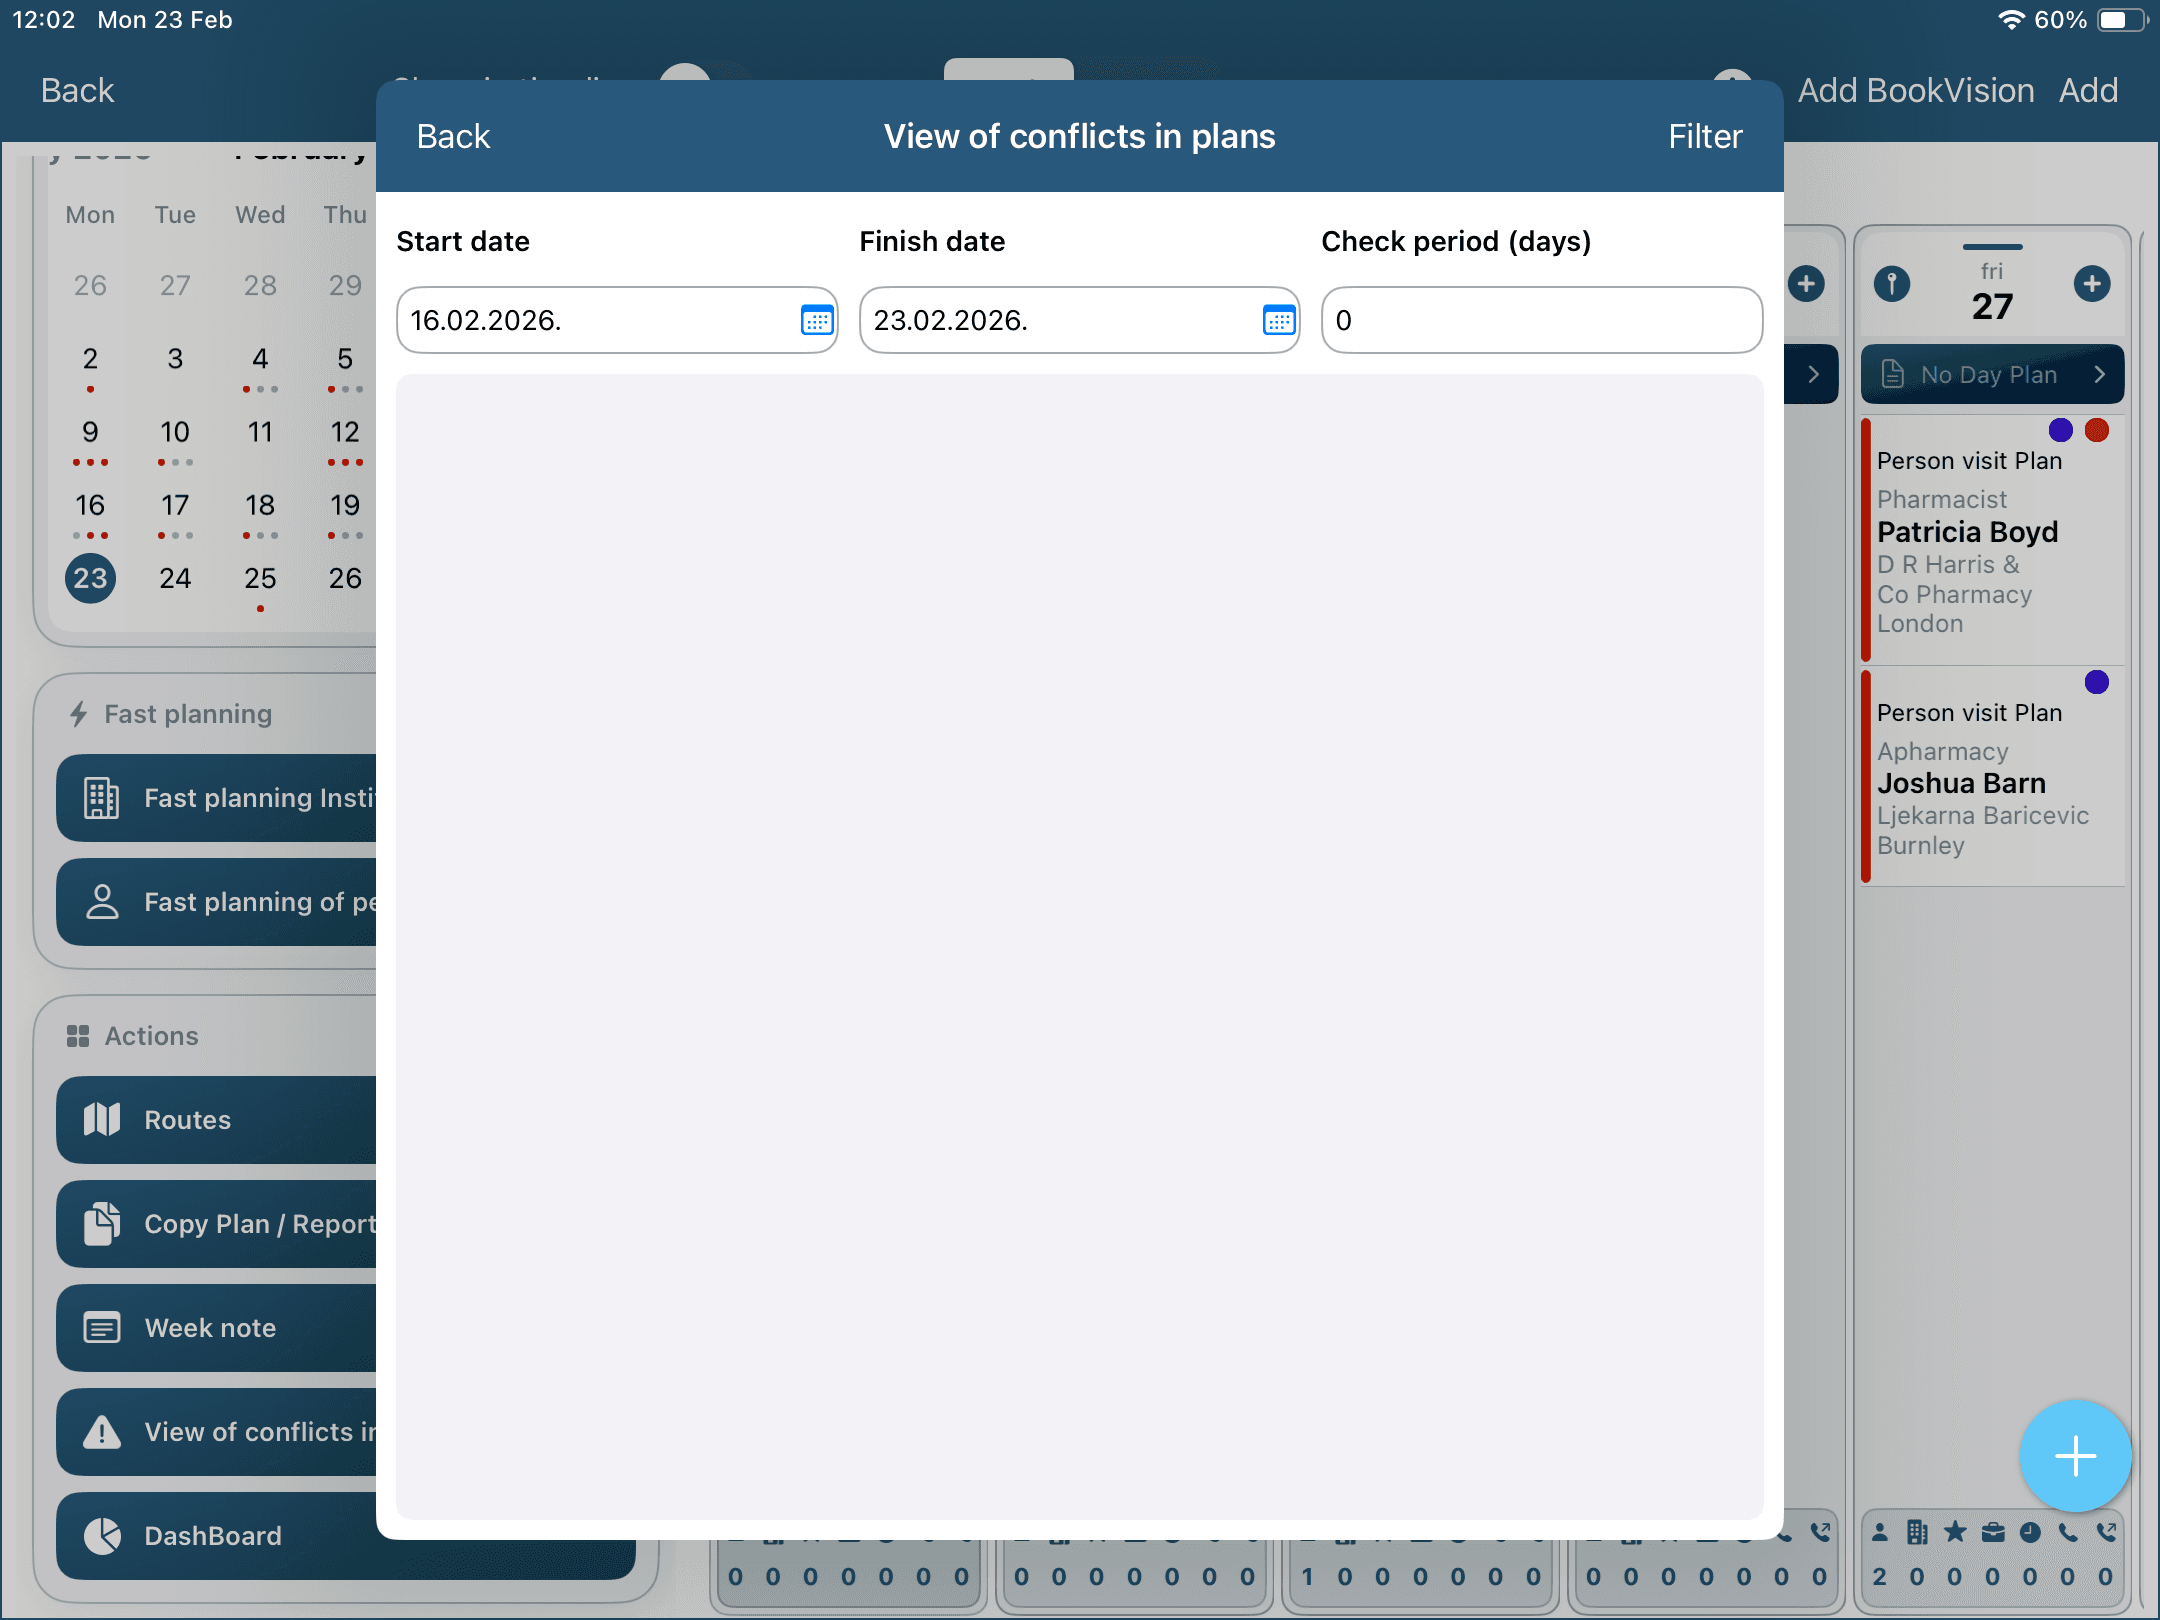
Plan conflict is a module where representative can see plans to the same person in selected period between other representatives. To access it, press Plan conflict button on calendar.
Filters are on top part of the screen with field Start date, Finish date and Check period (days). Start date and Finish date is period where plans will be checked and Check period is tolerance. For example, if we select whole week and period of 0 days, it will shown only the same plans for today (see picture below). Second example, if we selected whole week and period of 1 day, it will shown the same plans for today and yesterday.
Also, it si possible to edit plans by clicking on “i” button. Only your own plans can be edited.
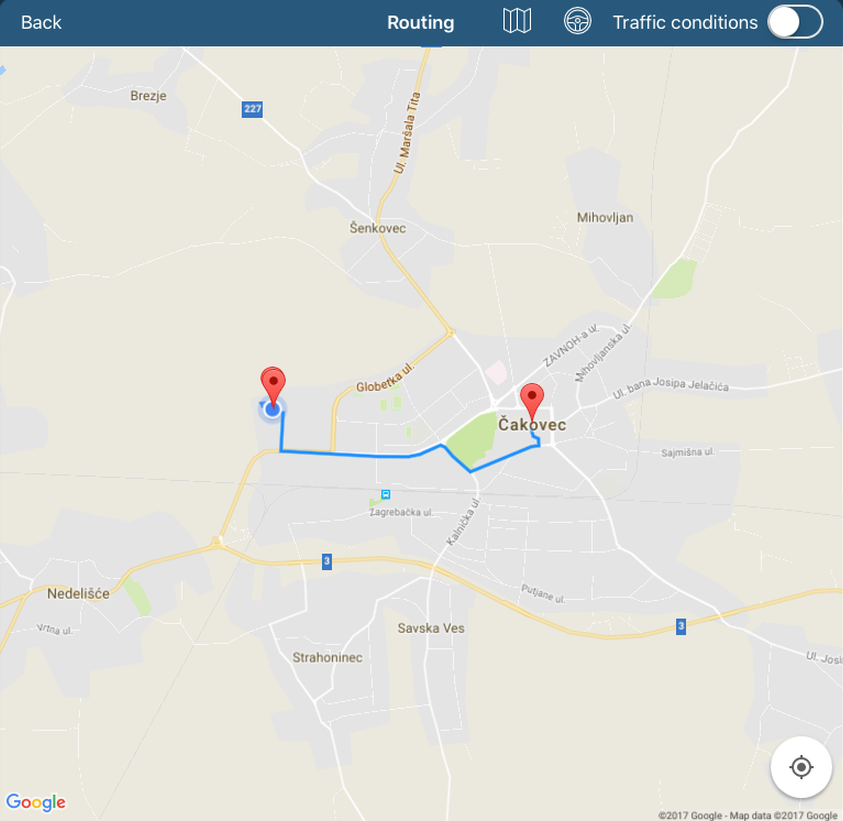
Routing
Routing can be used by pressing button next to every day of week. New window will open with map. Module Routing is used to show your movement for the day you have selected on the calendar according to your plans saved for that day. The visits are shown according to time saved while making plans and the ones that have a GPS saved are shown on the map.
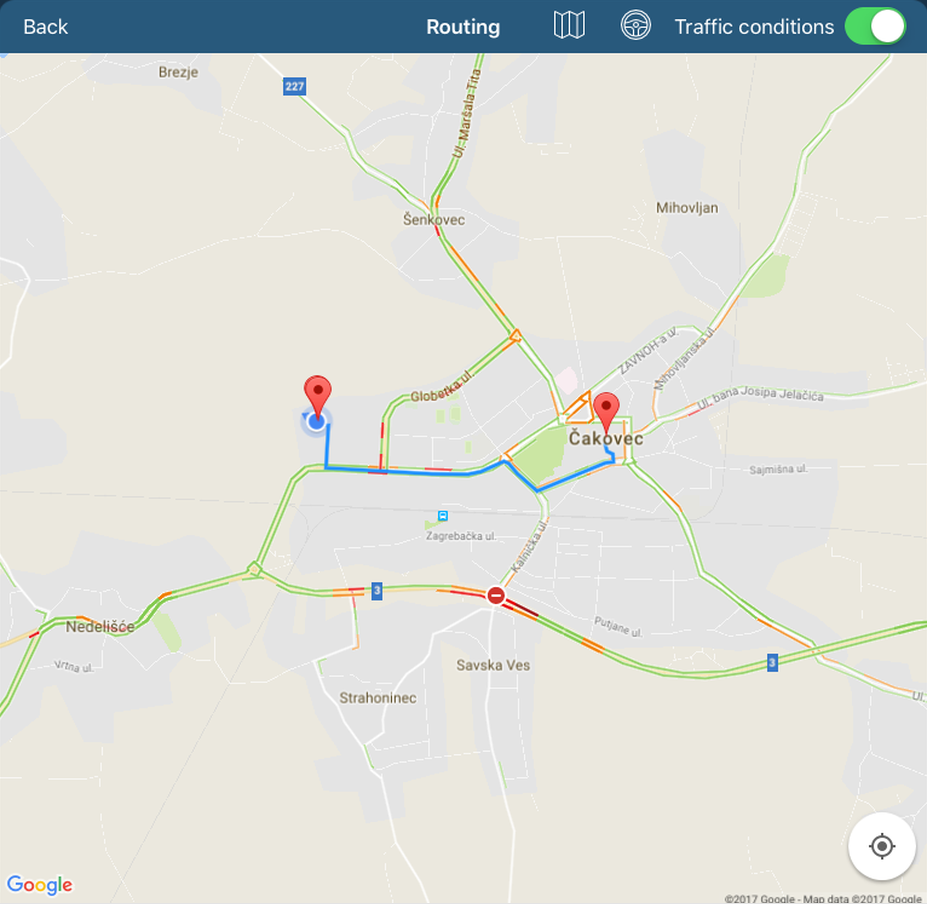
Traffic conditions
If we want to see traffic conditions simply use button Traffic conditions on top right part of the screen. It will automatically load traffic from Google. Make sure that you have internet connection.
As an example on picture below, we can see route line as blue. On that route, there are some red parts which means traffic is more often.
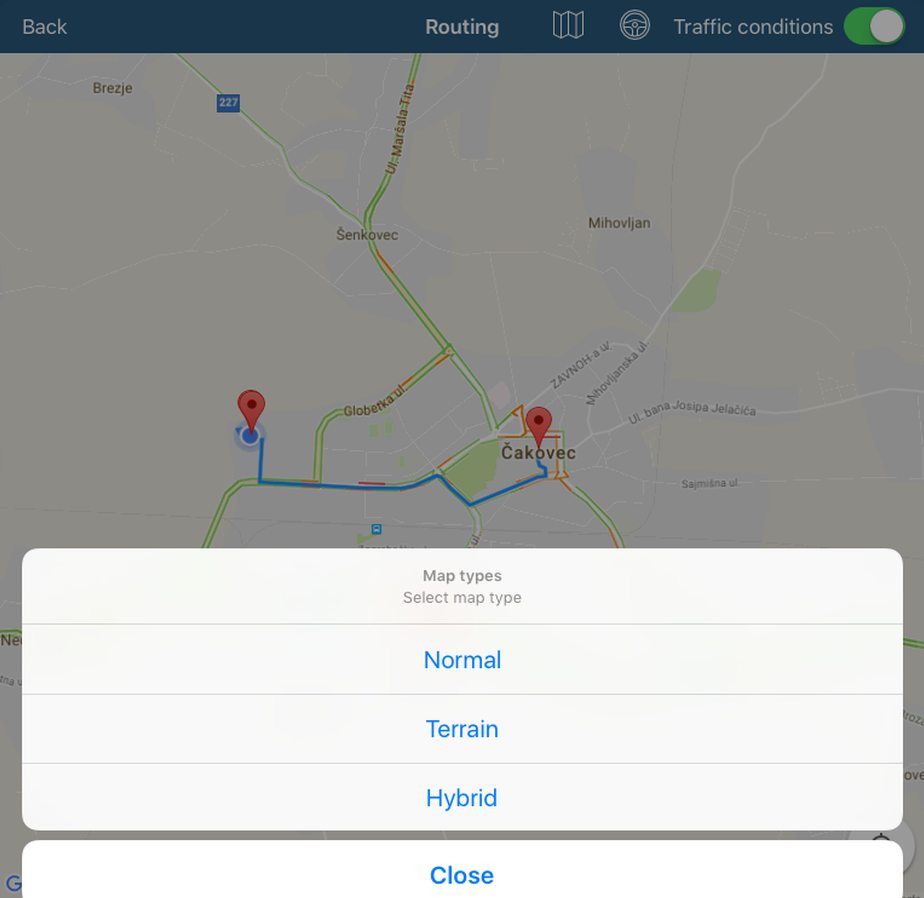
Besides Traffic conditions, we have option to select different type of maps such as Normal, Terrain and Hybrid type. This is available by clicking first button on top part of the screen.
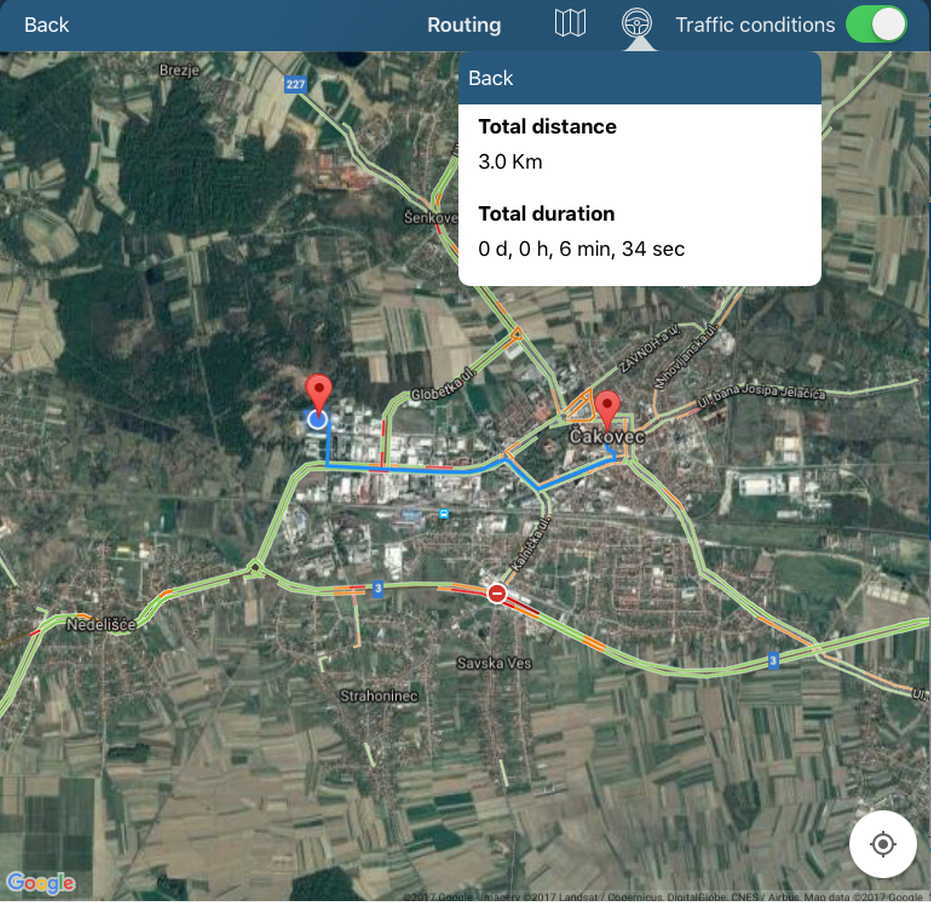
By clicking second button, it will show details about route with information of Total distance and Total duration.
One calendar view
Only difference between Normal view and One calendar view is that in One calendar you have only one screen where you can see both Plans and Visits. Also, other activities are in the same view. Day plan and Day report are in the same position (blue square under day), but in One calendar Day report is on left part and Day plan is on right part of square.
To add plans press on Plan button in top right side of screen. Here you can add Plan for person, Plan for institution and also use Fast planning.
To add visits press on Report button in top right side of screen. Here you can add Visit for person, Visit for institution and also use Fast reporting.

In view, Plans are marked with red color and Visits are marked with light green color.
When Plan is realized, it will disappear (you can still find it in Persons/Institutions module) and only Visit will stay on calendar. Also color will be changed from red to dark green color.
Drag and Drop
Drag and drop is used to enter new plans/visits and move already created to a different day.
When adding new plan/visit, find an institution you wish. Then, hold it for two seconds and simply drag it to day of the week you want. Form will open where you can add additional data and Save plan/visit. This is everything that needs to be done when using Drag and Drop.
If you entered or just want to move plan/visit to a different day, you can simply use Drag and Drop. Find desired plan/visit, hold on it for two seconds and drag to another day.
Moving plans is possible only for today and future on the same way as for entering new plan. Also, the same situation is for visits. Moving visits is possible only for today and past (depending on option) on the same way as for entering new visit.
If you move them in wrong day, you will get warning message.
Tasks
We have recently added this module Tasks. This module allows superiors to create tasks for their SR, and to track their progress. To activate this module, option “Enable To-Do tasks” in SV AnyAdmin needs to be enabled. To access this module, you need to go in Calendar module. On Calendar->Tasks, you can see list of active tasks for you.

It allows you to add tasks for SR that they need to finish by certain date. This tasks can be created by certain type of users in SV Anywhere:
Administrator
Product manager
HQ users
RM
Once Administrator creates new Task for SR, he will get message in module Messages, about task that was created for him. In that message he will see details about task like Name, Description, Comment ect.
Task will be visible in the module Calendar if date of option Needs to be realized until didn’t passed. Once you pass this date, task won’t be visible on Calendar. For SR that task is defined, he can change status of task and add comment on it. Preview of task is as on the following figure:
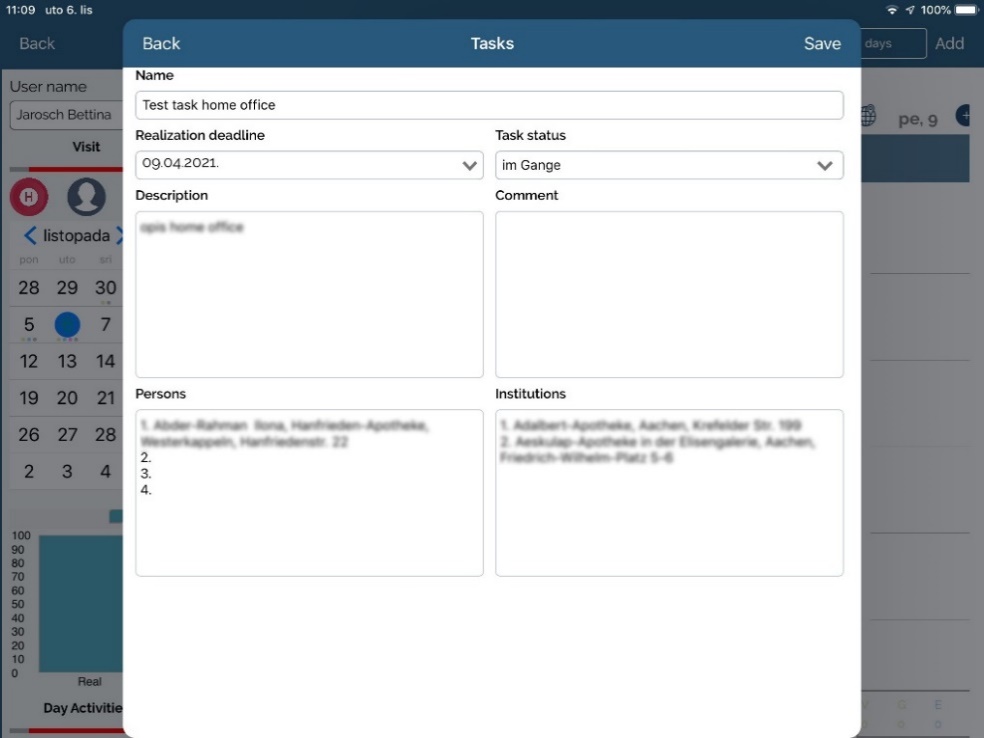
Task are also visible on through Persons and Institution modules for assigned persons/institutions.
Following figure is example on institutions module. Under the „more“ tab submenu „tasks“. The same steps are for persons module to access tasks.
