Basic data
All dropdown menus in the Sales Vision and basic data (doctor’s specialty, the image of people and institutions, titles, etc.) that appear in the system can be defined or changed at any time. As users use Sales Vision daily, they will usually be the ones who will have new requirements for such data. As they cannot make any changes they will forward it to the administrator, who can make such changes. After clicking on the menu Basic Data, the menu as in the picture below will open.
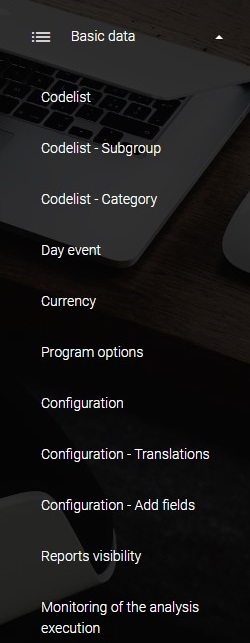
Menu, which is opened, presents modules to work within the basic data of Sales Vision. Each of these parts is explained separately in subsequent chapters.
Codelist
To open code lists, click Basic data in the main menu, and then on Codelist submenu. In the Codelist submenu to see any data is necessary to select data in the GROUP and SUBGROUP dropdown list.
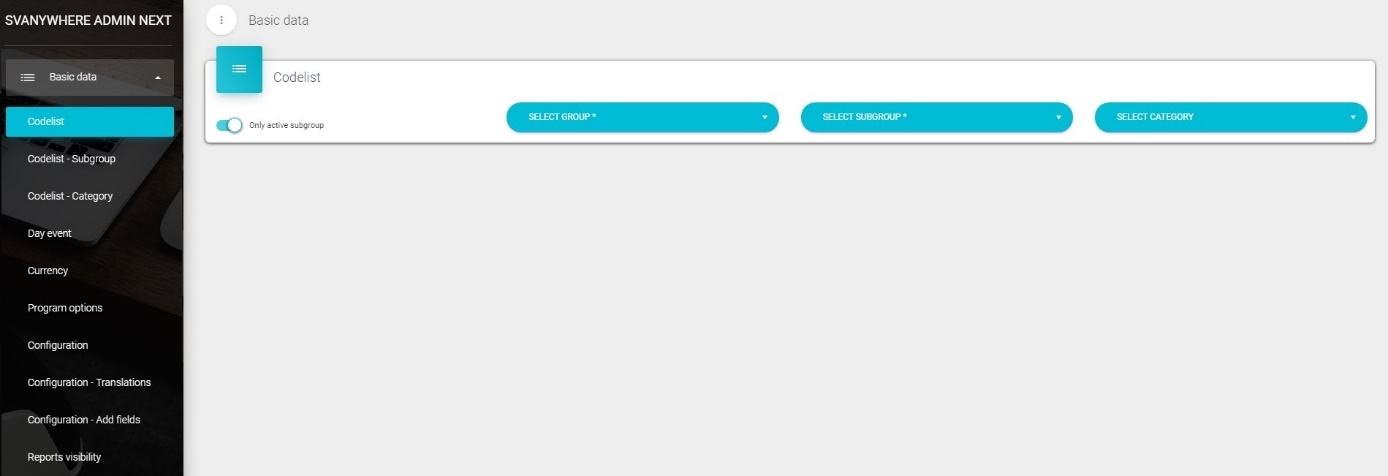
Afterwards, on the main screen, a new window for working with code list will open, just like the one on the image below.
Working with codelist
Code lists can be added, altered, deleted or set as inactive.
Adding new codelist
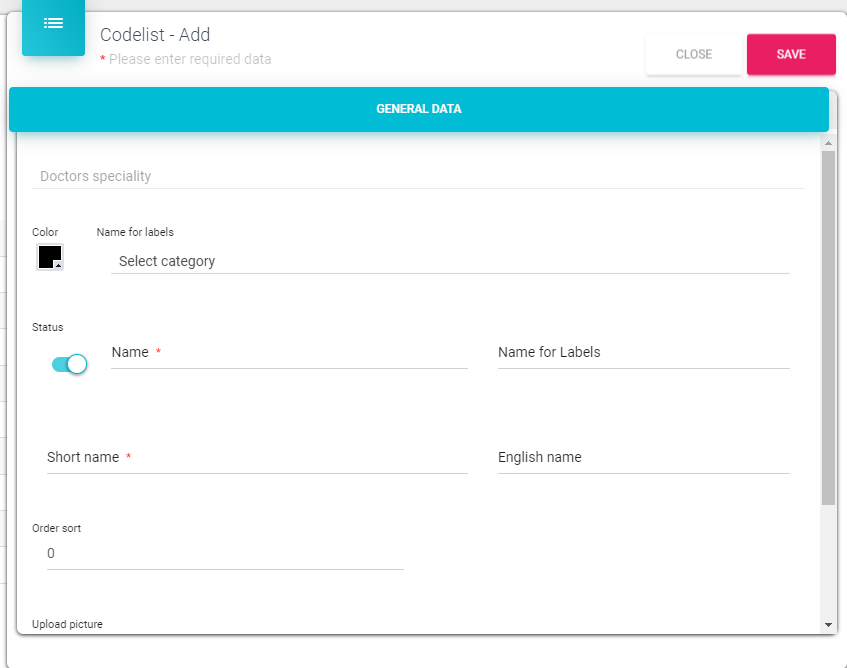
In the top right part of the screen click the “+” (add) button. A new window will appear where you can enter the new code list. Like this one on the picture below.

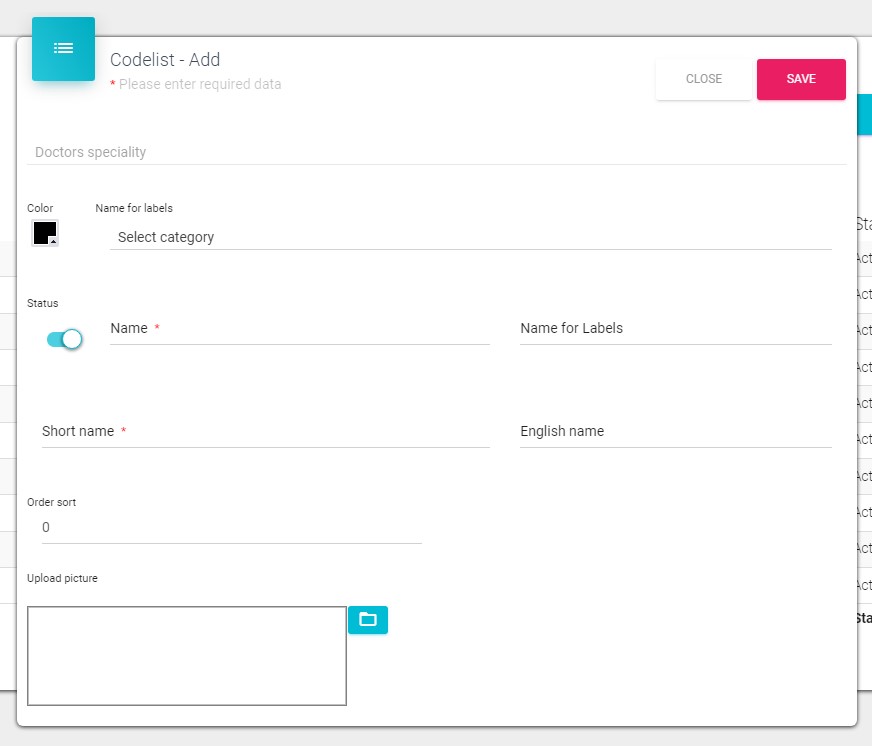
To enter a new code list it is necessary to fill in a data form. The data fields with red * symbol are required for entry while the others are optional. After filling in the data, it is necessary to click Save button in order to save the data in the system. After that, the new code list will become visible in the list of code lists.
Adding a new codelist for persons
To add a new codelist, navigate to Admin application Basic data menu Codelist submenu Select group Persons Select a subgroup, the available subgroups are Doctors speciality, Academic title, Representative classification, Gender, Enssurance, Function, Science title, Person Status, Address status, Person image, Classification, Microtargeting, Employment status, Subspeciality, Type of Person/Pharmacist, Subvention, Opinion leader, Adoption ladder, MT classification, Fee type, Position, Patients number per week, Subspeciality, Difficulty, Person style, RX type, Complementary color, Color, Diploma, Representative classification (2), The status of person consent, RTE, GDPR additional info, Person subtype, Customer Journey, Specialty, Indication, Ingredient, Native language, Further languages, KOL is active in, Active participation in international events, Consent modules, Collections, Reaction, Data source, Medical enquiries – Contact type, Medical enquiries – Question category, Medical enquiries – Question type, Medical enquiries – From patient, Medical enquiries – Frequent phrases In the top right part of the screen click the “+” (add) button. A new window will appear where you can enter the new code list. To enter a new code list it is necessary to fill in a data form. The data fields with red * symbol are required for entry while the others are optional. After filling in the data, it is necessary to click Save button in order to save the data in the system. After that, the new code list will become visible in the list of code lists.
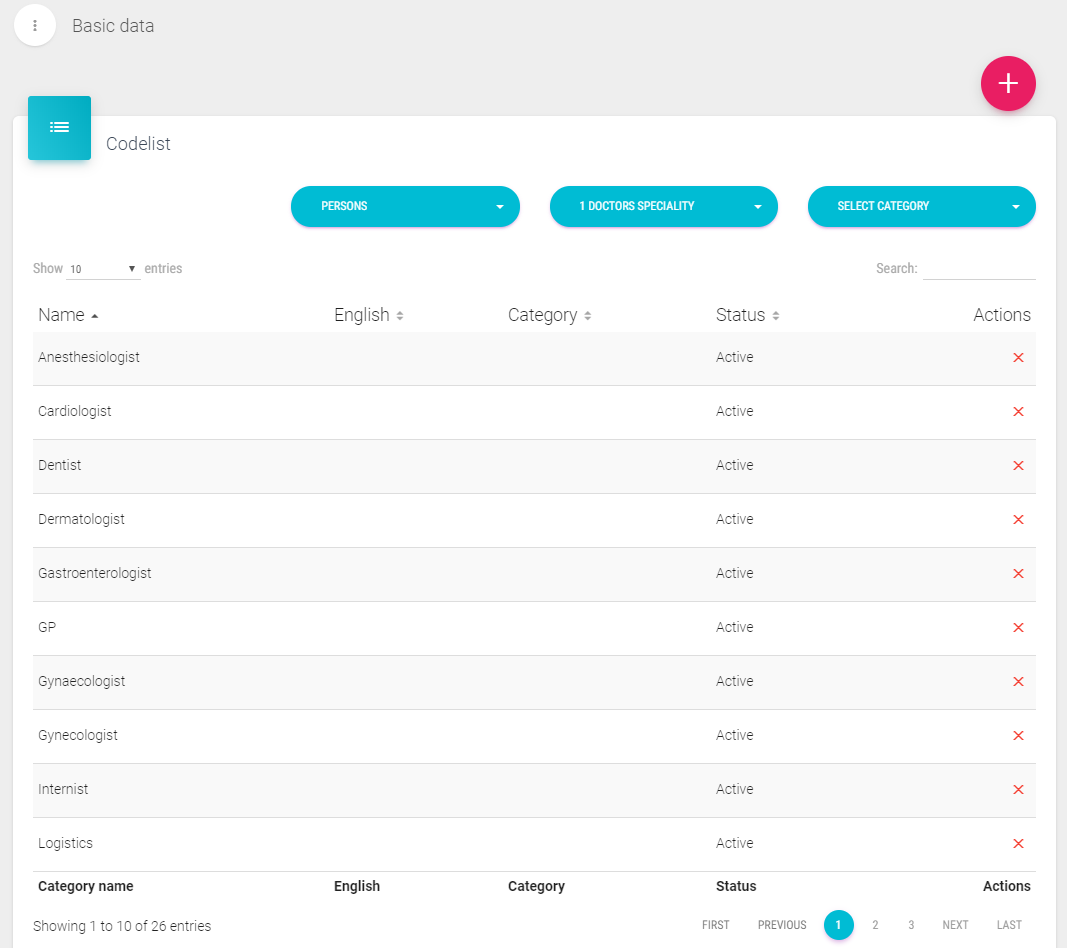
Adding a new person speciality
To add a new person speciality, navigate to Admin application Basic data menu Codelist submenu Select group Persons Select subgroup 1 Doctors speciality In the top right part of the screen click the “+” (add) button. A new window will appear where you can enter the new code list. To enter a new code list it is necessary to fill in a data form. The data fields with red * symbol are required for entry while the others are optional. After filling in the data, it is necessary to click Save button in order to save the data in the system. After that, the new code list will become visible in the list of code lists.
Adding a new team
To add a new team, navigate to Admin application Basic data menu Codelist submenu Select group Company Select subgroup 634 Team In the top right part of the screen click the “+” (add) button. A new window will appear where you can enter the new code list. To enter a new code list it is necessary to fill in a data form. The data fields with red * symbol are required for entry while the others are optional. After filling in the data, it is necessary to click Save button in order to save the data in the system. After that, the new code list will become visible in the list of code lists.
Adding a new codelist for institutions
To add a new codelist, navigate to Admin application Basic data menu Codelist submenu Select group Institutions Select a subgroup, the available subgroups are Type of Department, Type of Hospital, Type of Drugstore, Type of Ordination, Costs, Hospital image, Type of other institutions, Status of inactive institutions, Institution classification, Number of employees, Visits frequency, In stock, Patients type, Number of doctors, Wholesale, Contact 1, Inst profile – Rep classification, Activity type, Qty of Islands, Qty of shelfs, Qty of visits by cycle, Location, Status, Institution type – Additional 1, Institution type – Additional 2, Institution type – Additional 3, Institution type – Additional 4, Institution type – Additional 5, Institution type – Additional 6, Order type, Representative classification, Adoption stage per indication In the top right part of the screen click the “+” (add) button. A new window will appear where you can enter the new code list. To enter a new code list it is necessary to fill in a data form. The data fields with red * symbol are required for entry while the others are optional. After filling in the data, it is necessary to click Save button in order to save the data in the system. After that, the new code list will become visible in the list of code lists.
Adding a new codelist for visits
To add a new codelist, navigate to Admin application Basic data menu Codelist submenu Select group Visits Select a subgroup, the available subgroups are Scheduled time of the visit, Visit Code, Day reports, Type of Competition Activities, Participation Type, Type of Test, Type of representative activities, Participation type, Co-visit, Type of person plan, Type of event cost, Other activities, Event type, Supervision evaluation, Announcement before visit, Status, Evaluation results, Activity of representatives on event, Report type, Stock availability, Type of activity in product promotion, Pre call objective, Promoter In the top right part of the screen click the “+” (add) button. A new window will appear where you can enter the new code list. To enter a new code list it is necessary to fill in a data form. The data fields with red * symbol are required for entry while the others are optional. After filling in the data, it is necessary to click Save button in order to save the data in the system. After that, the new code list will become visible in the list of code lists.
Adding a new codelist for daily activity / day report
To add a new codelist, navigate to Admin application Basic data menu Codelist submenu Select group Visits Select a subgroup, the available subgroups are Scheduled time of the visit, Visit Code, Day reports, Type of Competition Activities, Participation Type, Type of Test, Type of representative activities, Participation type, Co-visit, Type of person plan, Type of event cost, Other activities, Event type, Supervision evaluation, Announcement before visit, Status, Evaluation results, Activity of representatives on event, Report type, Stock availability, Type of activity in product promotion, Pre call objective, Promoter Select “84 Day report” In the top right part of the screen click the “+” (add) button. A new window will appear where you can enter the new code list. To enter a new code list it is necessary to fill in a data form. The data fields with red * symbol are required for entry while the others are optional. After filling in the data, it is necessary to click Save button in order to save the data in the system. After that, the new code list will become visible in the list of code lists.
Adding a new codelist for products
To add a new codelist, navigate to Admin application Basic data menu Codelist submenu Select group Products Select a subgroup, the available subgroups are Instrument status, Type of product image, Prodform image type, Material type In the top right part of the screen click the “+” (add) button. A new window will appear where you can enter the new code list. To enter a new code list it is necessary to fill in a data form. The data fields with red * symbol are required for entry while the others are optional. After filling in the data, it is necessary to click Save button in order to save the data in the system. After that, the new code list will become visible in the list of code lists.
Adding a new codelist for company
To add a new codelist, navigate to Admin application Basic data menu Codelist submenu Select group Company Select a subgroup, the available subgroups are Employment status, Promotion, Bonus Type, Educatiion, Type of education, Promotion to, Bonus level, User equipment, Formal working position, Actual working position, CLM Category, Monthly car cost, Team, Presentation type, Target group, Group of user defined fields, Status zadatka (Status of a task), Job type, Method of project realization, File tags In the top right part of the screen click the “+” (add) button. A new window will appear where you can enter the new code list. To enter a new code list it is necessary to fill in a data form. The data fields with red * symbol are required for entry while the others are optional. After filling in the data, it is necessary to click Save button in order to save the data in the system. After that, the new code list will become visible in the list of code lists.
Adding a new codelist for mailing
To add a new codelist, navigate to Admin application Basic data menu Codelist submenu Select group Mailing Select a subgroup, the available subgroups are Status in campaign, Campaign type In the top right part of the screen click the “+” (add) button. A new window will appear where you can enter the new code list. To enter a new code list it is necessary to fill in a data form. The data fields with red * symbol are required for entry while the others are optional. After filling in the data, it is necessary to click Save button in order to save the data in the system. After that, the new code list will become visible in the list of code lists.
Adding a new codelist for projects
To add a new codelist, navigate to Admin application Basic data menu Codelist submenu Select group Projects Select a subgroup, the available subgroups are Project status, The way of payment, Type of project In the top right part of the screen click the “+” (add) button. A new window will appear where you can enter the new code list. To enter a new code list it is necessary to fill in a data form. The data fields with red * symbol are required for entry while the others are optional. After filling in the data, it is necessary to click Save button in order to save the data in the system. After that, the new code list will become visible in the list of code lists.
Adding a new codelist for stock management
To add a new codelist, navigate to Admin application Basic data menu Codelist submenu Select group Stock management Select a subgroup, the available subgroup is The reason for deficit on stock In the top right part of the screen click the “+” (add) button. A new window will appear where you can enter the new code list. To enter a new code list it is necessary to fill in a data form. The data fields with red * symbol are required for entry while the others are optional. After filling in the data, it is necessary to click Save button in order to save the data in the system. After that, the new code list will become visible in the list of code lists.
Adding a new codelist for territory management
To add a new codelist, navigate to Admin application Basic data menu Codelist submenu Select group Territory Management Select a subgroup, the available subgroup is City classification In the top right part of the screen click the “+” (add) button. A new window will appear where you can enter the new code list. To enter a new code list it is necessary to fill in a data form. The data fields with red * symbol are required for entry while the others are optional. After filling in the data, it is necessary to click Save button in order to save the data in the system. After that, the new code list will become visible in the list of code lists.
Editing codelist
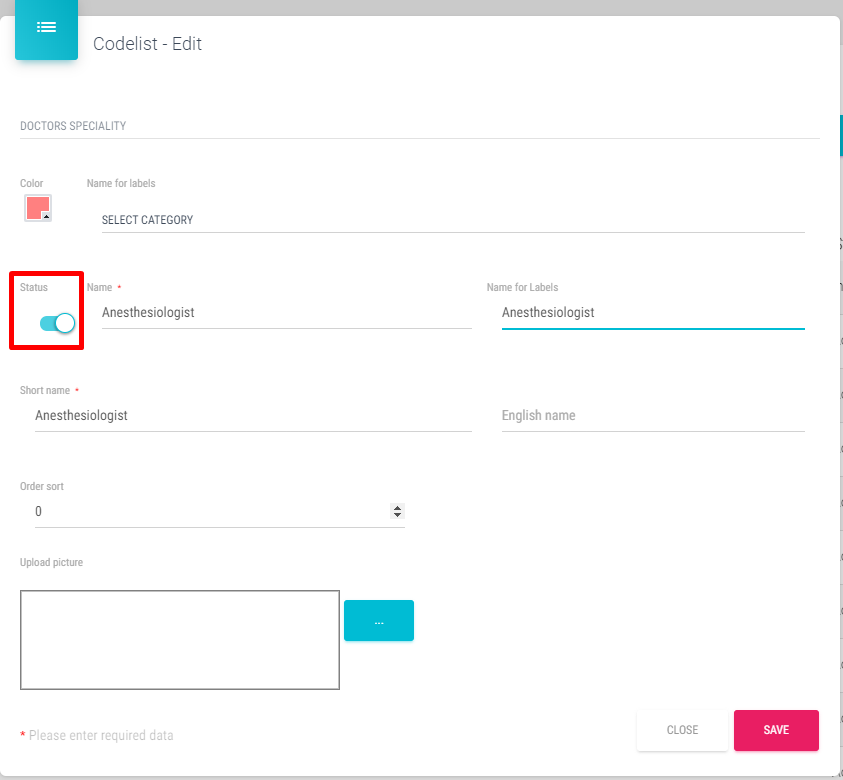
To change the data for a particular code list simply click on the line of that code list. The same window as for entering the new code list will be opened. In that window it is possible to make the desired changes and save them by clicking on a Save button. All code lists can be painted (have different colors). Sales Vision in some analysis and graphs it is possible to show specific data using colors (e.g. doctors specialty). In order to know exactly which color indicates which specialty you can choose it in this window.
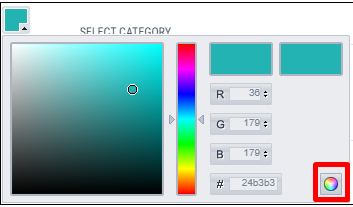
By clicking on the Color icon a new window will appear: Just select the color for the code list and click on the small color circle in the right bottom corner. If you do not click on this color button no changes will be applied. After that just simply click on the Save button to save codelist changes.
Deleting codelist
To delete a codelist click on “X” (delete) button on the right part of desired code list line.

Setting codelist as inactive
Instead of deleting code lists, they can be set as Inactive. Representatives will have the same effect because the code lists will become unavailable to them, while administrators will still have access to the code lists.
Code list can be set as inactive in a same way as for editing them and simply changing the status to inactive.
Only active code lists will be visible to the representatives.
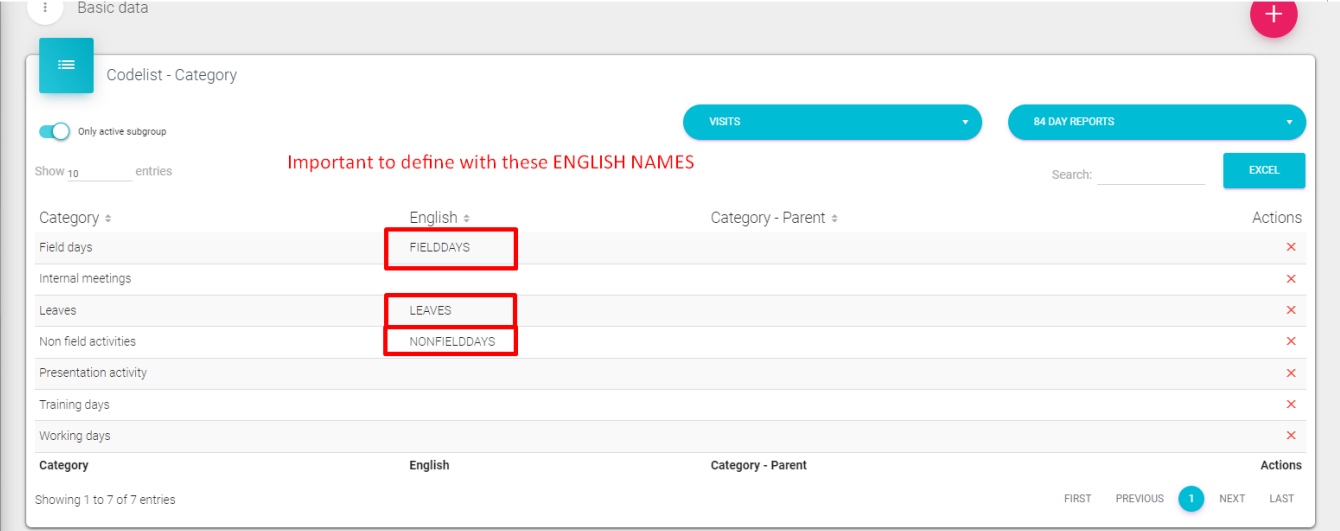
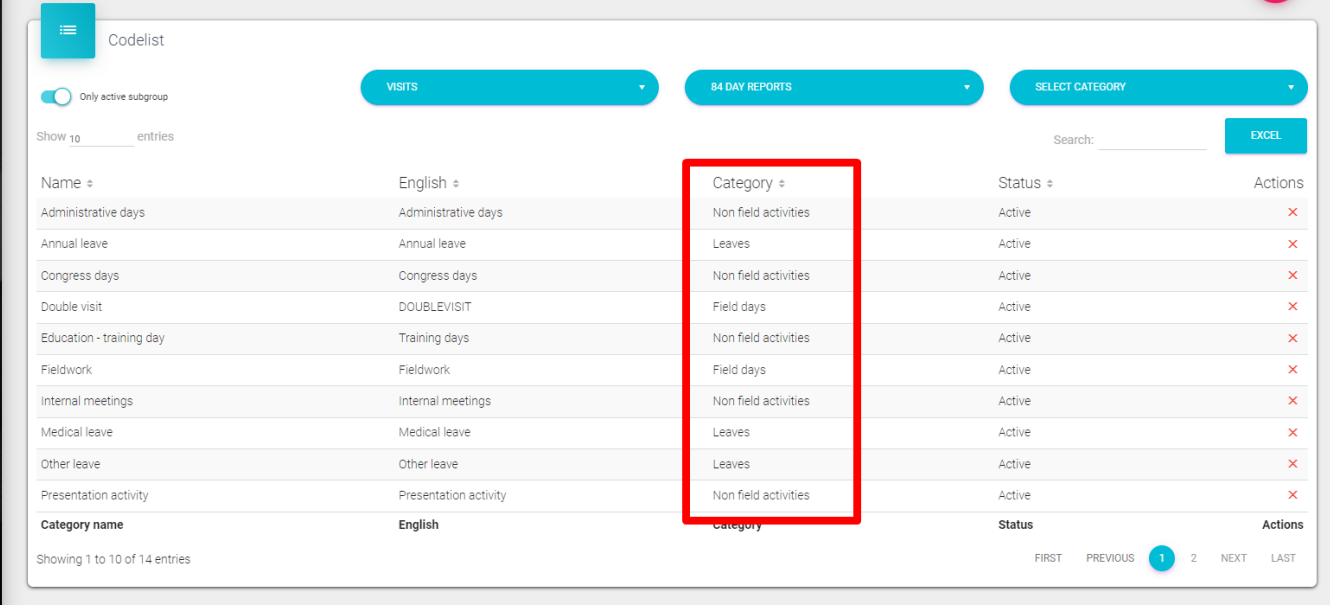
Defining codelists for Universal Dashboards
This is a new feature for clients that are using Marketing Plan by selection. In order to use the feature, all codelists names must have their English names inserted like in the picture below. This has to be inserted into Codelist – Category and Codelist.
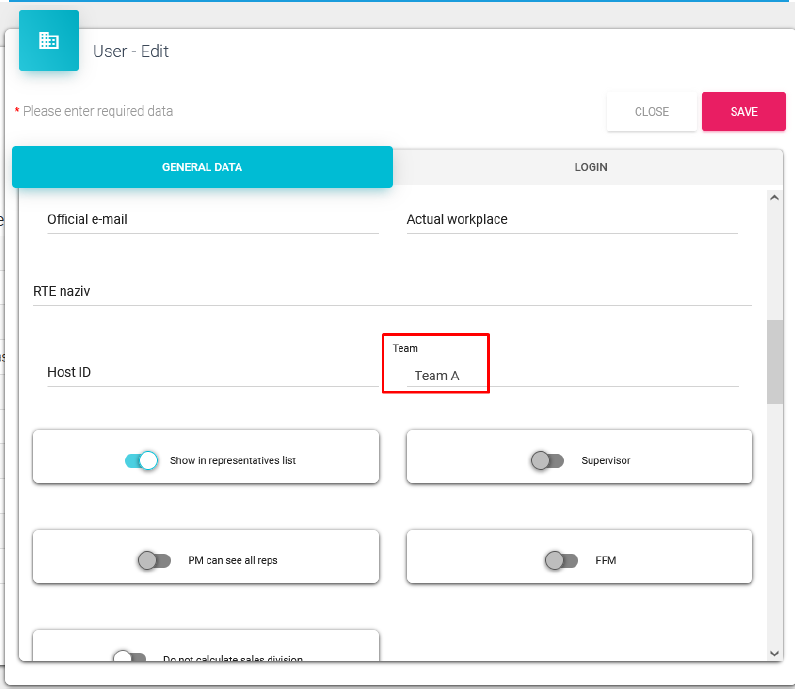
For using some features regarding the Universal Dashboards we will need to define a new codelist under the tab Company, number 634 like in the picture below. You can define the team name under the Team tag.
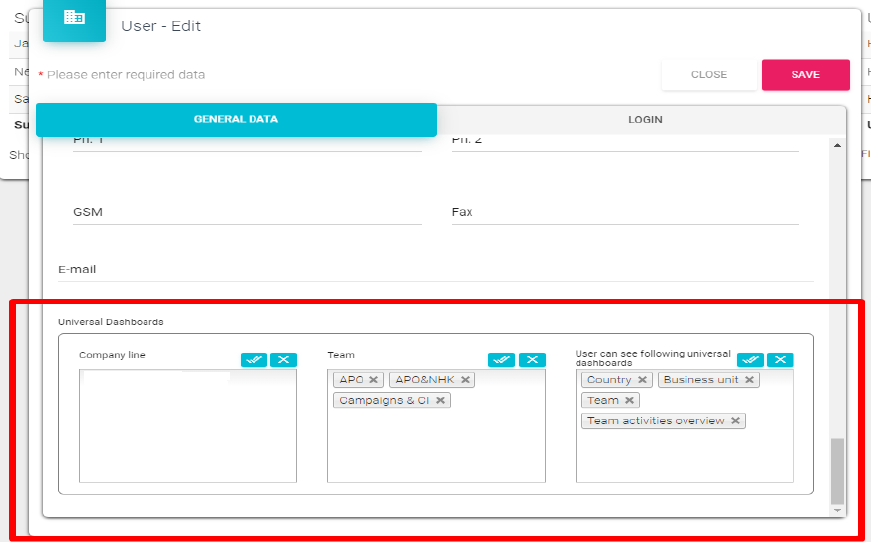
Additionally, HQ and RM users are able to select the Company line, Team and Users who can see the following universal dashboards. It is shown in the picture below.
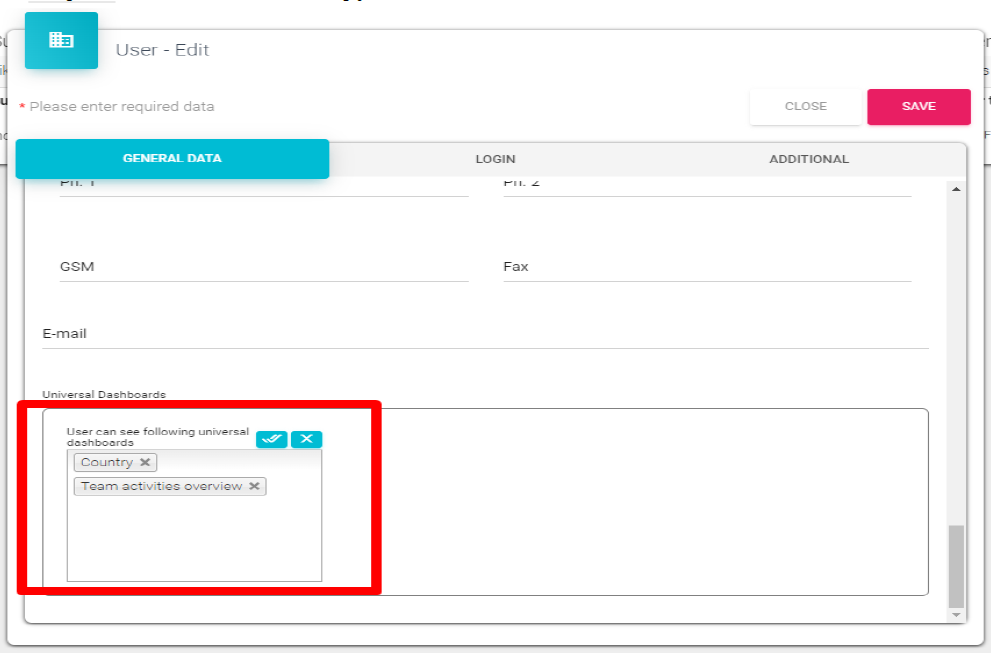
At least the RM cna only see the defined Dashboard types lin in picture below.
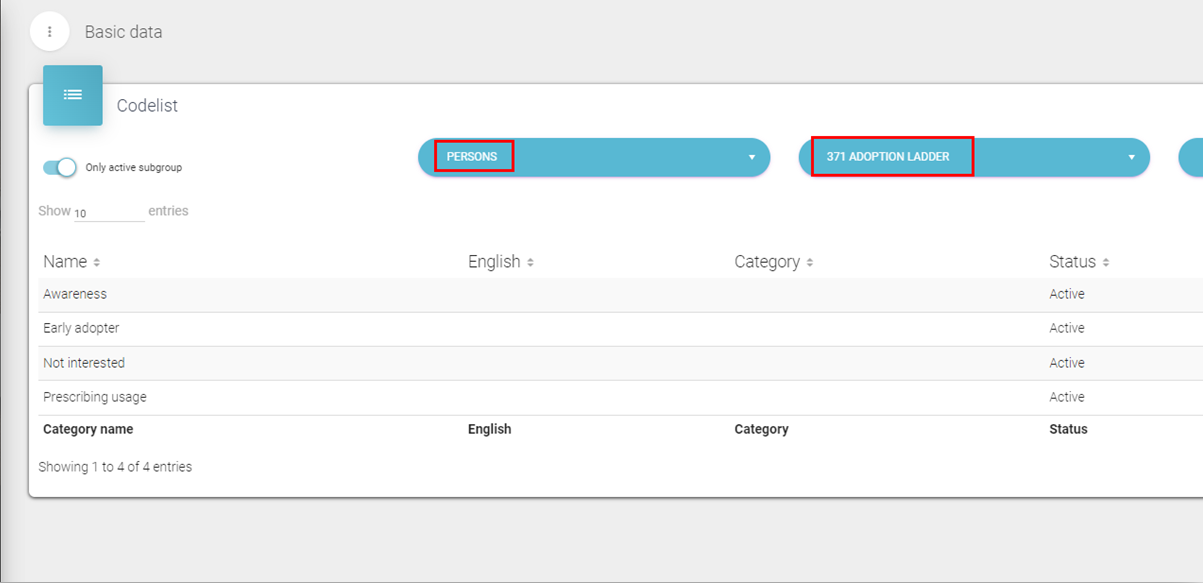
Defining codelists for Adoption ladder
There are multiple Adoption stages available that has to be entered in the codelist Adoption ladder for each product. The codelist is located under the group Persons -> 371 Adoption ladder.
Codelist – Subgroup
Codelist – Subroup module is used to see all the codelist groups, edit and entering the custom name.
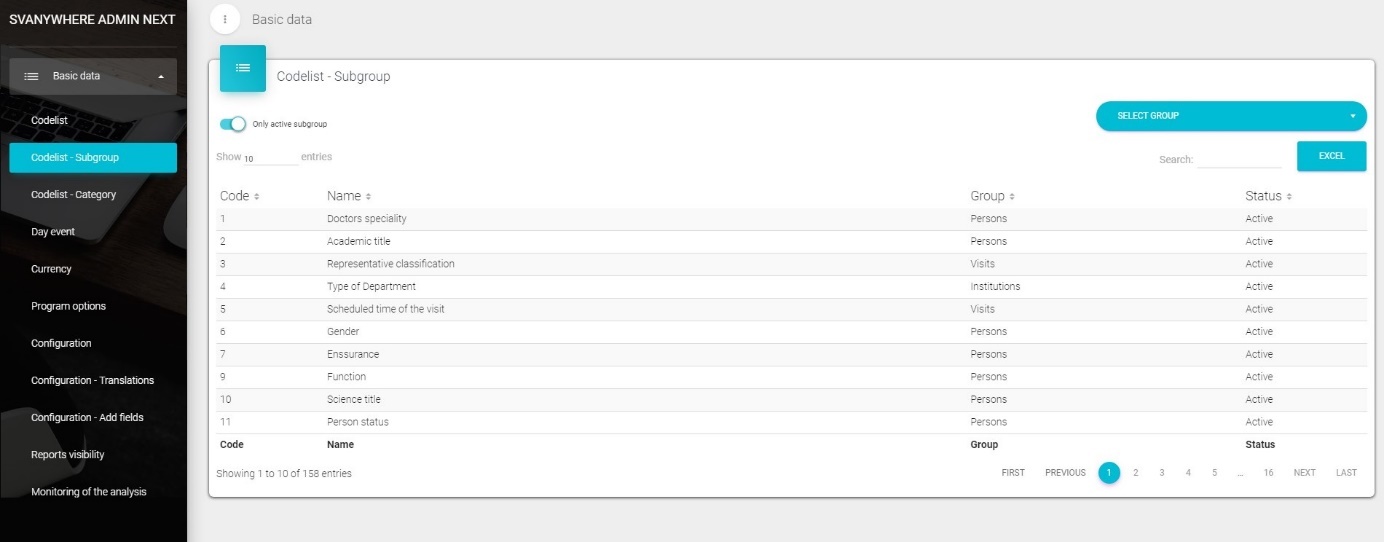
After we click on one of codelist group the following window will open:
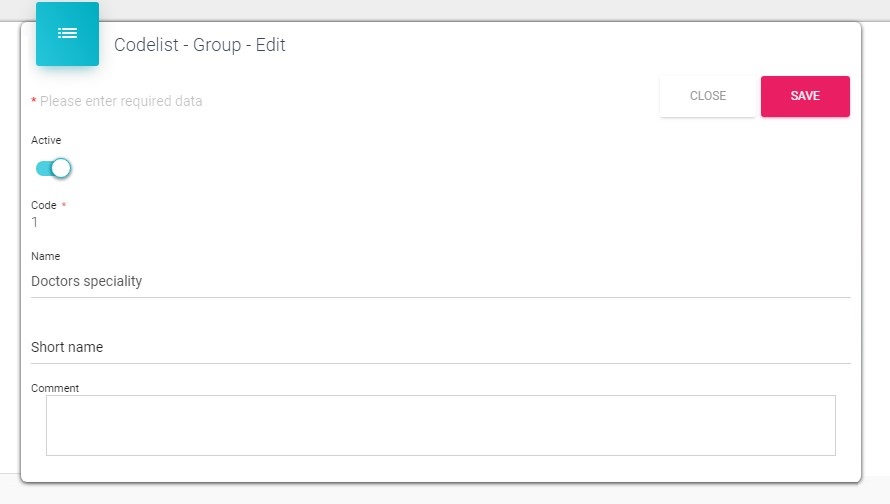
Codelist - Category
Codelist –Category module is used to define categories for codelist group. For example see the following figure:
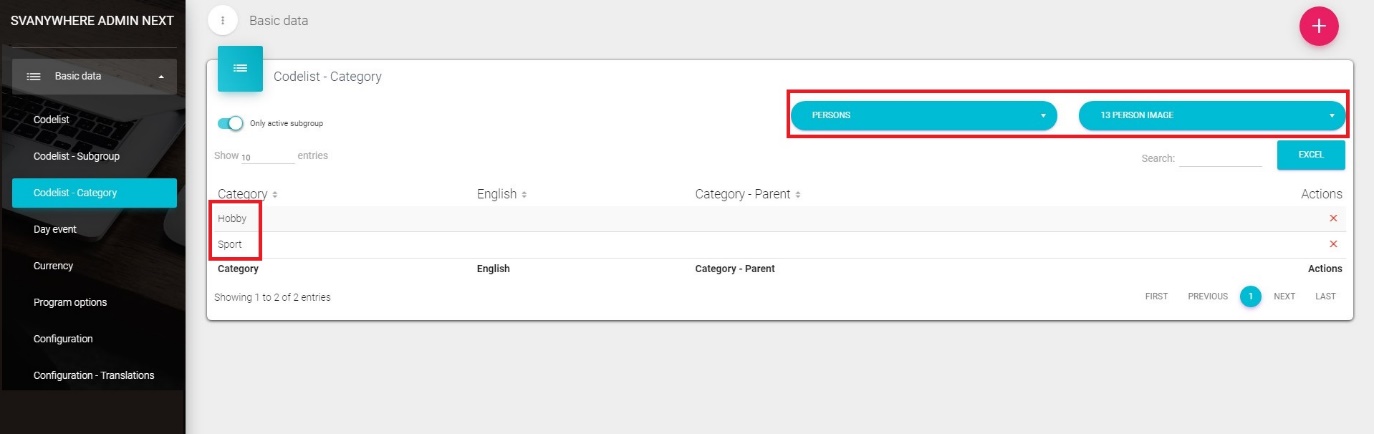
Selected is Persons category and the 13 Person image group. So for this group we created two categories Hobby and Sport.
For each of these categories we define codelist (e.g. Hobby – chess, collecting post marks, …) in Codelist module explained before.
Mostly used for CLM categorizing and for categorizing specialties by person type.
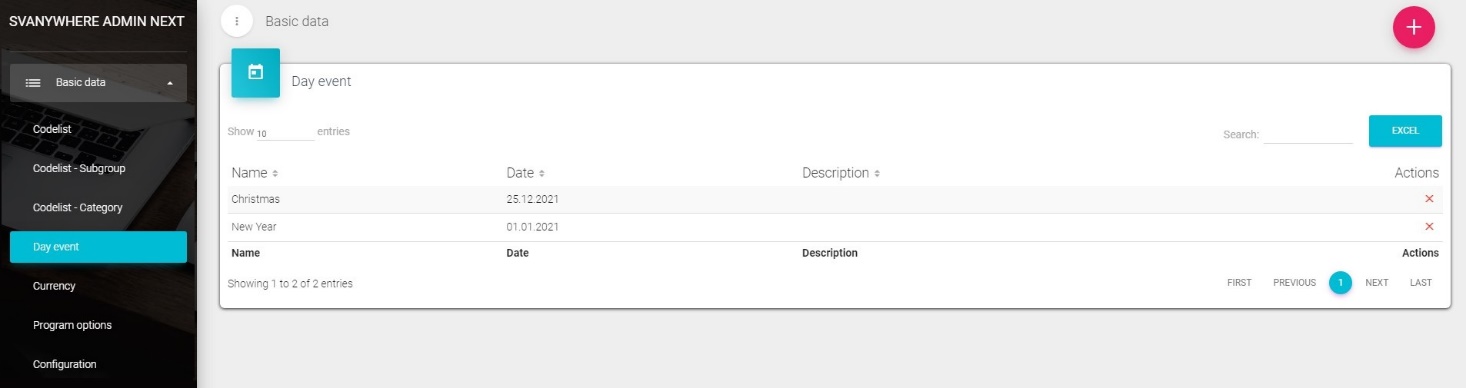
Day event
Sales Vision offers the possibility of defining nonworking days, as well as other important dates for your work. If you want to add, delete or modify any holiday or event, click on the Day Event in Basic data on the left side. A new screen like the one below will open:
To add a new day event just click on the “+” button and window like this one will appear:
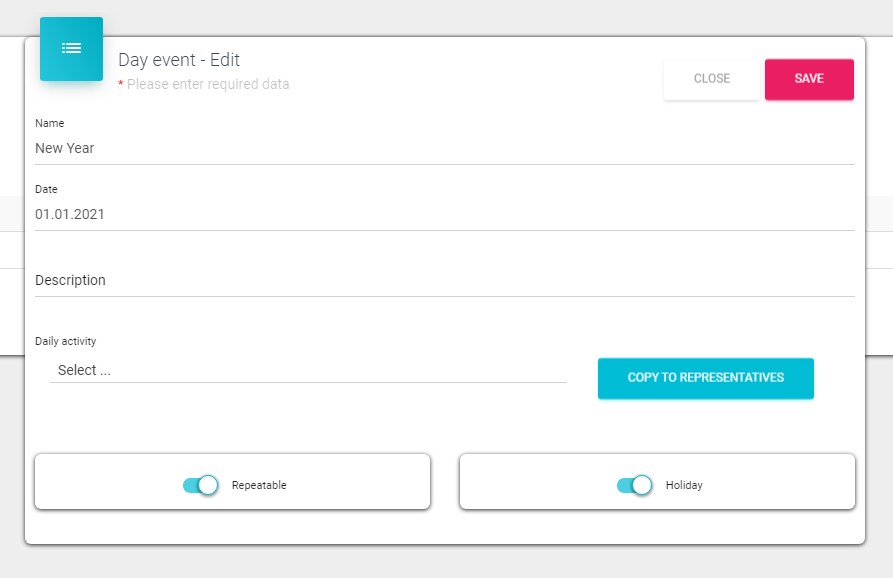
Fill out the exact date, enter the name of the event, you can enter a description of the event, and if you want to tick the checkbox for Holiday or Repeatable. Click on Save will store the information of events. If the Holiday checkbox is marked Sales Vision will observe the day as a holiday and will not include it in the analysis. Repeatable box is for those holidays that are always on the same date in the year (for example, Christmas or New Year) so you would not have to enter them each year but only once.
Currency
As Sales Vision provides the option to track the sales data, it is necessary to define the currency for the financial data.
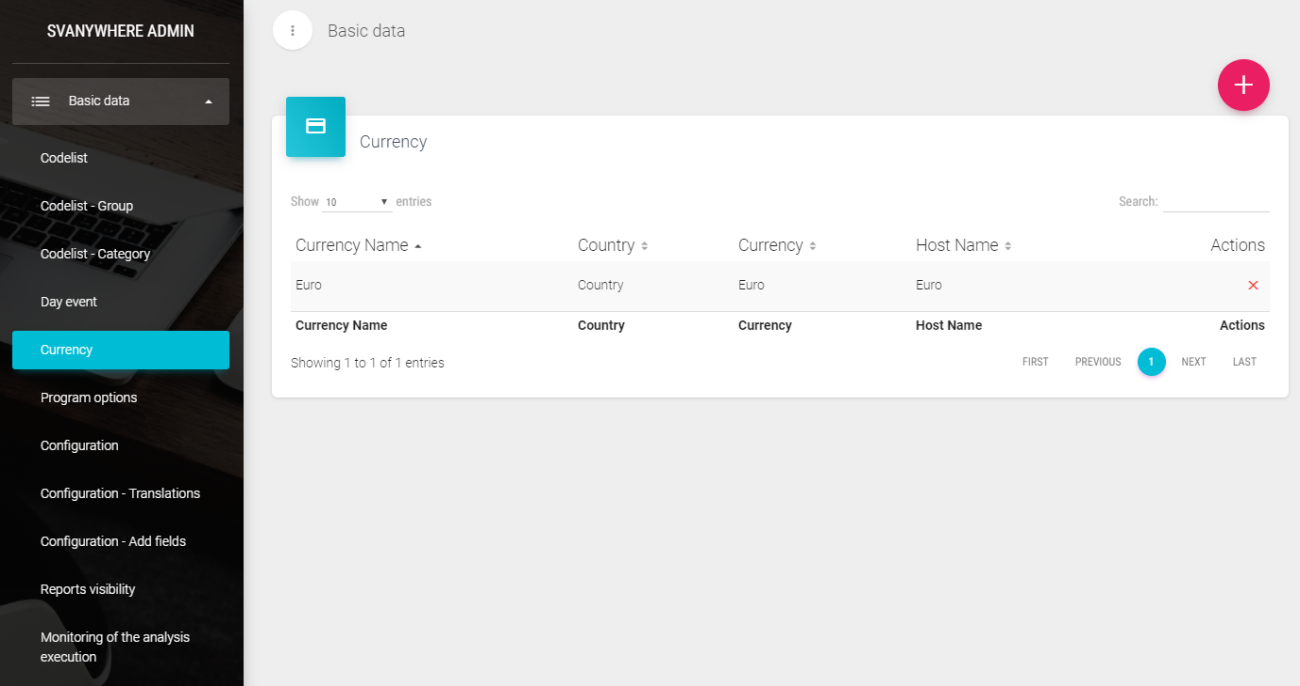
If you would like to add, delete or change currency, click on Currency in Basic Data in the main menu.
To add a new currency click the “+” button and fill in the information.
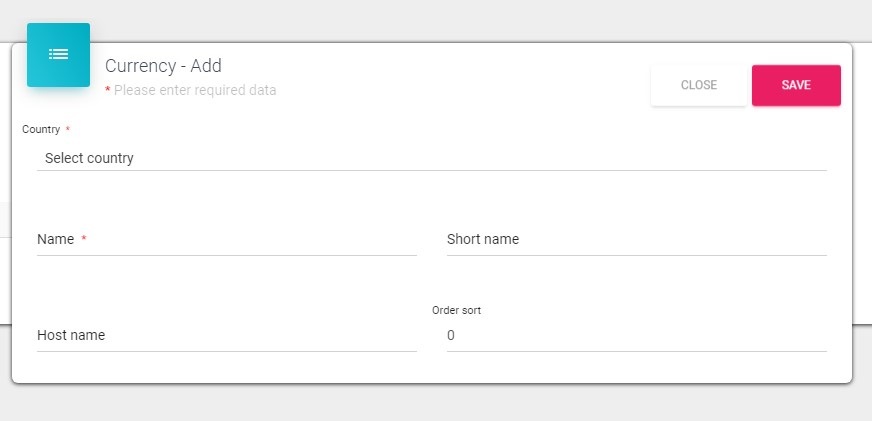
Choose the country from the dropdown menu; put the name of currency in the name field, you can also add a short name. By clicking on Save button changes will be saved, and click on Cancel will close the window without saving.
Program options
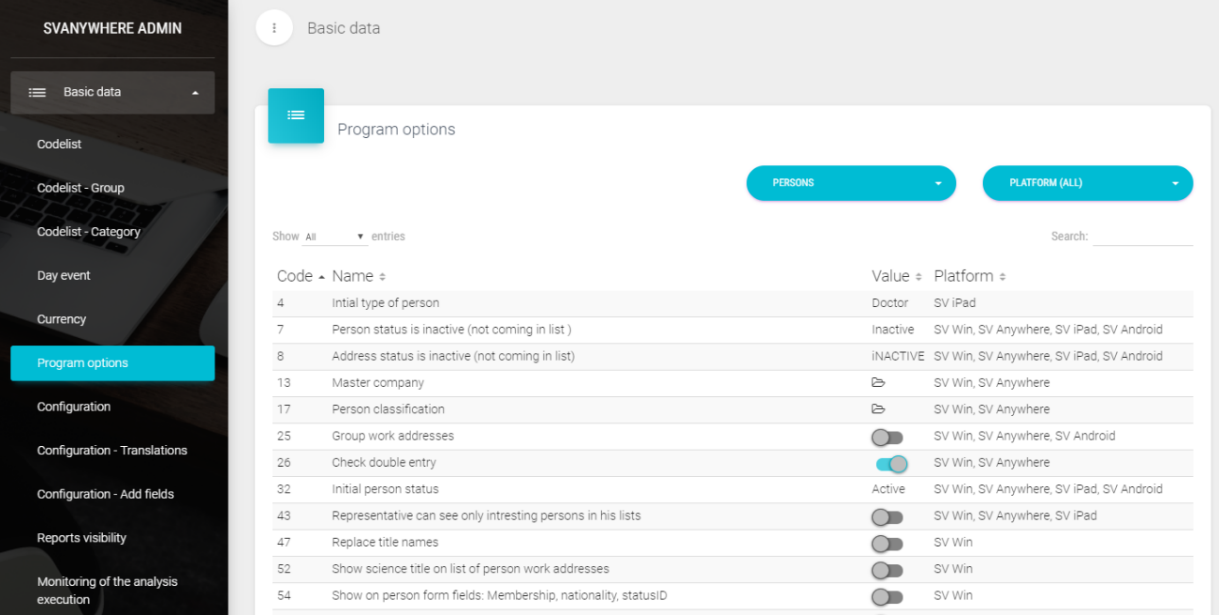
If you would like to define certain options for your Sales Vision, in Basic Data, click on the Program options.
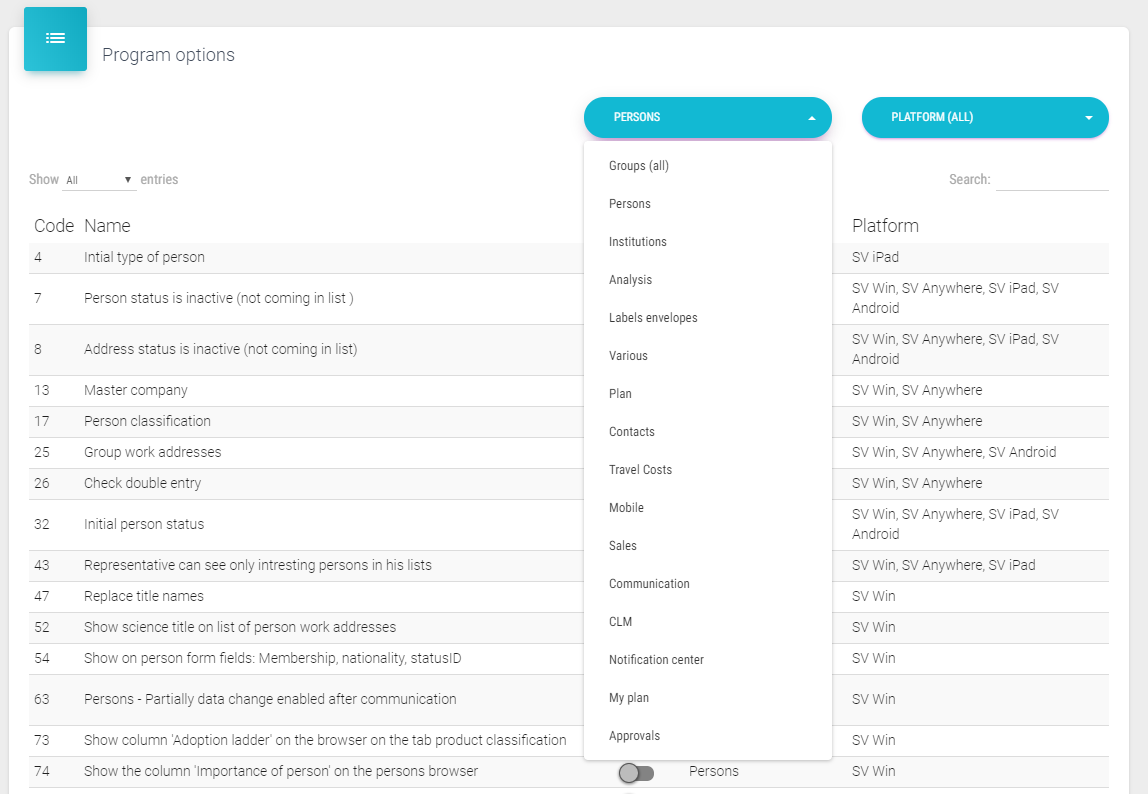
New window just like this one below will appear where you can change different system options. Program options are divided into submenu’s which can be selected in the first dropdown list (Persons, Institutions, Analysis, …). If you select Groups (all), all options will be listed. Second dropdown list is to choose the platform for which we want to change options. Each submenu is described in following chapters.
Persons
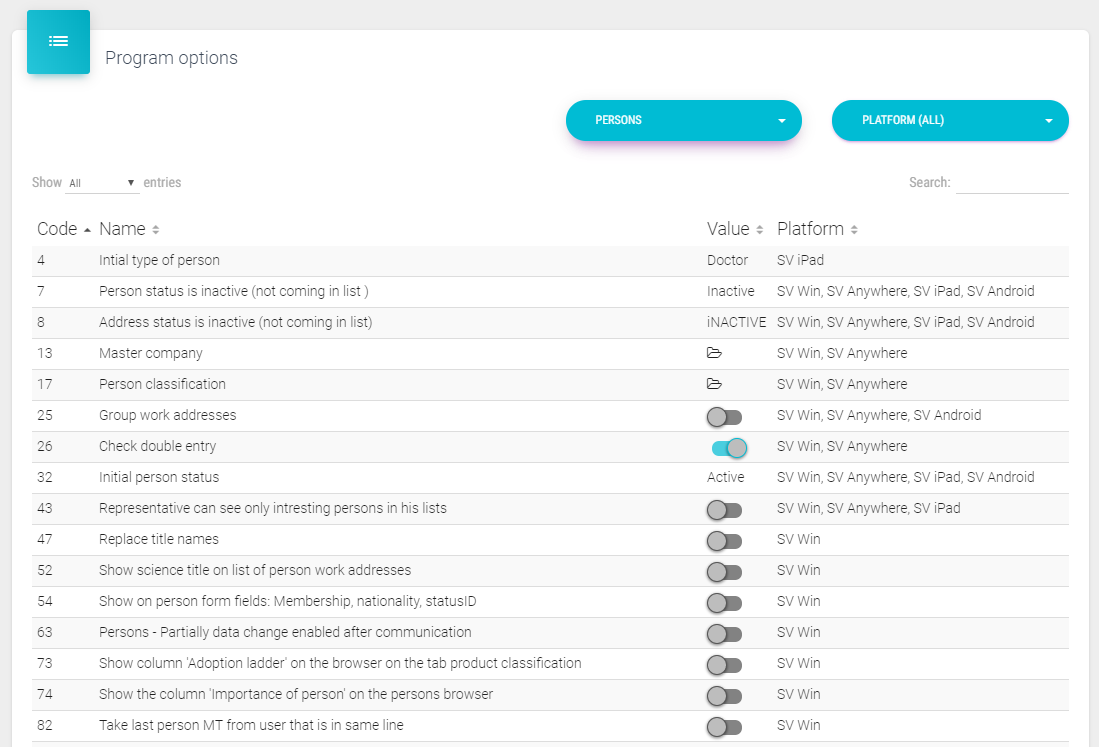
After you choose Persons in the dropdown list, you can use following options.
4 - Initial type of person – when you create a new person in Sales Vision, these fields will be automatically set as default.
7 - Person status is inactive– list of person status which you need to check for not showing in Sales Vision Win system.
8 - Address status is inactive – list of person status which you need to check for not showing in Sales Vision Win system.
13 - Master company – here you have the possibility to define a major company in Sales Vision
17 - Person classification – show person classification by representative or global or company line (this option will be changed/renamed to person and institution classification)
25 - Group work addresses – with this option, if person has two or more addresses, in list of person this person will appear once with, but with more addresses (in opposite way, in list, name of person will appear twice or more (it depends how many working addresses they have) – Warning: when you switch on this option, you will lose filters in persons list!
26 - Check double entry – when you enter a new person, system will check for duplicate (through filter) in current database
32 - Initial person status– when you create a new person in Sales Vision, these fields will be automatically set as default.
43 – Representatives can see only interesting persons in his lists – for representative in person list and analysis are shown only interesting persons.
47 - Replace title names – in case that in Sales Vision, names of academic titles and science titles are inserted wrong, with this option, you can replace titles
52 - Show science title on list of person work addresses – it will show science title on the list of persons
54 - Show on person form fields: Membership, nationality, Status ID – In person’s card, these fields will appear
63 - Persons –partially data change enabled after communication – available data change after communication except name and surname.
73 - Show column “Adoption Ladder” in the browser on tab product classification – Column “Adoption Ladder” will appear
74 - Show the column “importance of person” on the person browser – Column “Importance of person” will be displayed in list of persons
82 – Take last person MT from user that is in same line – when copying institutions to other representatives it is taken last person MT from representative of the same line.
86 – Hidden Tabs SR – you select tabs that will be hidden for SR in person module.
87 – Hidden Tabs HQ - you select tabs that will be hidden for HQ in person module.
90 – Tax Number – in the person list is shown tax number.
92 – Show also active institutions without Sales – used when accumulating, updates the sales_inst_data so that active institutions without sale can be shown in DataView.
95 - Lock person classification after microtarget - after you add new microtargeting, person’s classification can’t be changed
100 - Master country – here you have the possibility to define a major country in Sales Vision
101 - Check if proxy is enabled
157 - Direct sales download over communication – sales data is downloaded over communication
181 - Enable person changes for representatives – SR can edit a person
182 - Disable add new person for representative – SR can’t add new person to database
185 - The number of person is visible in the main list – in Persons module, in the main list, number of person is shown
186 – Enable adding/deleting persons from Marketing plan – if is in licence included option Marketing plan by selection, with this option is enabled adding/deleting persons from marketing plan. In SVAnywhere with this option beside mentioned enables also adding/deleting institutions from marketing plan.
190 – Enable changes of field ‘Importance of person’ – with this option is possible to select representatives which will be able to change the field ‘Importance of person’. If is selected at least one representative then only this representative can change this field. If no one is selected then all can change that field.
193 - Use IE proxy – for communication and autoupdate is used proxy.
196 – Order in displaying the person’s name: Surname, Name, Fathers name – defines person name sort in analysis, person list and dataview.
233 – Change alloved only to RM – if is in licence activated option marketing plan (MP) by selection and program option ‘Enable adding/deleting persons in MP’, with this option is defined that only RM can add/delete person from MP. In SVAnywhere to that is also enabled that RM can add/delete institution from MP.
269 – Working time (from – to) – with this option is enabled additional working time in person module, where can be defined time from – to when person is available, respectively when it has for e.g. lunch break.
281 – When adding persons add the institution and vice versa – if active, when adding person in MP automatically are added institutions where person works and vice versa. This option applies if is in licence included MP by selection.
321 – Order in displaying the persons name: option defines how it will look sort in showing person name.
354 – Data collecting – Contract text
356 – Time line – Columns for tracking – columns which change data we want to follow for table person, perslocwork and persimage. It is written in PERSON_TIMELINE table.
411 – Show person function – showing person function in person grid
412 – Do not change the status of uninteresting persons If person is not interesting, it doesn’t change
417 – No. of institutions/Personf nr. must be unique – NR of person and institution is generated when importing or creating new record on central base. When creating remote in NR is saved 0.
424 – Use targeting by colors – showing field PERSON.COLOR_SNR and PERSON.KOL_SNR in person form.
427 – Microtargeting – to calculate person classification if person classification is general type.
439 – Show only primary work address – in the person grid are visible only primary working addresses and records which do not have primary working addresses set.
447 – Tabs on browser – Person type – in browser to generate tabs by person type
450 – Calculate general classification through product classification
490 – Show the following columns in the browser: Planned visits per year, Visits YTD, Last Visit – columns are obtained in dependence of options MyPlan and Marketing plan by selection (MPBYS).
493 – Show field: Classification – Changed by representative
495 – Show department name on person list -shows department name in person list
505 – Delete working address if institution is inactive – deletes working address if institution is inactive
624 – Person list- Show : Representative classification – shows representative classification in person list
636 – Show only primary work address – shows only primary working adress
684 – Use person subtytpe – uses person subtype
697 – Mandatory fields in module KOL – for selecting mandatory fields in module KOL
698 – Person default email – for selecting default e-mail RTE, Private data,workplace
Institutions
91 – Institutions – show ‘Stock List’ – under Institution details is shown the tab ‘Stock list’ in SV Win.
183 – Enable institution changes for representatives – when active representatives can change institution data.
184 – Disable add new institution for representatives – when active representatives are not able to add a new institutions.
390 – Institutions – Hidden Tabs SR – by clicking on it new window will open where we select which institution tabs will be hidden for representatives.
391 – Institution – Hidden Tabs HQ - by clicking on it new window will open where we select which institution tabs will be hidden for HQ’s.
416 – Allow selection of only one territory per institution –the institution can only be in one territory.
417 – No. of institutions/Persons nr. must be unique! – number is generated automatically when importing new record or creating new person/institution on central base and when remote number is 0. Option only for SV Win.
431 – Execute the dashboards only through Report Server – sales data are received from the Web service (IMS sale and sale).
434 – Show: Ownership type/Healthcare level – this fields are visible when editing or creating new institution to select ownership type and healthcare level.
488 – Adding a new institution – selected all cities – by default all cities are listed when selecting city.
493 – Show Field: Classification – Changed by – shows which user has changed classification.
- – Exclude this subtypes or types of institutions from user territory
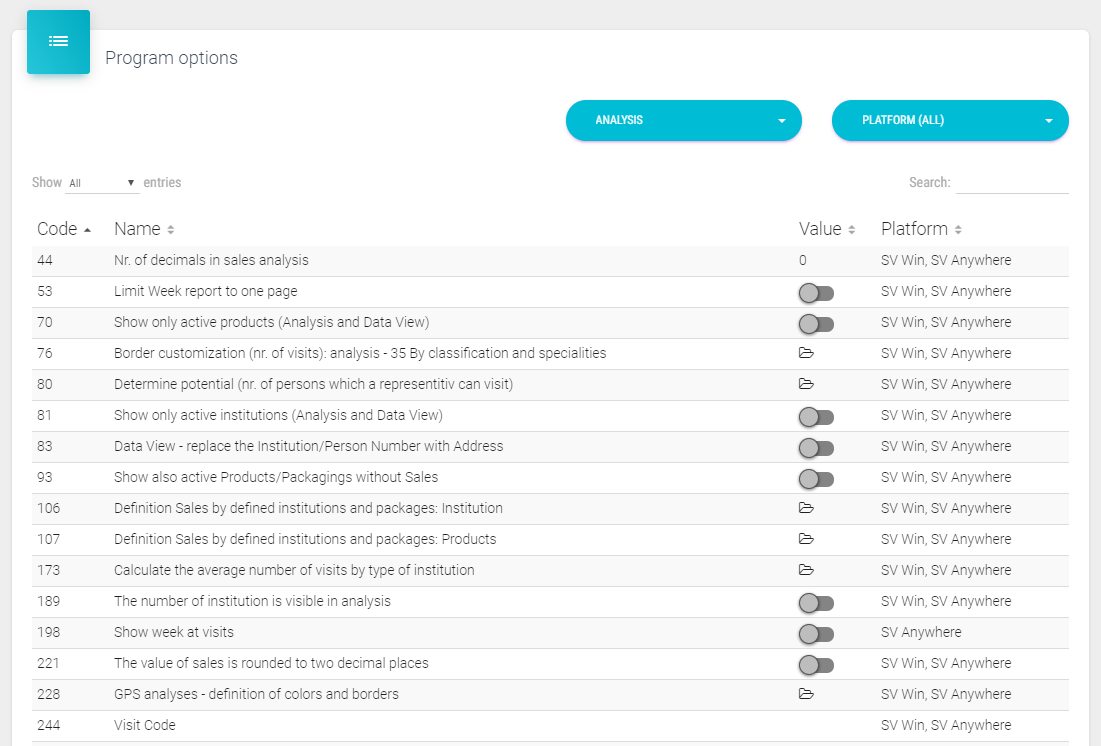
Analysis
44 - Nr. of decimals in sales analysis – put the number of decimal for sales analysis
53 - Limit week report to one page – Week report is limited to only one page
70 - Show only active products (Analysis and Data View) – it will display only active products in sales analyses
76 - Border customization (nr. Of visits): analysis – 35 By classification and specialties - adding number of visits to determine conditions for analysis nr. 35.
80 - Determine potential (nr. of persons which a representative can visit)– drop down menu to select potential by territory or visit history
81 - Show only active institutions (Analysis and Data view) – it will display only active institutions in sales analyses
83 - Data View - replace the Institution Number with Address – replace institution number with institution address
93 – Show also active Products/Packagings without Sales – used in accumulation where is sales_inst_data updated so the active packages/products without sales can be shown in DataView.
106 – Definition Sales by defined institutions and packages: Institution – used for defining institutions in Sale analysis 32.
107 – Definition Sales by defined institutions and packages: Products - used for packaging defining in Sale analysis 32
173 – Calculate the average number of visits by type of institution –option is not used.
189 – The number of institution is visible in analysis – used in Sales, Visits, samples and Persons analysis for showing NR next to the name of institution.
198 – Show week at visits – in DataView when selecting Institution visits it is enabled view of visits per weeks.
221 - The value of sales is rounded to two decimal places
228 – GPS analyses – definition of colors and borders – used in GPS analyses for defining minimal distance value between visit and real location of Institution/person.
244 – Visit Code – analysis will return data for those visits where is the way of visit same as in the choosen option, if nothing is selected, all visits are shown.
266 – Week report/ Plan – Type – with this option we define which week report/plan will be shown.
268 – Marketing plan – 13, 14, 15 Analysis % Deviation –Mark with red – defines the percentage of redundancy indicated with red color by MP analysis 13, 14, 15.
347 – Analysis/ Data view – Show host id institution – displays the Host ID of the institution with the institution name.
355 – Daily activities included in the fieldwork – for choosing double visit, coaching. By daily activities
357 – Daily activities included in the supervison – works in DataView
409 – Run analysis only through the Report Server
443 – User defined analysis – enable custom analysis.
481 – Show all report pages on one page – show all pages in one page when displaying analysis.
486 – Second value in a parallel column – DataView – second value is shown as parallel column.
538 – Show only active representatives – Only active representatives will be shown
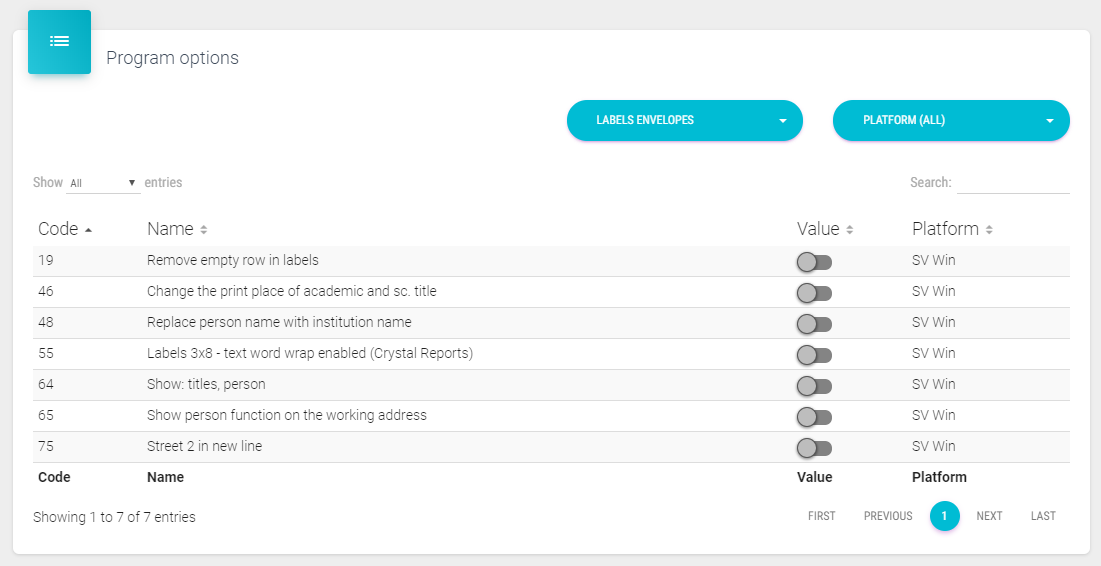
Labels/envelopes
19 - Remove empty row in tables – Empty row will be removed in tables
46 - Change the print place of academic and sc. title – it will be displayed first titles then person name
48 - Replace person name with institution name – replace person name with institution name
55 - Labels 3x8 – text word wrap enabled – it enables word wrapping in this label
64 - Show: Title, person – show title in labels
65 – Show person function on the working address – when printing a label, it prints a function if it exists.
75 - Street 2 in new line – show second street in one line
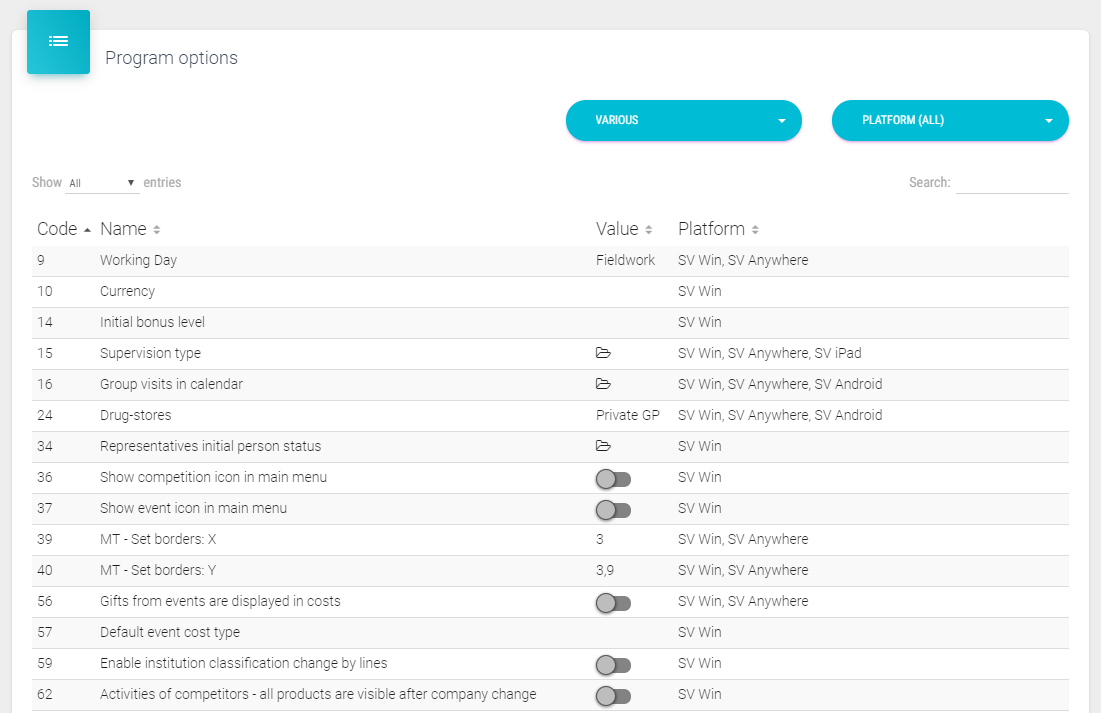
Various
9 - Working day – choose the day activity which will be calculated with number of visits in some period (for calculating average number of visits)
10 - Currency – default currency- default currency is selected
14 - Initial bonus level – choose initial bonus level
15 - Supervision type – choose supervision type
16 – Group visits in calendar – can be selected to Show only group visit or Include persons from group visit.
24 – Drug-stores – you choose subtype institution which will be treated as Wholesales.
34 – Representatives initial person status – Initial visit status is set at territory change
36 – Show competition icon in main menu – display Competition icon in main menu
37 - Show event icon in main menu – displays Event icon in main menu
39 – MT – set borders: X – default borders are set for product MT
40 – MT – set borders: Y – default borders are set for product MT
56 – Gifts from events are displayed in costs – display gifts from event in costs
57 – Default event cost type – choose default cost from created ones (e.g. Fuel).
59 - Enable institution classification change by lines
62 - Activities of competitors – all products are visible after company change – enables to input products for all companies
68 - Representatives have restricted subvention types – representatives will not see all types of subventions
72 – Disable export and printing for representatives – for SR’s in browser is disabled export and print in DataView and analysis.
84 – MT set borders: Yd - default borders are set for product MT
85 – Sending wholesales to sales representatives
91 - Institutions – show “Stock list” – showing stock list in Institutions module
98 - HQ autoupdate check – checking for SV updates
102 - Packaging – Code 2 is equal to code 1 – in Products, code 2 field will automatically be filled with the same code as code 1
103 - Supervision – include addition notes for supervision
151 – Daily reports – Begin and end of work – when creating day report defined time is automatically defined set.
152 - Show IMS brick for city – while adding a city in Institutions module, IMS brick for that city will be shown
158 – MR see data newer then – MR sees data newer then defined date.
160 – Print institution: City – institution name – replaces institution name with address.
162 – Inst. Sales plan: Enable selection of more than one institution
178 - Geographical units: Regions – using regions in SV
215 – Survey – answers are not mandatory – if active answers in surveys are not mandatory.
219 – Calculate the secondary sale – enables coefficients insert of secondary sale and in accumulation calculates the second sale.
220 – Secondary Sales: Wholesales – here we select wholesale for which is calculated the secondary sale.
227 – Show the coordinates of institution for person – taken is GPS location of institution where this person works. This option is also used in GPS analysis ’66 GPS tracking of visits’.
235 – Initial institution status – when adding a new institution, the status that is set in this option is initially selected. This is also the initial status of a person’s work address.
251 – RM cannot change SR’s data – used in SV2007.
252 – Institution sales plan: allowplanning for multiple packages
260 – Central users who see the module Supervision – used in SV2007
267 – Use text fields for time from / time to (SVAnywhere) – at congresses, you can select ‘time from’/’time to’ in the combobox, and this option allows you to write it and in the same time combobox for time choose is hidden.
278 – Only admin can add marketing plans – when option active only admin can add MP.
291 – Password change: hide – additional option which disables change the of password.
325 –Microtargeting – by cities – if option is active the MT list for the person/institution is filtered except microtarget.specs field and whether there is a corresponding entry in the mt.cities.
329 – Number of days before expiration of month for sending notifications – option defines how many days before end of the month is sent the list of persons that still need to be visited (based on the frequency of visits in MP).
350 – Date format – setting up the date format which will be used
351 – Password strength policy – rule of the password strength.
366 – DashBoard – Invisible – when active hides the Dashboard module.
370 – Search – Ignore accents – ignoring accents on letters (e.g. for Poland)
374 – Marketing calendar – RM can see SR’s data
377 – Limit (Day) – limit, how many day activities can be selected per day.
380 – Discount definition through quantity classes – in commercial offer to use discount definition through quantity classes.
385 – Day event – if the day where we create plan or visit is for e.g. holiday (exists in DayEvent table) then with this option is defined selected day activity.
388 – Reset passwords for remote users every 1st of month - with this feature enabled all users on the 1st of each month will get temporary new password to email.
398 – Enable the transfer of samples between representatives
399 – Anyone can transfer to anyone – stock management sharing anyone to anybody.
401 – Microtargeting – Question (type): Number - it can be entered number (normally can answer only be selected from the dropdown list).
403 – Persons – disable initial marketing plan filter – if option is active persons will not be filtered default by certain MP for logged user.
408 – SR can give to RM – territory dividing
419 – Password forgotten? – hide – hides this button in application.
420 – Sales import – use wholesales coefficient
422 – Show – Number of remittances since last visit
430 – Commercial offer: Signature – Mandatory - when order on institution is created, to confirm order signature is required.
438 – Supervision – Questions grouped by name – questions in supervision are grouped by question name.
440 – Discount type – in orders to use quantity/price discount (old orders).
442 – Number of recent passwords that can not be the same – for example if you set 3 in this option – last password can not be used in three next password changes.
445 – Direct Mailing – Send email from system – send email to selected persons/institutions (filtered).
446 – Sales 2 – type of institution – works with the module Sales plan 2.
456 – Show list of events and do not show the events in the calendar
459 – Marketing plan by days – when activated marketing plan can also be defined per day (default is only months and year).
466 – Visits to the institution – Mandatory selection of people –when creating visit to the institution it is required to select the at least one person in that institution.
469 – Disable adding via visits – disable surveys adding through visits.
472 – SR see only surveys from their line – representative can see only surveys from their line.
516 – Orders –CC E-mail – adding e-mail address of person to which will be sent copy of created order.
519 – E-mail subject for sending order – predefined subject in e-mail.
520 – E-mail body for sending order - predefined body in e-mail.
535 – Institutions – disable initial marketing plan filter - if option is active institutions will not be filtered default by certain MP for logged user.
542 – Participation on event per day – option refers to events in which representatives which participating on them can personally define days on which they have participated if event duration is more days. This is only available to admin user and event creator.
584 – Double visits for field – Export – E-mail – with this option is defined export and e-mail body design when sending order.
772 – Display only marketing products in Subvention module – display only active products that are marked as Marketing products.
With following options is defined e-mail which is sent when by visit is given the digital material:
593 – Materials – Digital form – E-mail – CC – here is defined e-mail address to which is sent “Carbon copy”.
594 – Materials – Digital form – E-mail – Subject – here we define e-mail subject. It is also possible to define tags that are replaced for the real values (e.g. “Digital material - #date_today”)
595 – Materials – Digital form – E – mail – Text – here we define body of the e-mail together with the tags if we want to use them.
Tags which replace the real values (can be used in Subject and Text form): SUBJECT - #date_today – for current date TEXT: #login_user – logged user #SR-name – representative from the visit #SR-gsm – GSM number of the representative from the visit.
602 –MT – Enable score view for all users
603 – MT – Enable delete of MT classification at any time
-
-Day report activity without restrictions
-
– Program – Color – for choosing program color
-
– Tasks – enables or disables tasks
-
– In list by default show only active – Users, Packagings, Products
-
– Hide inactive MTs on persons and institution
-
– Orders – Show column HOST ID of packaging
-
– Survey by main user line
765 – Settings for sending e-mails
766 – Show column and field: Occupied by (when MP by selection is active)
767 – The rule for document upload
768 – Weekly plan locking
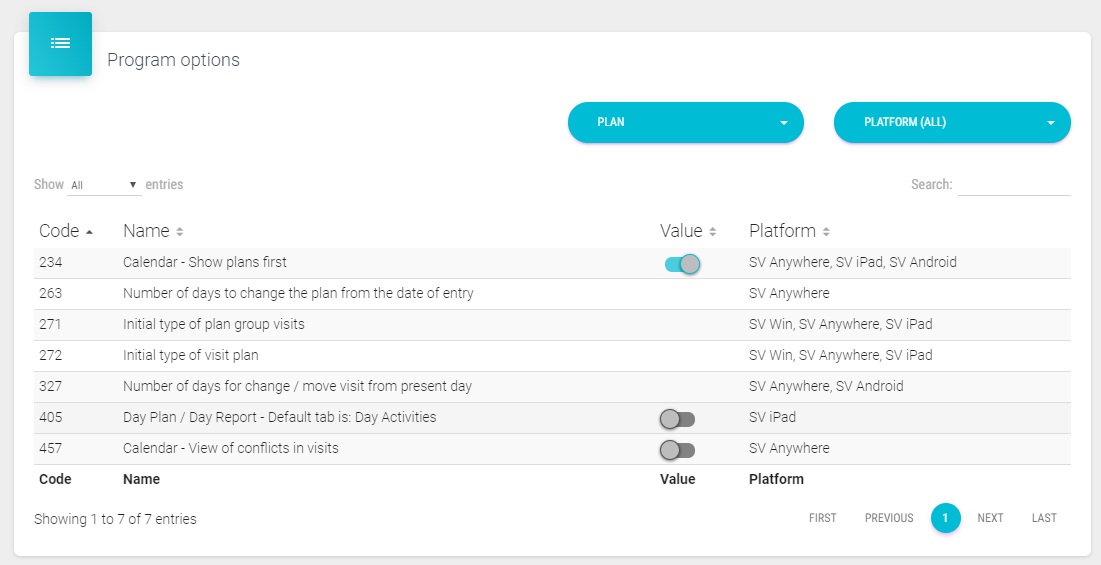
Plan
234 - Calendar - show plans first. – shows plans first in calendar
263 - Number of days to change the plan from the date of entry – enter the number of days when is possible to change entry in plans
271 - Initial type of plan group visits– choose which type of visit will be initial
272 - Initial type of visit plan– choose which type of visit will be initial when entering plans
327 - Number of days for change/move visit from present day - enter the number of day when is possible to change entry in plans
405 – Day plan / Day Report – Default tab is: Day Activities
457 – Calendar – View of conflicts in visits – display form for double visits/plans on same person and same date.
588 – Number of days to determine conflicts in planning – if there already exists plan for that person/institution you will get notification when trying to save it that this plan of visit already exists and who has created it.
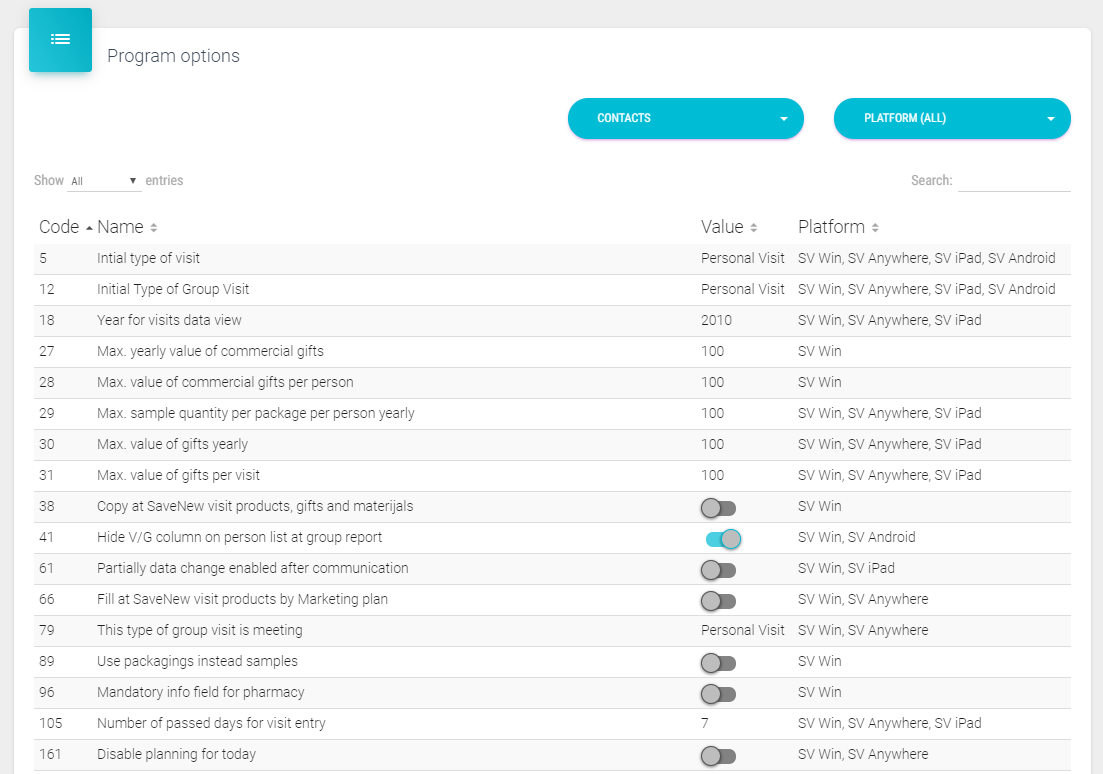
Contacts
5 - Initial type of visit – select initial type of visit which will automatically display entering new visit
12 - Initial type of group visit – select initial type of group visit which will automatically display entering group visit
18 – Year for visits data view – set the default year in data view filter.
27 – Max. yearly value of commercial gifts – defines maximal yearly value of commercial gifts.
28 – Max. value of commercial gifts per person
29 – Max. sample quantity per package per person yearly
30 – Max. value of gifts yearly – defines maximal yearly values of gifts
31 – Max. value of gifts per visit - defines maximal value of gifts per visit
38 – Copy at SaveNew visit products, gifts and materials – if this option is active when we are creating visit and clicking on the button SaveAndNew all products, gifts and materials are automatically filled in the new form.
41 - Hide V/G column on person’s list at group report – hide V/G columns at group report.
61 - Partially data change enabled after communication – enabled save and disabled date and user fields change (check option 331 for more changes)
66 – Fill at SaveNew visit products by Marketing plan – if activated products are automatically filled by defined MP in the new form window when clicking on ‘Save And New’ button.
79 – This type of group visit is meeting – select visit group which will be defined as meeting (used in visit analysis 63).
89 – Use packaging’s instead samples – when creating visit to person/institution instead of samples are shown packages.
96 – Mandatory info field for pharmacy – when creating institution visit, if institution is pharmacy, info field is mandatory.
105 – Number of passed days for visit entry – if logged in user is else than admin, this option defines how many days in past he can add, save and change visits.
161 – Disable planning for today – disables creating of plans for current day (persons, institutions, congress, fast planning)
203 – Calendar: definition of the text color – define text colors for visits/plans in calendar.
211 - Fast visits planning – when option is active and you are adding a new plan instead of the normal form where you select person/institution it is open form for fast planning where is possible to add and delete plans to person/institution.
236 – hide ‘Save And New’ – when option is active in visits window is hidden button ‘Save and New’.
249 – Max. quantity of promotional material per product and per visit – maximal quantity of individual promotional material per visit for representative.
250 – Max. quantity of samples per visit – temporary not used. Transferred to Packagings in Products submenu.
254 – Set the time of visit from server – when creating/changing person/institution visit if there is no visit time set, automatically is server time filled in.
255 – Fast visit planning with time – when creating plan on institution/person and for all selected institutions/person is automatically set visit time. Time is obtained from codelist ‘5 Scheduled time of the visit’.
262 – Default calendar view is 2 day view
273 – Enable blueprint plans – only on SV9. System that automatically suggests which person/institution to visit based on a defined MP (explained in SV Win manual).
277 – Escort in visit from codelist nr. 142 – escort in visits is read from the codelist where you define what you want, instead of classic escort which is loading all users. When this is active, classic escort is not available.
297 – Provide info per representative – enables info entry in events by representatives.
308 – Allow adding multiple visits/plans to the same person/institution for the same day
315 – Transfer info from day plan to report – option enables info copy from day plan into day report, when we create new day report.
318 – Person visit – Samples: Enable chars in batch number – only on SV9. Enables sign input in batch by adding samples.
326 – Initial type of pharmacy visit –automatically fills ‘Visit code’ field in pharmacy visit form by defined type of visit.
331 – Number of days for change/move visit from present day – you enter how many days in the past from current day can visit be edited.
333 – Calendar order activities by time
346 – Add double visit for person in escort
362 – Show GPS indicators – if option is active in calendar next to visit is displayed indicator: ***.- if there is no coordinates in perslocwork/institution and visitpers/visitinst, ** - if there are coordinates in perslocwork/institution and no coordinates in visitpers/visitinst, * - if the distance between perslocwork/institution and visitpers/visitinst is more than 100 000 meters.
363 – Enable product changing and deleting if percentage is disabled in MP – this option works if in marketing plan is checked ‘When creating visits it is not allowed to modify data of products’. You can delete and change product but percentage not.
364 – Enable product deleting, and disable adding if percentages are disabled in MP - this option works if in marketing plan is checked ‘When creating visits it is not allowed to modify data of products’. You can delete but you can not change or add product and percentage.
367 – Number of products to choose when visiting a person/institution – limited number of selected products in institution/person visits.
368 – Enable all data reported – enabling functionality ‘All data reported’ in events, person/institution visit. When you check this checkbox, you confirm your entered data and no more changes can be made after the visit is saved.
369 – Enable product themes – enabling product themes tab when creating person visit, to define what themes should be solved with this person.
384 – Calendar – Order (plan/visits) – define in which order will be displayed row visit/plan text (e.g. person, info, address, institution).
- – Samples can be given without promoting the product to which they belong
389 – Time copy from plan - if you report plan the planned time will be automatically transferred to visits. This is done only if this option is enabled.
396 – Calendar: Show in timeline – Period (min.) – when active and you click on the checkbox ‘Show in timeline’ when creating fast reporting/planning, timeline is loaded to select the time of visit/plan.
406 – Working time – From – when creating a new plan of visit to person/institution automatically is set time that we defined here.
410 – Double visits through daily plan/report
413 – Verification – stock management verification. – for stock approval setting
423 – Hide the number of daily activities in the calendar
428 – Default value – unchecked – when active functionality ‘All data reported’ is unchecked by default. This is sub option of option 368.
429 – Daily activity must be entered before saving visits – user must enter daily activities before saving visits
435 – E-mail subject for rejecting sample – here we define subject that will be filled when sample is rejected.
436 – E-mail body for sample reject – here we define body text that will be filled when sample is rejected.
437 – E-mail for sample reject - here we define e-mail address where the rejection e-mail will be sent.
449 – Visit to person – Show history of info field – when active the info data of previous visit are shown.
453 – The selection of product is mandatory – it is mandatory to choose products when creating person/institution visit or event.
455 – Daily activities – Group: AM, PM – in daily activities can be seen morning and afternoon groups.
457 – Calendar – view of conflicts in visits – when active, displayed is form to view plan/visit conflicts on the same person and the same date.
468 – Specialties for which visits cannot be created – here you select specialty for which will not be possible to create a visit.
479 – Show short name for type of visit – when active in calendar is displayed short name of type of visit.
483 – Representatives does not see visits, plans, costs and other related data of other representatives – SR cannot open other SR’s visits and plans.
499 – Gifts/Materials/Samples – Default value – here we set default value which will be filled in form for gifts/materials and samples.
504 – Visits can be entered only from plans – when active if there is no created plan it is not possible to create a visit.
533 – Time – Copy from plan: set current time – overrides either visit beginning time or finishing time with the current local time.
546 - Percent of time dedicated to product according to number of products – define how much time is needed to present for products by visit.
548 – General not promoted products – for general promotional materials – with this option are defined products which contain usual promotion materials, but those products are not promoted (they can be promoted, but depends if they are marketing products or not). This option controls are visible only if option 547 is active.
554 – Hide gifts – this option depends on option 547.
556 – Visit to person / Visit to institution – it is not allowed to give samples – it is not allowed to add samples to person or institution
576 – This visit code is double visit – choose which visit code is double visit.
587 – Number of days to determine conflicts in reporting – if there already exists report for that person/institution you get notification when trying to save it that this report already exists and who created it.
613 – Allow signing of samples for users – enables signing samples to users
-
– Event type – report of promotion – selecting event type for promotion
-
– Default participation type on events – select participation type organizator or initiator
-
– Use private e-mail and phone for remote call and Maestro - private number is used for remote calls and Maestro
-
– Hide all additional fields on product tab for visit, except product selection and time – hides alladditional fields on product tab for visit, except product selection and time
-
– Person / Institution visit – Hide promotional materials – for hiding promotional materials for Person or Institution visit
-
– Person / Institution visit – Hide gifts – Hiding gifts for Person or Institution vist
-
– Person / institution visits – Hide samples
-
– Person visit – show potencial and loyality by product
-
– Giving samples is not allowed to persons of these speciality – Samples can’t be given to persons of selected specialities
683 – Day report – representatives can enter their break time – representatives can enter break time
693 – Representative can not open plan, visit or survey from other representatives – representative can’t open day plan from other representatives
695 – Show classification of person and institution in calendar -shows classification of person and institution in calendar
701 – Persons – Number of plans per classification
704 – Default event participation type – when selecting participation default participation type
707 – Number of passed days for visit entry – per user - After how many days car user make entry for event
709 – KPI – targets – selecting value for target
710 – Total validated time – list for selecting day activities -
711 – Face to face visit code – select option for face to face visit
712 – Coaching visit code – select type of activity for coaching
713 – Default person G classification – selecting default classification for G person
714 – Default institution G classification – selecting value for institution G classification
715 – Default person S classification – selecting value for personwith S classification
716 – Default institution S classification – selecting value for institution with S classification
717 – Institutions – Number of plans per classification – selecting numbers of plans for institution per classification
721 – Email subject for samples – selecting email subject for sending samples
751 – Visit types for KPI and Frequency Dashboards – selection of the visit types that will be used for data calculation on Frequency Dashboards and KPI’s
771 – Mandatory survey
776 – Maximum number of samples given by package – define maximum number of samples given by package in year and in visit
786 – Automatically select RM as co-visit if type of visit is double visit – This way visit will be created for RM as well and you don’t have to manually select person who is co-visit with you
839 – Promoted products on visits initial tab
841 – Number of past days for notifying users about creating a new visit to the same person
843 – Show indicators for inactive statuses on calendar module
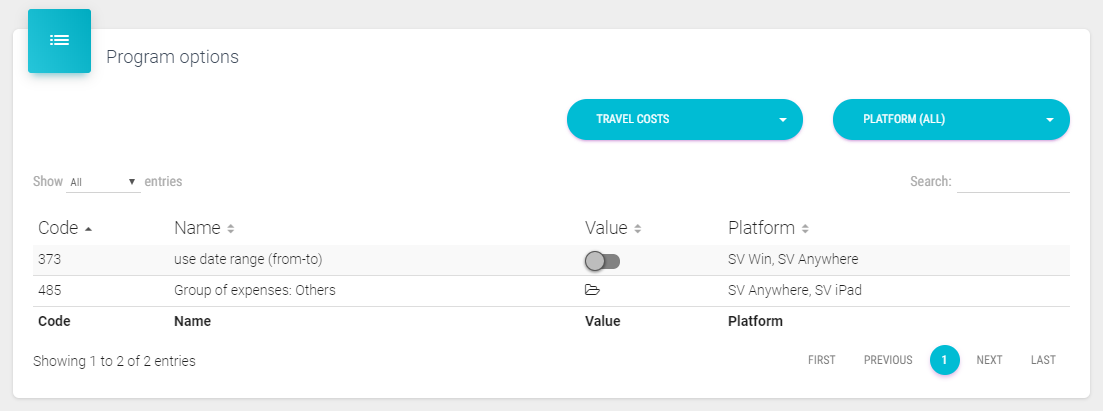
Travel costs
373 - use date range (from – to) – defines if date range will be used at Travel Costs
485 - Group of expenses: Others – defines under which group are going expenses
Mobile
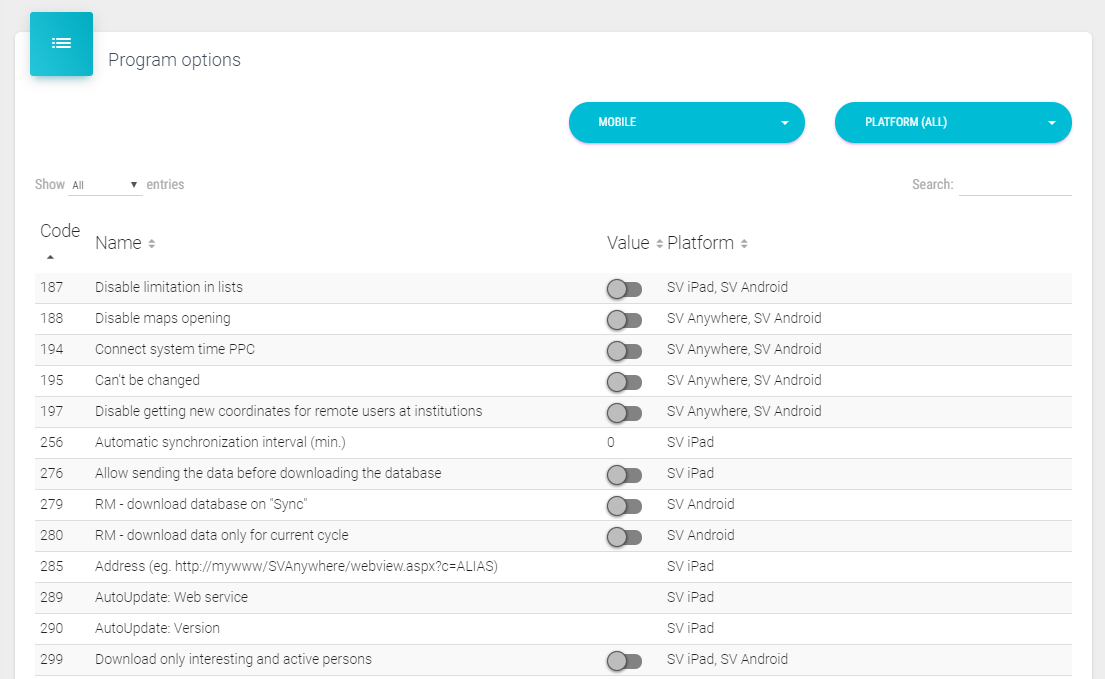
Windows mobile
187 - Disable limitation in lists– lists are not limited
188 - Disable maps opening – maps can’t be opened
194 - Connect system time PPC – connect system time on mobile device
195 – Can’t be changed – if option 194 is active with this option active is disabled to enter time manually. Time is obtained from the system.
197 - Disable getting new coordinates for remote users at institutions – remote users can’t get new coordinates for institutions if this option is turned on.
256 – Automatic synchronization interval (min.) – we define interval in minutes to automatically run the synchronization.
276 – Allow sending the data before downloading the database – for SV Flat. In Next is this integrated in the app by default (prevents, losing data).
279 – RM – download database on “Sync” – for android application, first are data uploaded and after successful upload starts download of database.
280 – RM – download data only for current cycle – to send only data that are in current cycle.
285 – Address (eg.http://mywww/SVAnywhere/webview.aspx?c=ALIAS) – here you define a web address which will be loaded in web view window.
288 – Visible module – option where you can enable/disable certain modules
289 – AutoUpdate: Web service – here we define url link for application update (ipa file).
290 – AutoUpdate: Version – option that serves for login into web service.
299 – Download only interesting and active persons
300 – Communication: notebook - headquarter - mobile device (iPhone/iPad/Android) – enable 3way communication.
301 – Do not log visit time – do not log time of visit
302 – Do not log GPS position of visit
305 – Visits, person and old territory are downloaded with new database – old territory is included when downloading new database.
338 – Enable user tracking – enables writing of currently coordinates directly to HQ database over a web service in specific time intervals.
343 – Enable download of remote database without administrators confirmation
365 – DashBoard – Invisible – hides the dashboard
376 – Language selection (First Value: Default language)
378 – Don’t show records at start of person and institution list – disable automatic records loading at start of person and institution list.
379 – Person visit – Signature – Additional Text – works only on iPad. Additional text which is sent by mail when giving a sample.
402 – RM can see only data from representatives – RM can see data only from his/hers representatives.
425 – Show history of orders by sales volume – showing orders by order value descending.
426 – Show custom dashboards on Home screen
452 – Persons – Show TO DO tab
458 – Signature in giving the sample is optional – signature when giving a sample is not mandatory.
775 – Googles Maps API key – it inserts Google Maps API key for usage
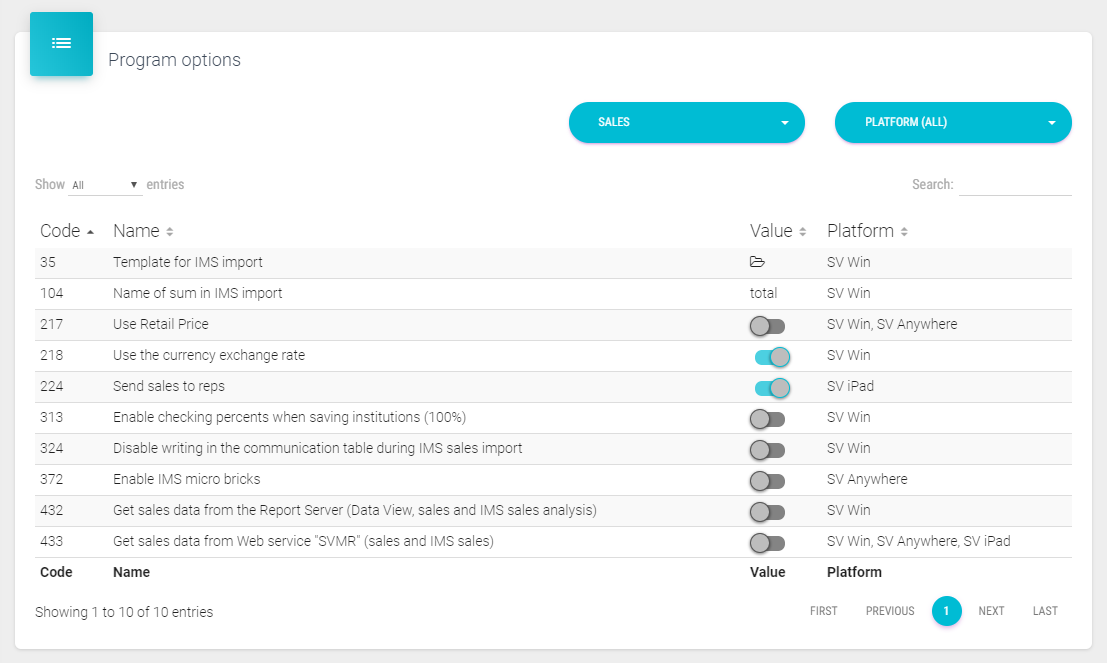
Sales
24 – Drug-stores
35 – Template for IMS import
85 – Sending wholesales to sales representatives
104 – Name of sum in IMS import – for example: total
217 – Use Retail Price – to use retail price in sales accumulation
218 – Use the currency exchange rate – when adding currency it is possible to add currency rate. In data view enables filtering by currency.
220 – Secondary Sales: Wholesales
224 – Send sales to reps – when active sales are visible to representatives.
313 – Enable checking percents when saving institutions (100%) – if in license is included “Sales division by territory”, in that case this option can be used to check if the sum percentage by sales distribution is equal to 100%.
324 – Disable writing in the communication table during IMS sales import
372 – Enable IMS micro bricks – if standards bricks contain smaller bricks.
420 – Sales import – use wholesales coefficient
432 – Get sales data from the Report Server (Data View, sales and IMS sales analysis)
433 – Get sales data from Web service “SVMR” (sales and IMS sales)
641 – Sales Plan, Budget – lock
656 – Enable import of quantities in decimal format
Communication
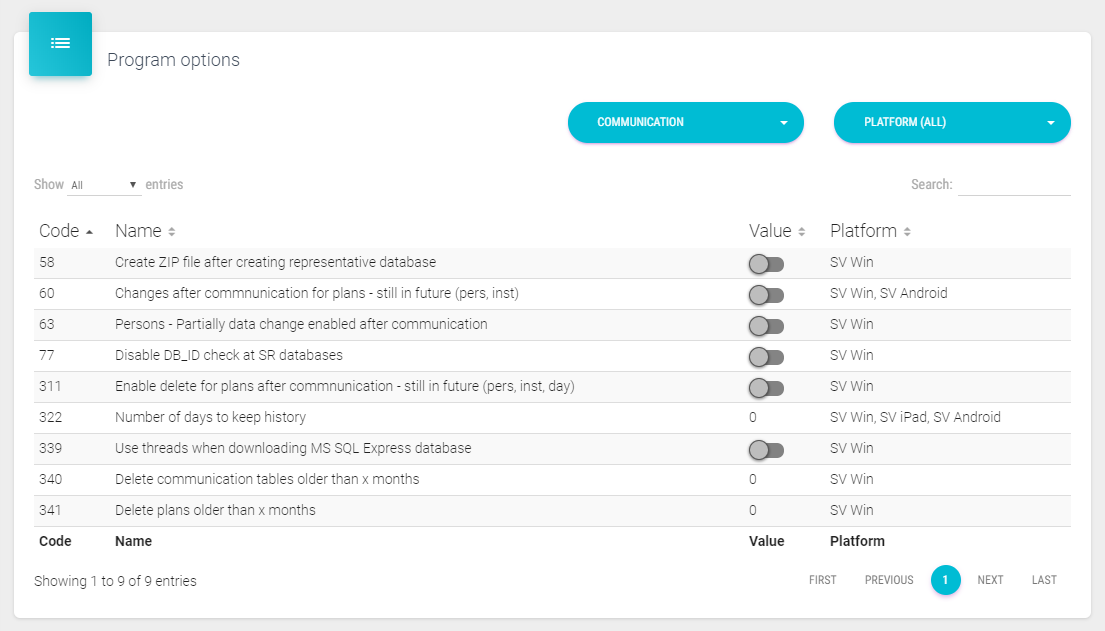
58 - Create ZIP file after creating representative database –after creating a new database, ZIP file will be made
60 - Changes after communication for plans– still in future (pers, inst) – after communication, plans for persons and institutions made for the future are editable
63 - Persons – partially data change enabled after communication – enables changing all data in person’s card after communication except name and surname
77- Disable DB-ID check at SR database
311 - Enable delete for plans after communication – still in future (pers, inst, day)
322 – Number of days to keep history – number of days to keep mobile communication data.
339 - Use threads when downloading MS SQL Express database
340 – Delete communication tables older than x months – delete communication tables older than defined number of months.
341 – Delete plans older than x months - delete plans older than defined number of months.
720 – Universal user password
CLM/BookVision
Administrator can adjust settings for BookVision module in Program options, by selecting CLM in the dropdown list as shown on the picture below.
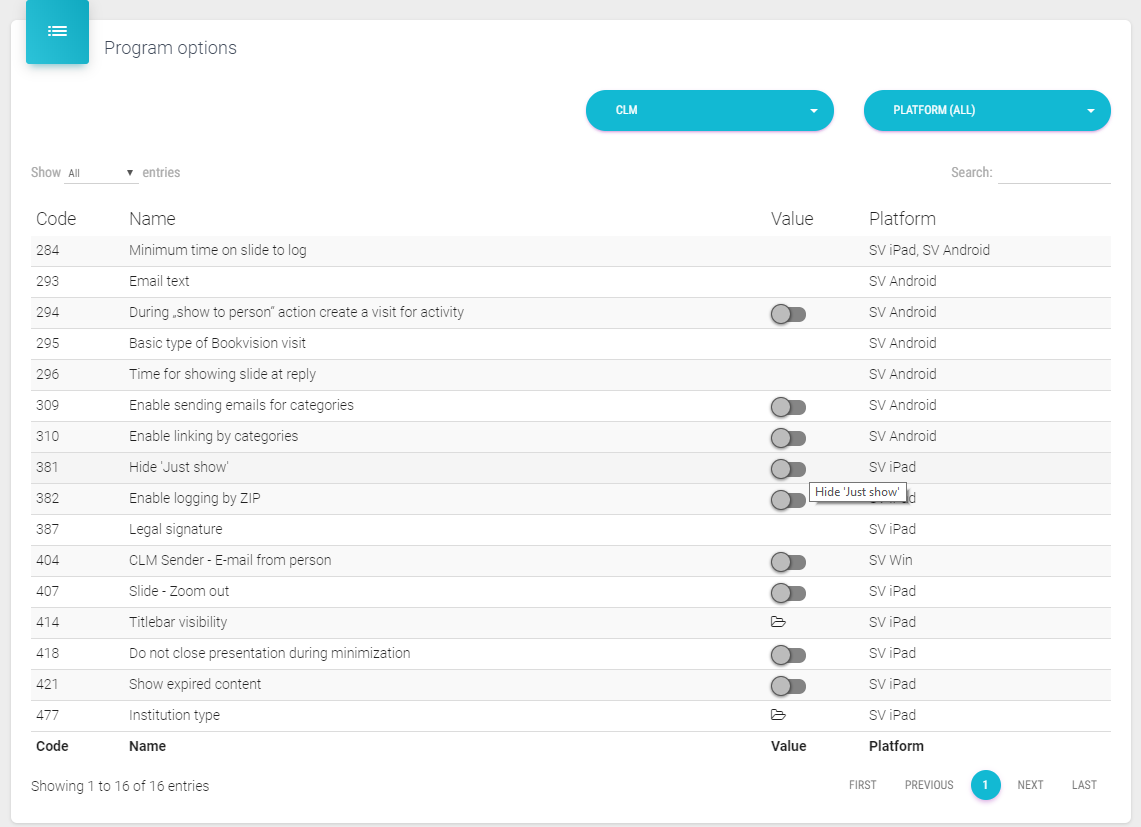
CLM menu consists of the following options:
284 - Minimum time on slide to log – minimal number of seconds showing each slide for slide to be logged.
293 - E-mail text – you can add description and signature of text when you are sending presentation via e-mail.
294 - During “Show to person” action create a visit for activity – when this option is turned on, when showing a presentation to a certain person, visit to a person will be created.
295 - Basic type of BookVision visit – you can choose which type of visit will be shown as default one when entering visit to a person via Show to person button (if During “Show to person” action create a visit for activity is turned on).
296 - Time for showing slide at reply – duration of each slide in seconds when replying the presentation.
309 – Enable sending emails for categories – CLM categories is able to send over e-mail when active.
310 – Enable linking by categories – when option is active the links to other content of presentation can be found on the slide where are they defined. If option is inactive than all links are shown on each slide never matter on what slide are they set.
381 – Hide ‘Just show’ – when option is active it hides on the iPad application in the BookVision module button Just show.
382 – Enable logging by ZIP – it is used when BookVision is standalone application and in database is no saved persons, but only cities with ZIP codes. Then for logging presentations is used ZIP code.
387 – Legal signature – legal signature in the e-mail.
404 – CLM Sender – E-mail from person – CLM sender uses persons e-mail.
407 – Slide – Zoom out – when this option is active in presentation is immediately turned on zoom to fit the screen.
414 – Titlebar visibility – here we select from the dropdown list for how long will be bottom bar be visible after the interaction.
418 – Do not close presentation during minimization – presentation will not be closed in case where we minimize application (into background).
421 – Show expired content – when active, expired content is shown.
477 – Institution type – here we select type of institutions that will be used with BookVision.
647 – Don’t use CLM groups
730 – Show discrete “like” / “dislike” buttons – This option enables / disables discrete like or dislike buttons
744.- Disable adding photos from gallery – disables or enables option of upload picture when visiting person or institution
747 – Hide buttons like and dislike – hides like and dislike during presentation
773 – BookVision – back button does not close visit
796 – Additional submenu button – Add a new Consent agreement (will be visible only if the consent agreement module is turned on), Add a new Survey (will be visible only if the survey module is turned on) and pause presentation buttons are a possibility to be added in the “submenu button” during presentation.
Notification center
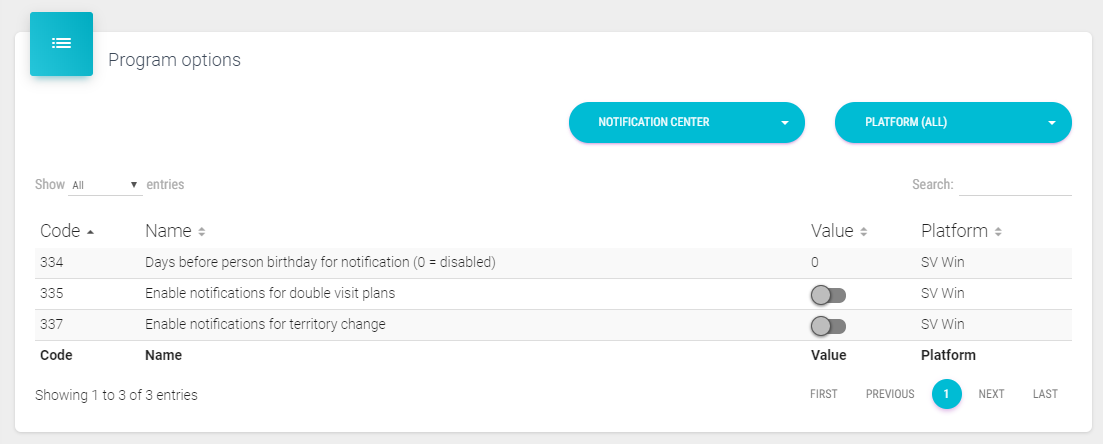
334 - Days before person birthday for notification (0 = disabled) – choose the number of days
335 - Enable notifications for double visit plan
337 - Enable notifications for territory change
Approvals

166 - Data of person who do not need to approve
237 - Allow approval for person to the following types of users
238 - Allow approval for institutions to the following types of users
242 - 1. level of approval
316 - Institution data that does not need to approve
441 - Show additional approval statuses
451 - Hide the new an unapproved persons/institutions in lists – if active in lists are unapproved persons/institutions hidden.
512 - Disable automated emails for new and changed records
524 - Disable adding visit for unapproved persons or institutions
666 – It is not allowed to give samples when visiting newly added persons who have not yrt been approved
679 – Specialities of person which notgo to approval
My plan
349 – Lock – Territory Assignment
352 – Lock – List creation
358 – Lock – Action Plan
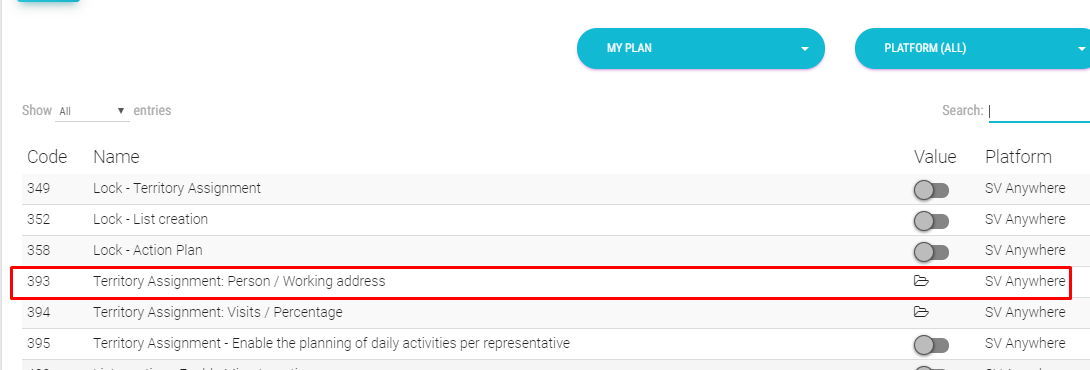
393 – Territory Assignment Peron/Working address - We have implemented switch for My plan module. Now you can work per person or per working address in My plan. Setting is changed here:
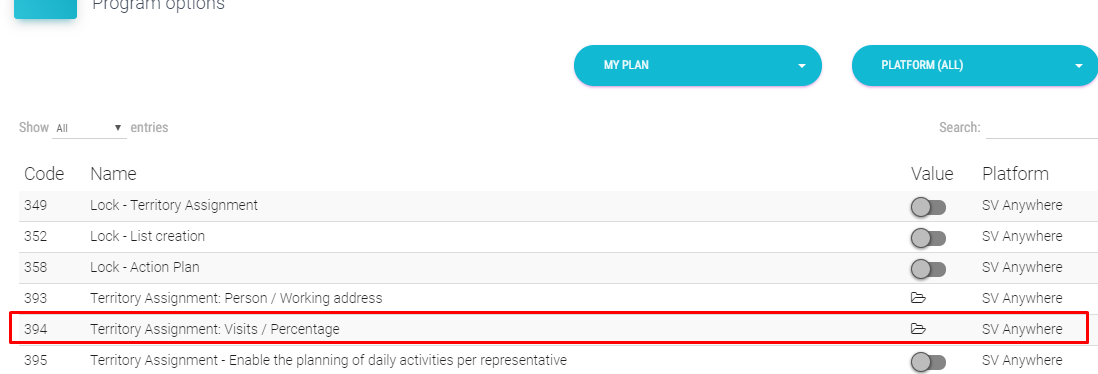
394 – Territory Assignment Visits/Percentage - We have added a new option for My plan territory assignment. Instead of changing % for each brick you can enter number of visits that you wish to allocate per brick. To turn that option on you need to change the option in admin:
When this option is enabled it is manifested in web version as new column where representatives should enter number of visits that he/she wishes to allocate per brick. Note: you can’t allocate percentages any more, just visits.
395 – Territory Assignment – Enable the planning of daily activities per representative - Planning of daily activity per cycle feature gives your representatives option to enter their own daily plans allocation and this number of working days is used for calculation of real “working days” per representatives. To enable the feature this option should be selected in admin area.
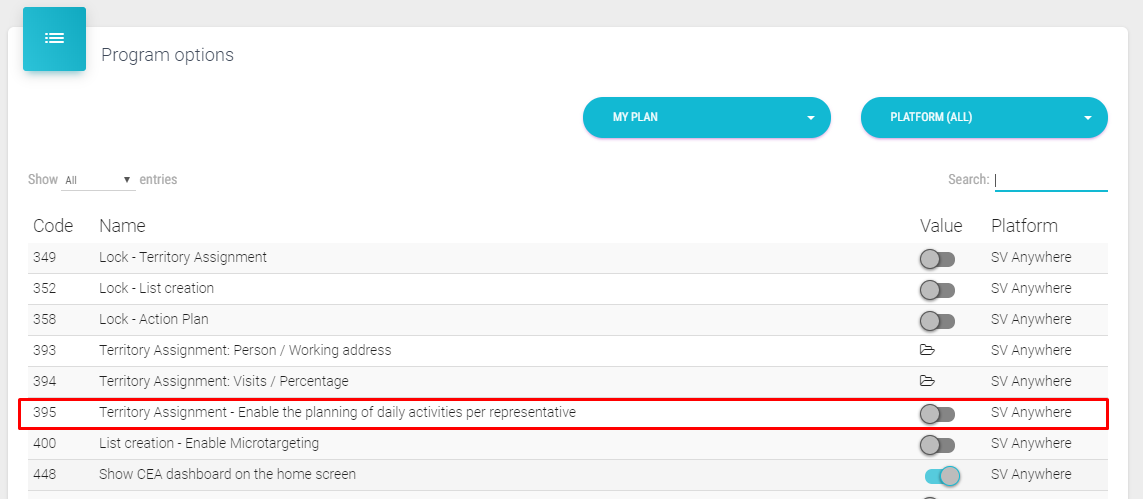
When this option is enabled new options are shown in my plan module. If you click on this button you can allocate your working days as you desire and it should be approved by regional manager/admin.
Consent agreement
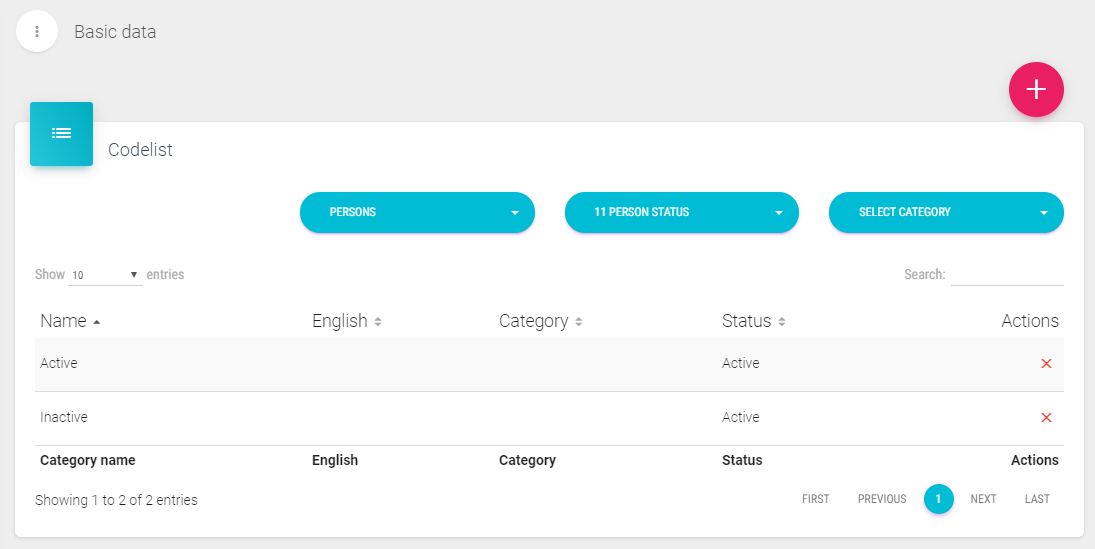
First thing to do in Admin is to add codelists for Person consent status. You can find the codelist under Basic data menu -> Codelist -> Persons -> Code list nr 775.

For an example, for testing purpose we have added these status:
-
Consent Obtained
-
Consent Withdrawn
-
Does Not Consent
-
Expired
-
Pending.
But you can set other such as: I agree, I do not agree etc.
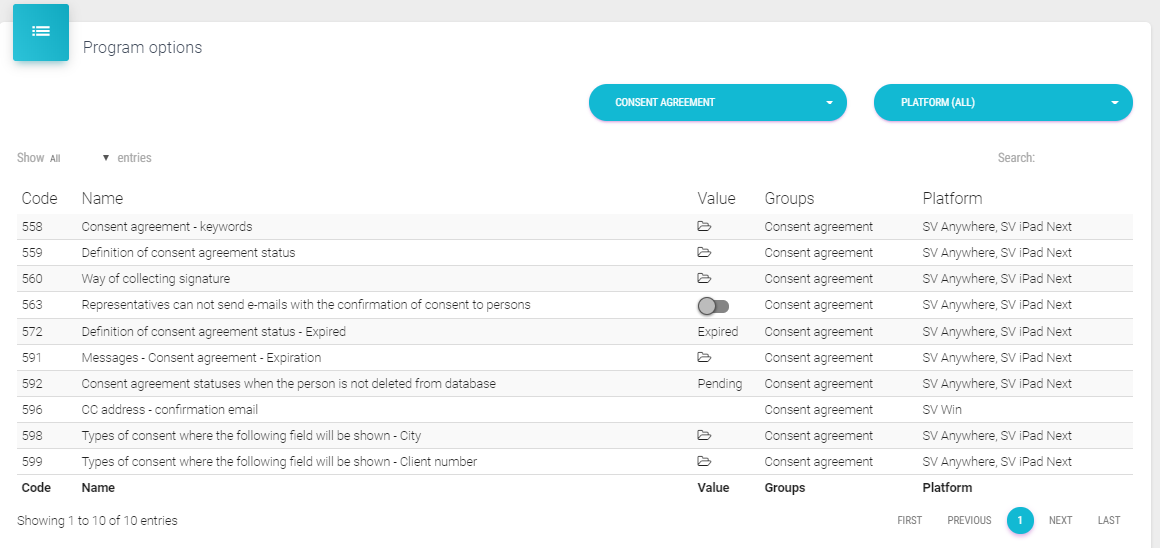
Settings
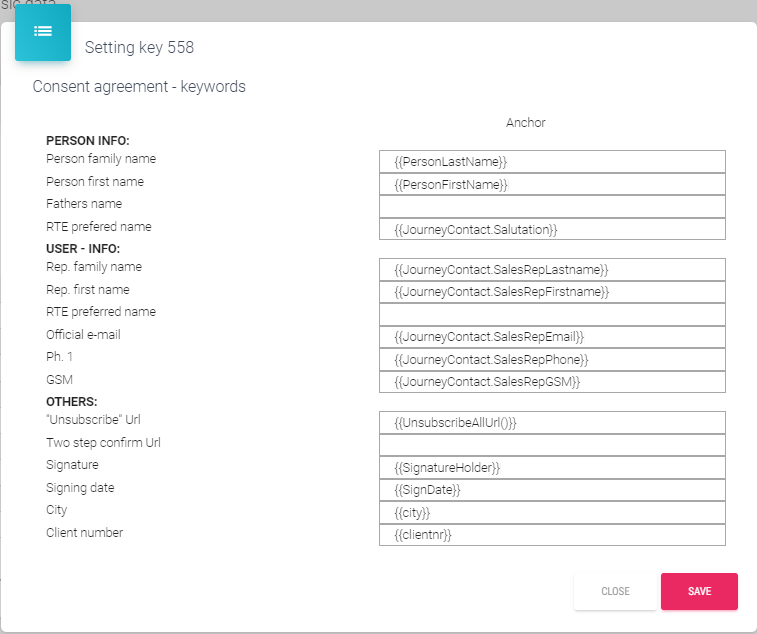
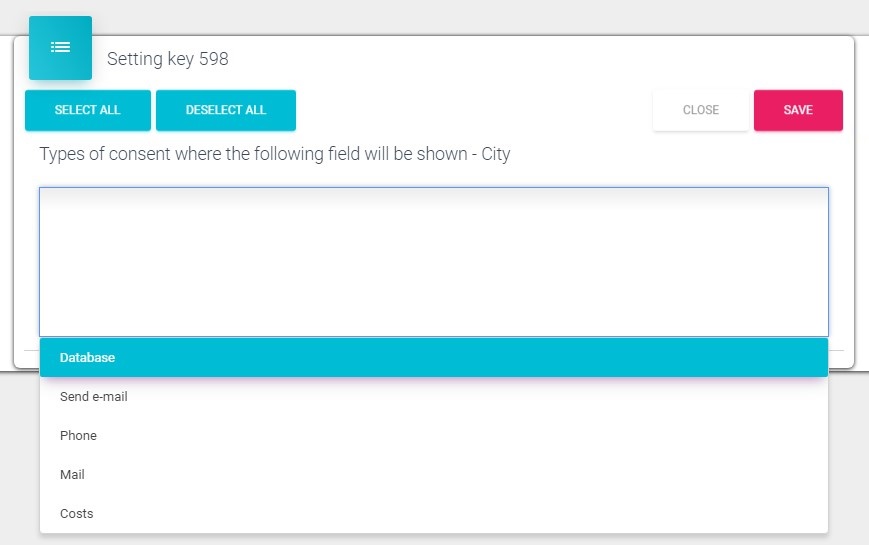
558 – Consent agreement – keywords – here you can define anchors which will be replaced within the consent template and/or consent confirmation template. Example is shown on the picture below. You can add keywords for SR's first name, last name, email and phone etc. which will be shown within consent template with data from databse.
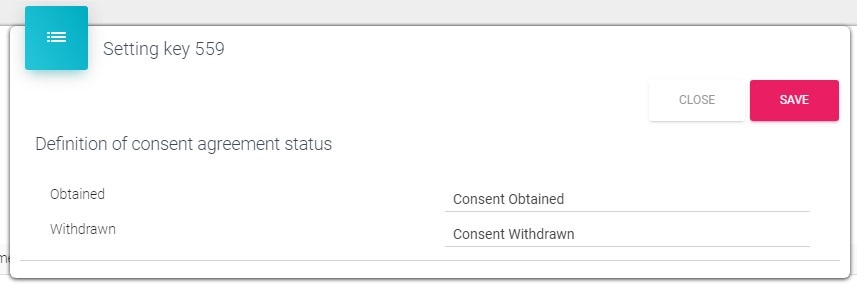
559 – Definition of consent agreement status – Obtained and Withdrawn - drop down list from codelist Person consent status where you can define which status will be used if person has agreed to share his/hers data and status if person has withdrawn his/hers signature to consent agreement.
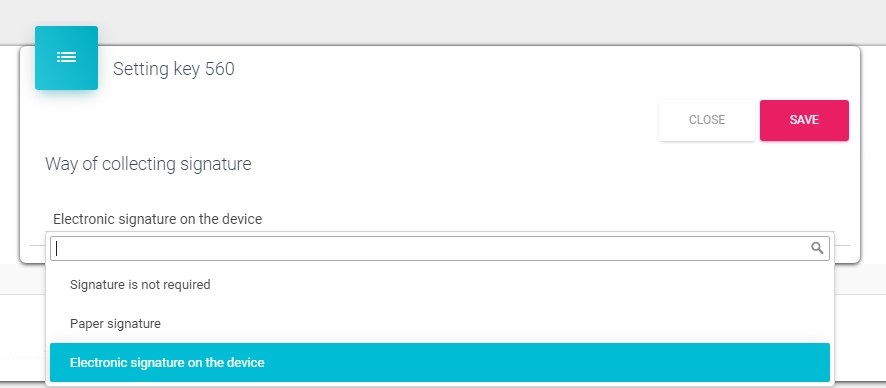
560 – Way of collecting signature Signature is not required - representatives will only add status of agreement without the need to upload signed document or electronic signature on iPad device Paper signature – representatives will upload paper signed document for collecting data for both web and iPad platforms Electronic signature on device – HCP will be asked to sign the agreement directly on device and document will automatically be generated on documents tab. This is used only for iPad platform. If this selection is used, web platform will remain to function as „Paper signature“ as the is no possibility to use electronic signature on web.
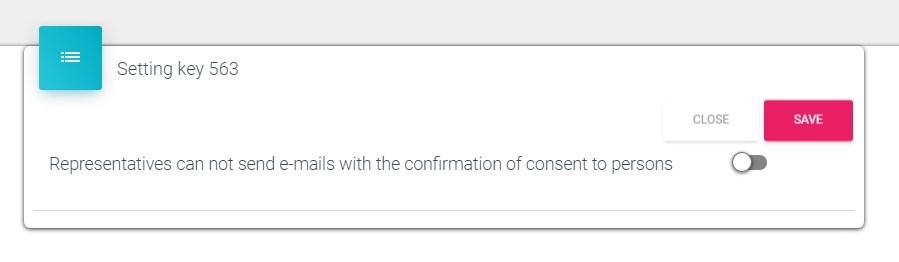
563 – Representatives can not send e-mails with the confirmation of consent to persons - Consent management in web platforms offers possibility for Admin and HQ users to upload Consent confirmation email, sort of a „thank you mail“ for signing the agreement. If this option is turned on, users will not have option to send confirmation e-mails.
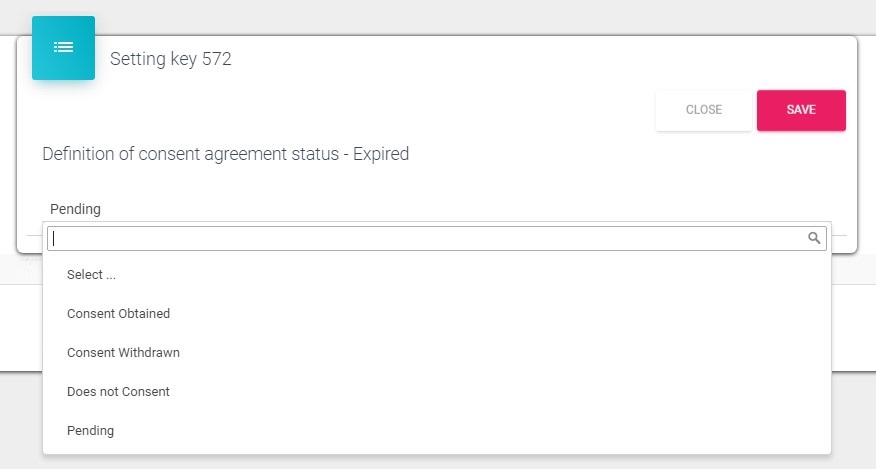
572 – Expired - drop down list from codelist Person consent status where you can define which status will be used of a person after consent agreement has expired.
591 – Messages – Consent agreement – Expiration: Number of days until consent expires –sendingog messages will begin –if is 0 messages will not be sent.
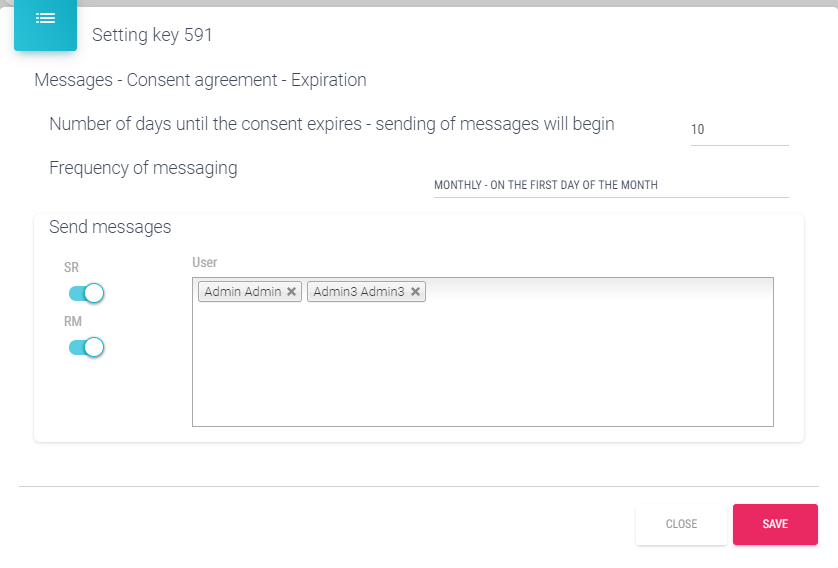
Frequency of messaging – you select how often will notification e-mail be sent (Only once, Daily, Weekly –Monday or Monthly – On the first day of the month).
Send messages – if SR, RM buttons are not active and under User window is none person selected no messages will be sent. If button is active, for example SR, all SR's will receive e-mail. The same is with the RM button. If we want that for example admin also receives notification we select admin in the User window as in the previous figure.
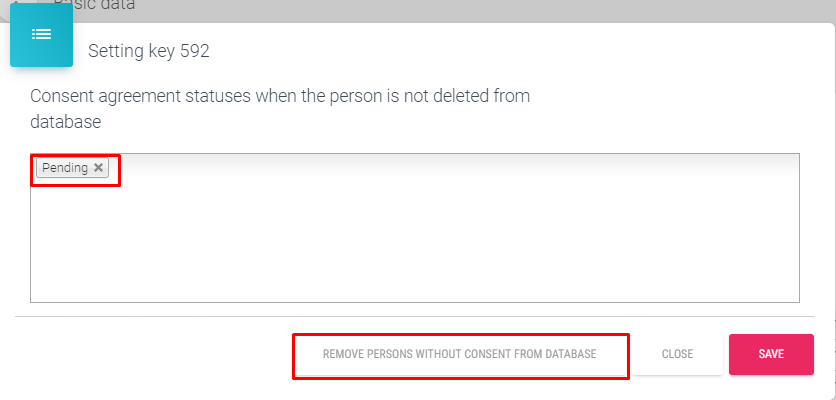
592 – Consent agreement statuses when the person is not deleted from database – Administrator can set status of a person when a person is not deleted from database. For an example, when GDPR module is turned on for the first time, all persons are without database consent agreement. You can set them all to status of a person when person is not deleted from database (in our example Pending) and these records won't be deleted. After that, you can start collecting consent.
Button Remove persons without consent from database – is the easiest way to clean up your database. By using this option, Administator can delete all persons from database which don't have any entry for consent (persons who were never asked to sign the consent agreement. By clicking on this button, first you will get a preview of this kind of persons (see the following figure).
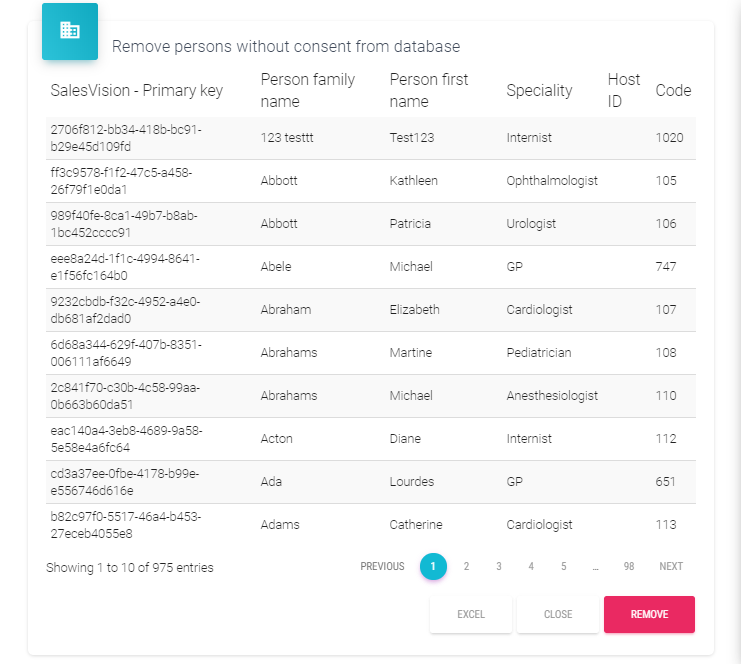
You can use Excel button to export list into excel. Click on the Remove button to confirm you want to delete persons without consent from database or Cancel button to go back and quit delete procedure. Please be careful when using this option!
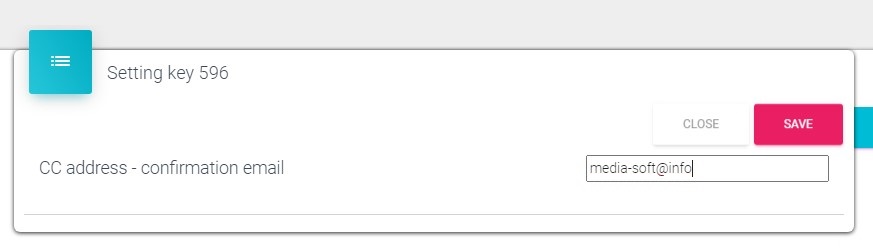
596 – CC address – confirmation email – here we enter e-mail address on which we want receive all confirmation e-mails.
598 – Types of consent where the following field will be shown – City – here we select types of consents where anchor for the city will be used. City will be automatically loaded in consent but we have also the possibility to select city before saving the consent.
599 – Types of consent where the following field will be shown – Client number – similar as previous option (598) only that this one works for Client number. After we define anchor and include it into consent, when we open that consent before signing we can enter Client number. This client number is than imported into consent on the position where was anchor set. Client number can be only manually entered.
RTE
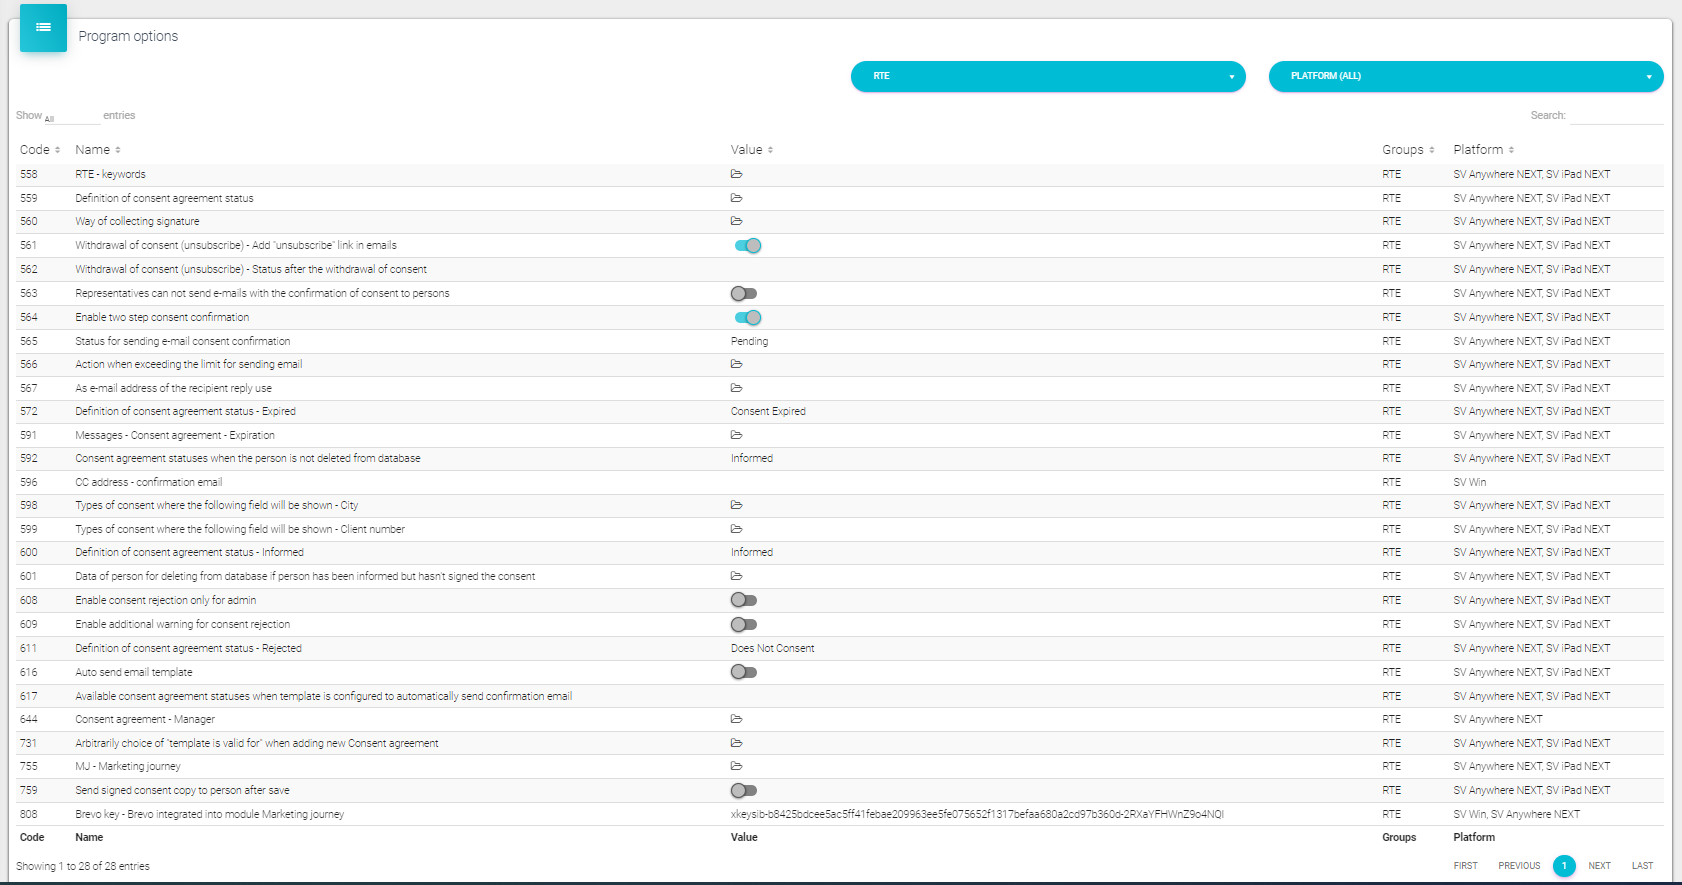
When RTE is activated previously explained options group Consent agreement are included in this RTE options group together with new options. In the continuation are explained new options that come with active RTE.
Withdrawal of consent (unsubscribe):
561 – Withdrawal of consent (unsubscribe) – Add “unsubscribe” link in emails - if you want to use unsubcribe link in your marketing journey email set to active this option.
562 – Withdrawal of consent (unsubscribe) – Status after the withdrawal of consent - set status from dropdown list from codelist Status after the withdrawal of consent (codelist Persons, 775).
Two step consent confirmation:
564 – Enable two step consent confirmation - if you want to use two step consent confirmation set to active.
565 – Status for sending e-mail consent confirmation – here we select from the dropdown list to what will be set status after person confirmation.
566 – Action when exceeding the limit for sending email - Checking limits is not required / Allow sending e-mails regardless of exceeding the limit on the number of e-mail sent to the person / Do not allow the sending of e-mails after reaching the limit on the number of e-mails sent to the person.
567 – As e-mail address of the recipient reply use - Representative's e-mail address / „no-reply“ email address .
616 – Auto send email template – Here you can select person who you will send automatic email template
617 - Available consent agreement statuses when template is configured to automatically send confirmation email – Here you can add status that will be shown on list Status For „no-reply“ email and email subject please send our Consulting department what you want to use so they can add it in Mail Sender config.
755 – MJ – Marketing journey – option under the Consent agreement group that enables sending templates x days after last visit with predefined parameters like Template, Specialities, User and Presentation.
IQVIA Connector:
780 - IQVIA connector - GDPR management (available for databases that are using IQVIA connector and Data Source OWN option) with three possibilities:
DEFAULT
person is renamed to DATA PROTECTION (the old functionality that was) without any additional change on the data source field
CHECK CONSENT we automatically keep this person in the database without renaming them to DATA PROTECTION. It means if IQVIA sends an update of a person’s first and last name to “DATA PROTECTION” we ignore it only in case a person has a valid Consent agreement status Consent obtained or Informed automatically set up the Data Source of such a person to OWN.
INFORM IF CONSENT IS MISSING automatically keep this person in the database without renaming them to DATA PROTECTION. It means if IQVIA sends an update of a person’s first and last name to “DATA PROTECTION” we ignore it regardless of the status of the consent agreement; automatically set up the Data Source of such person to OWN; in case a person does not have a valid consent agreement status Consent obtained or Informed we inform the System Administrator and users joined to this person by email that they should upload a valid consent agreement. The second part of the system option defines which is the code list used to switch to data source OWN (because it can be more than one). If the data source is switched to OWN, then that person won't be sent to approval to IQVIA, and if the option is set to IQVIA, then that person will be sent to approval. BREVO API 808 – Brevo key – Brevo integrated into module Marketing journey – option that has to have updated with the key that you get from Brevo, once it's updated with a key, Brevo API will be used for campaign statistics.
Configurations
In Sales Vision Admin you can make your own translations.
Configuration
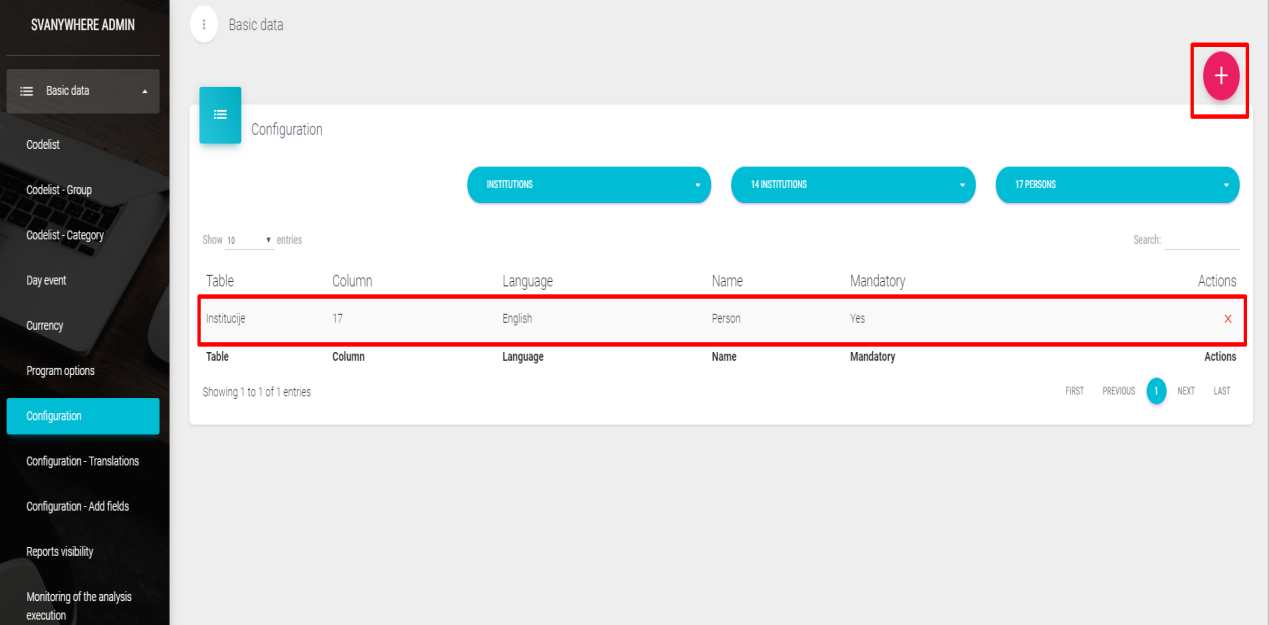
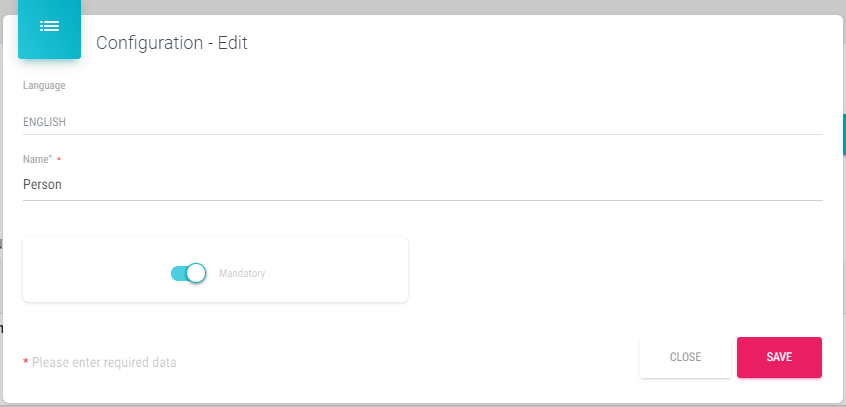
In the Configuration submenu we can add our own translations simply by finding table and column we want to rename using dropdown menus on the top of the window. After we found column we searched by clicking on the “+” button we add our translation (figure bellow) and click on Save button.
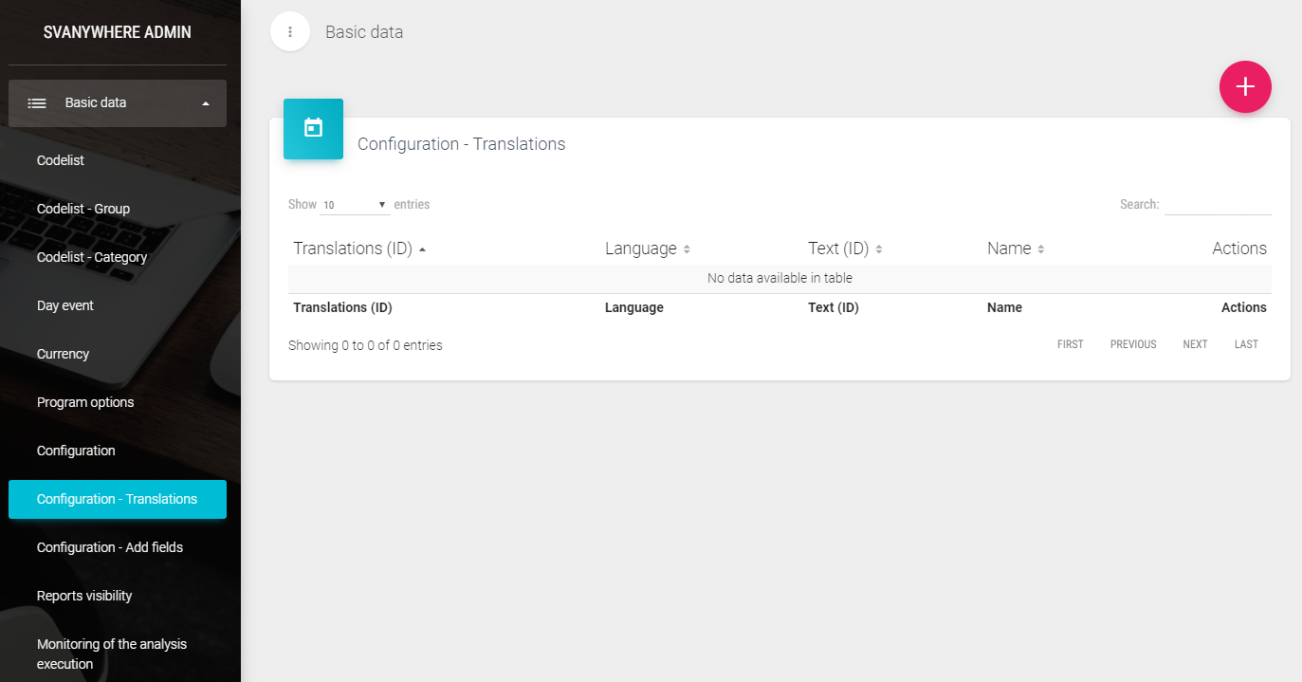
Configuration – Translations
To change translation, you have to know the ID or the name for field you wish to rename. By clicking on the “+” button new window opens.
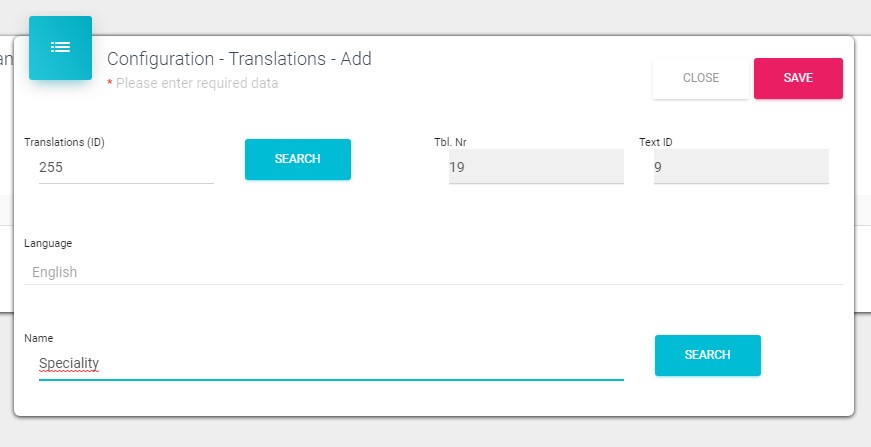
To find the field we want rename, can be done by Entering ID number in Translations ID and clicking on the Search button next to it, or by writing currently name in the Name and clicking on search. Other fields are after search automatically fulfilled. Next we have to write the Name we want and click the Save button.
Configuration – Add fields In the Configuration – Add fields module we add our custom fields for the Person, Institution, Contacts, Group Contacts, Contact schedule and Institution plan tables.
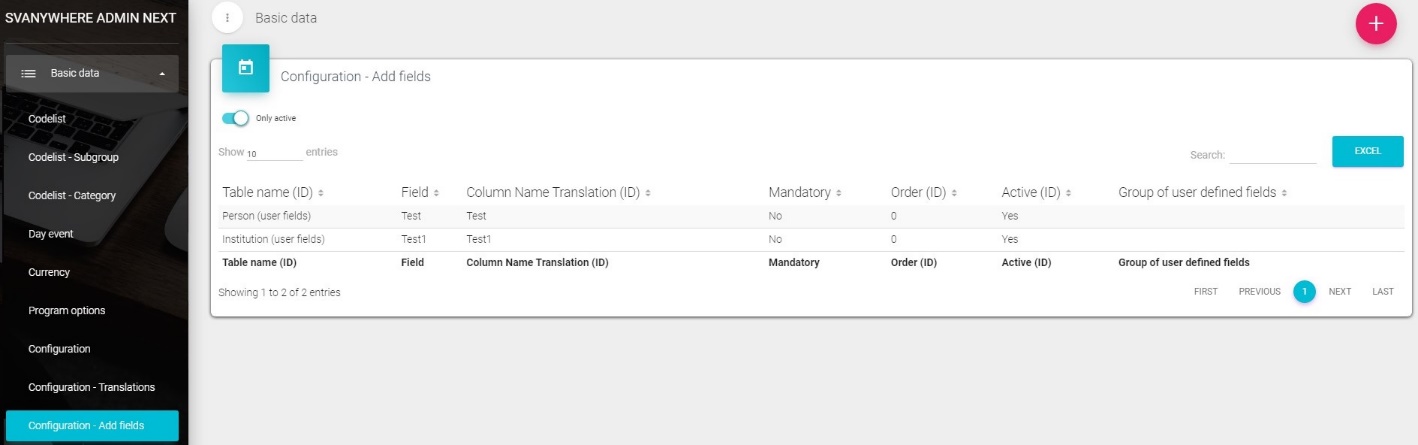
When we click on the “+” button to add a new field, following window will open:
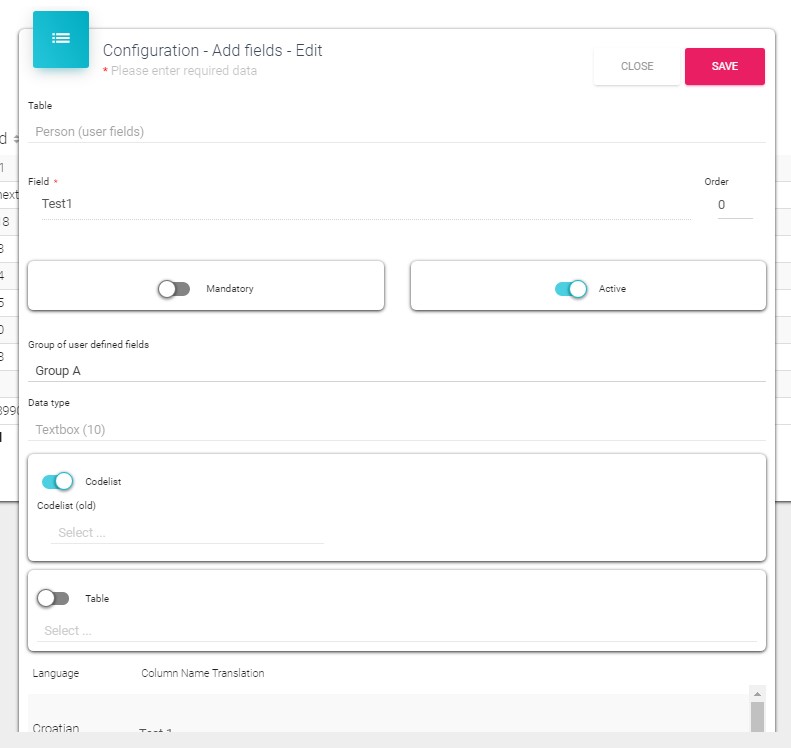
First we select table in the dropdown list for which we will create custom field. Field – here we enter the name of the field. Mandatory button – if active this field will be mandatory to fulfill before saving. Active button – used to activate or deactivate this custom field. Group of user defined fields – you can define groups of fields so each so the future created fields you join to specific group. To create a group for user defined fields go to Codelist module and select filter as on the following figure:
Data type – type of data that will be entered (e.g. dropdown list, texbox, …) Codelist button – in codelist (old) we can select from dropdown list the codelist from which we create the new one in Codelist (new). After we click on button Add codelist is created. If first codelist (old) is not selected and we enter the name in Codelist (new), completely new codelist will be created. Table button – if we activate Table button and we select table from the dropdown menu in this user field will be listed all records from that table. Language translation – we can define this field translation for English language.
Reports visibility
Reports visibility is module used to set up which reports will be visible for which user.
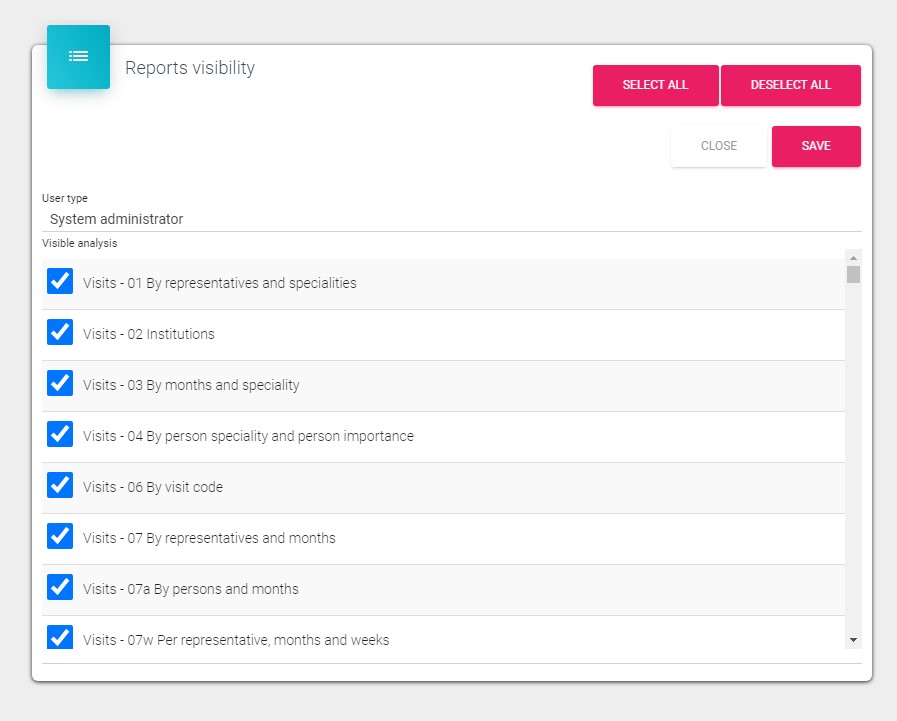
In the dropdown list we select User type and select or deselect analysis we want. Using buttons we can Select all or Deselect all.
After all changes are made we click on the Save button to save changes.
Monitoring of the analysis execution
Monitoring of the analysis execution module is used to define which analysis and for which user will administrator monitor.
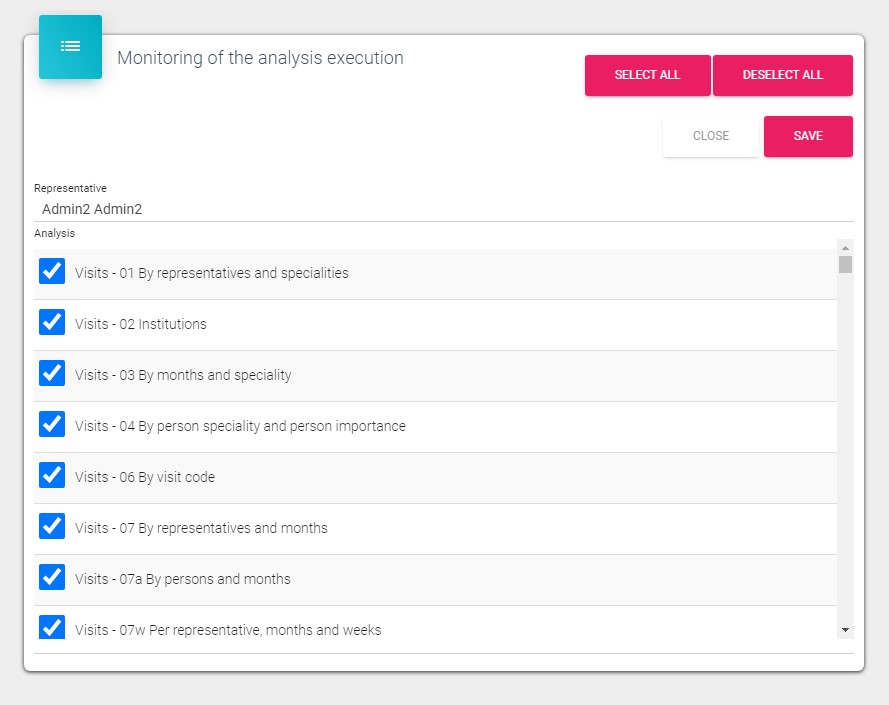
In the dropdown list we select the Representative and then select or deselect all analysis which we as administrator want to monitor. *This monitor analysis can run only administrator in the Sales Vision Anywhere in the Standard reports, Communication submenu analysis 04a.